
Leaderboard

Popular Content
Showing content with the highest reputation on 06/06/2020 in all areas
-

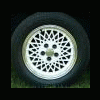
LQ1 common oil leak areas
jiggity76 reacted to 06goat75 for a topic
I know this has been discussed multiple times, but my google search skills are failing, not to mention the posts I do find are quite outdated (pictures missing). I've read there are two common oil leak areas. One being the distributor plug o ring, the other being the rectangle block next to it. I don't know what that thing is called, nor do I know what to get to fix it. Is this accurate? How do I do some preventive maintenance on it to prevent that rectangle block from leaking? Picture for reference.1 point -
LQ1 common oil leak areas
jiggity76 reacted to 55trucker for a topic
The O ring that was supplied in the intake gasket kit will the O ring for the throttle body passage in the intake manifold. Gm really dropped the ball when it comes the cylinder head casting, one thinks that after the head was put into place they realized that one cannot remove the distributor drive at all. From that pic of your Greg, I do not see a terrible mess there, perhaps clean that area up before attempting to dislodge the O ring.1 point -
LQ1 common oil leak areas
jiggity76 reacted to 06goat75 for a topic
Well, there is an o-ring that goes from the plenum to intake under the TB. There is also an O ring that goes on the shaft on the distributor plug. I'm not exactly sure which one you are holding in the picture. Replacing the O ring on the distributor plug shaft (where the oil leaks), the proper way, requires head removal. Some people have had luck replacing the O ring by cutting the old one off, and fitting it over the distributor plug, I did not have luck doing that. I left the O ring in place, got a distributor seal (they are all the same size from era of GM vehicles), put RTV on both sides and put it under the distributor plug. That has worked so far, though it has only been a few months. Other people have had luck doing that too. Yes, the big, rectangle, aluminum cover is the oil distribution cover. I purchased a Fel-pro set off of RA (MS95822) and it came with the oil distribution cover gasket (even though it isn't included in the picture). They were under 5 bucks, so I bought two of them.1 point -
LQ1 common oil leak areas
jiggity76 reacted to 06goat75 for a topic
There are two common oil leaks in that general area, one is the distributor plug seal/gasket (what you are looking at) and the other is the oil distribution cover. The rectangle to the passenger side of the oil distributor plug. It is the rectangle cover that has that "Z" shaped part on the top. You can see the cover in the top picture, lower left. The oil distribution cover gasket can be ordered from one of the GM part places, but it also comes in a set that I got off of RockAuto closeout stuff. Much cheaper the RA way.1 point -

Best way to clean out gas tank.
jiggity76 reacted to rich_e777 for a topic
I might have to do this to but not on a W body. Would a about a gallon of seafoam sloshed around in there take care of everything? Looks like its been seal from the pump but is there alot of rust in it?1 point -
TRW Keyless Entry module
jiggity76 reacted to dougg3 for a topic
I just wanted to second this. Earlier in this thread I said my keyless entry module was acting erratically in programming mode. I resoldered all the solder joints on both boards in the module and now it works great, both in my vehicle and on my test bench. The only annoying part is the conformal coating. It makes the iron want to slip off the solder joints. But you can still resolder through it without going through the trouble of trying to remove the coating. Just have to be careful as you're holding the iron. If the module is acting up I would definitely recommend trying this. Add a little bit of new fresh solder to each joint as you do it.1 point -

TRW Keyless Entry module
jiggity76 reacted to Pontiac6KSTEAWD for a topic
Pulled the power lock fuse out, and all the interior light went out, put the fuse back in, and the locks started working.. WTF? Went and ground the wire in the trunk, and nothing... Well I guess I wont be fixing that.. But I do have power locks!1 point -

TRW Keyless Entry module
jiggity76 reacted to digitaloutsider for a topic
The solder points on the box aren't small or intricate or anything, you could definitely do it yourself with a low cost iron. Good learning project.1 point -
LQ1 common oil leak areas
jiggity76 reacted to 06goat75 for a topic
Thanks. Found the part number searching the forum, and ordered one online. Hopefully be here next week, and have the rest of the stuff coming, should have it back together next weekend.1 point -
lim gaskets
jiggity76 reacted to James Robert for a topic
OK, thanks. I figured that out shortly after I made this post. Nice looking GP! I used to have a Pontiac 6000STE and loved that car. What kind of coolant do you recommend for the LQ1?1 point -
lim gaskets
jiggity76 reacted to 55trucker for a topic
Not being able to see what you're referring to .. the only O-ring that would be included in the kit would be the coolant bypass O ring that is between the plenum & the intake... it is to the rear of the coolant thermostat housing, right under the throttle body1 point -
Bleeding after heatercore replacement
jiggity76 reacted to 55trucker for a topic
Doing a *complete* flush of the entire cooling system shouldn't be necessary to solve your problem there. To properly *bleed* the system........you don't need to park on an incline, fill the system thru the rap cap to approx 2" below the filler neck, with the cap off let the engine run until the engine comes up to near running temp (as the temp comes up the fluid & air will expand), as the thermostat opens there should be a drop in the fluid level at the cap, when you see the fluid level drop refill to the top of the filler neck (the engine is still running). Now close the cap to seal the system, let the pressure build up and then open both of the bleeders just enough to get a forceful shot of air/fluid flowing from them (it will be white/foamy). When the flow begins to subside close the bleeders and let the pressure build up again, repeat the procedure with the bleeders....eventually you will see less foam & more coolant/anitfreeze, repeat this until you see no foam or tiny air bubbles when you open the bleeders. Shut off the engine, carefully open the rad cap (rag over your hand) to check the fluid level & top up again, close the cap, repeat the bleed process, when you get no air from the bleeders fill the overflow tank & you're done. This process can take as long as an hour so be patient.1 point