
Leaderboard


Popular Content
Showing content with the highest reputation since 07/01/2026 in all areas
-

89 olds swaybar
Raffaelli and 2 others reacted to sadolboy48 for a topic
Alright, went and picked up the part (long drive) took a few hours to put it in. Had to take outer tie rods loose and do a WHOLE bunch of wiggle jiggle to get it fished up in there but finally got it done. Drives like a dream! Handles so much better than it ever did. The 30mm is a lot beefier than the one i had. Thank you all for all your help.3 points -
89 olds swaybar
rich_e777 and one other reacted to Bake82 for a topic
any 1st gen w-body or 1.5 gen w-body will have a sway bar that will fit. They MIGHT be different sizes, but will physically fit. Grab the bar + brackets, and bushings. and then get new bushings. cars with a 3.4 DOHC should have a bigger front bar.2 points -

89 olds swaybar
Raffaelli reacted to 55trucker for a topic
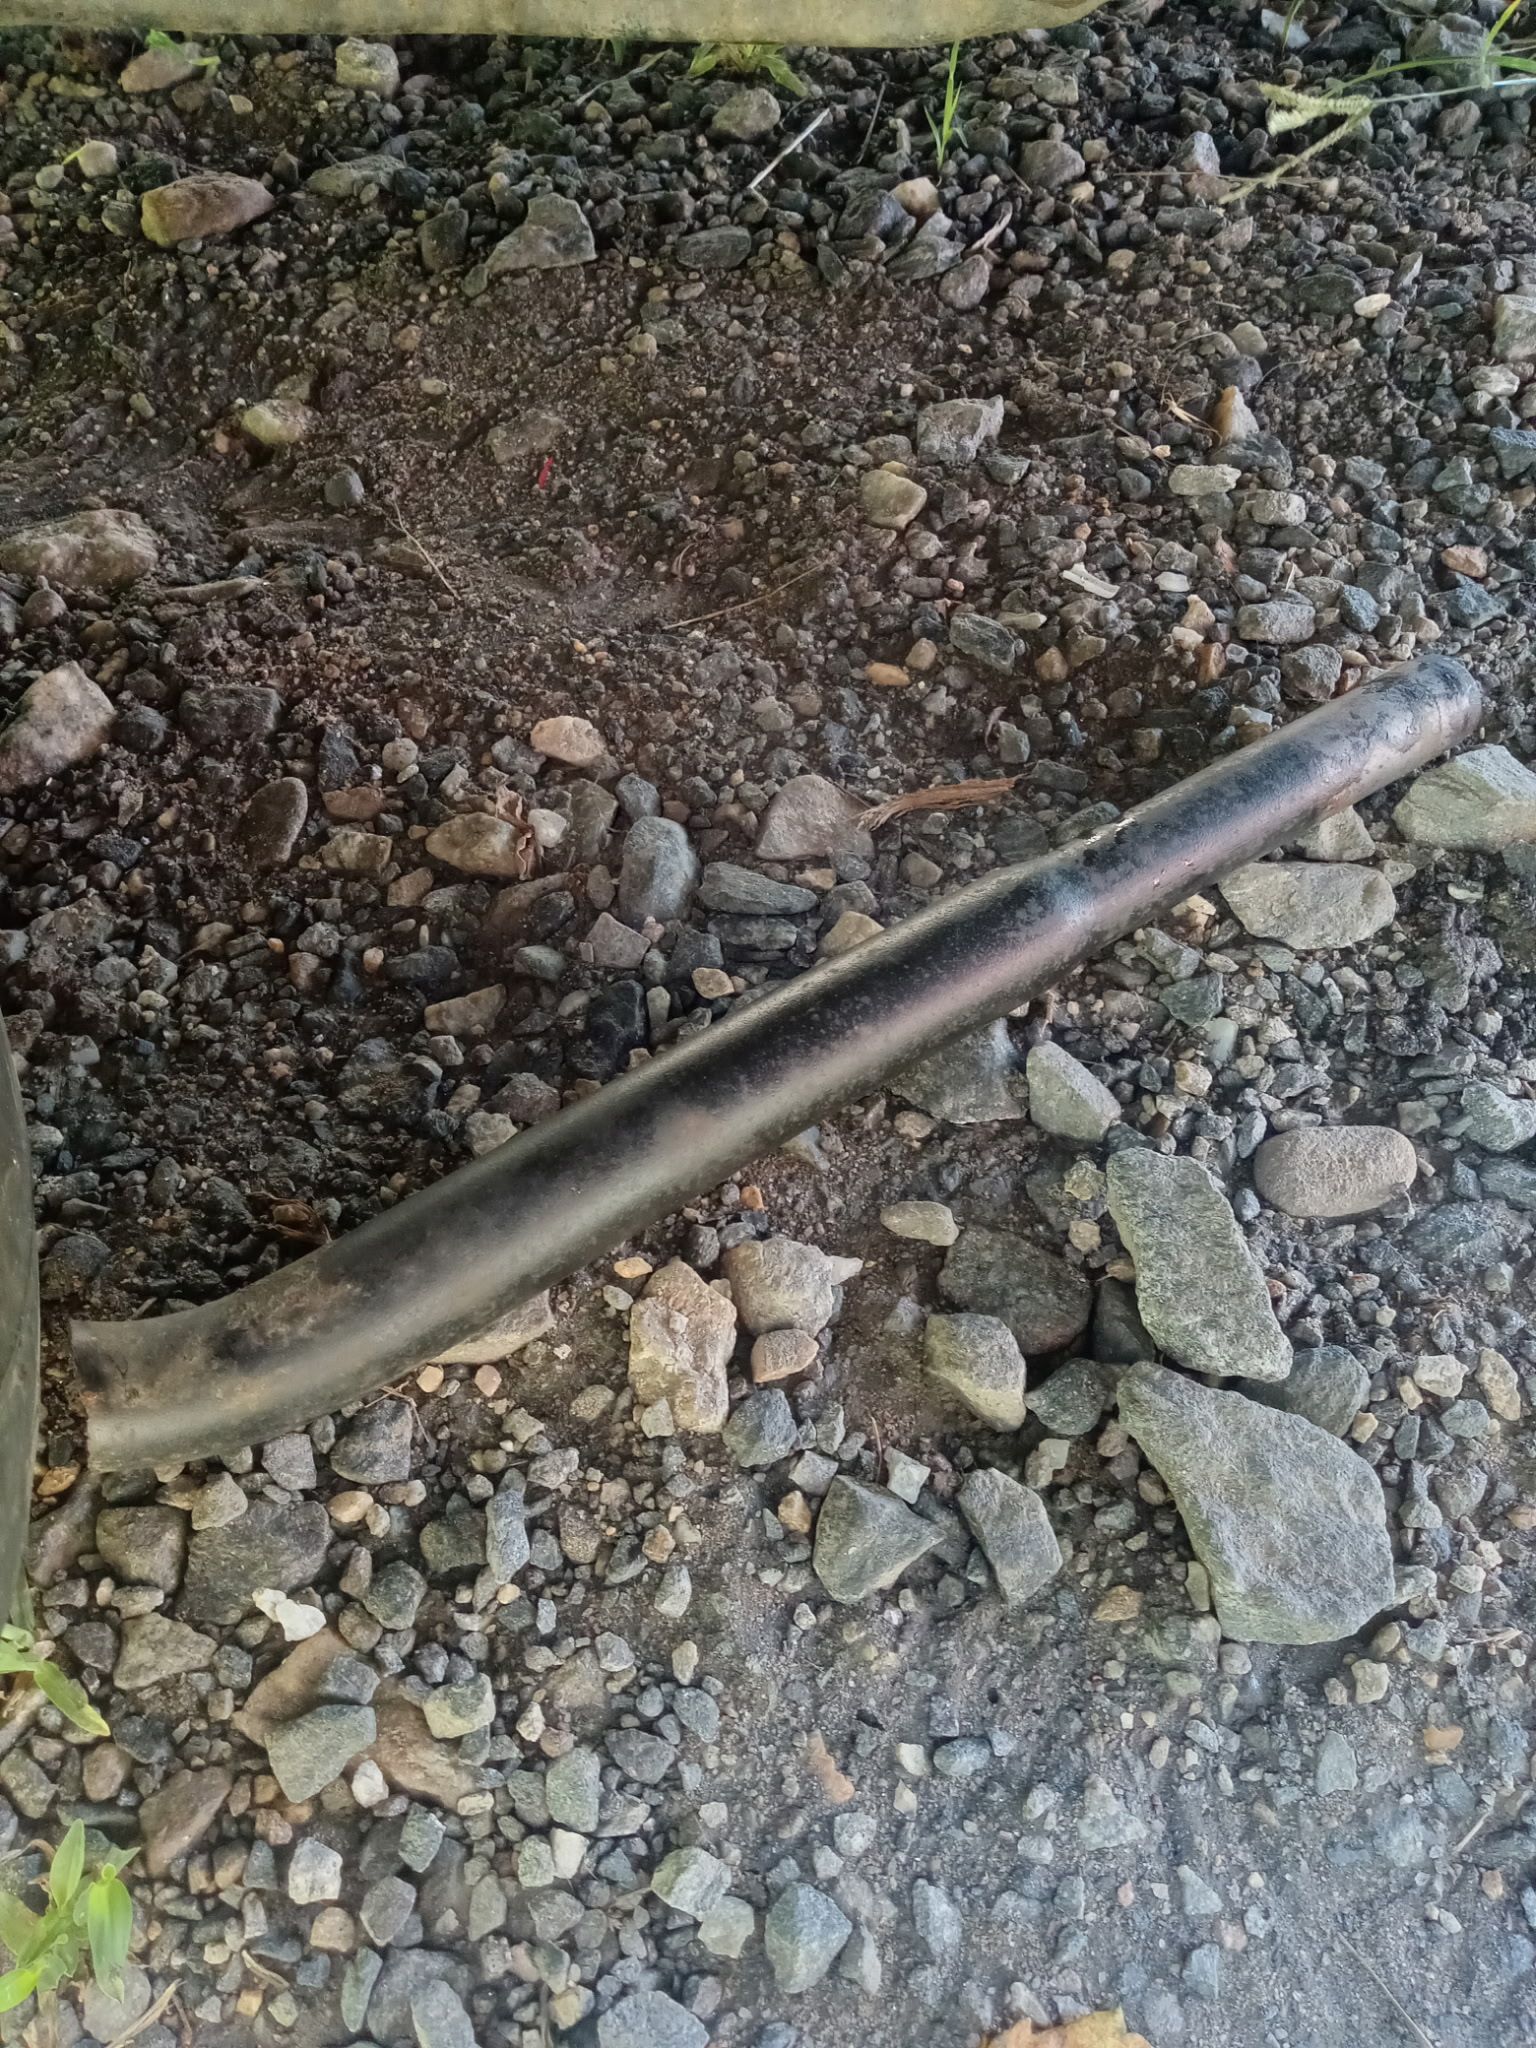
Be choosy where you get one from.......as you can see they are hollow, dirt, moisture/salt gets inside them from the front facing ends & rots them from the inside. Try to find one south of you, in a salvage yard... a rust free location.1 point -
89 olds swaybar
Raffaelli reacted to sadolboy48 for a topic
There it is in all it glory lol. I went on car-part.com as you suggested and I was able to find one in tennessee. Its the closest place to me which is 3 hours away, but it could be worse. The bar is only $50 but to have it shipped is around $150. So haven't decided if I'm gonna drive out there or pay the shipping but I'm just happy to have found a fix finally. Mine is the 28mm but the one im getting is 30mm. Thank you guys for everything and all the advice cause I'd be stuck without it.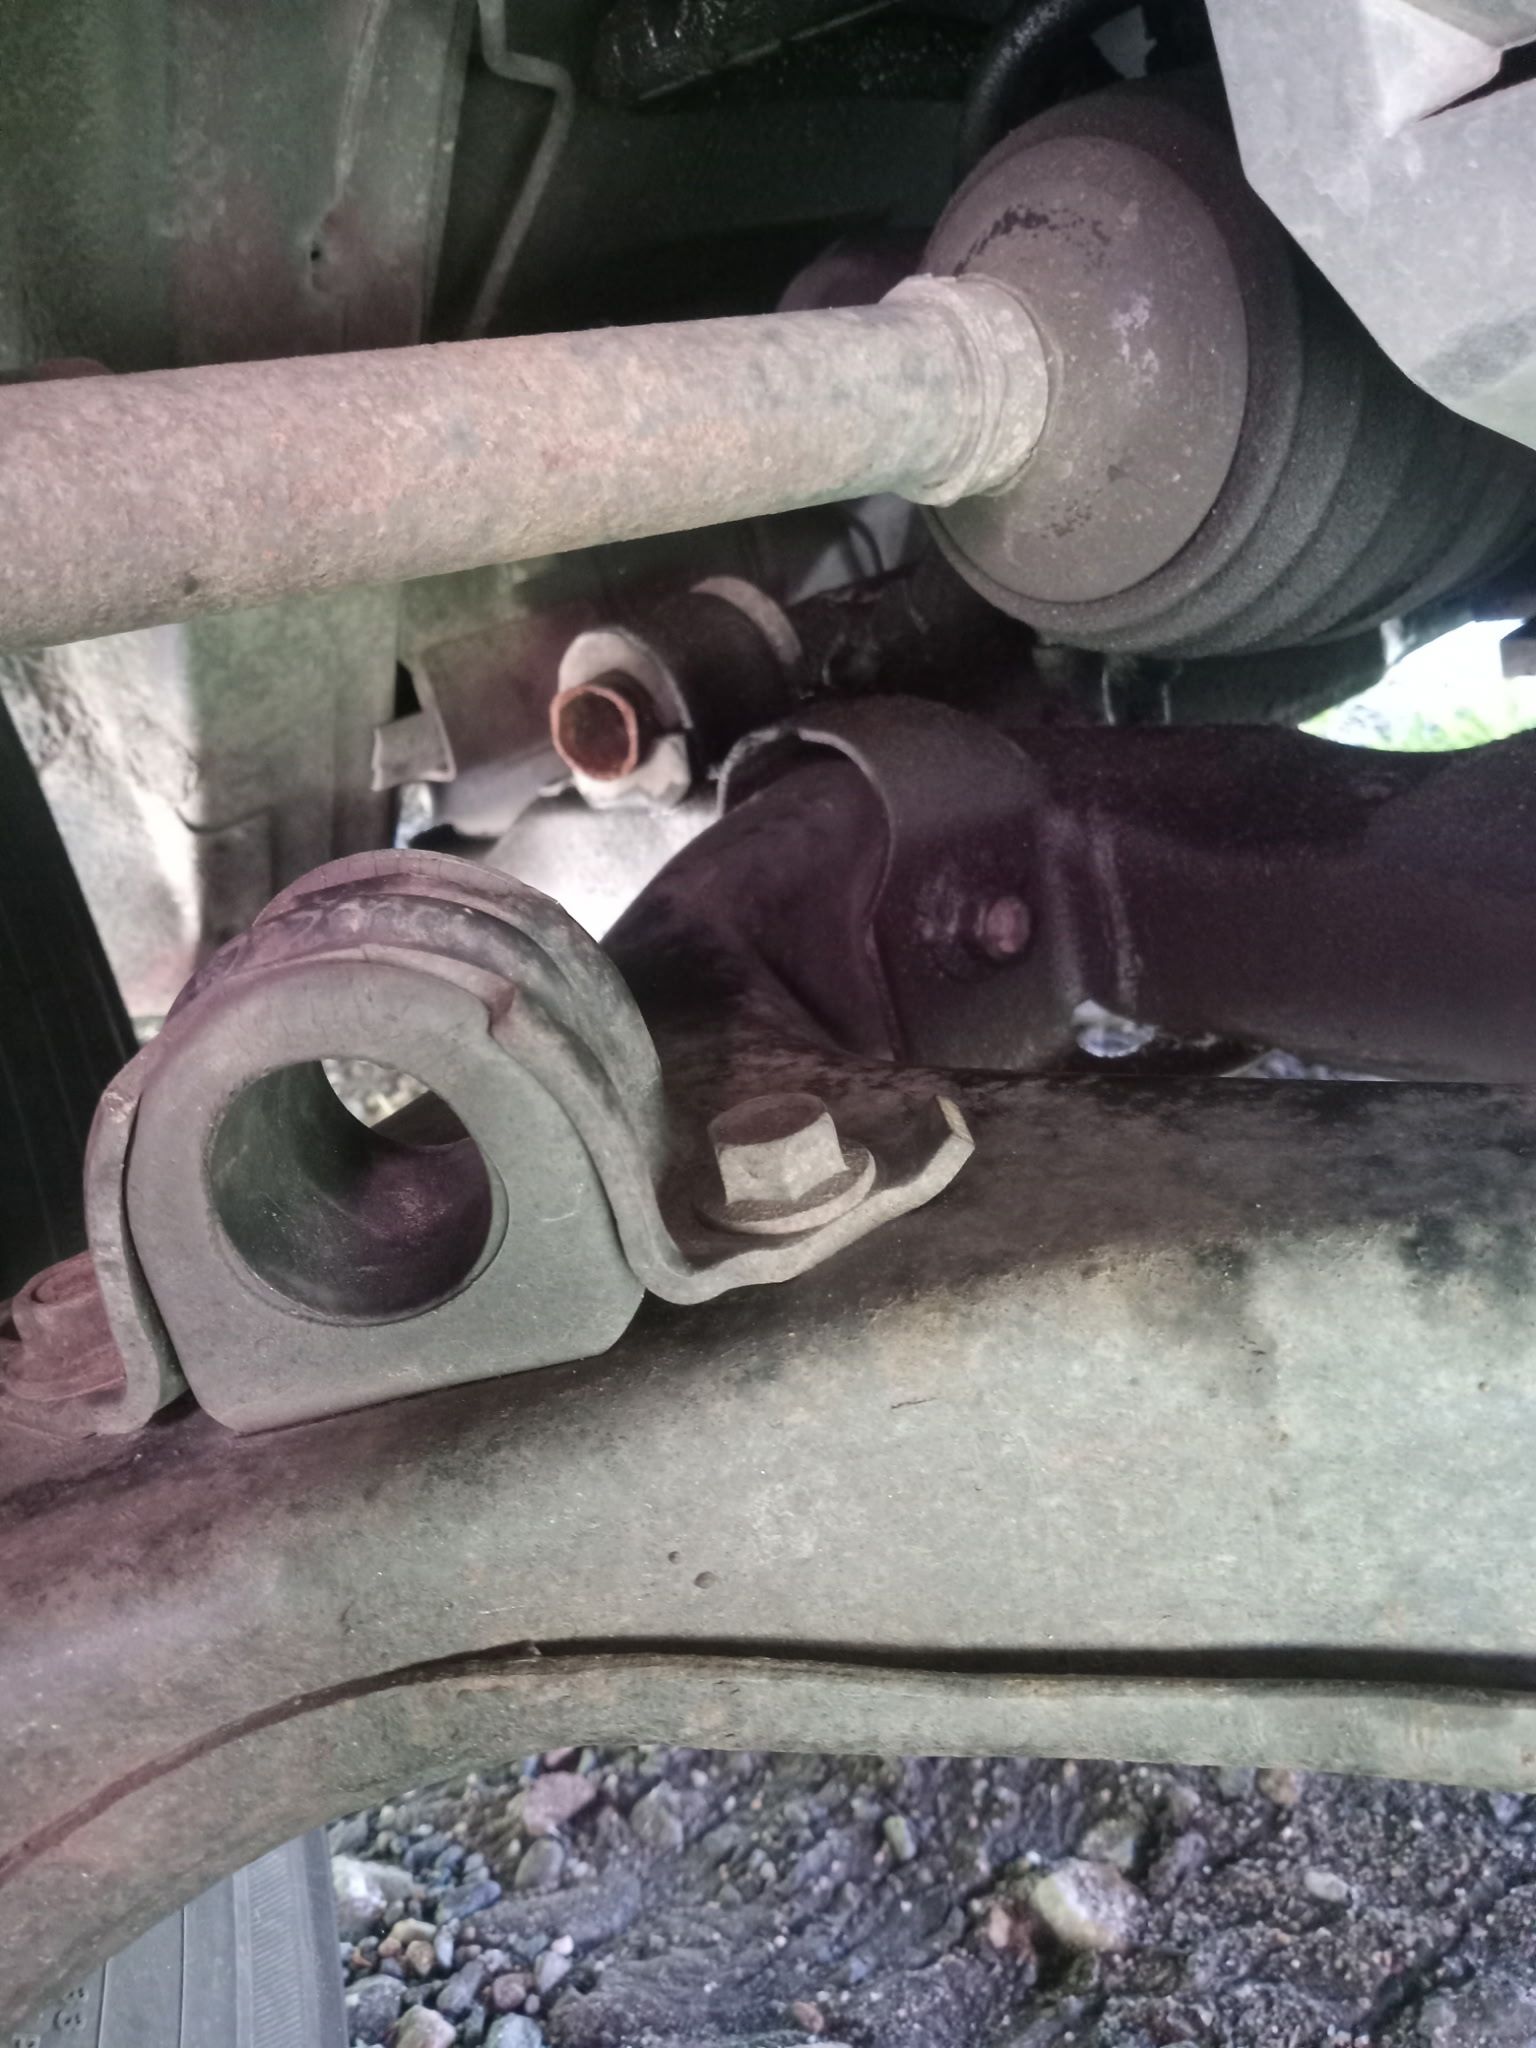
 1 point
 -

3.4 Cutlass Supreme runs rough
94 olds vert reacted to Psych0matt for a topic
Also, how are all the vacuum lines?1 point -

3.4 Cutlass Supreme runs rough
Psych0matt reacted to 94 olds vert for a topic
You put in new coils, plugs, and wires? And its still not running right? What kind of coils did you use? Some aftermarket coils can be bad right out of the box. Just curious what kind of spark plugs did you use? What does "after hot" mean? Did you gap your plugs? Plug gap on a Lq1 should be 0.045. Has the car been sitting? How old is the fuel?1 point -
89 olds swaybar
94 olds vert reacted to 55trucker for a topic
You should have what looks like this...... basic lower control arm covers all 1st gen W's from 88-96/991 point -
89 olds swaybar
94 olds vert reacted to sadolboy48 for a topic
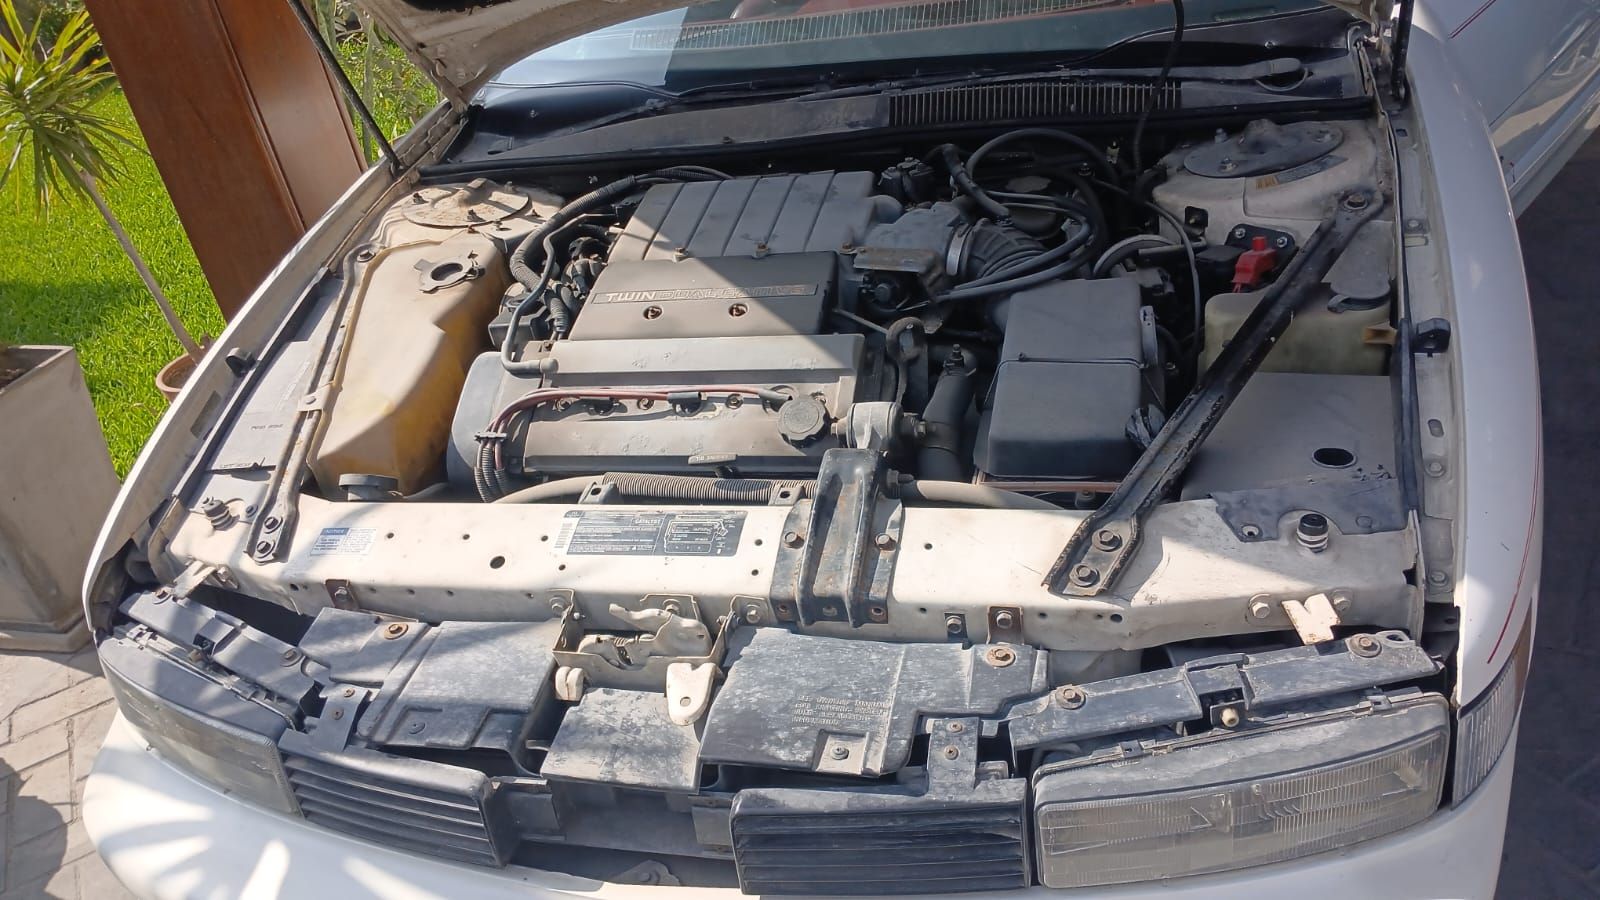
Apparently I'm wrong again. You cannot change just the lower A-arms to adapt a different style of sway bar on your 1989 Oldsmobile Cutlass Supreme. Your 1988–1989 First-Generation W-body uses a highly specific, early-production front suspension setup. The sway bar has unique "looped" ends that slide directly over the front leg of the lower control arm, sliding into a thick rubber bushing pinned to the top of the arm. Why Switching the A-Arms Won't Work The 1990+ Redesign: In 1990, GM completely redesigned the W-body front suspension. Newer models use a sway bar that hovers above the frame and connects to the struts or control arms via vertical end links with small ball joints or vertical bolt bushings. [1, 2, 3] Subframe Differences: The 1990+ lower control arms will not physically line up or bolt into your 1989 engine subframe cradle. The mounting pockets, spacing, and geometry are completely different. [1] The Braking Threat: If you attempt to adapt or use a standard vertical end-link style sway bar on your original 1989 A-arms, the bar will swing wildly into your CV axles or steering linkage under a hard turn. Your Best Options for a Broken 1989 Sway Bar Because your early-style front sway bar is unique, you must replace it with a design intended for the 1988–1989 model years. Source a Used Factory Bar: Your quickest and most cost-effective solution is sourcing a front sway bar from a donor 1988–1989 W-body vehicle (Cutlass Supreme, Pontiac Grand Prix, Buick Regal) at a local auto salvage yard. Verify the Subframe Bushings: When installing the replacement bar, make sure to replace the main frame-mount bushings and the A-arm target bushings. If these bushings wear out and seize, they bind the suspension, which is usually what causes these brittle older bars to snap under stress. SO, back to trying to find a specific donor car that no junkyard has. If anyone had any ideas i would greatlyappreciate it.1 point -
Will Impala rear suspension fit on my 07 buick lacrosse?
White93z34 reacted to Allure for a topic
Thanks! Looks like they both use the same fcs rear shock/strut assembly according to rockauto. I'll definitely keep in mind looking into springs as well.1 point -
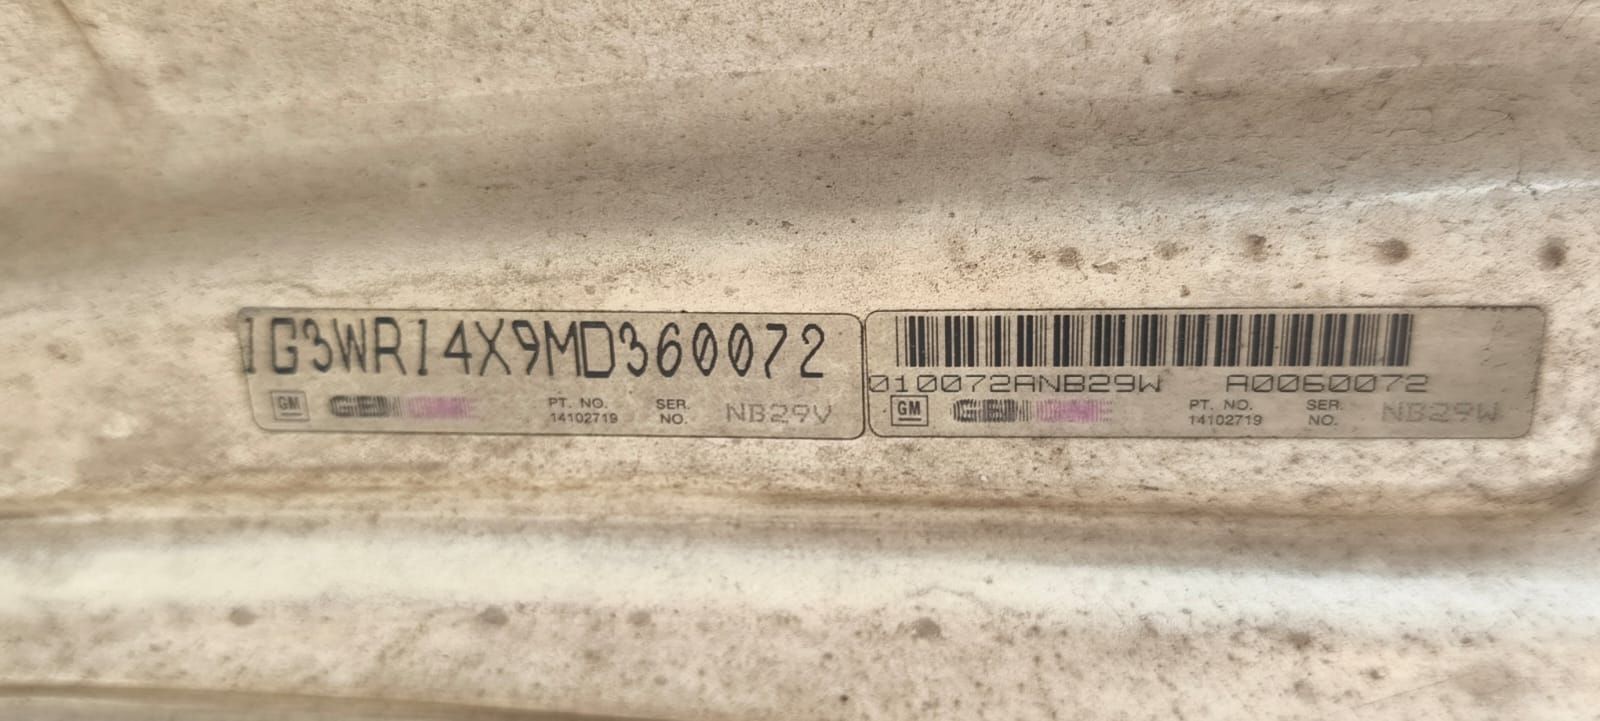
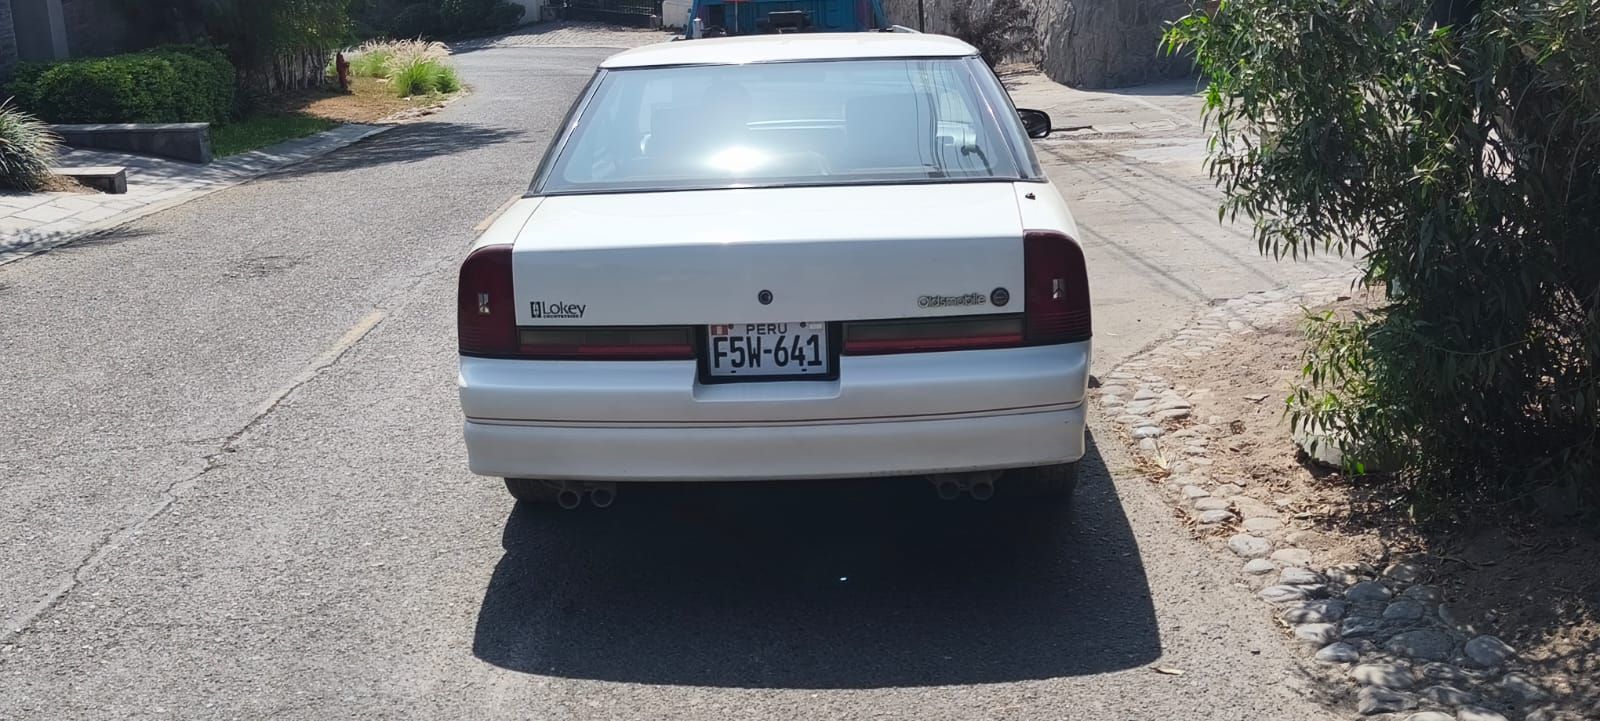
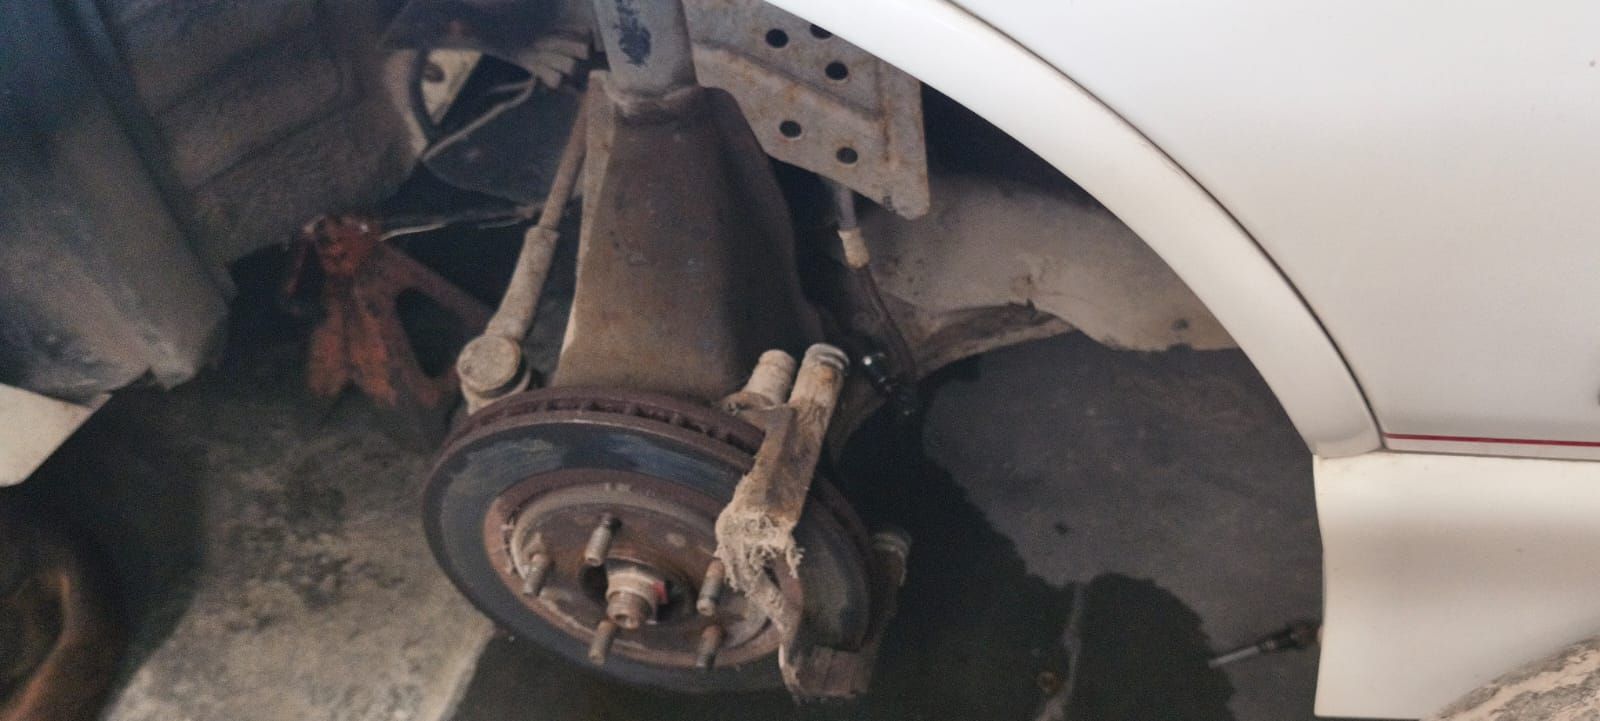
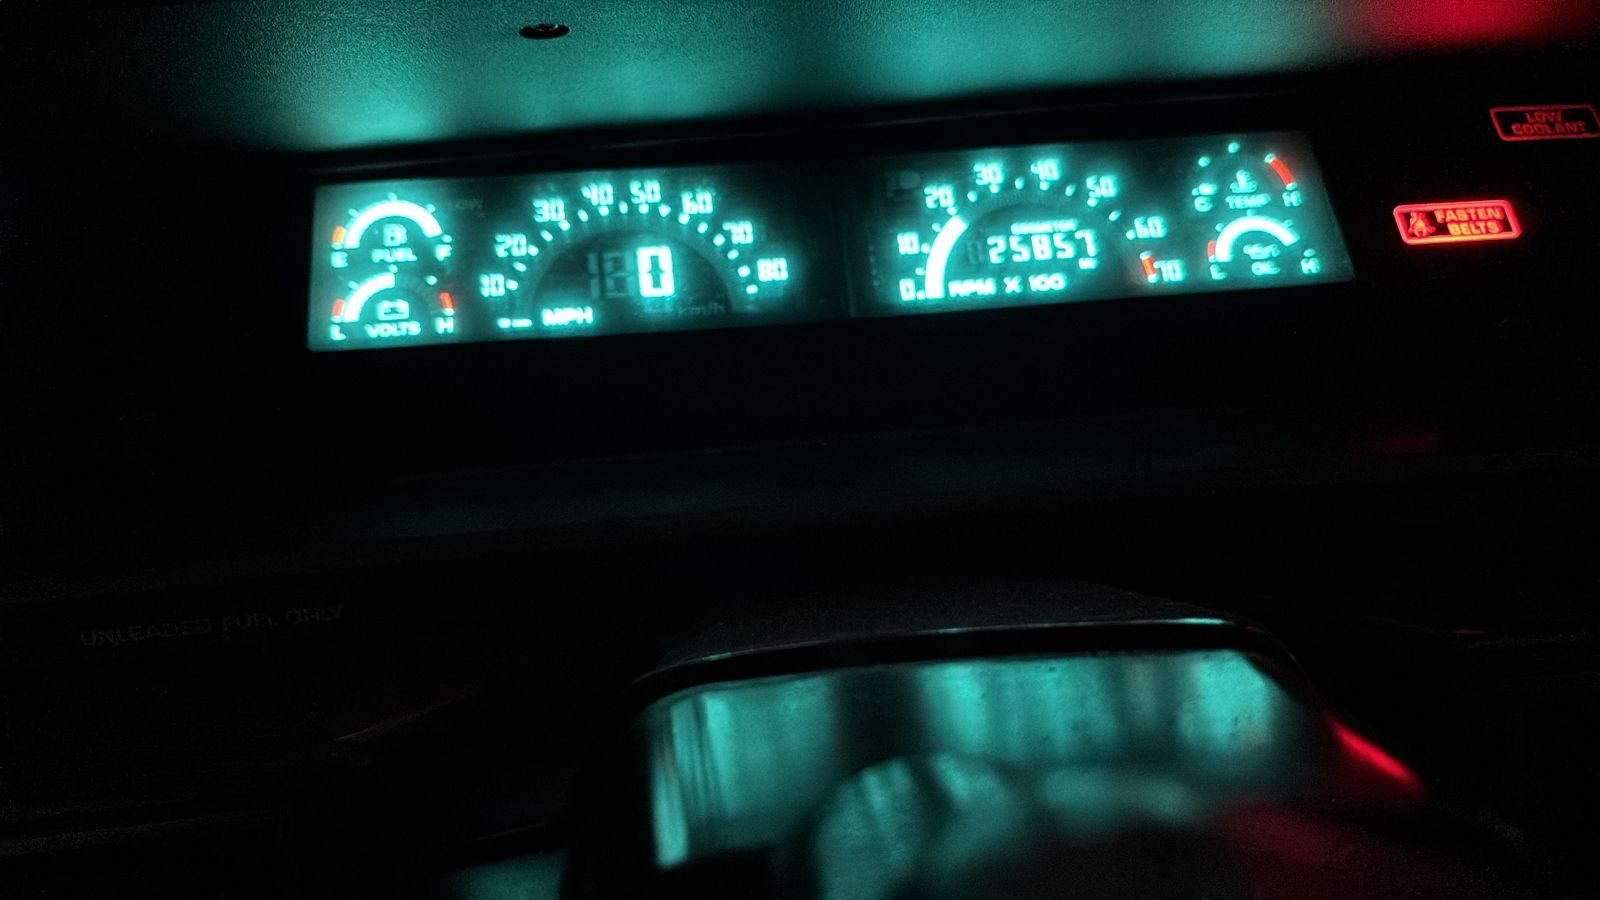
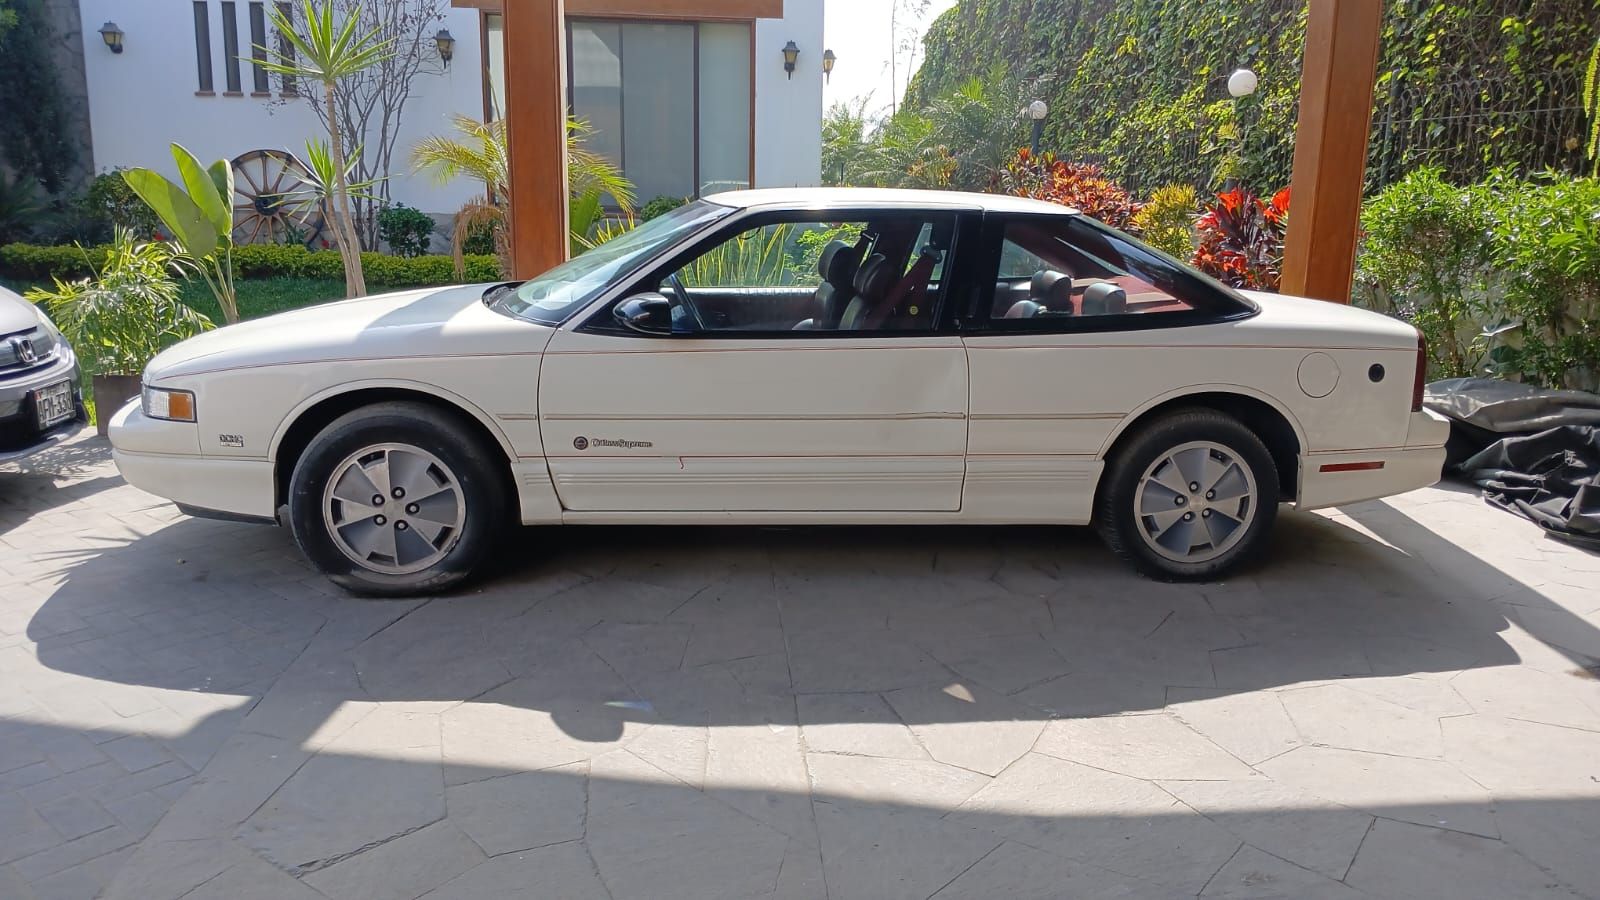
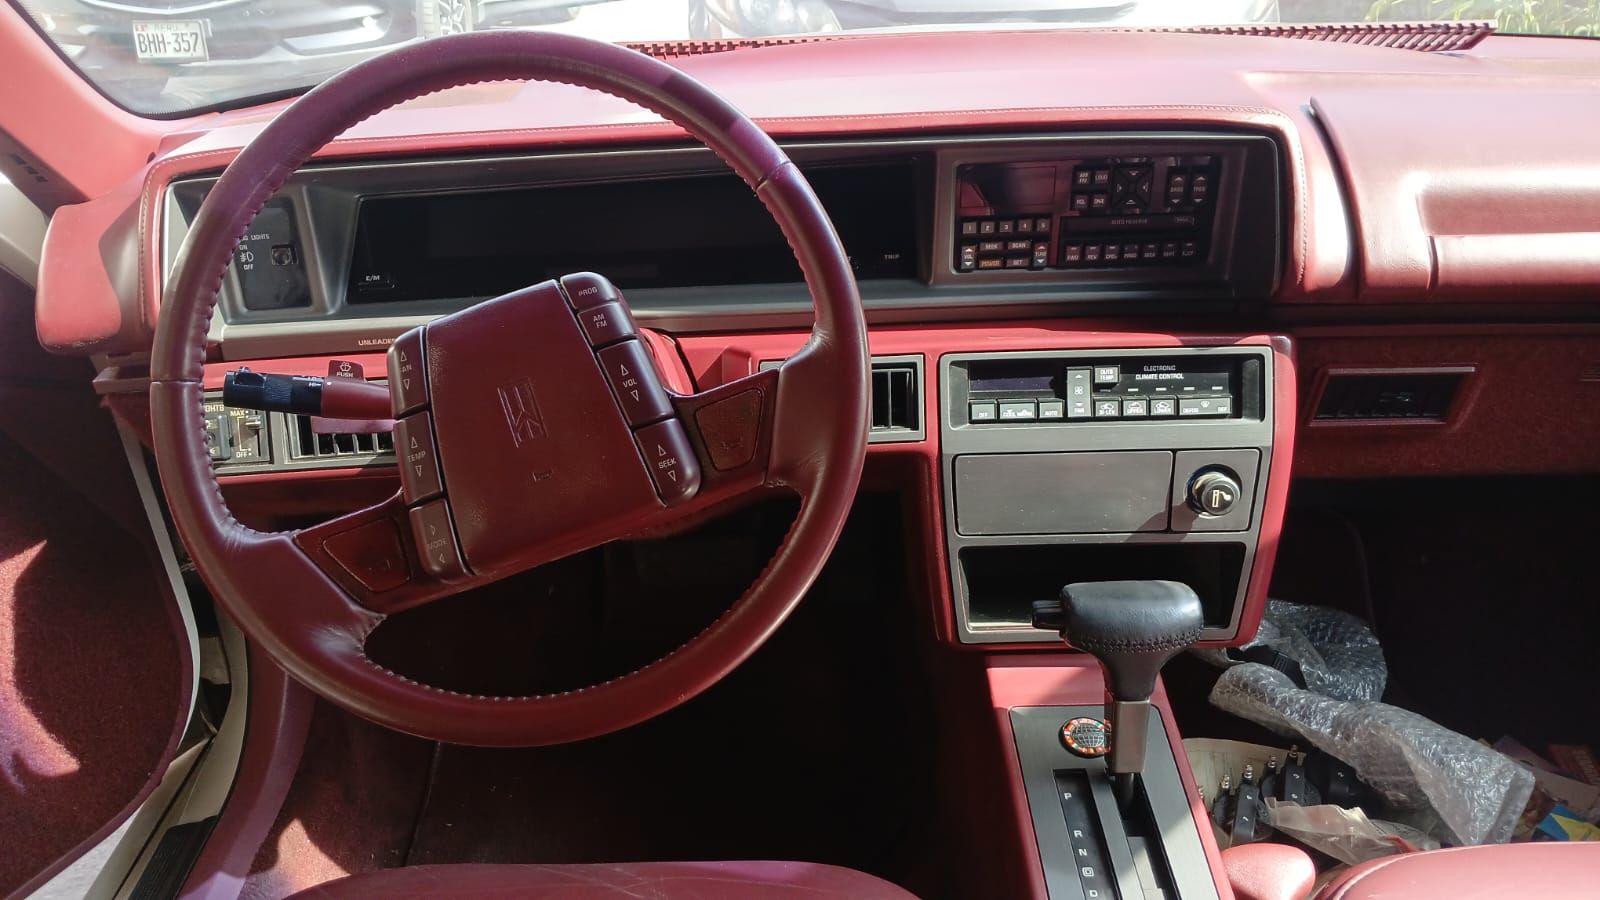
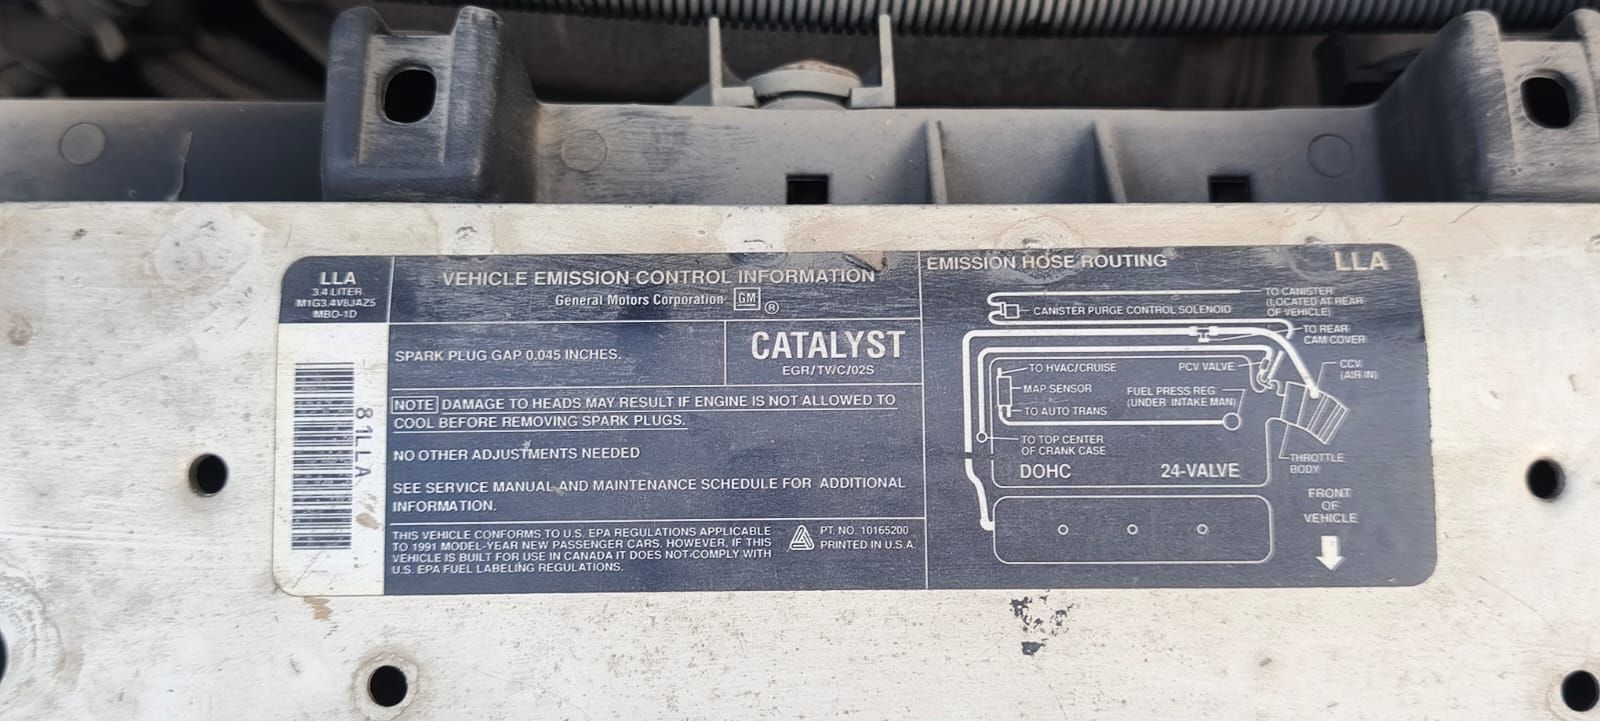
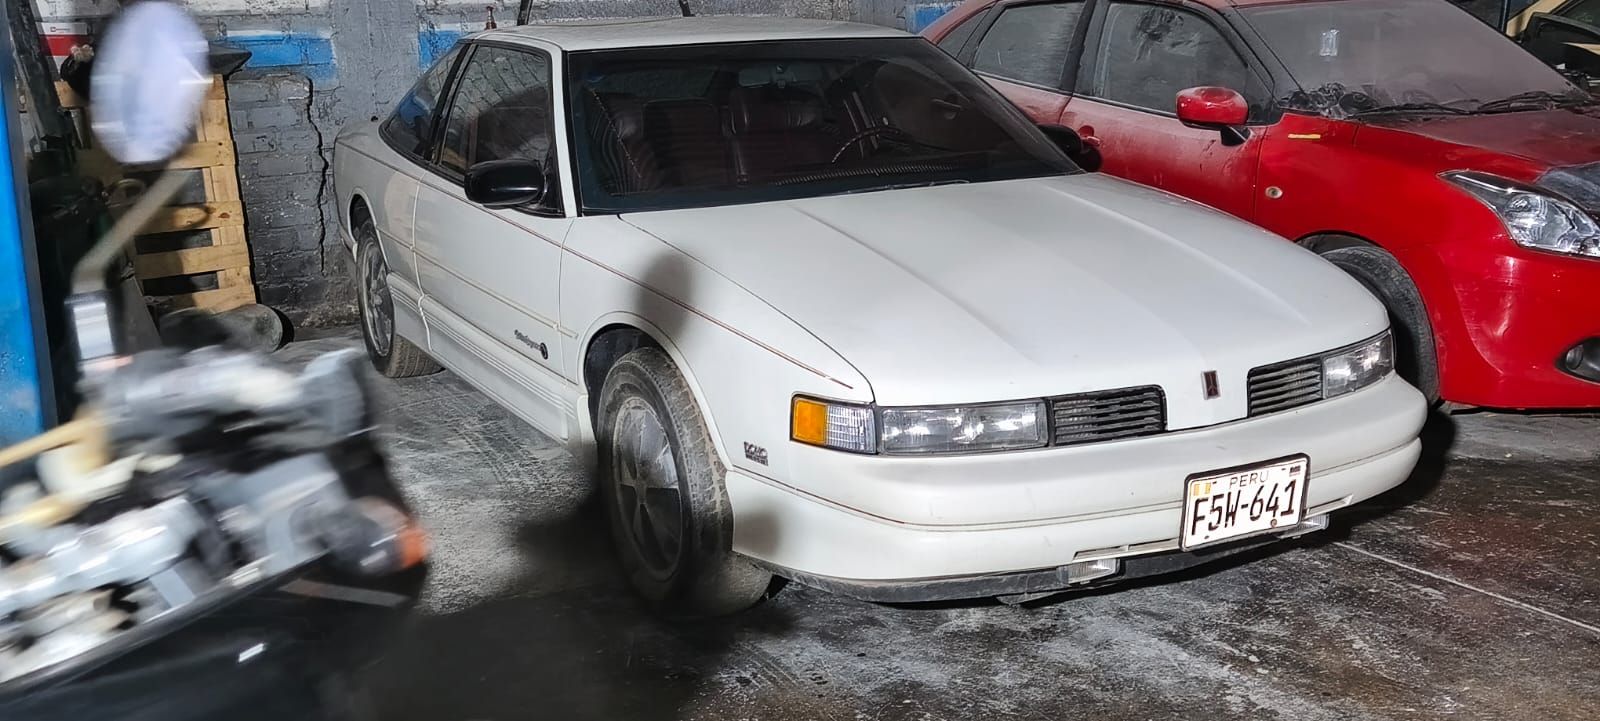
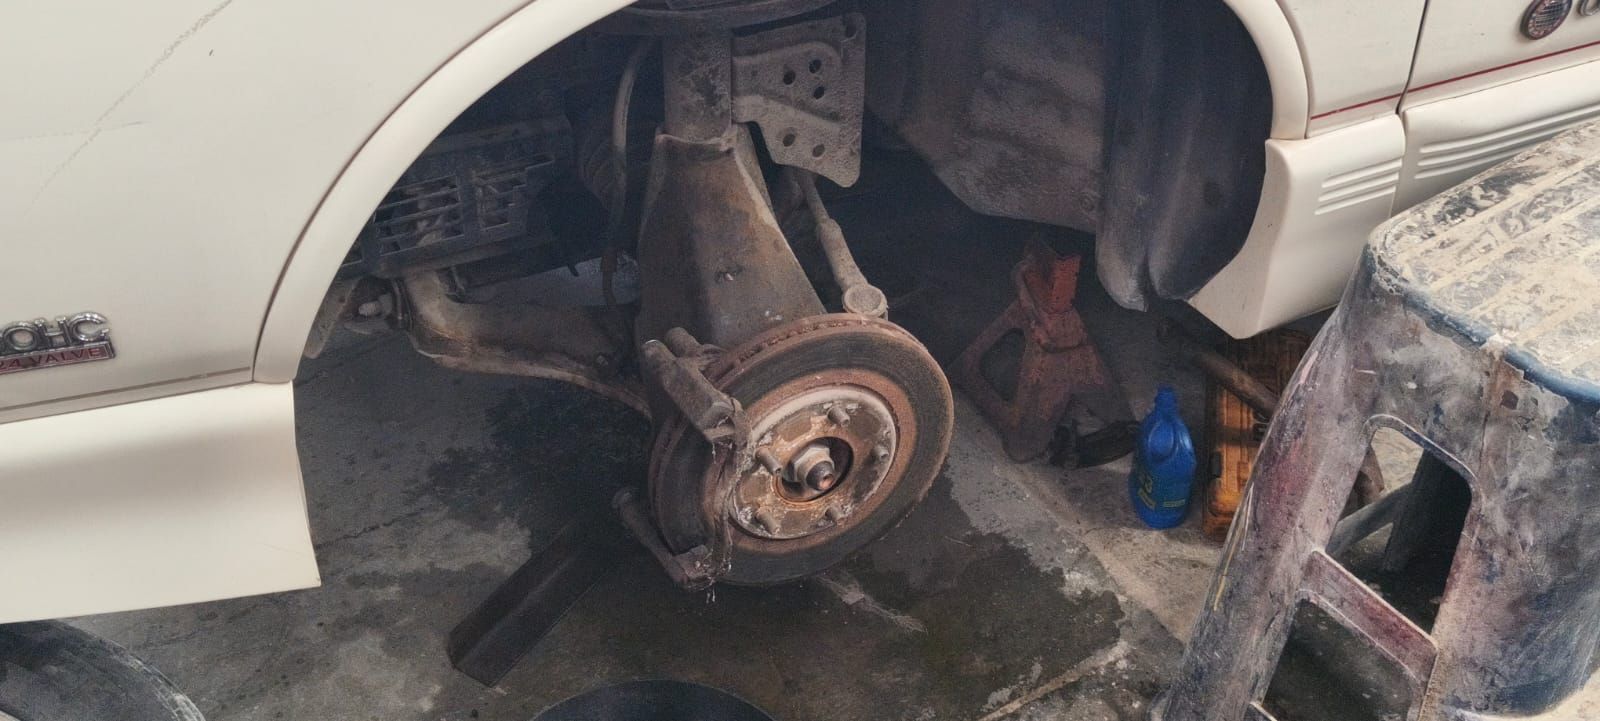
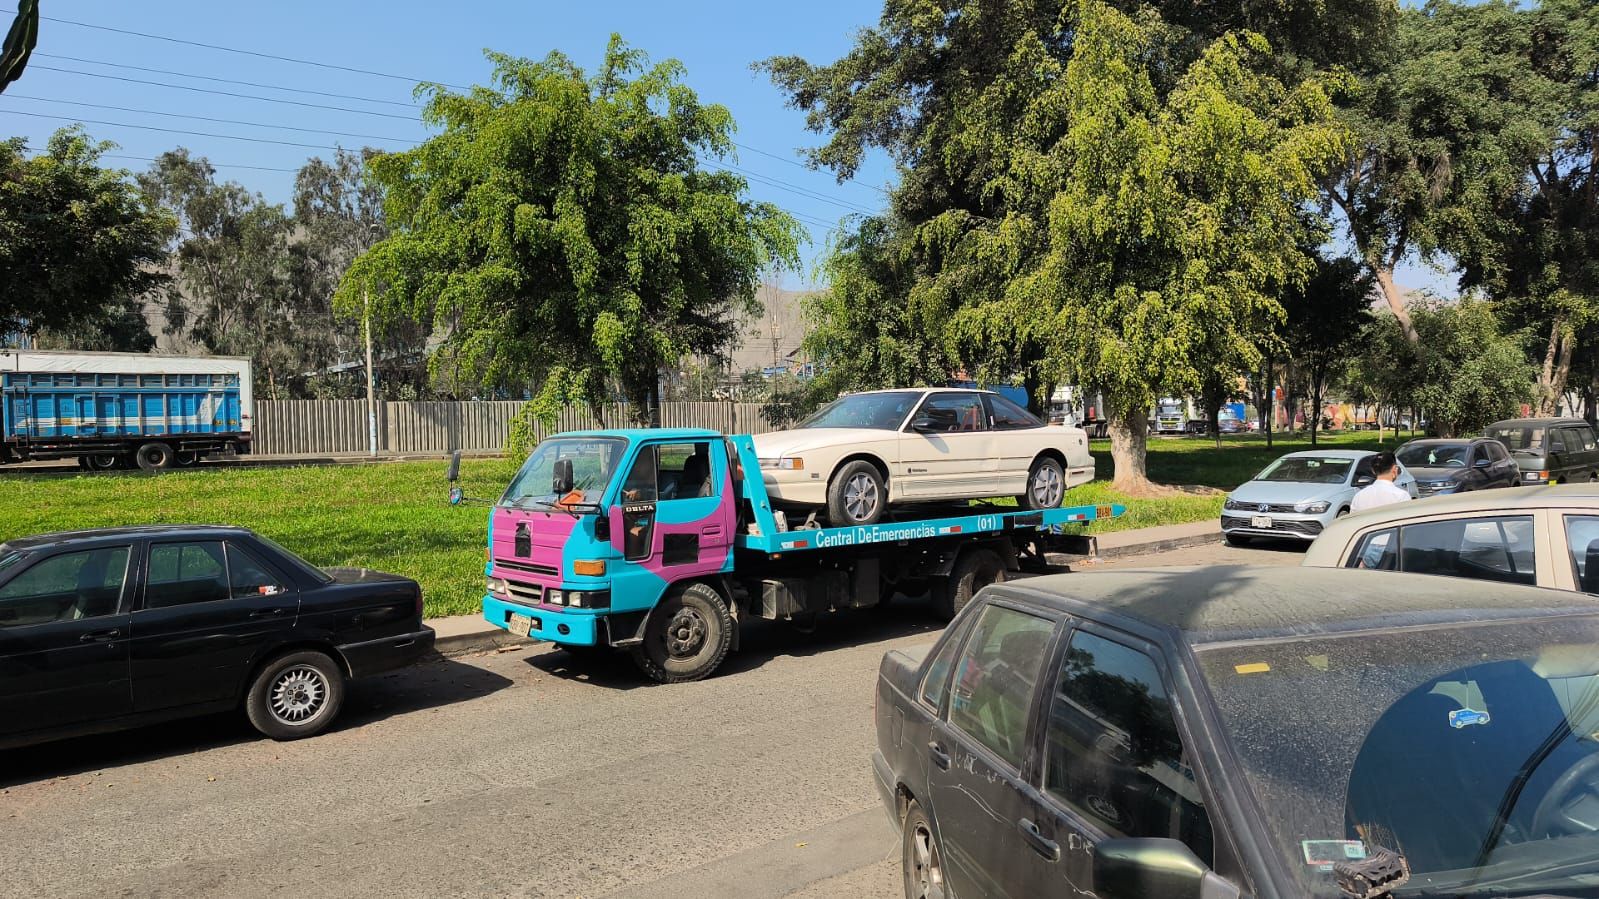
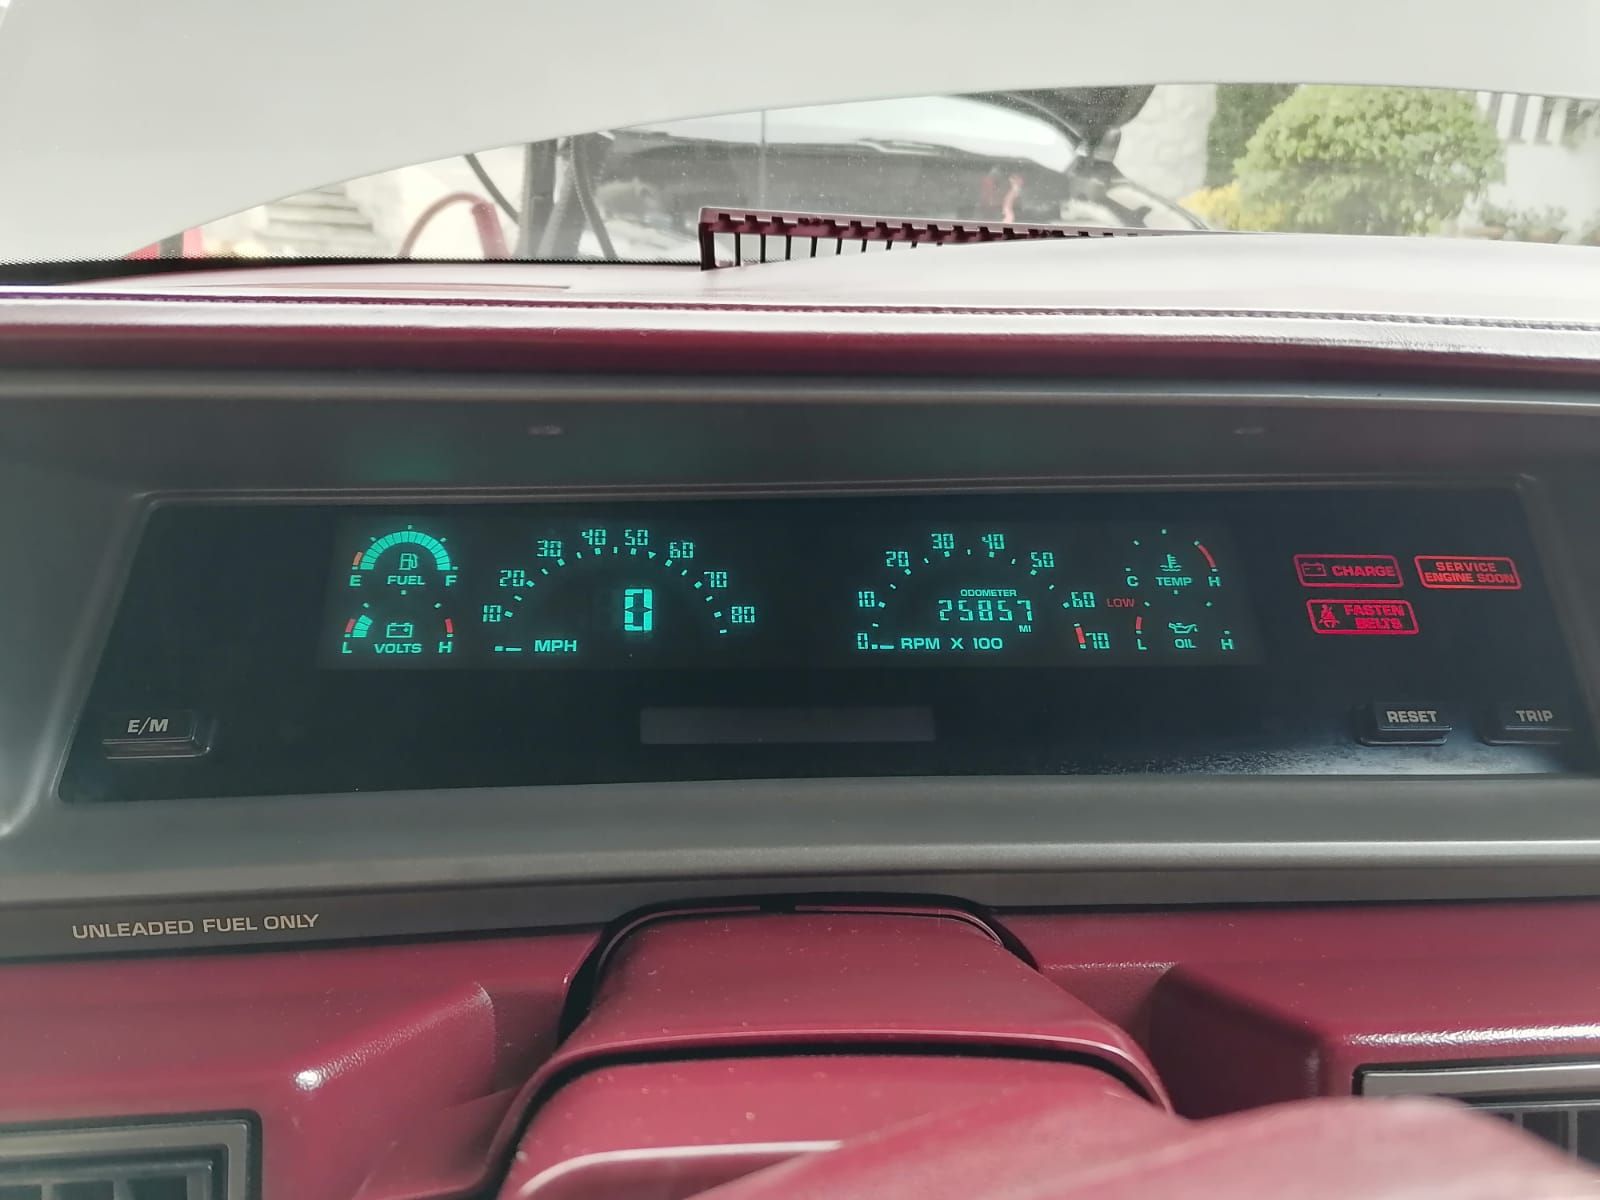
1991 cutlass international coupe-x-code 3.4 DOHC-25k original miles preservation
rcLord510 reacted to claudio Ruesta for a topic
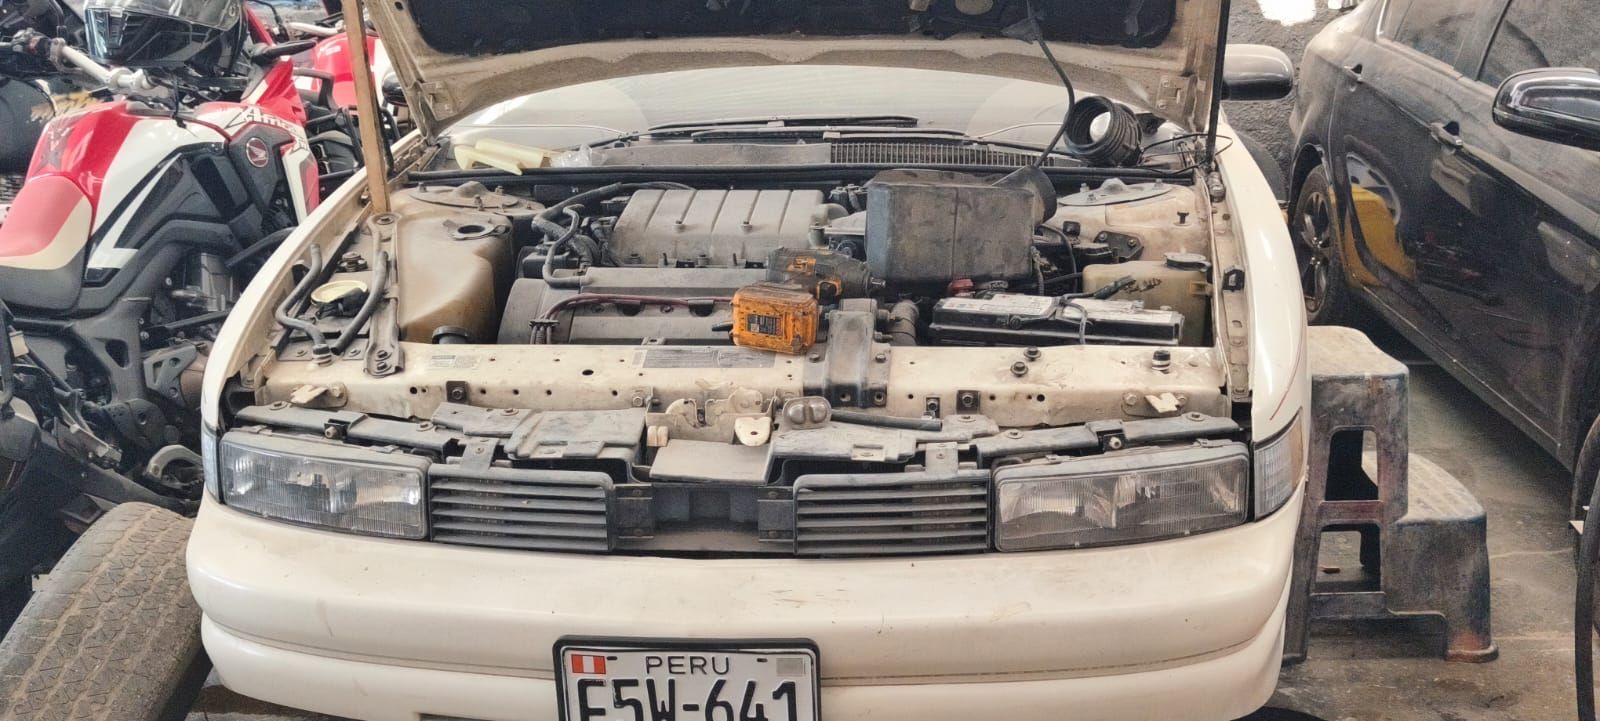
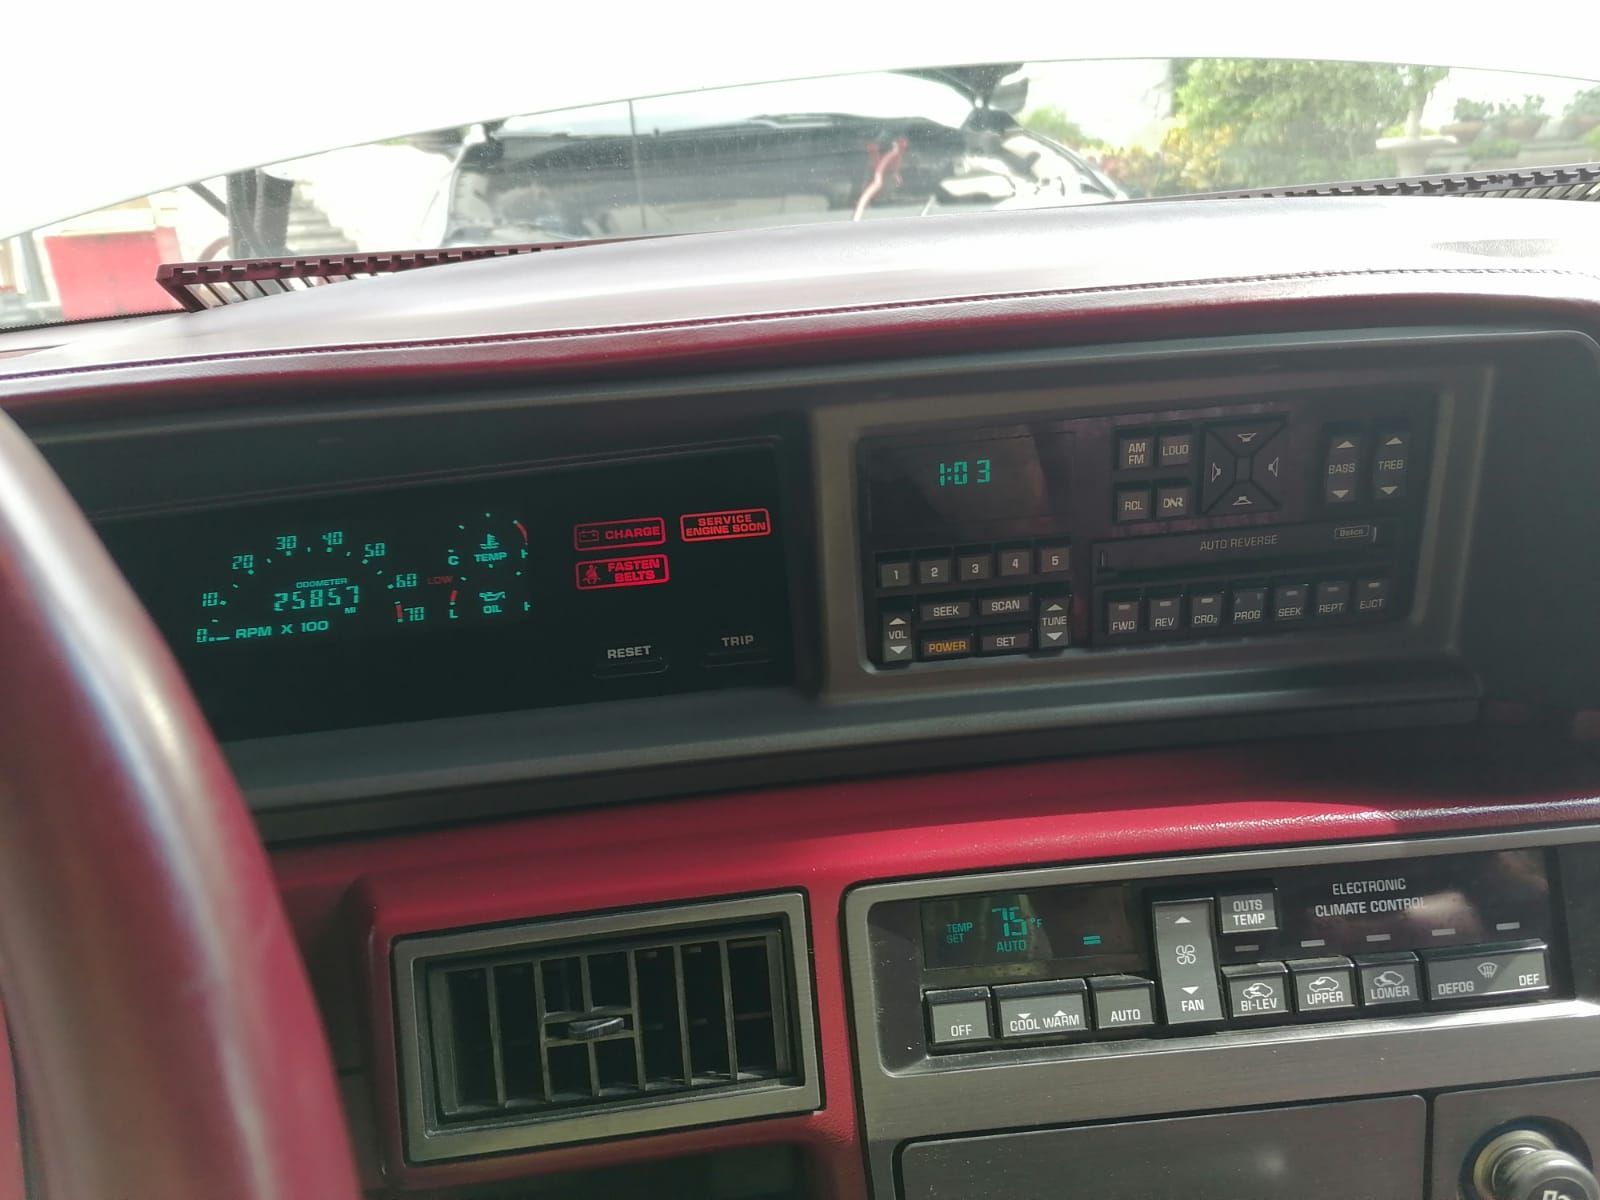
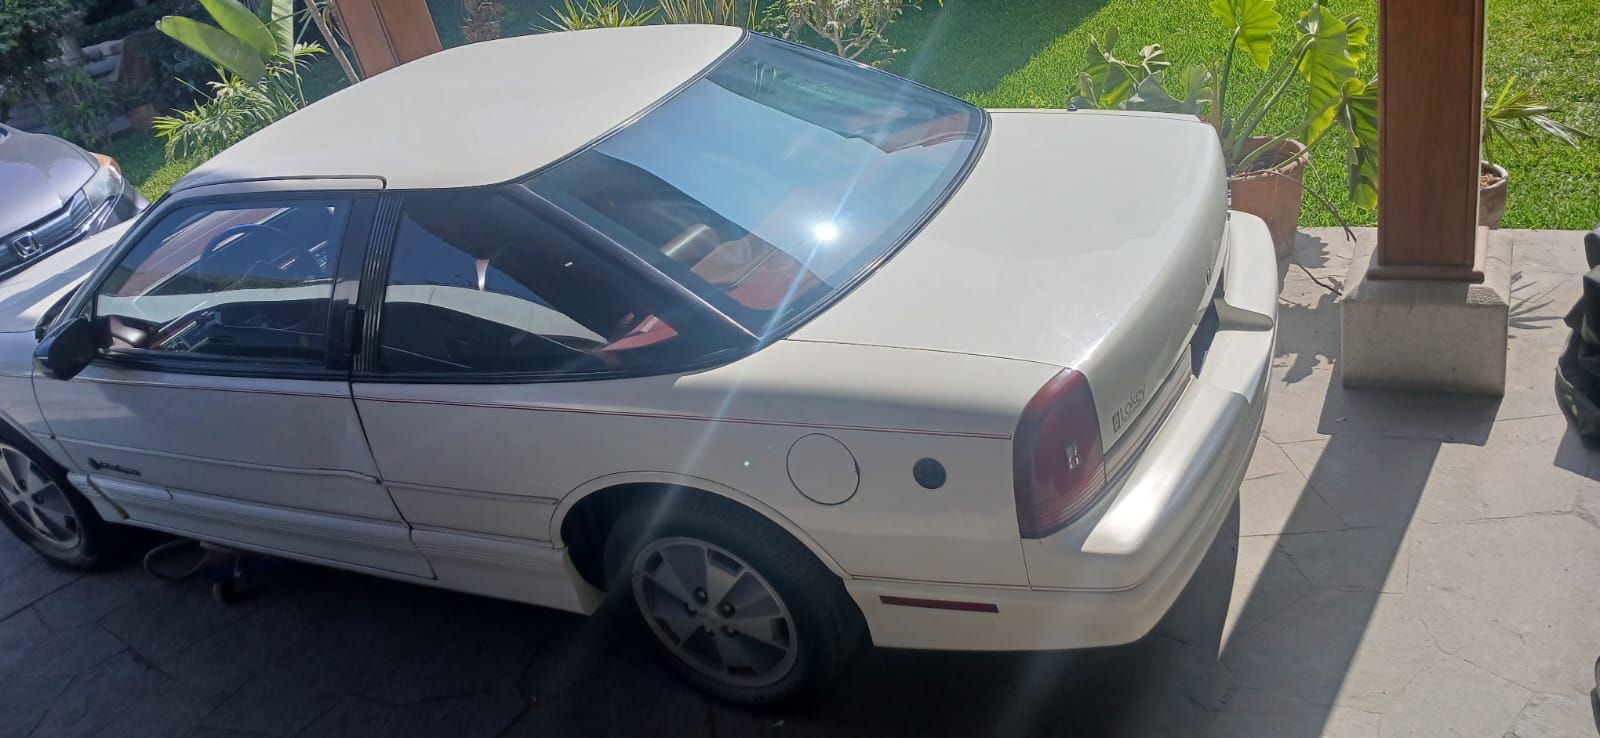
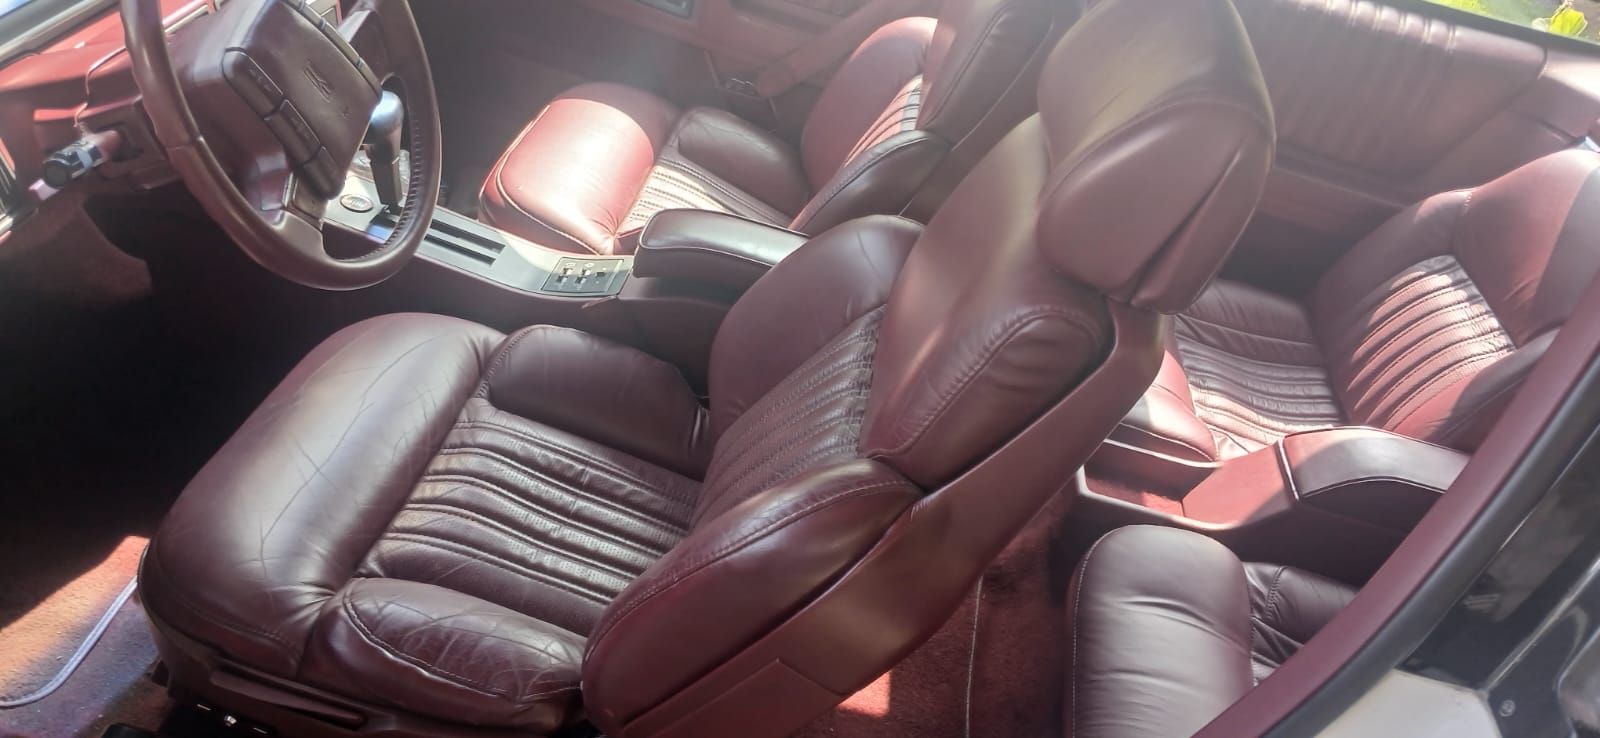
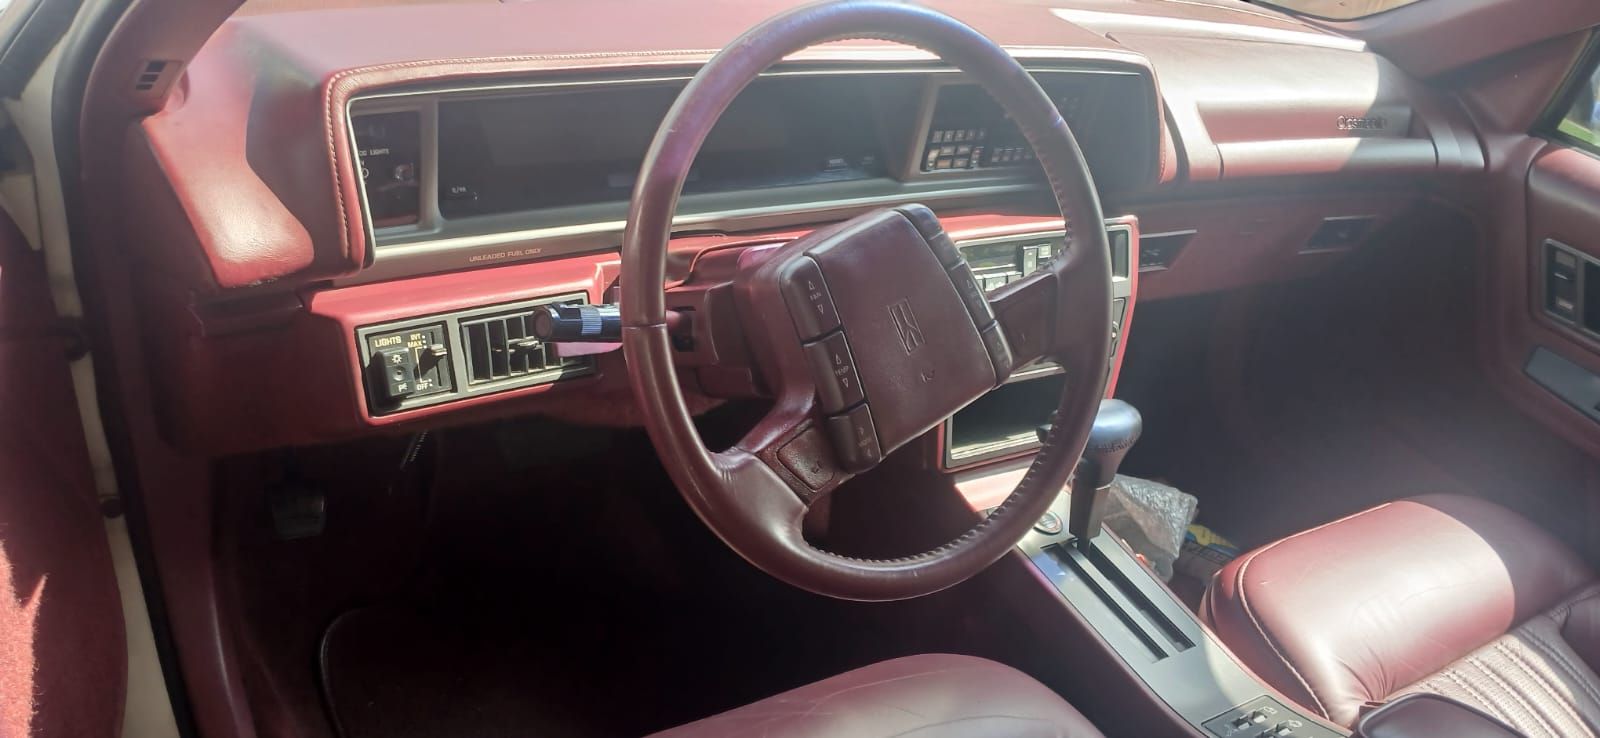
Greetings form Peru justa wan to share my new preservation project with the community. it's a legitimate 1991 OLSDMOBILE CUTLASS SUPREME INTERNATIONAL SERIES COUPE ( X-Code 3.4L DOHC TWIN Dual Cam) with only 25,857 original miles Here is a crazy part of its history: Someone in the past installed a 3rd-generation LPG system on it, which caused it to stop running back in the day. Because of that mistake, the car was left sitting for decades, sleeping like a time capsule! A blessing in disguise for me. Everything from the LPG system has been removed from the engine bay, except for the 16-gallon tank in the trunk and the exterior filler valve, which I will remove and patch later. The great news is that the engine is finally up and running again, and it sounds great! The interior is full Burgundy leather with the premium AQ9 bucket seats, and the green digital cluster works perfectly. Right now, I'm doing a complete brake overhaul (the front calipers were seized) and getting ready for a full fluid flush. New water pump and mechanical thermostat are going in next. My approach is mechanics first: make it move, shift, and brake safely, then deal with the bodywork. Glad to be here, and I'd love to hear your thoughts, technical tips, and recommendations for bringing this 90s unicorn back to life! WhatsApp Video 2026-.mp4 WhatsApp Video 2026-06-28 .mp4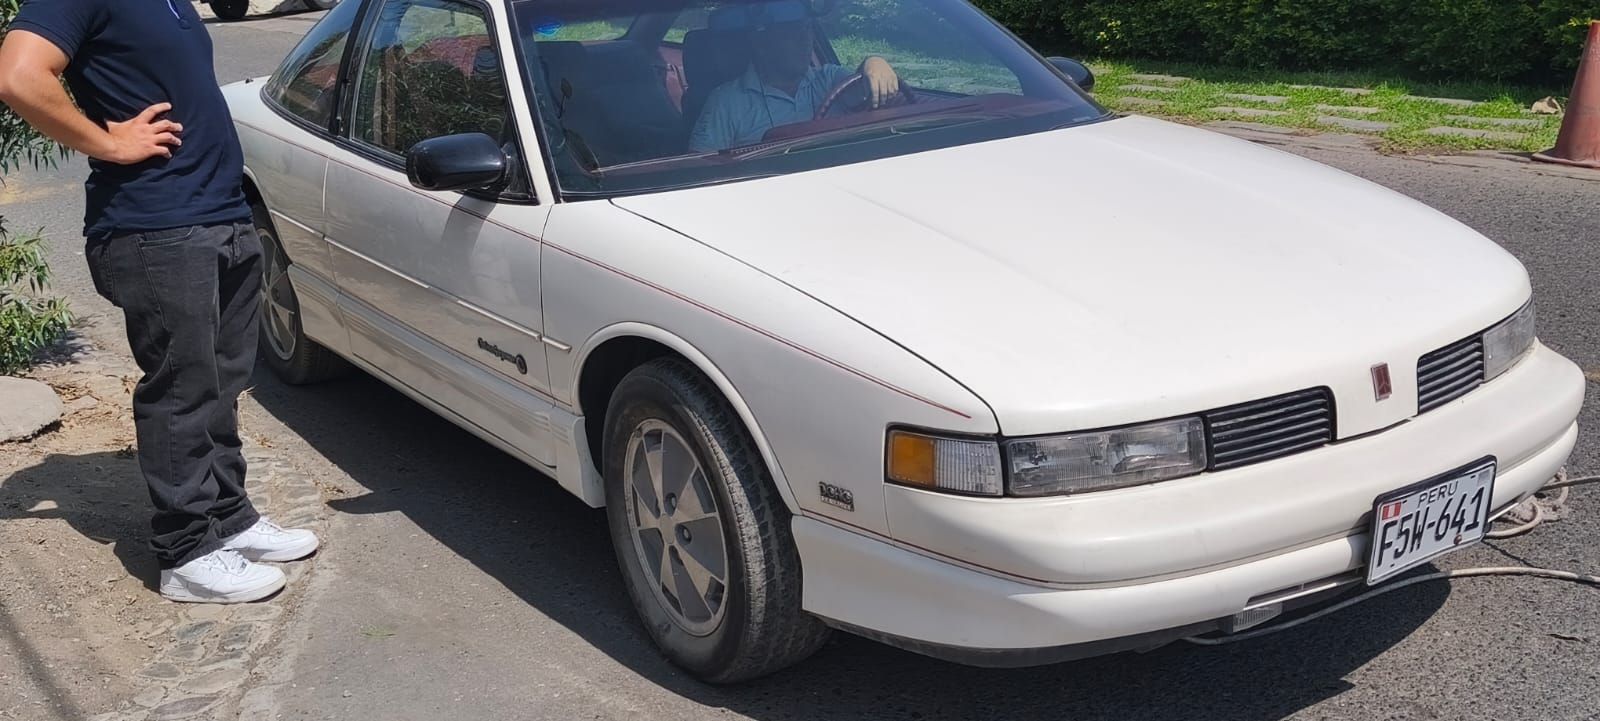


 1 point
 -
DOES ANYONE KNOW WHERE TO GET LATERAL LINKS FOR 95 CUTTY???
rich_e777 reacted to Raffaelli for a topic
I bought a set of new Doorman second generation adjustable arms. Put in new poly bushings. Running in my 1994 Z34. About the second page of the thread.1 point -
`89 TGP joining the collection
rich_e777 reacted to 94 olds vert for a topic
Jealous of your antique plate. I can't wait to get one on my GTP.1 point