Leaderboard
Popular Content
Showing content with the highest reputation since 09/29/2025 in Posts
-
TOM ( SUPERBUICK)
Psych0matt and 7 others reacted to SuperBuick for a topic
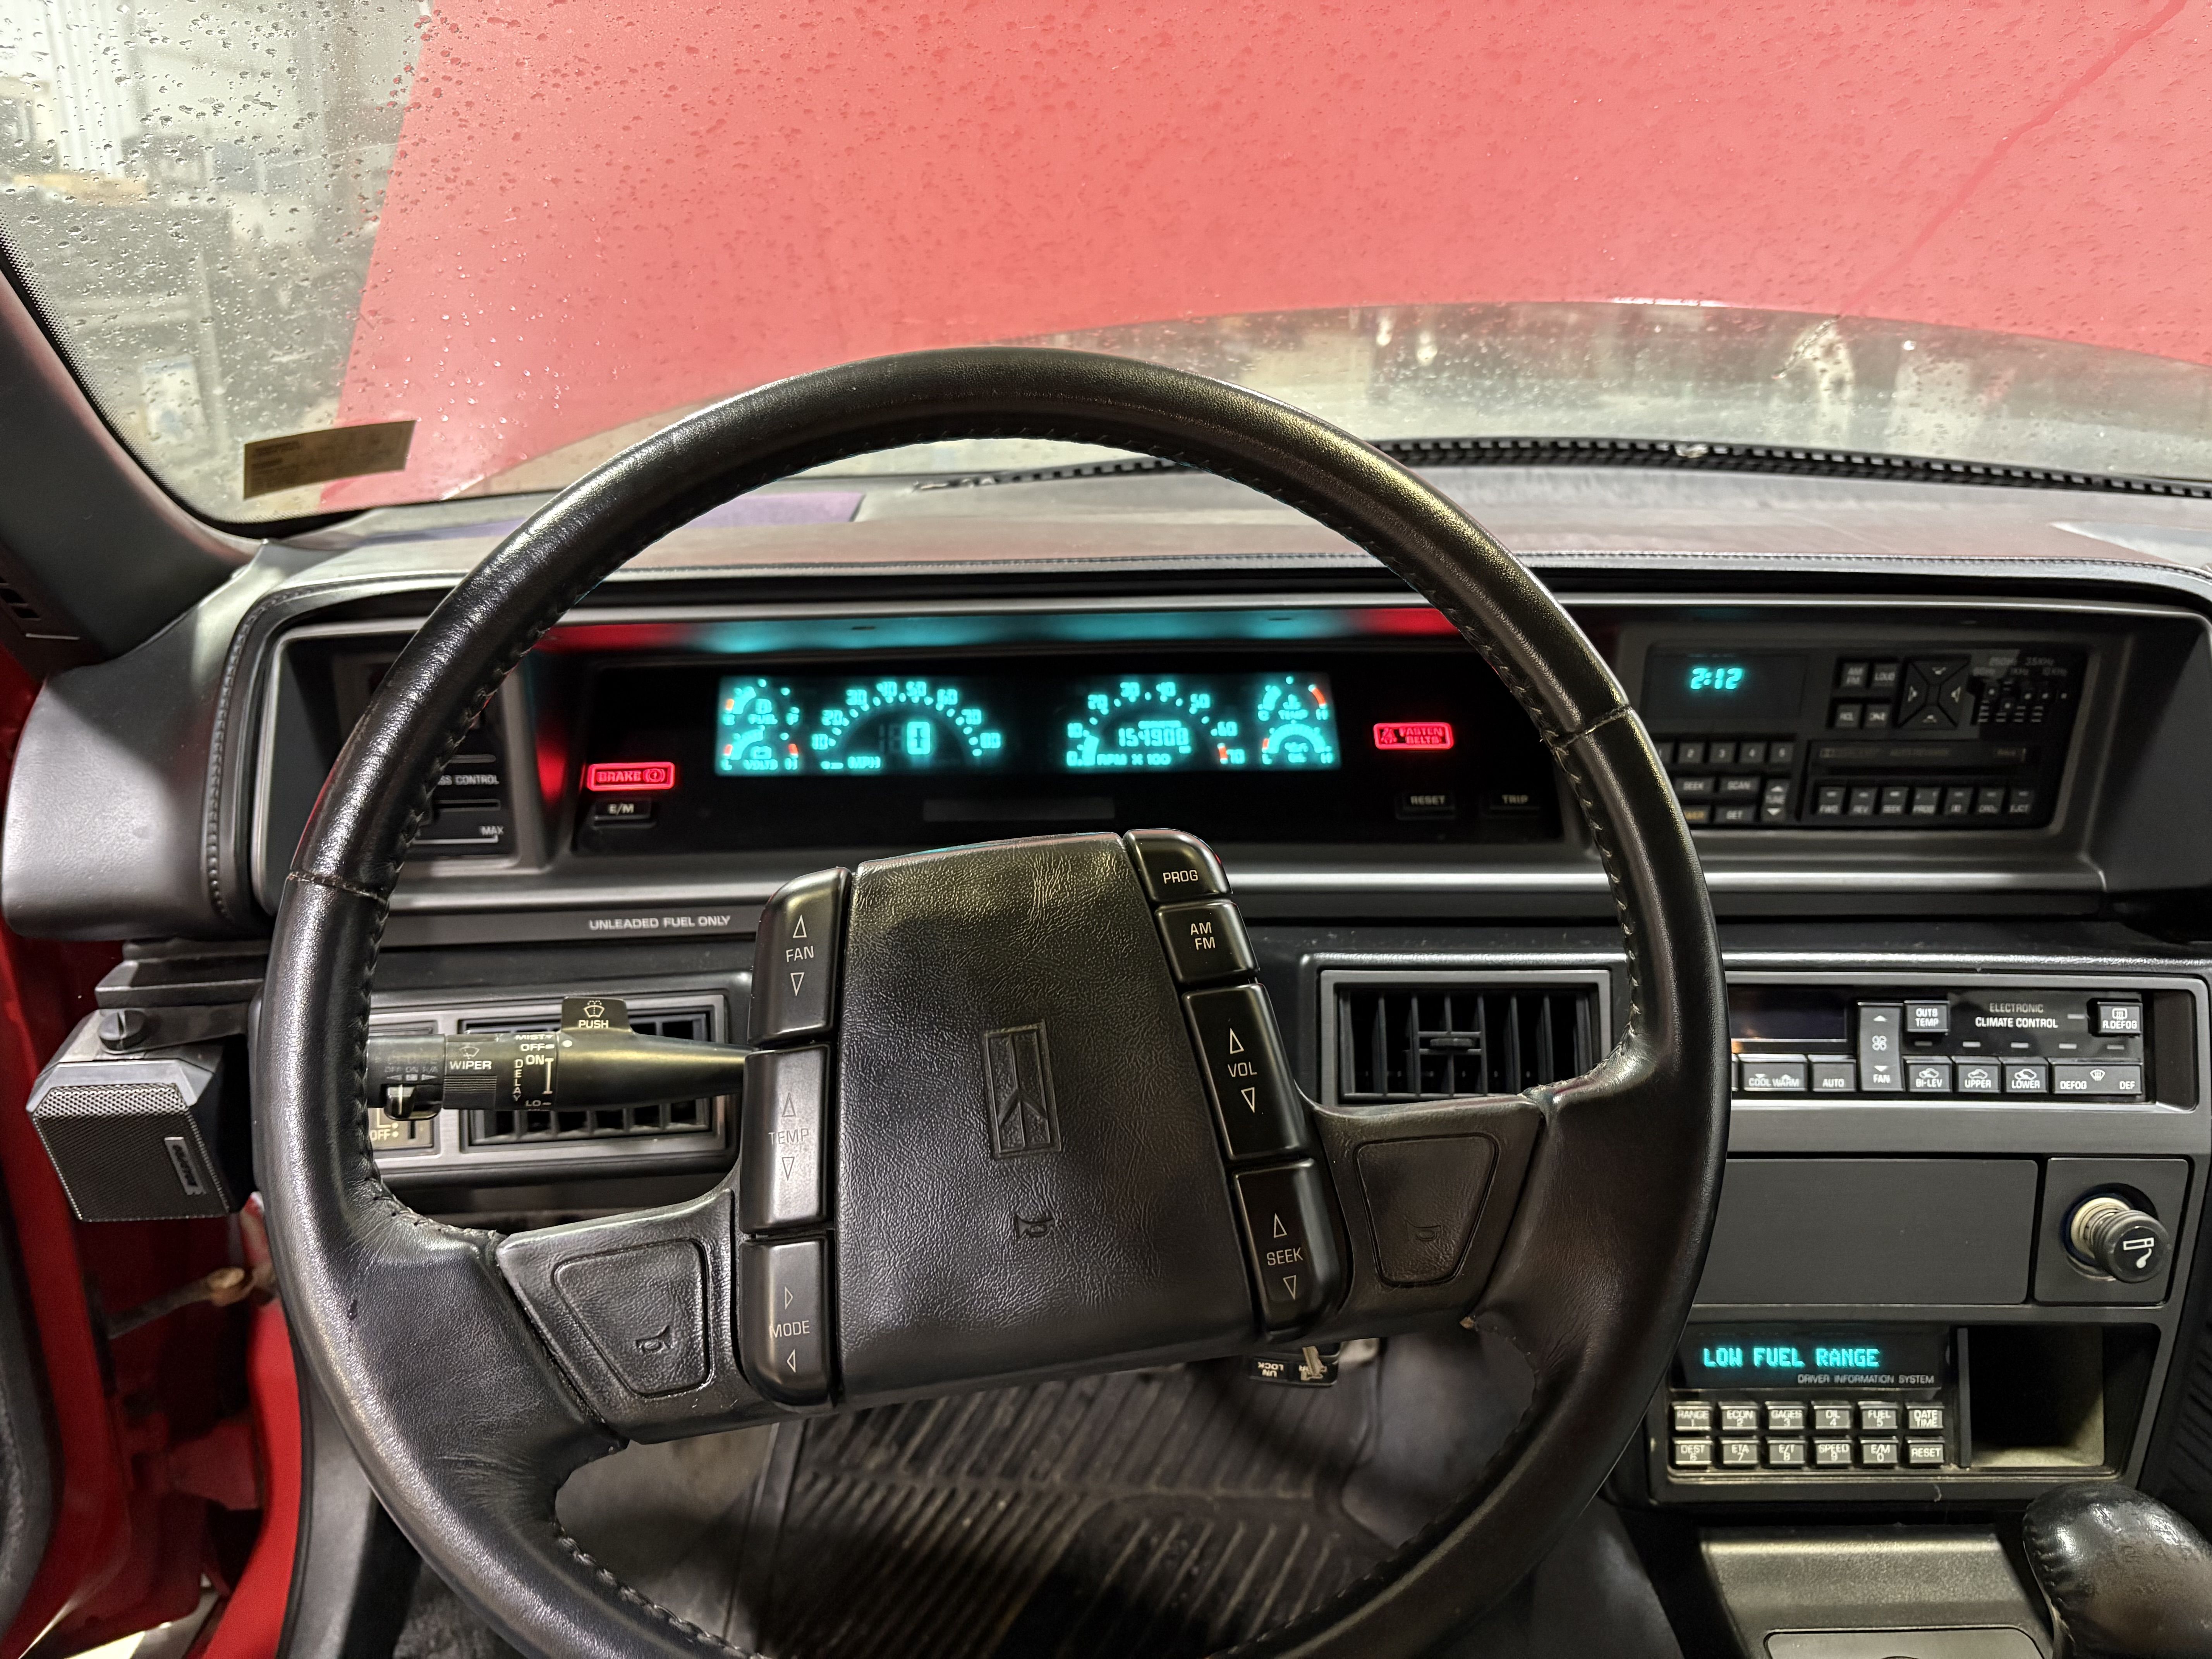
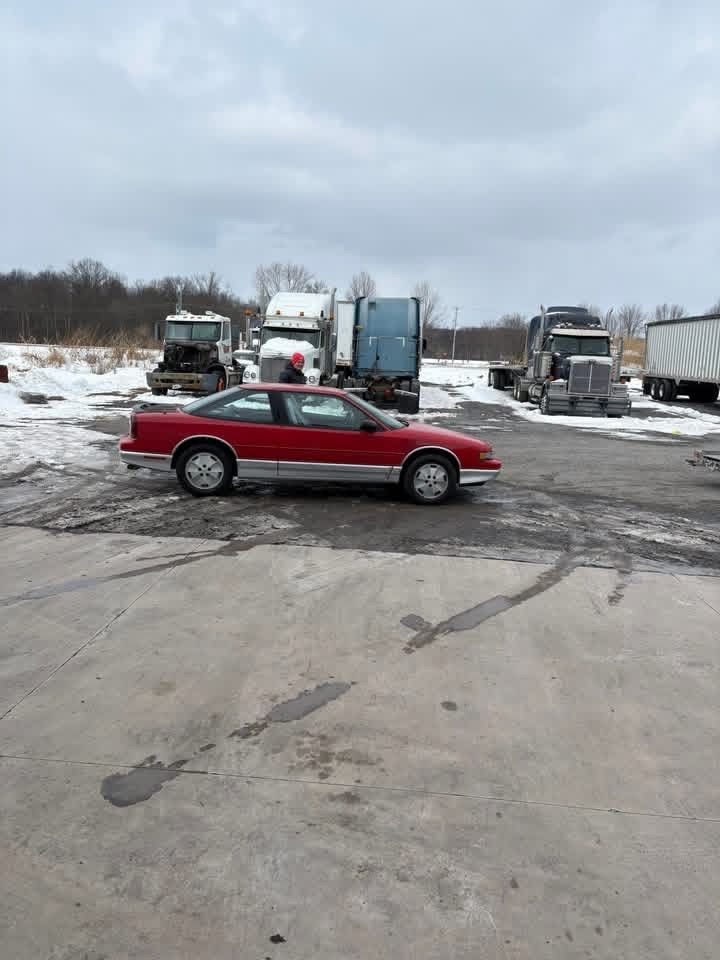
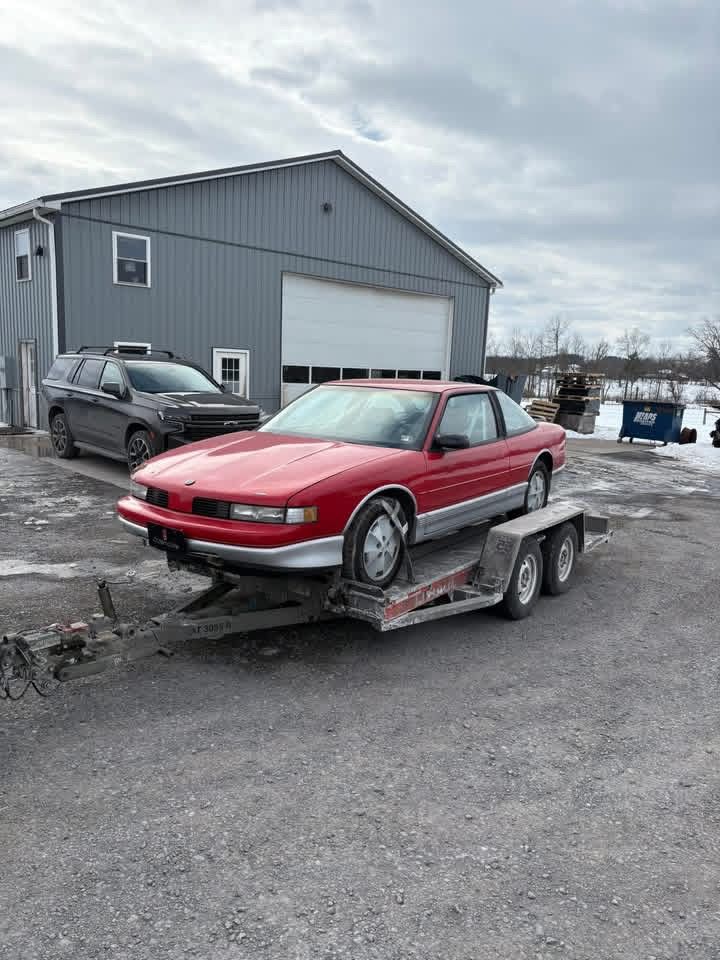
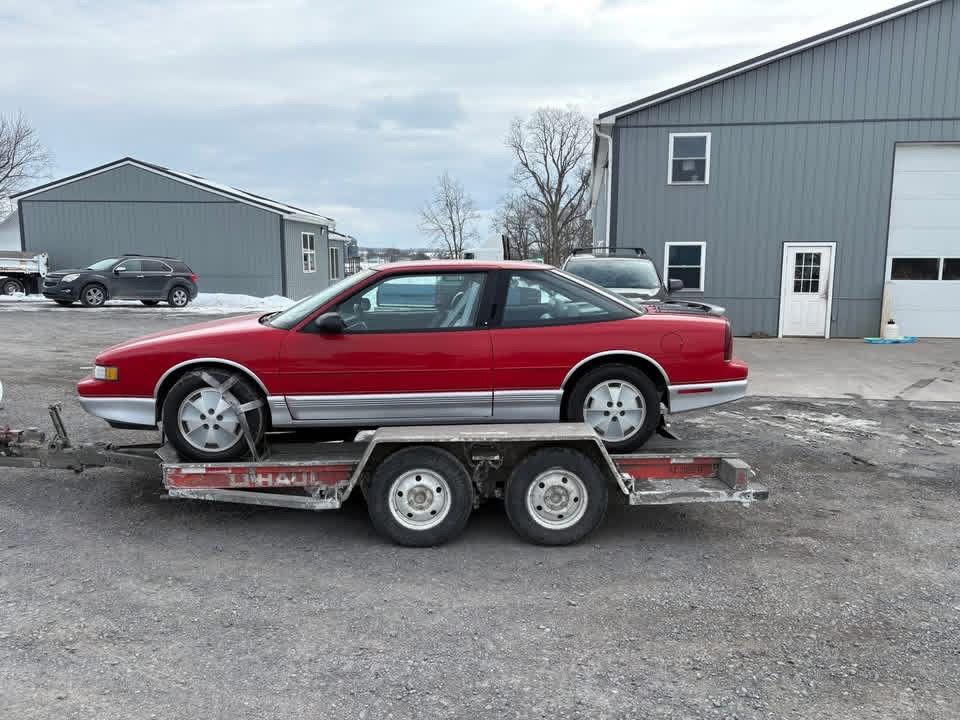
Well I cant wait any longer for you guys. 23.5 years is a bit long to make a guy hang on. So I just went ahead and got it myself.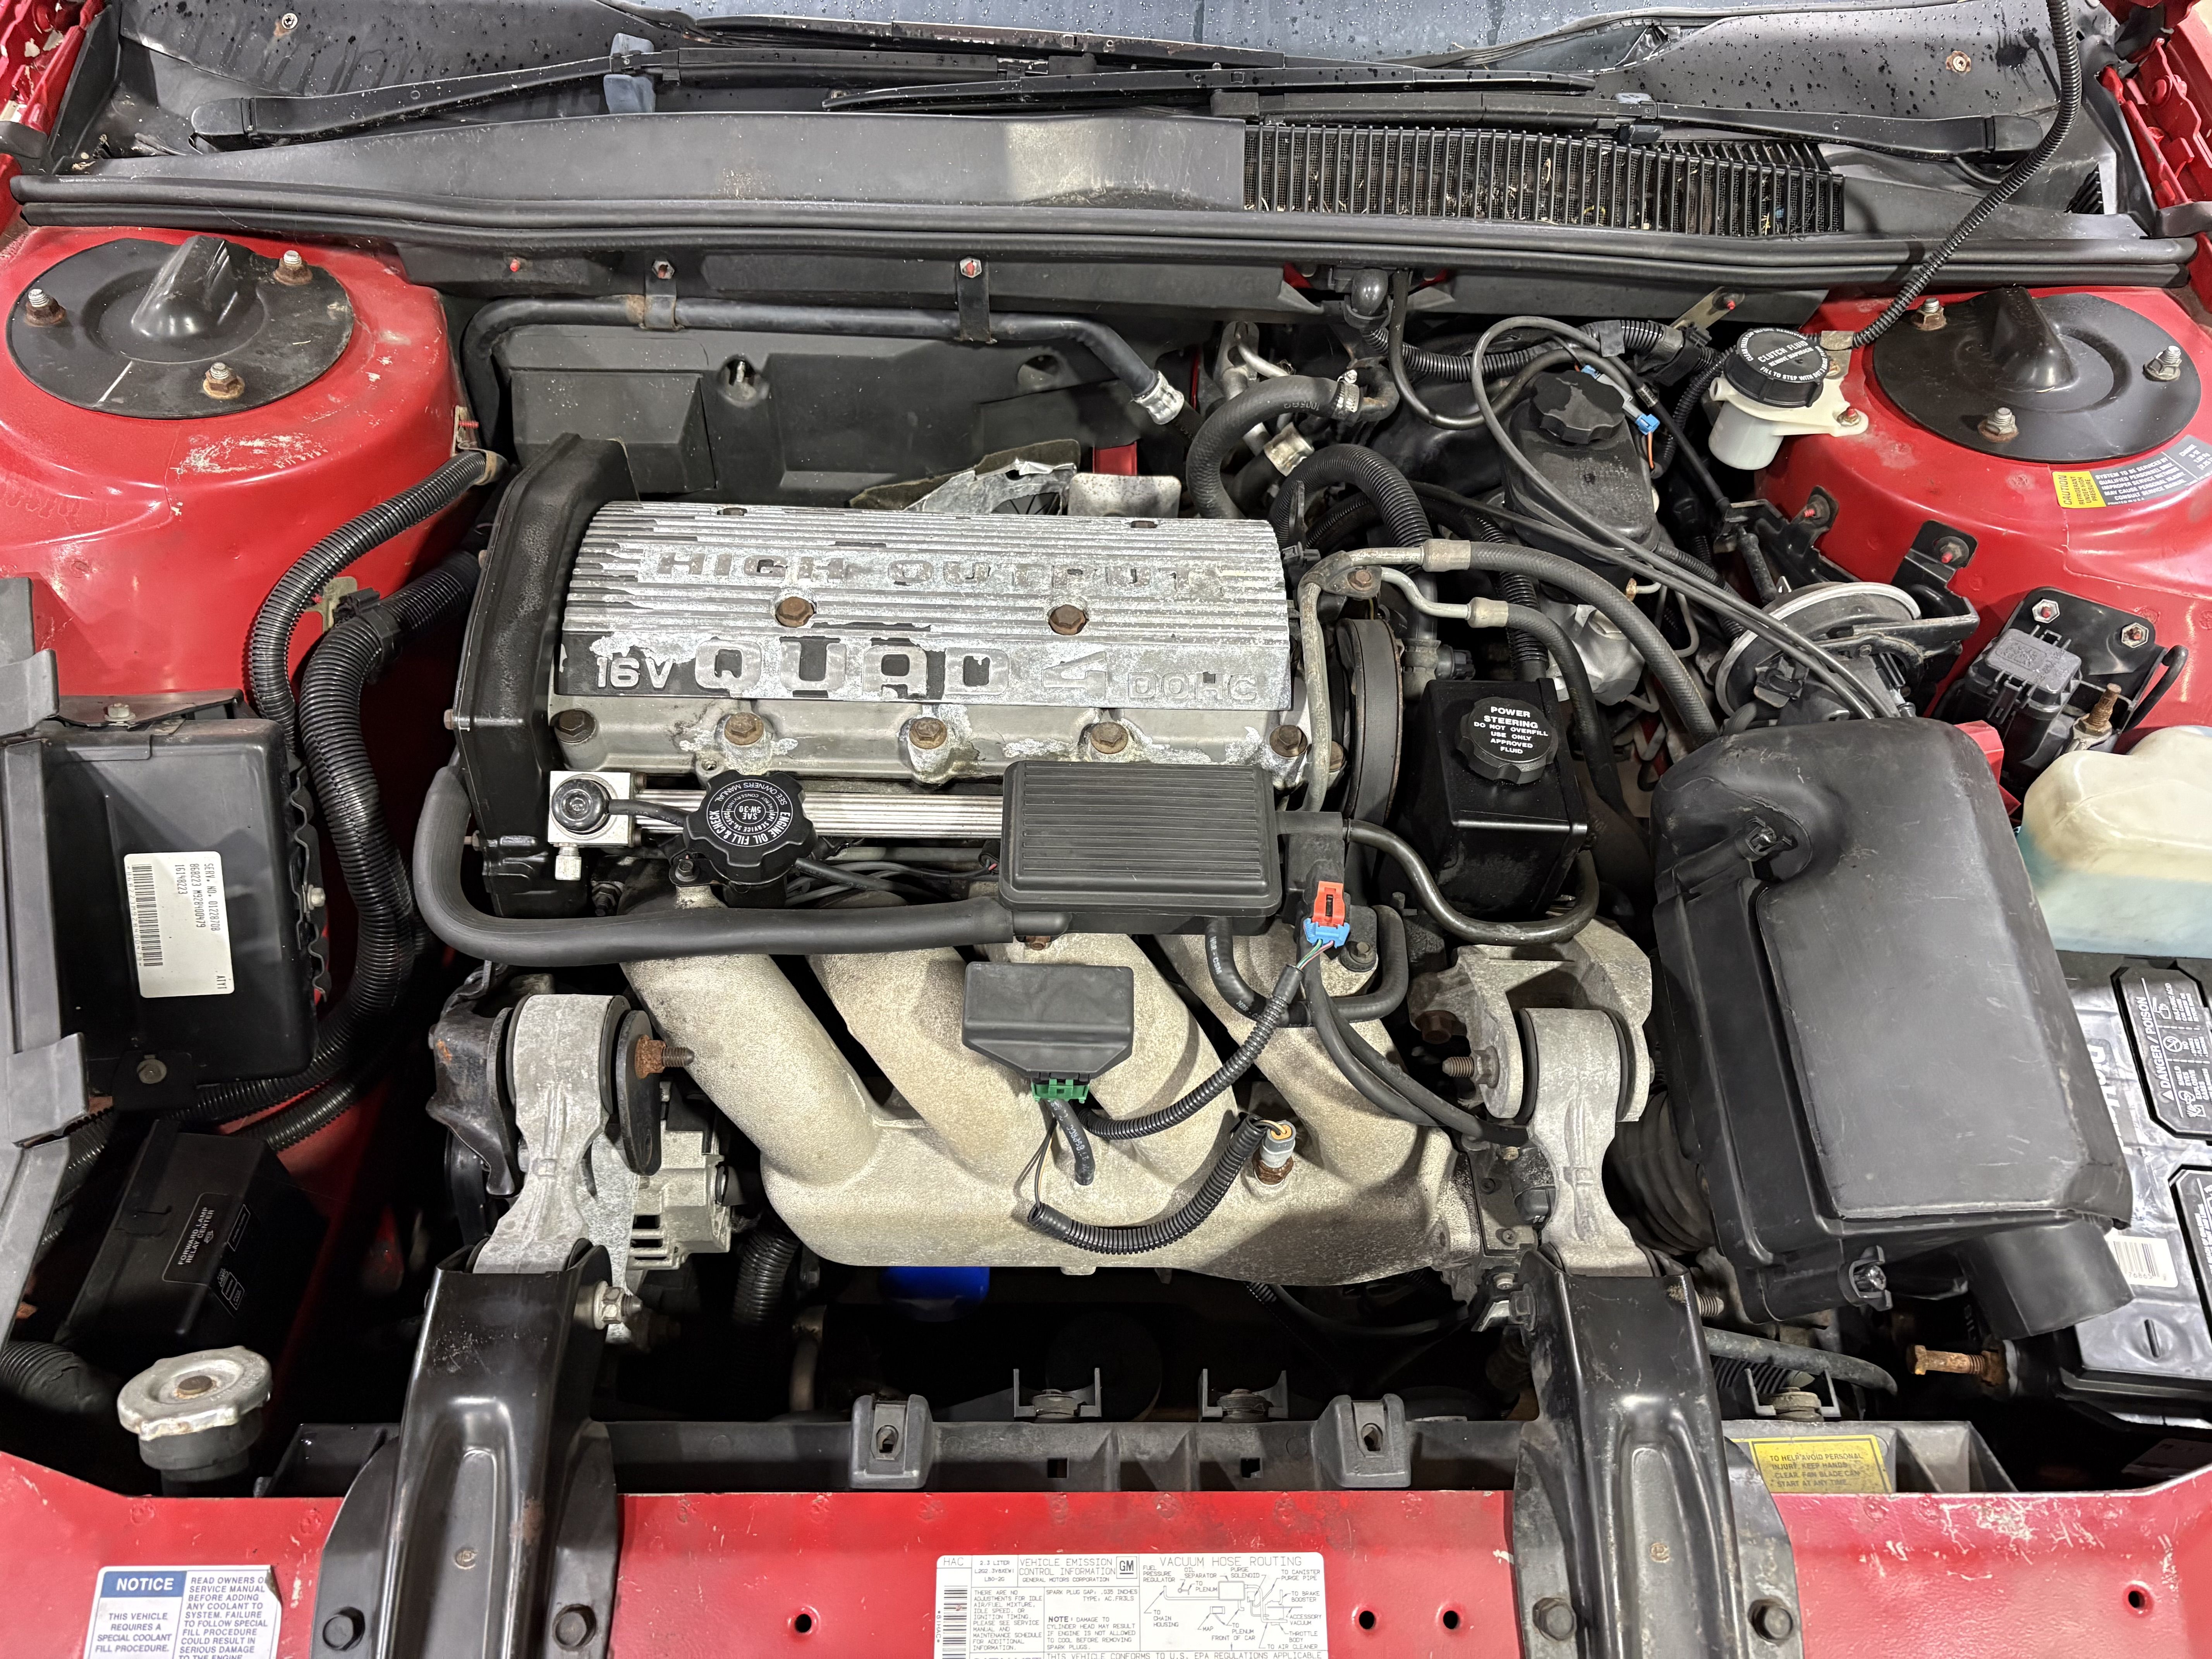
 8 points
 -

1991 cutlass international coupe-x-code 3.4 DOHC-25k original miles preservation
GnatGoSplat and 4 others reacted to claudio Ruesta for a topic
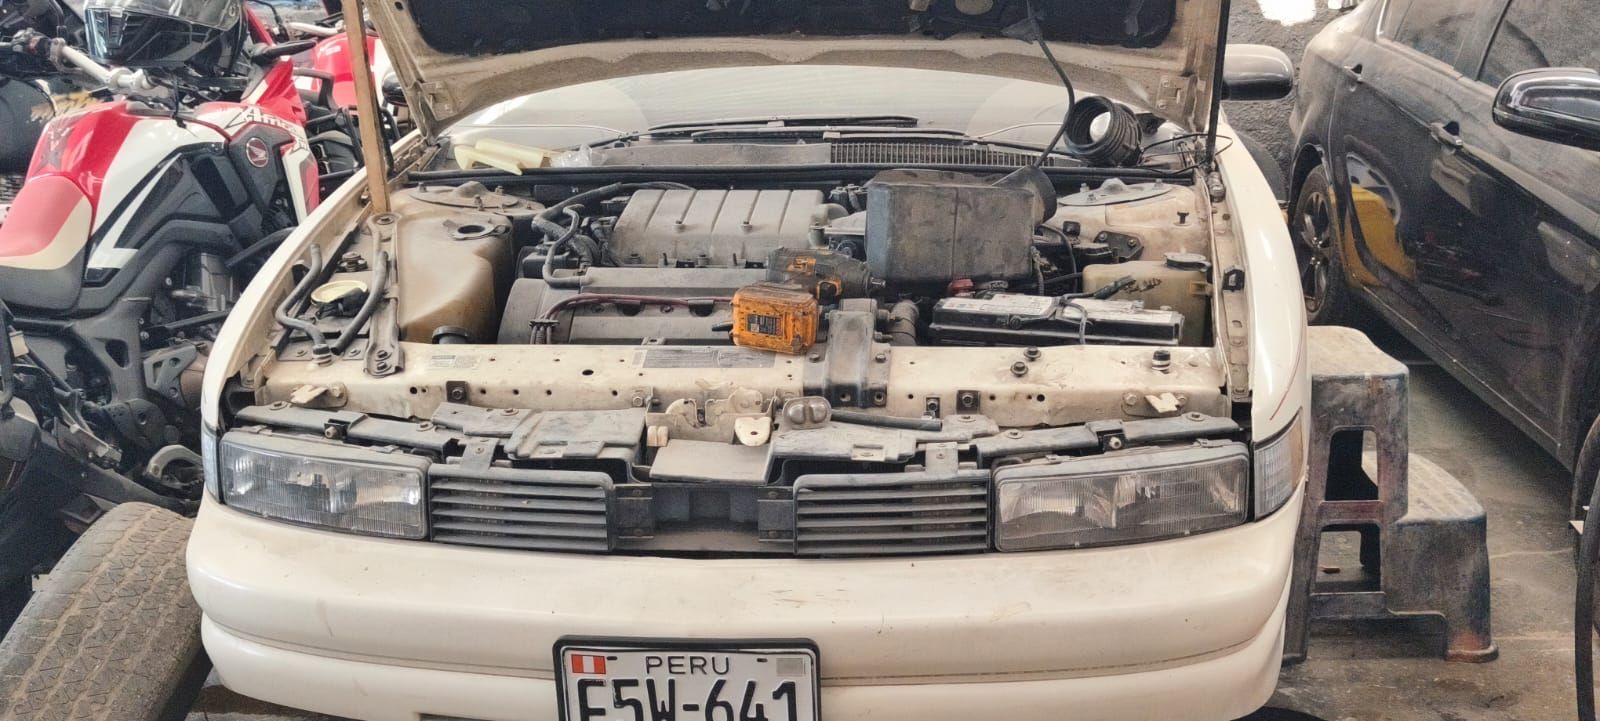
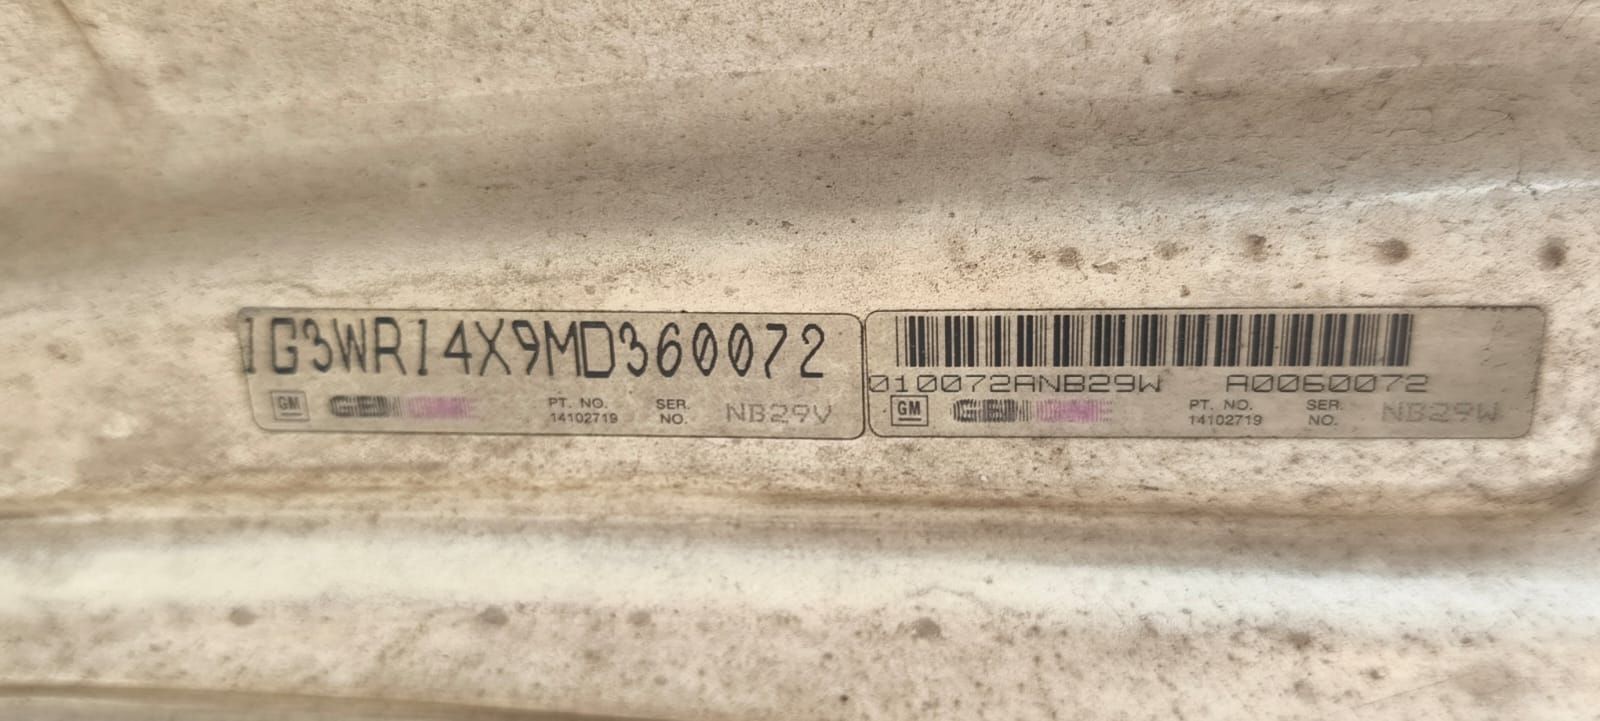
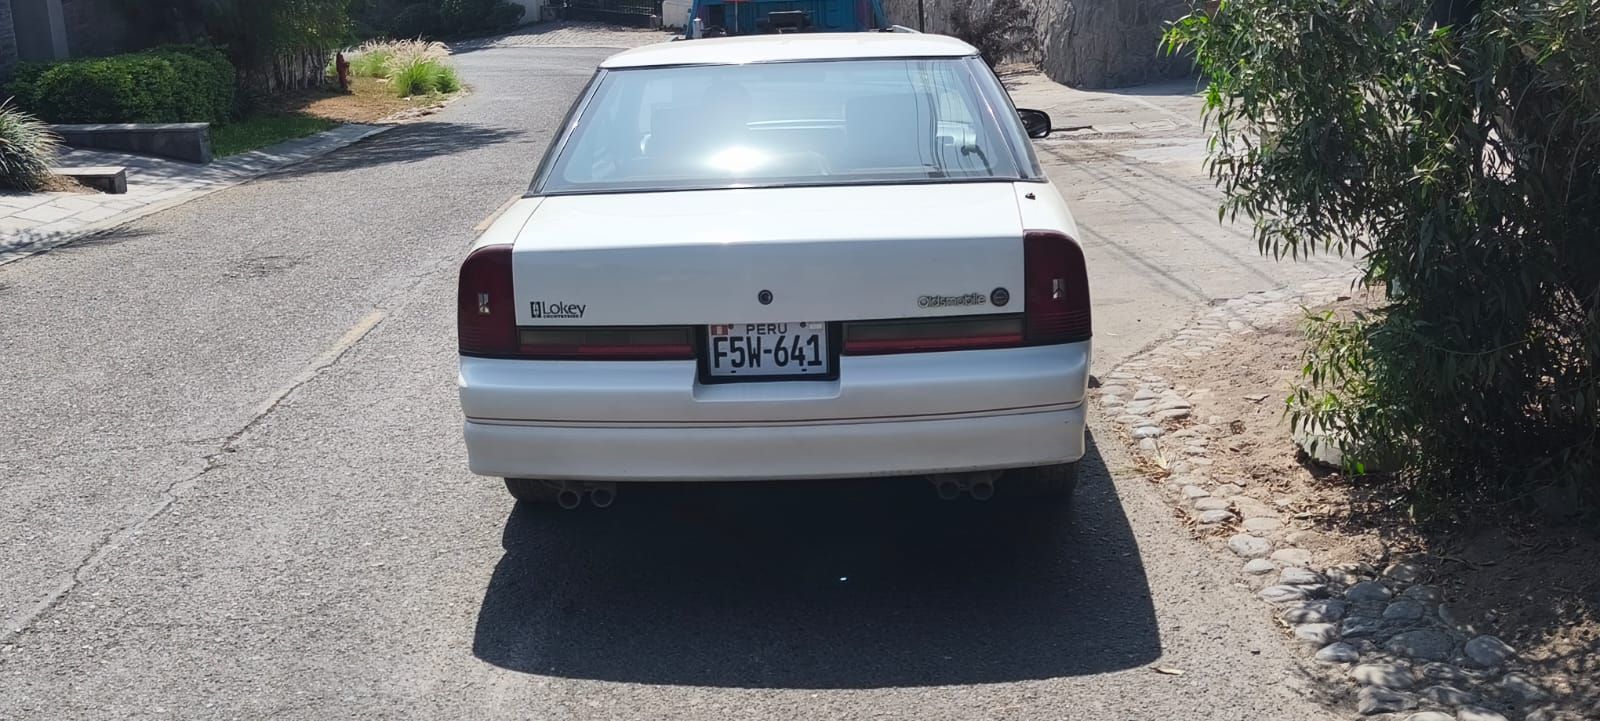
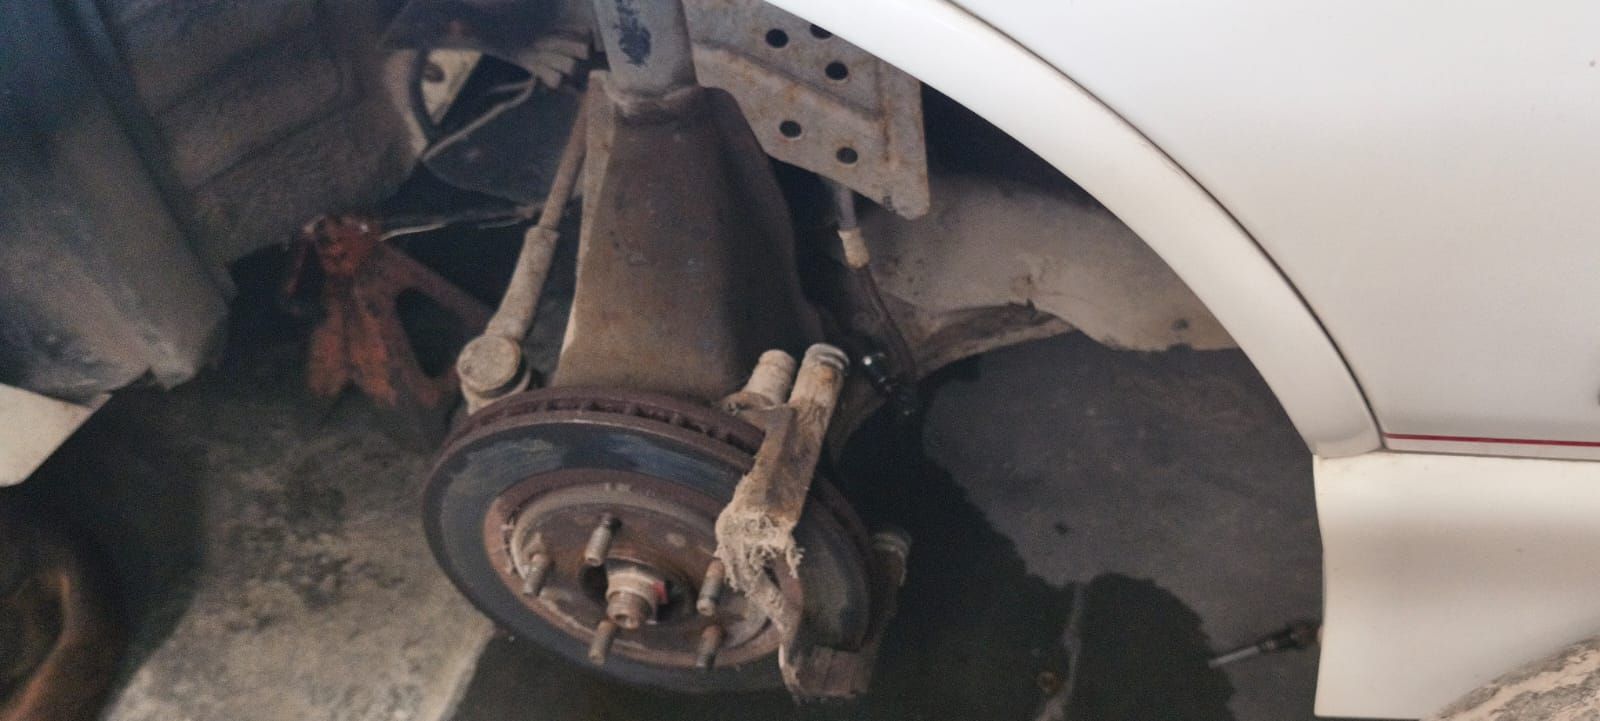
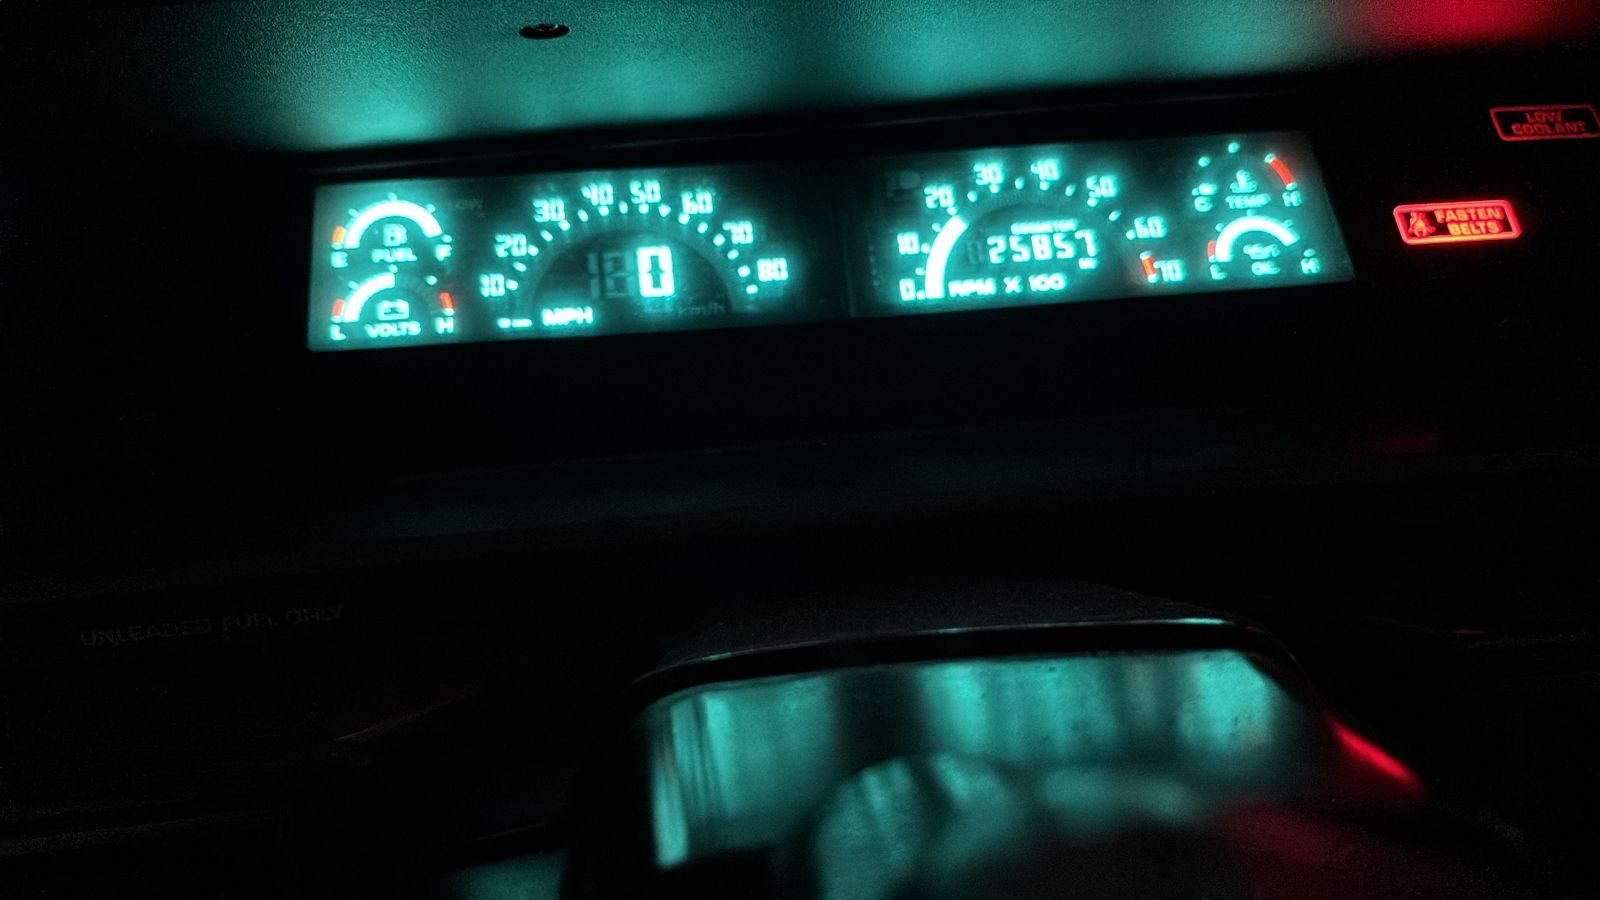
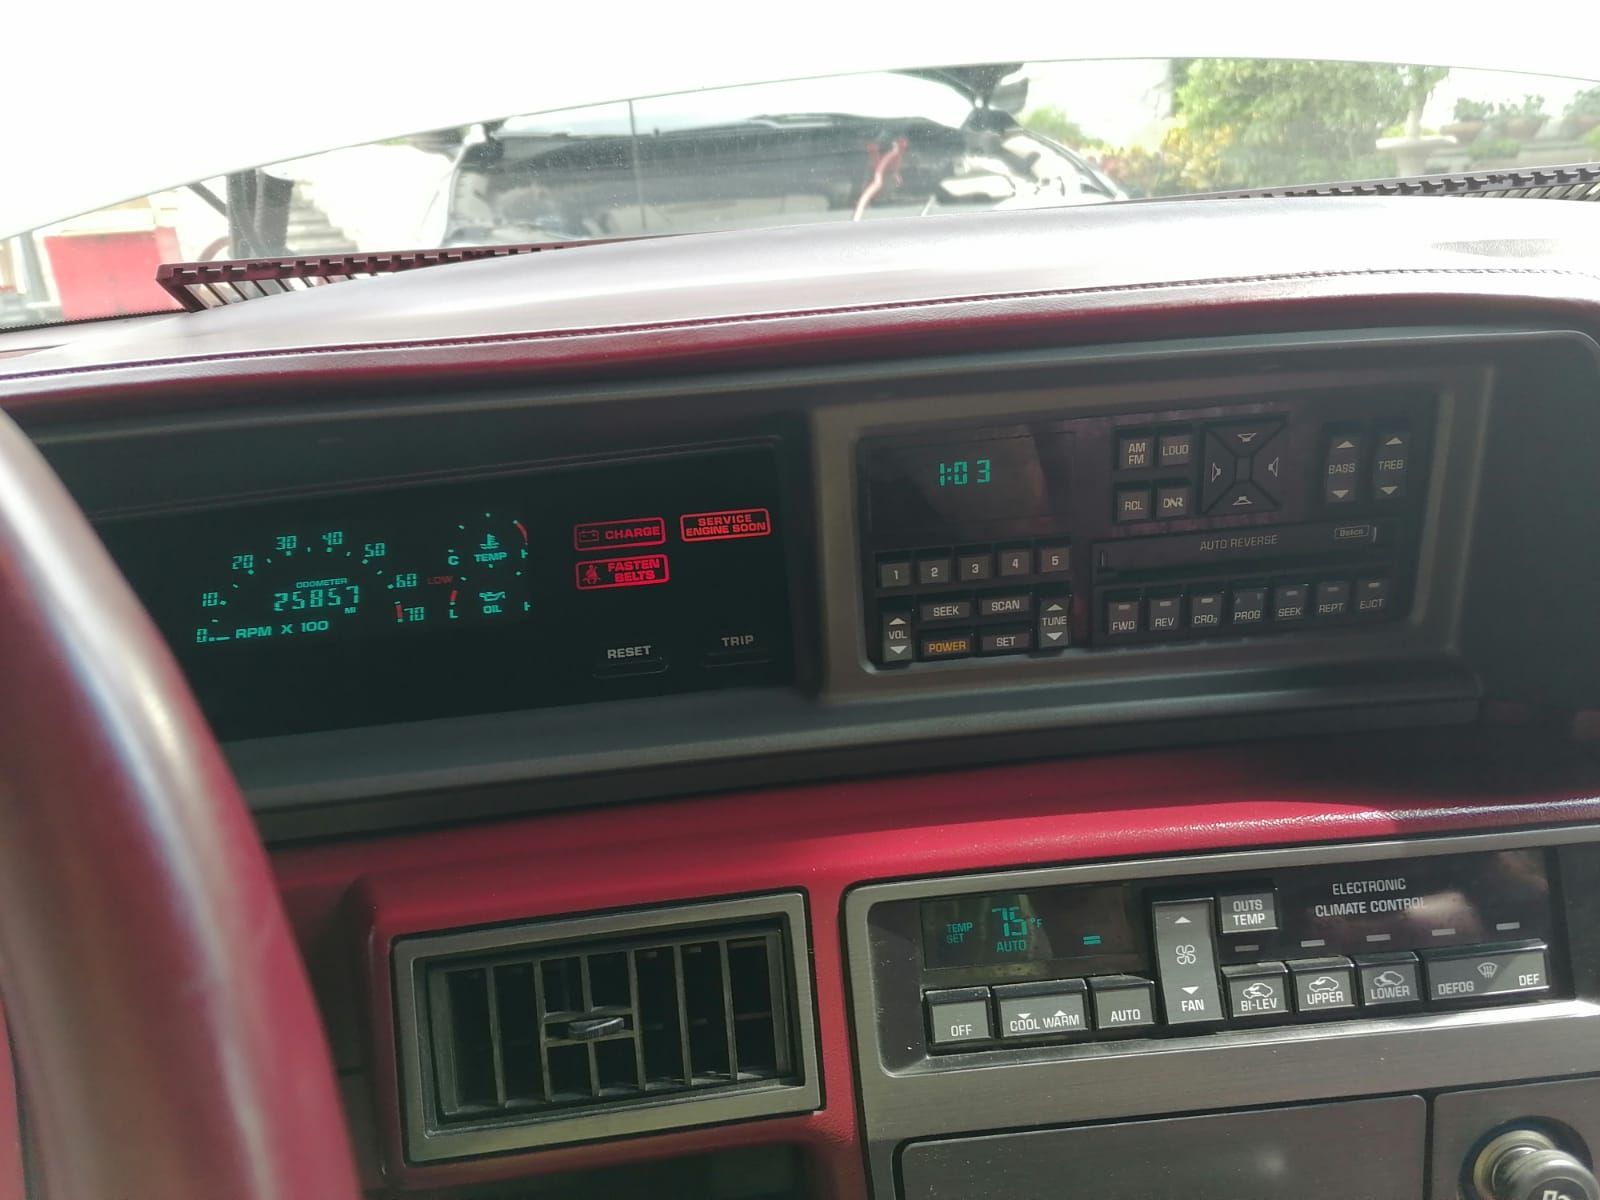
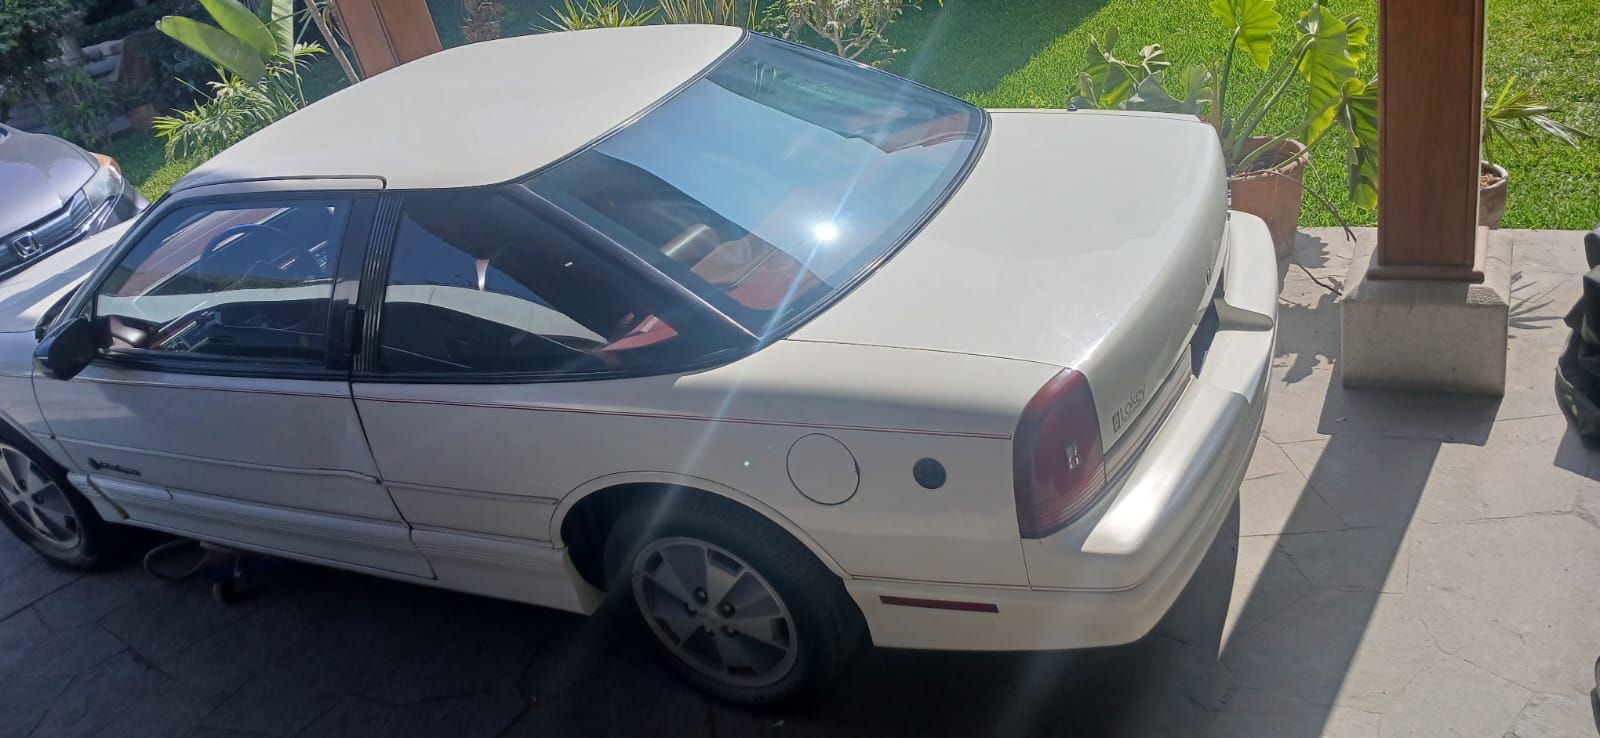
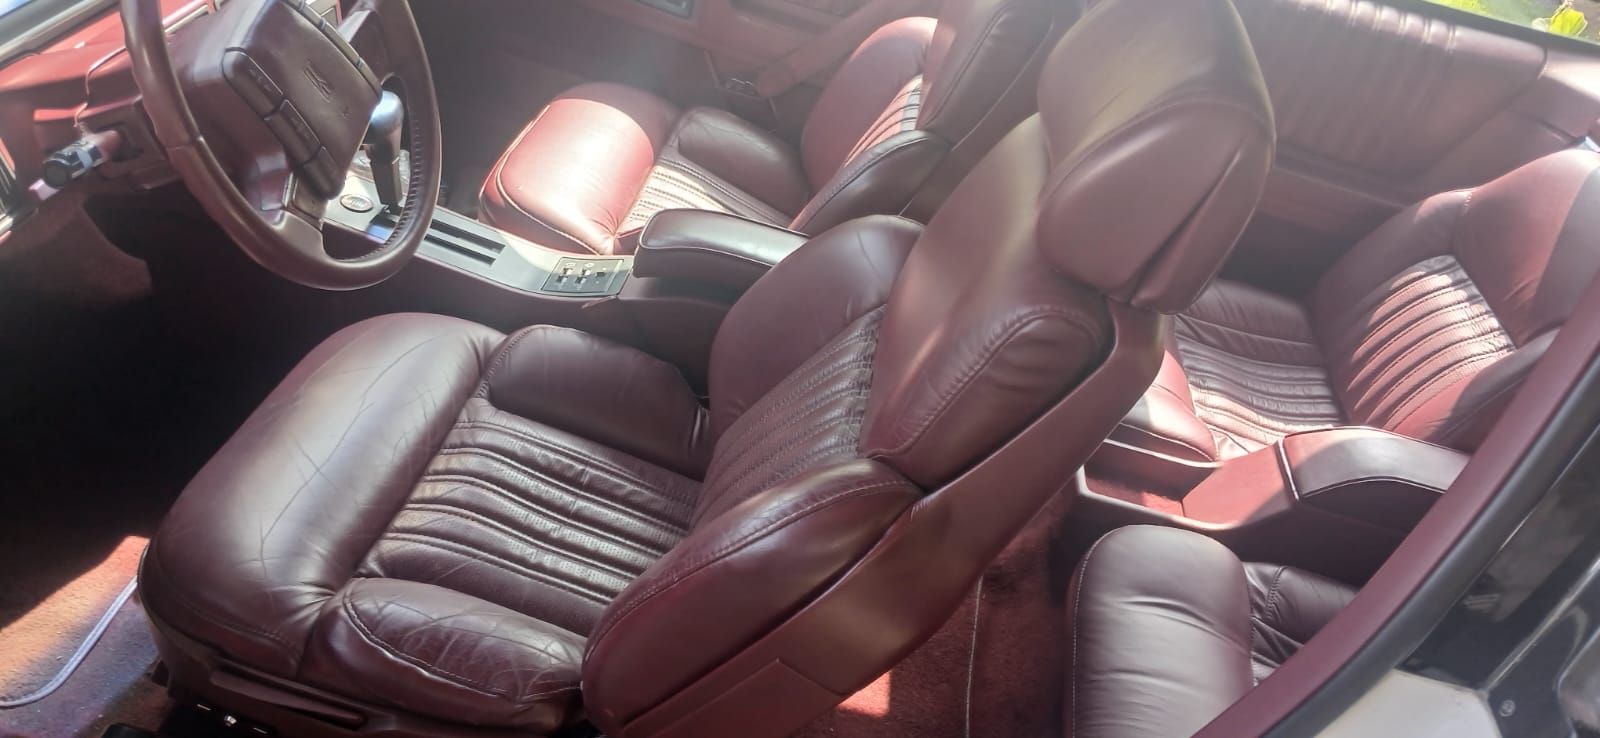
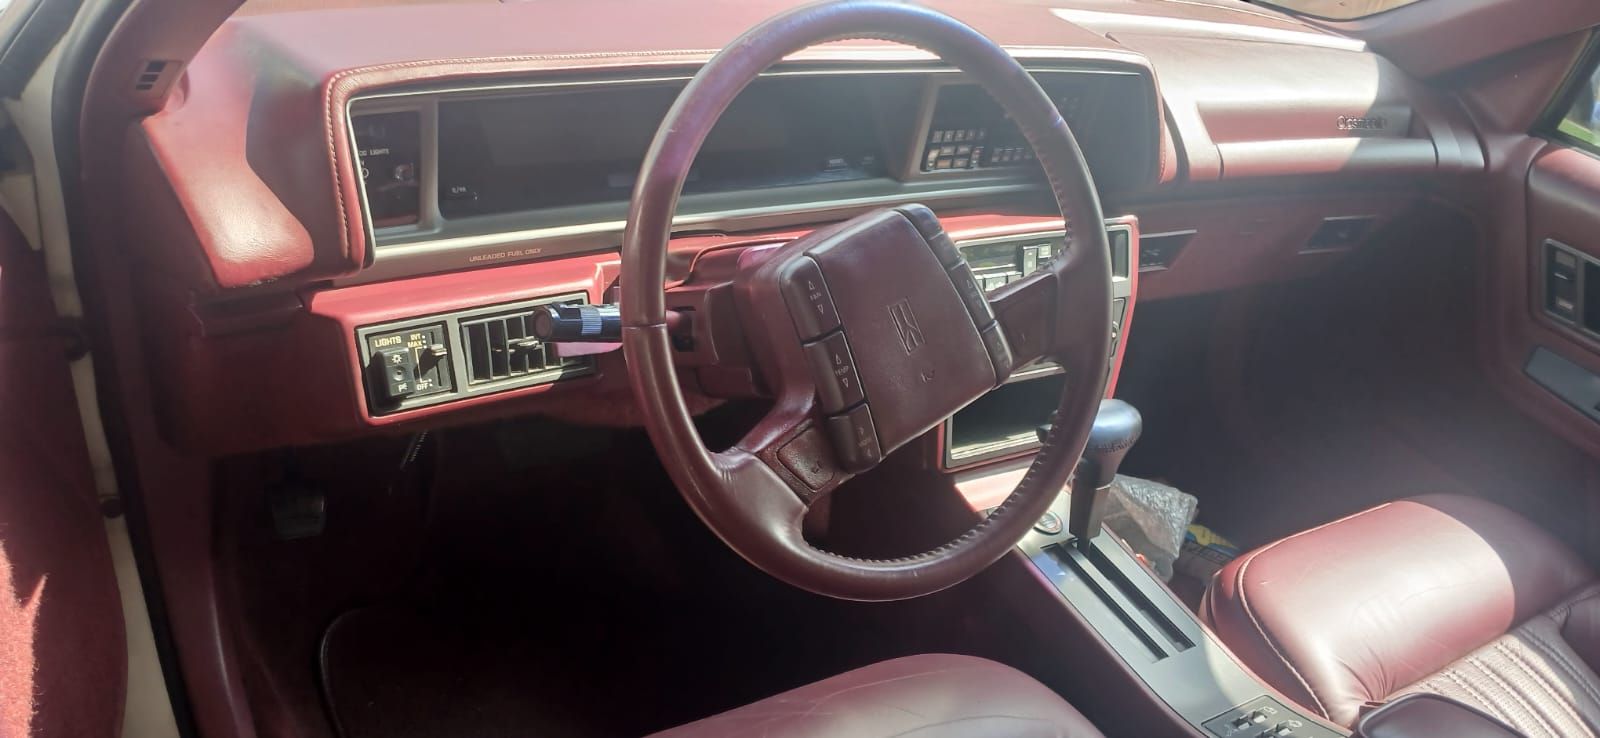
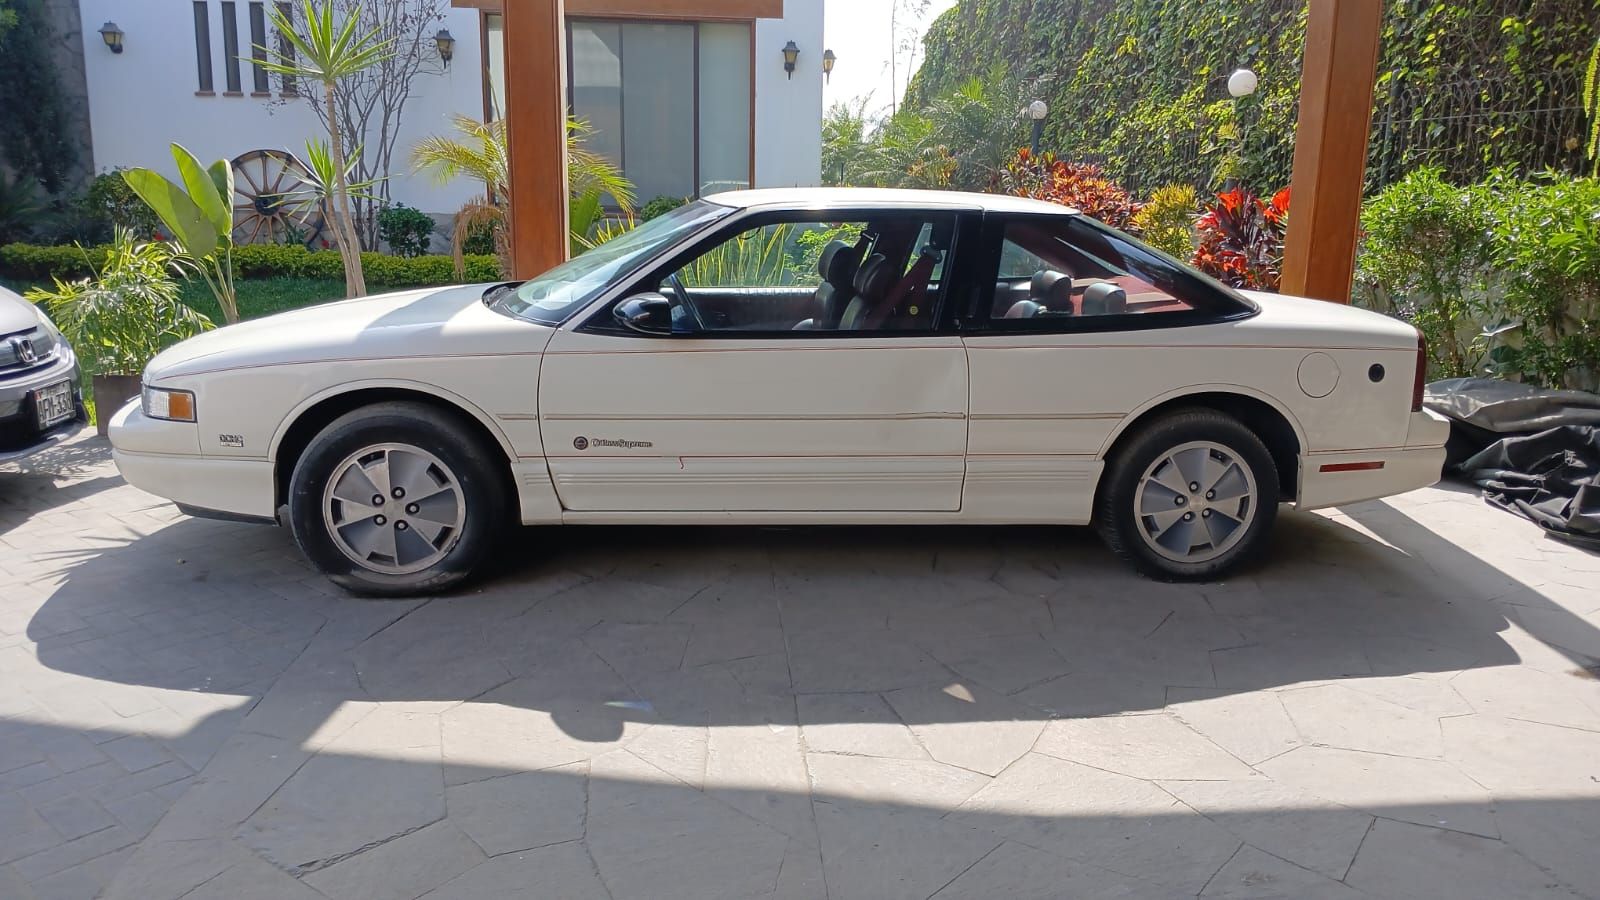
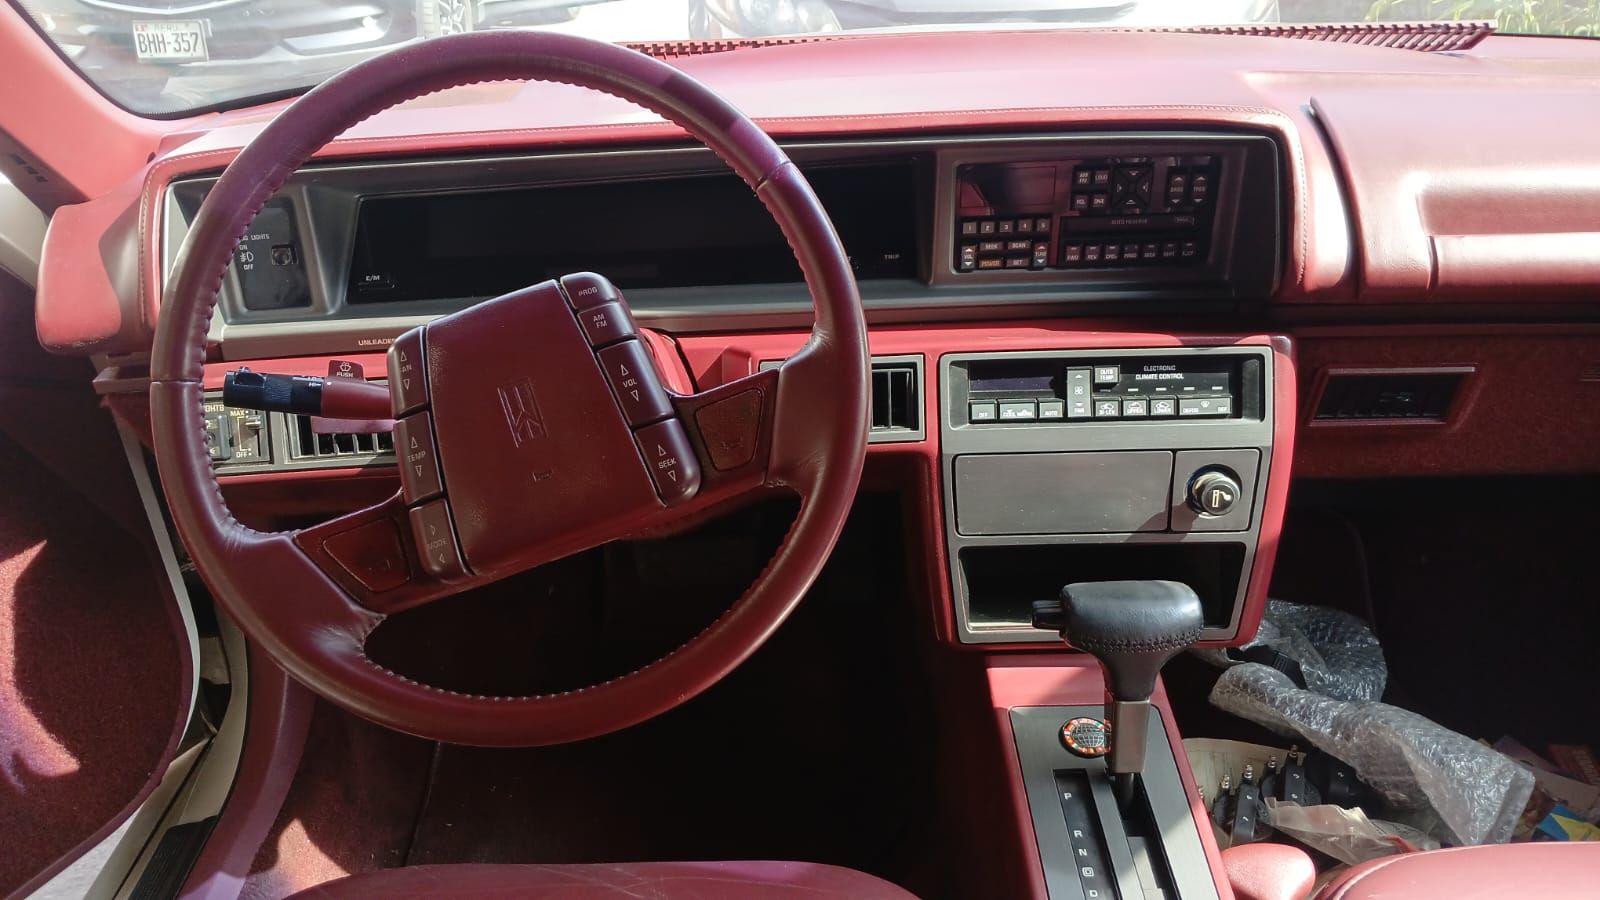
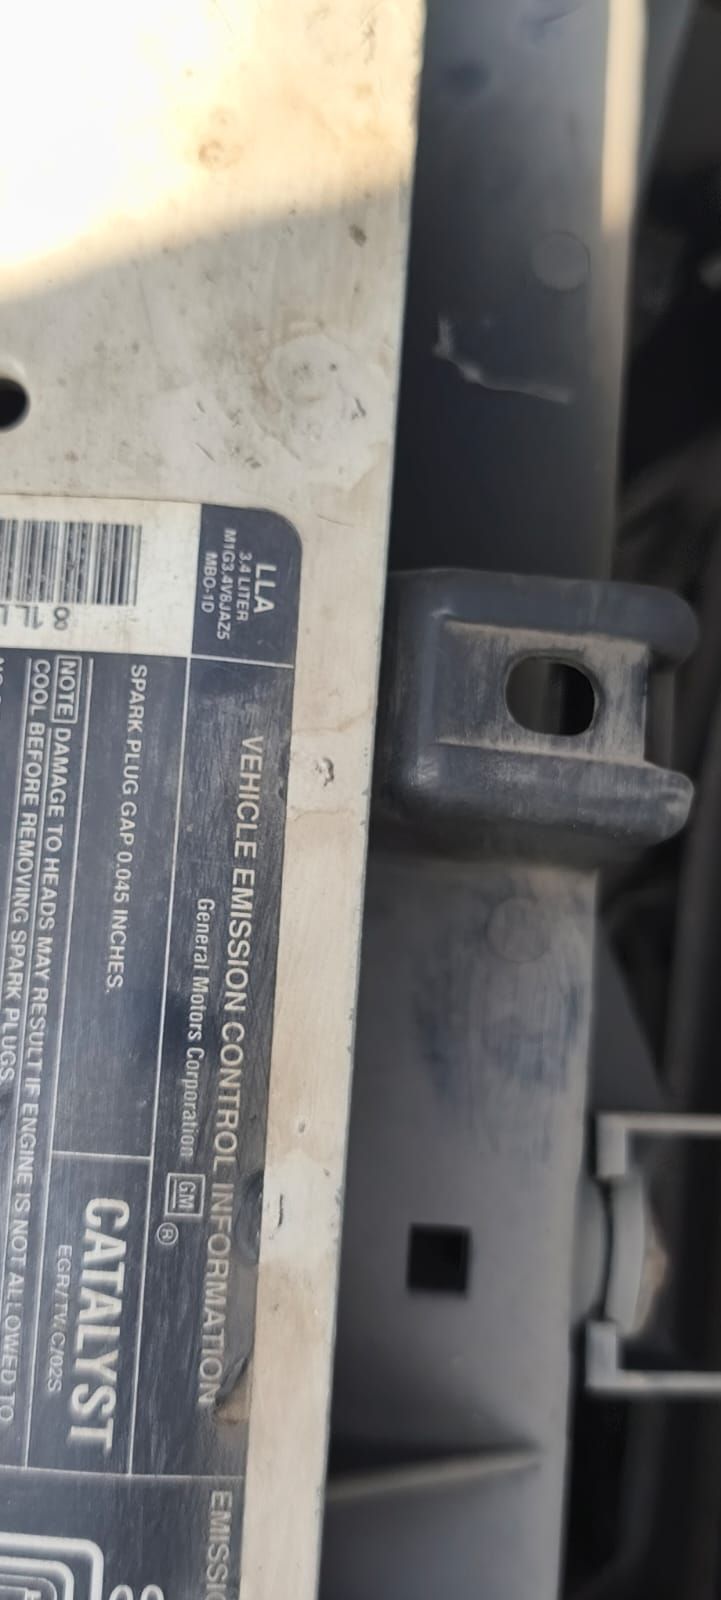
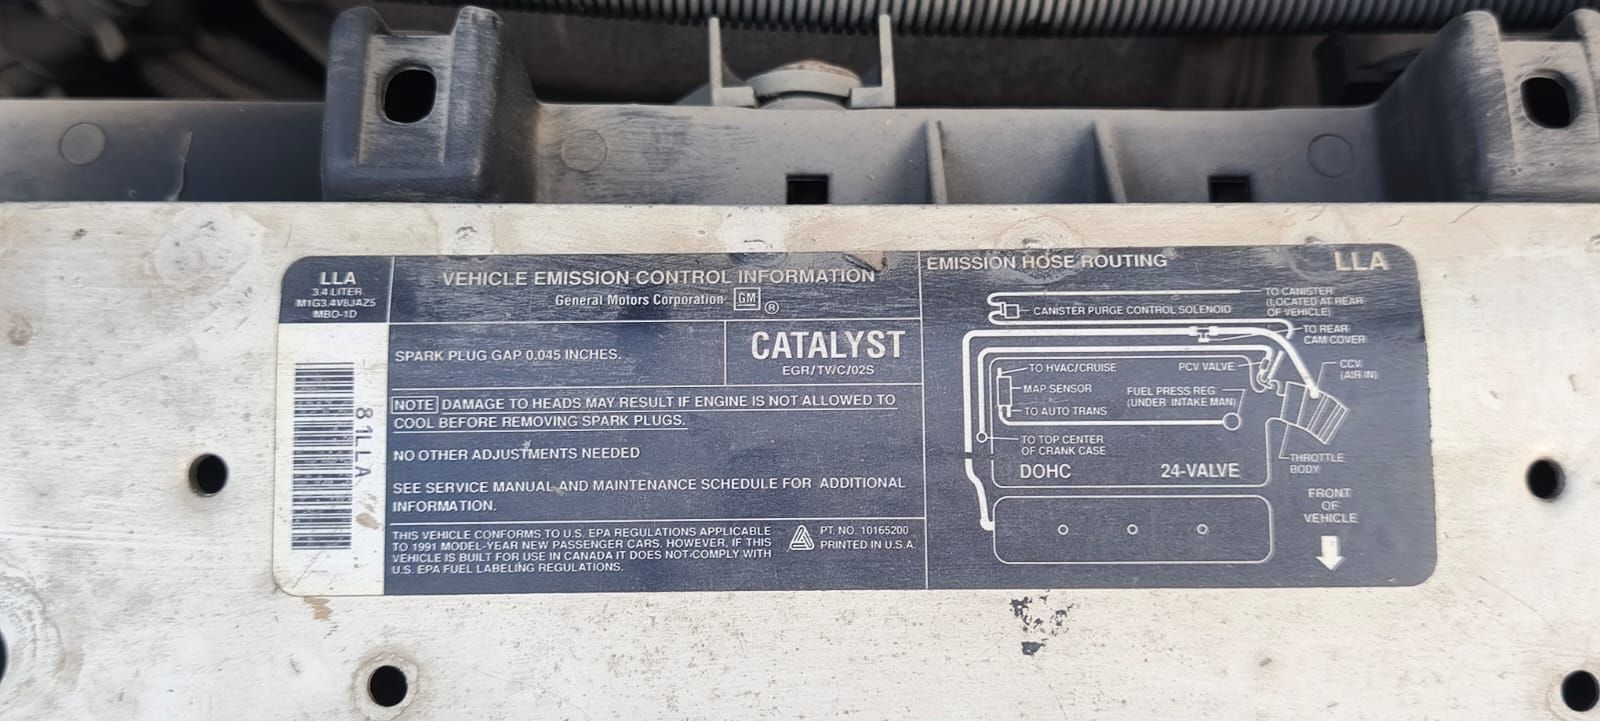
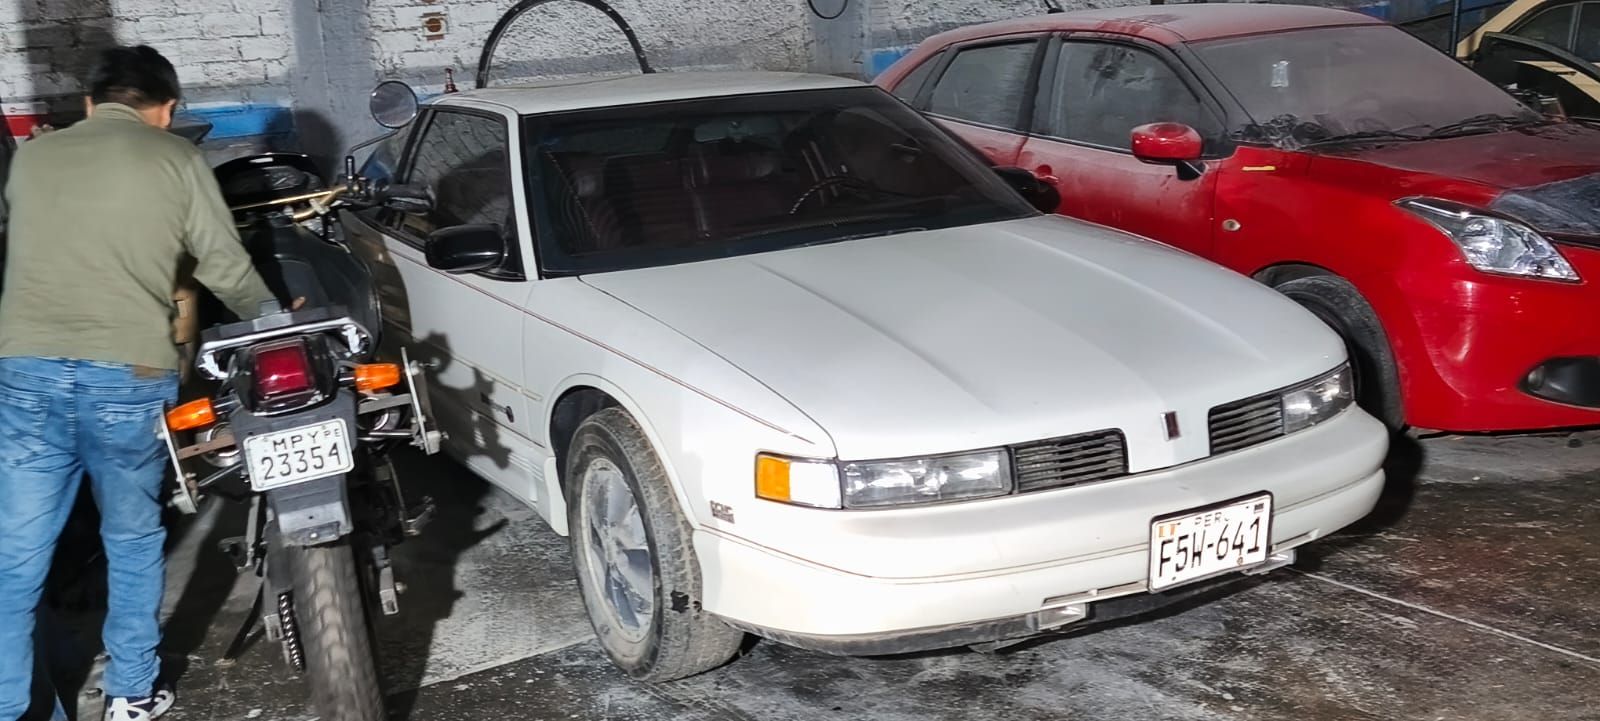
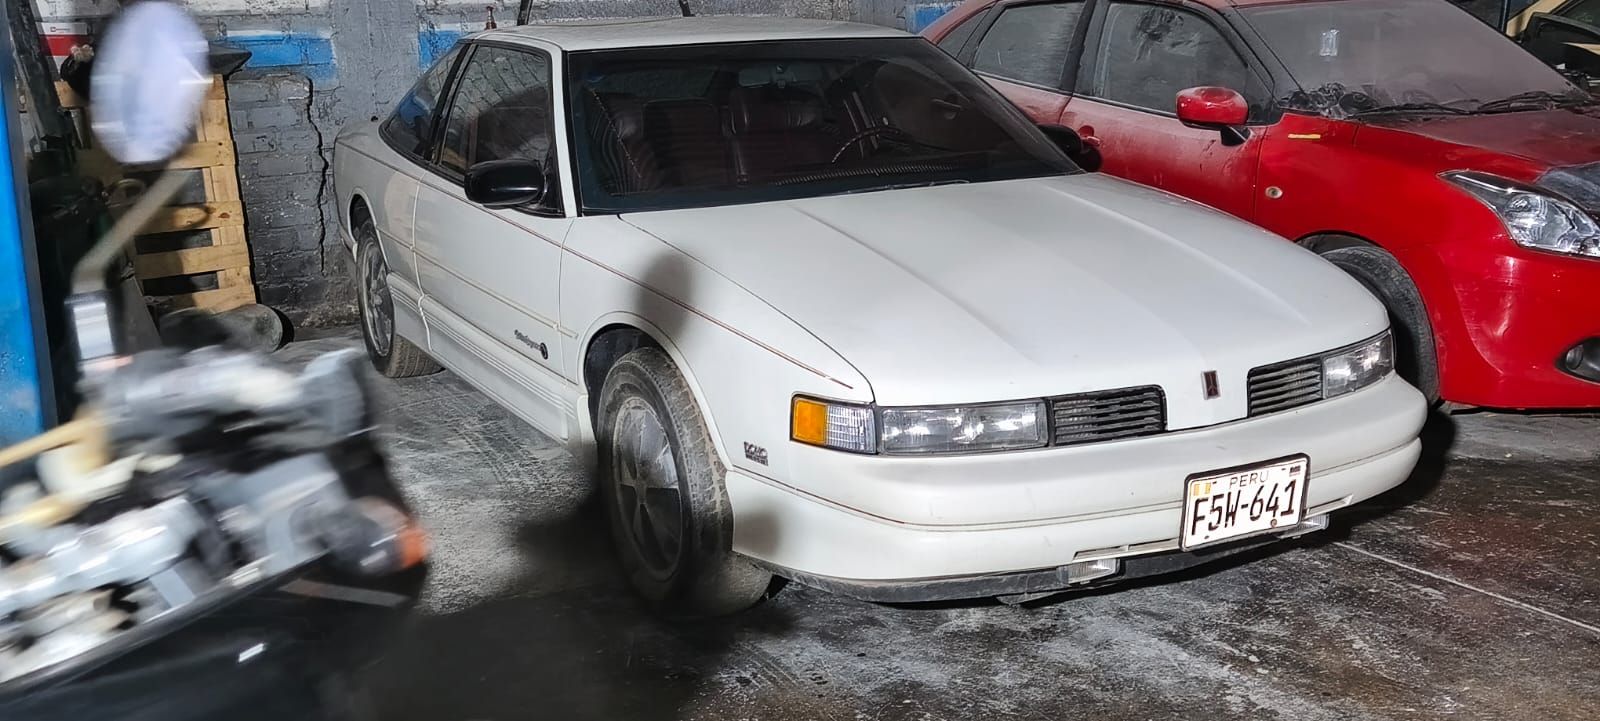
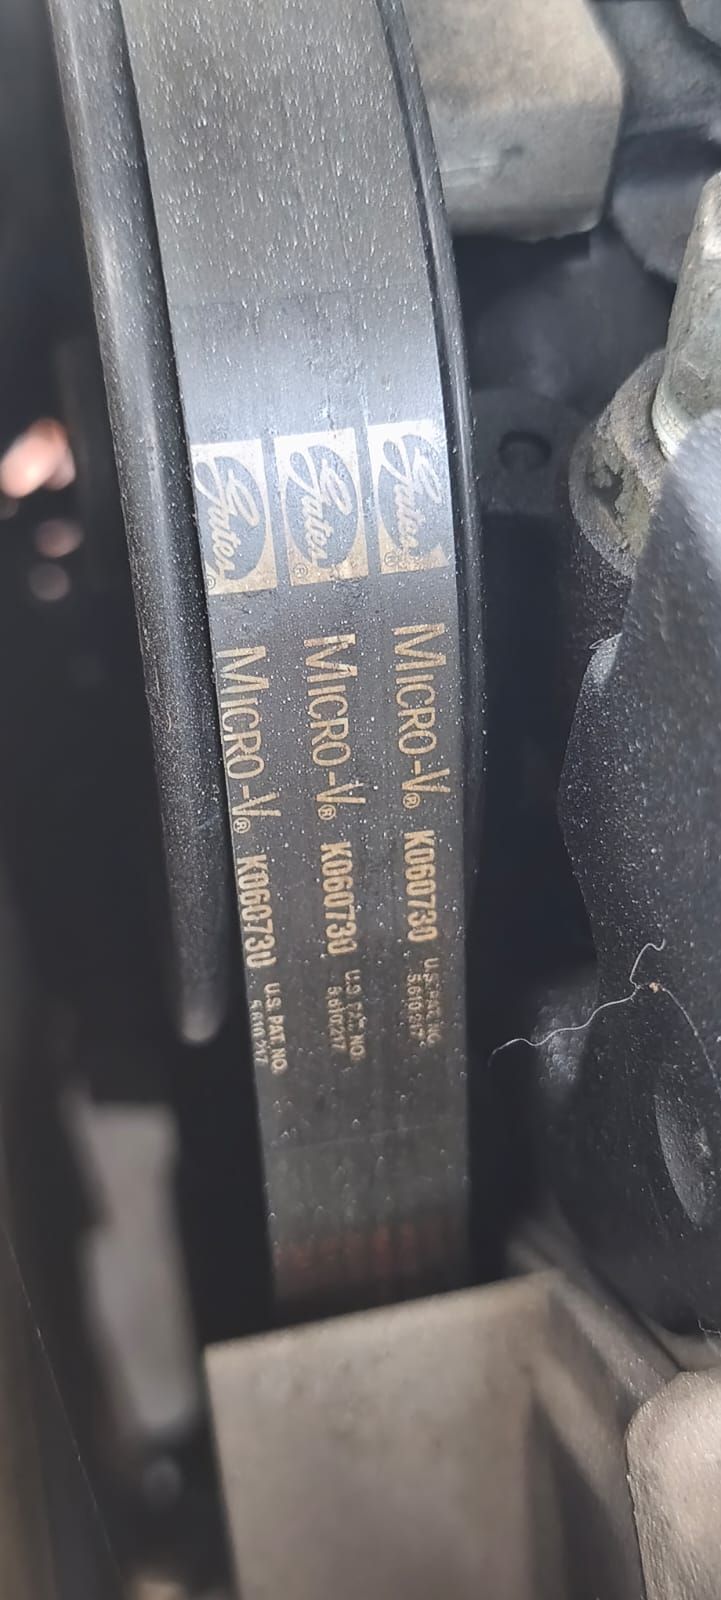
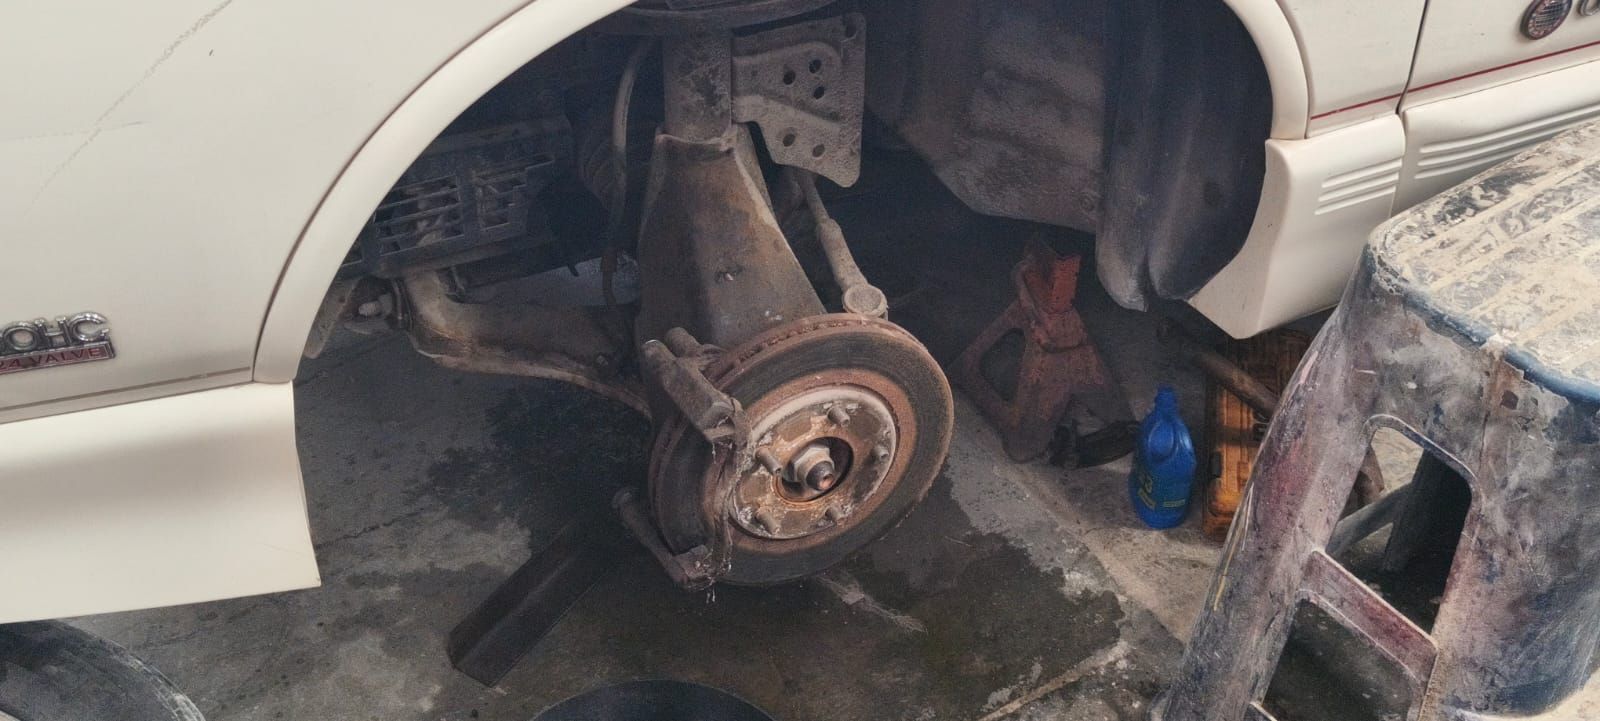
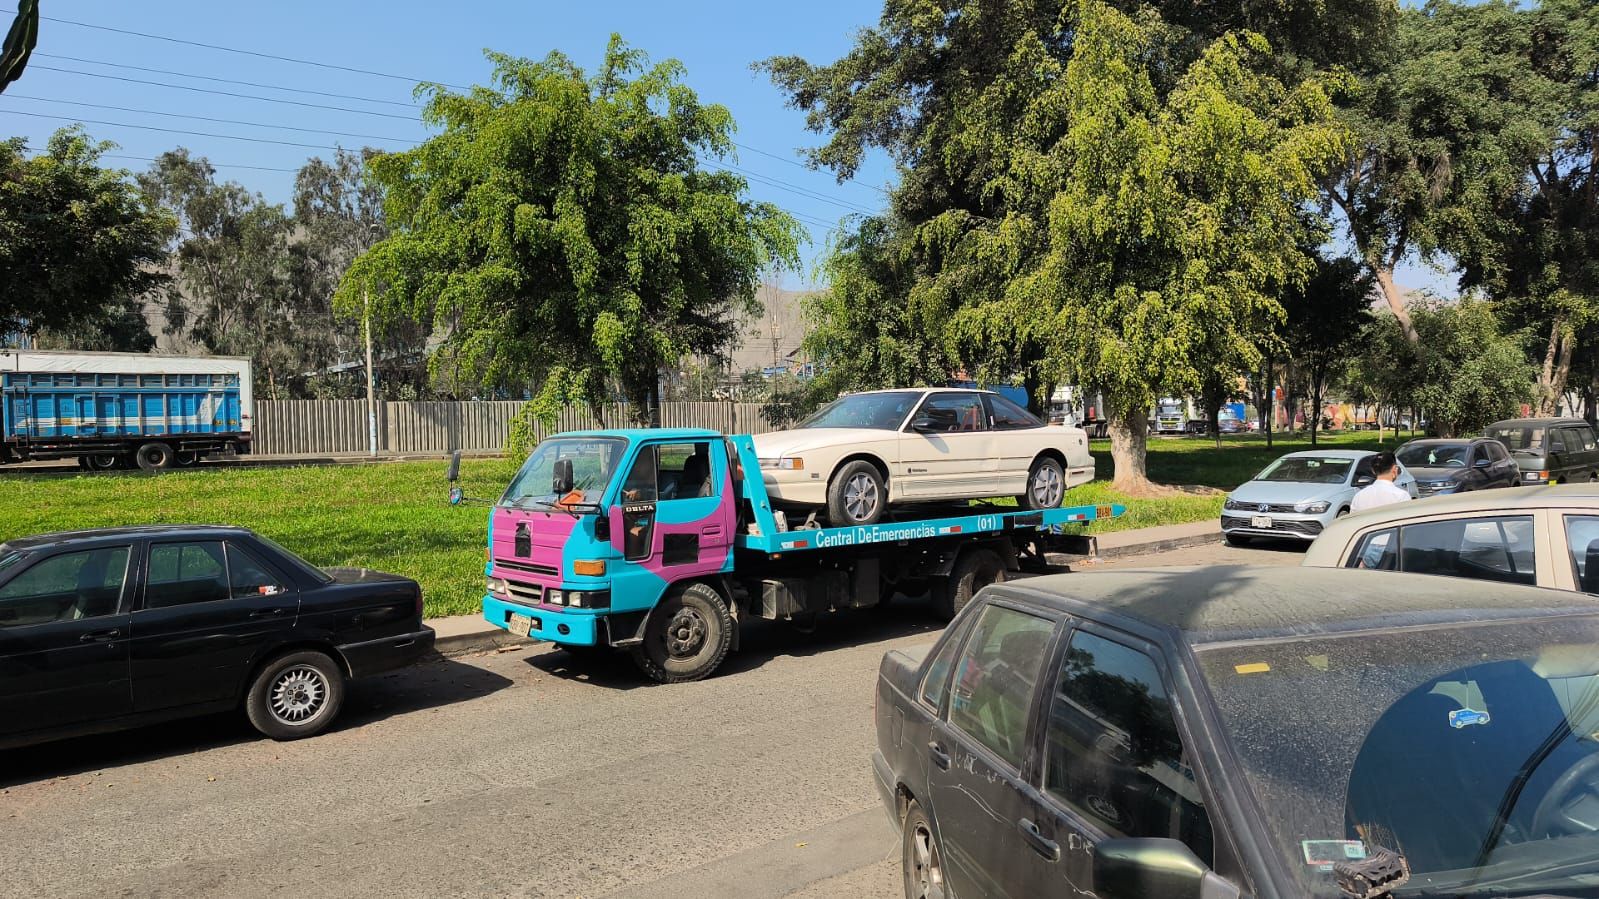
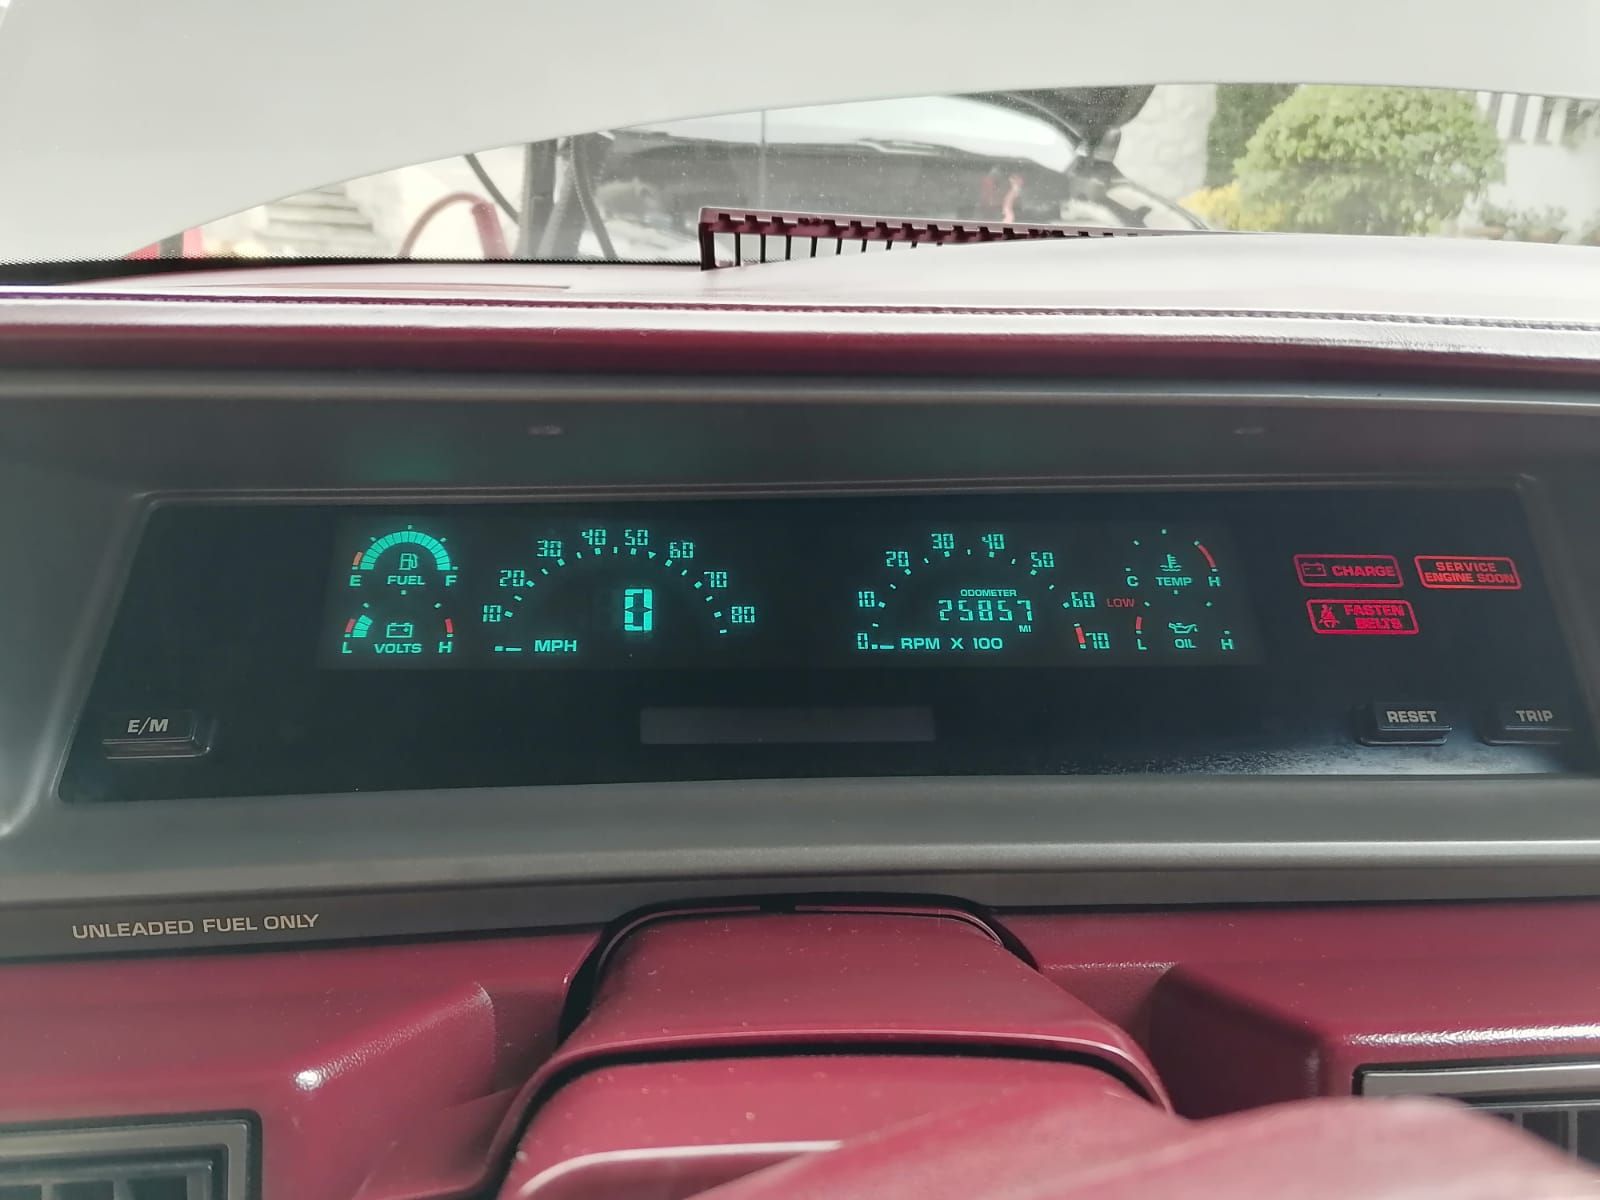
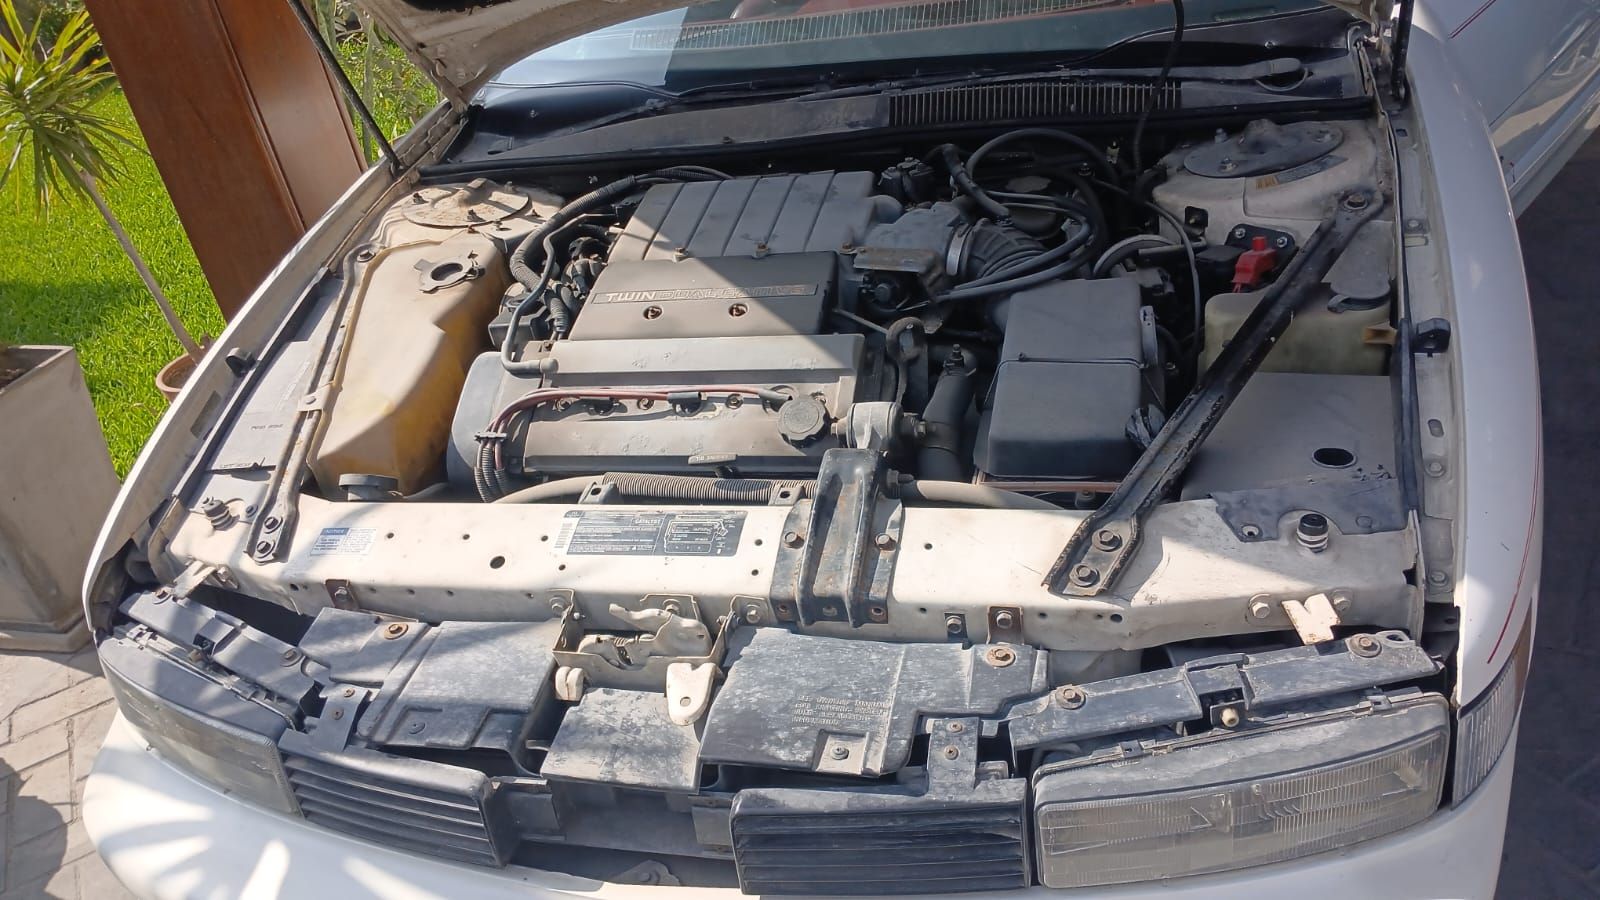
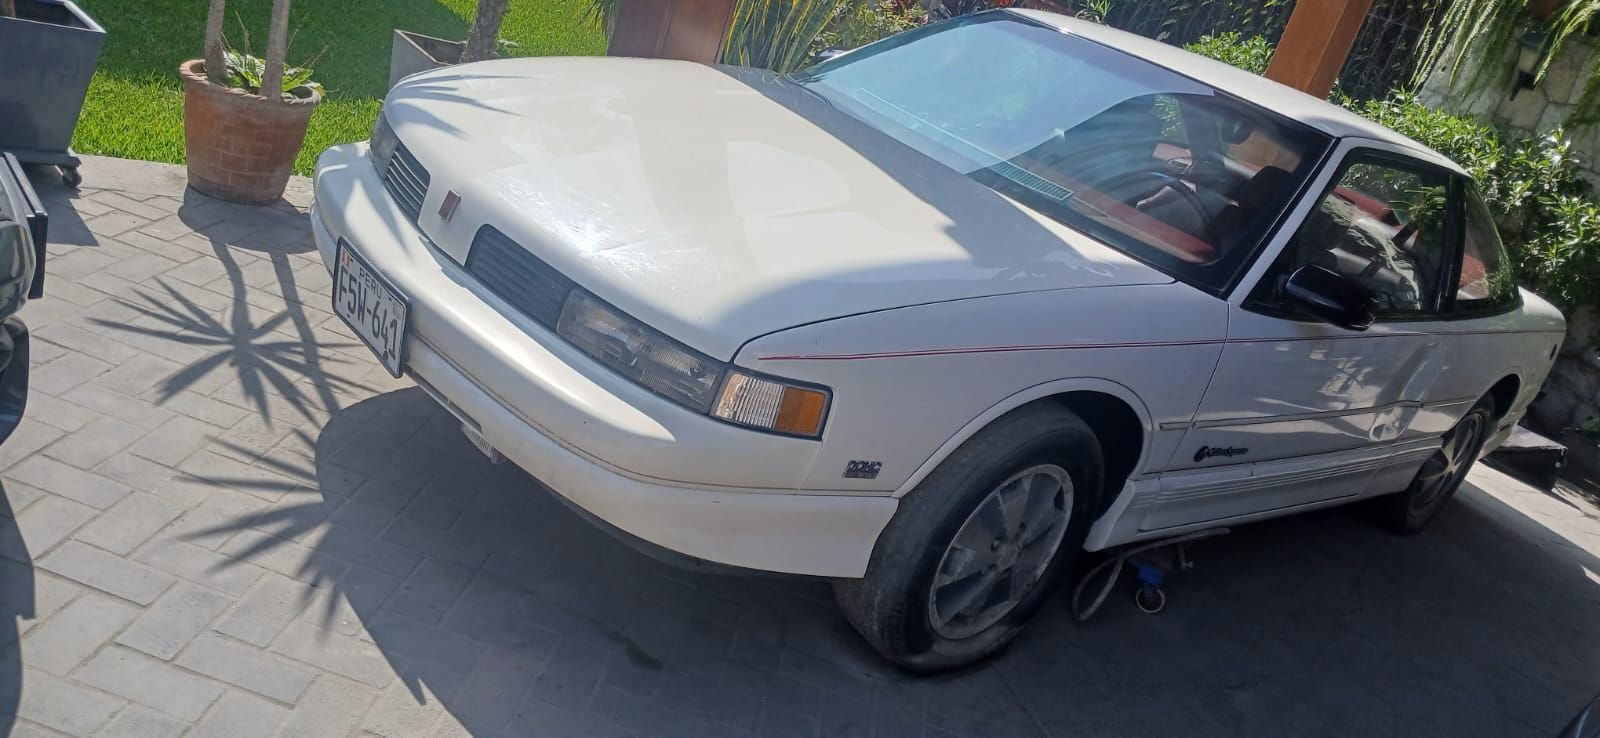
Greetings form Peru justa wan to share my new preservation project with the community. it's a legitimate 1991 OLSDMOBILE CUTLASS SUPREME INTERNATIONAL SERIES COUPE ( X-Code 3.4L DOHC TWIN Dual Cam) with only 25,857 original miles Here is a crazy part of its history: Someone in the past installed a 3rd-generation LPG system on it, which caused it to stop running back in the day. Because of that mistake, the car was left sitting for decades, sleeping like a time capsule! A blessing in disguise for me. Everything from the LPG system has been removed from the engine bay, except for the 16-gallon tank in the trunk and the exterior filler valve, which I will remove and patch later. The great news is that the engine is finally up and running again, and it sounds great! The interior is full Burgundy leather with the premium AQ9 bucket seats, and the green digital cluster works perfectly. Right now, I'm doing a complete brake overhaul (the front calipers were seized) and getting ready for a full fluid flush. New water pump and mechanical thermostat are going in next. My approach is mechanics first: make it move, shift, and brake safely, then deal with the bodywork. Glad to be here, and I'd love to hear your thoughts, technical tips, and recommendations for bringing this 90s unicorn back to life! WhatsApp Video 2026-.mp4 WhatsApp Video 2026-06-28 .mp4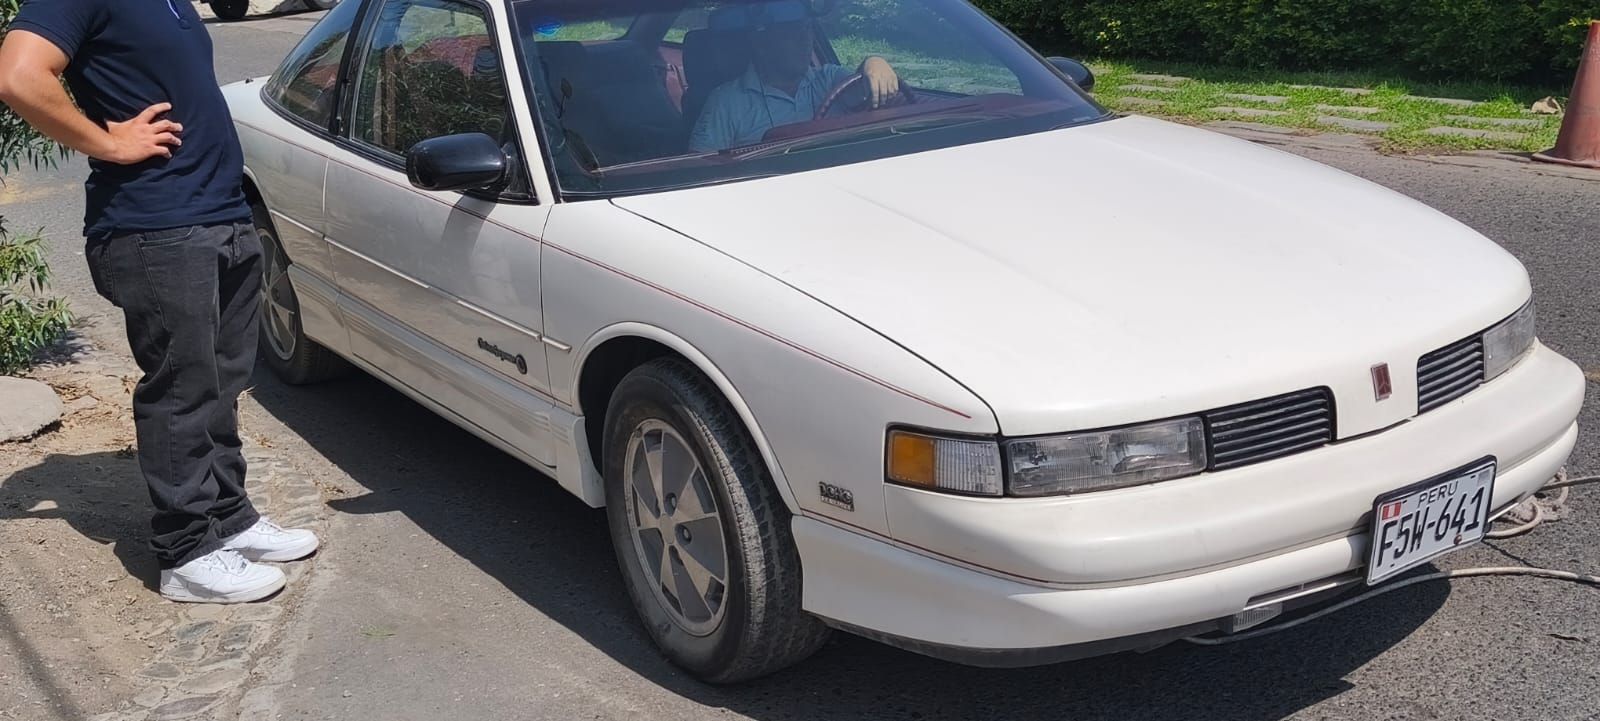
 5 points
 -
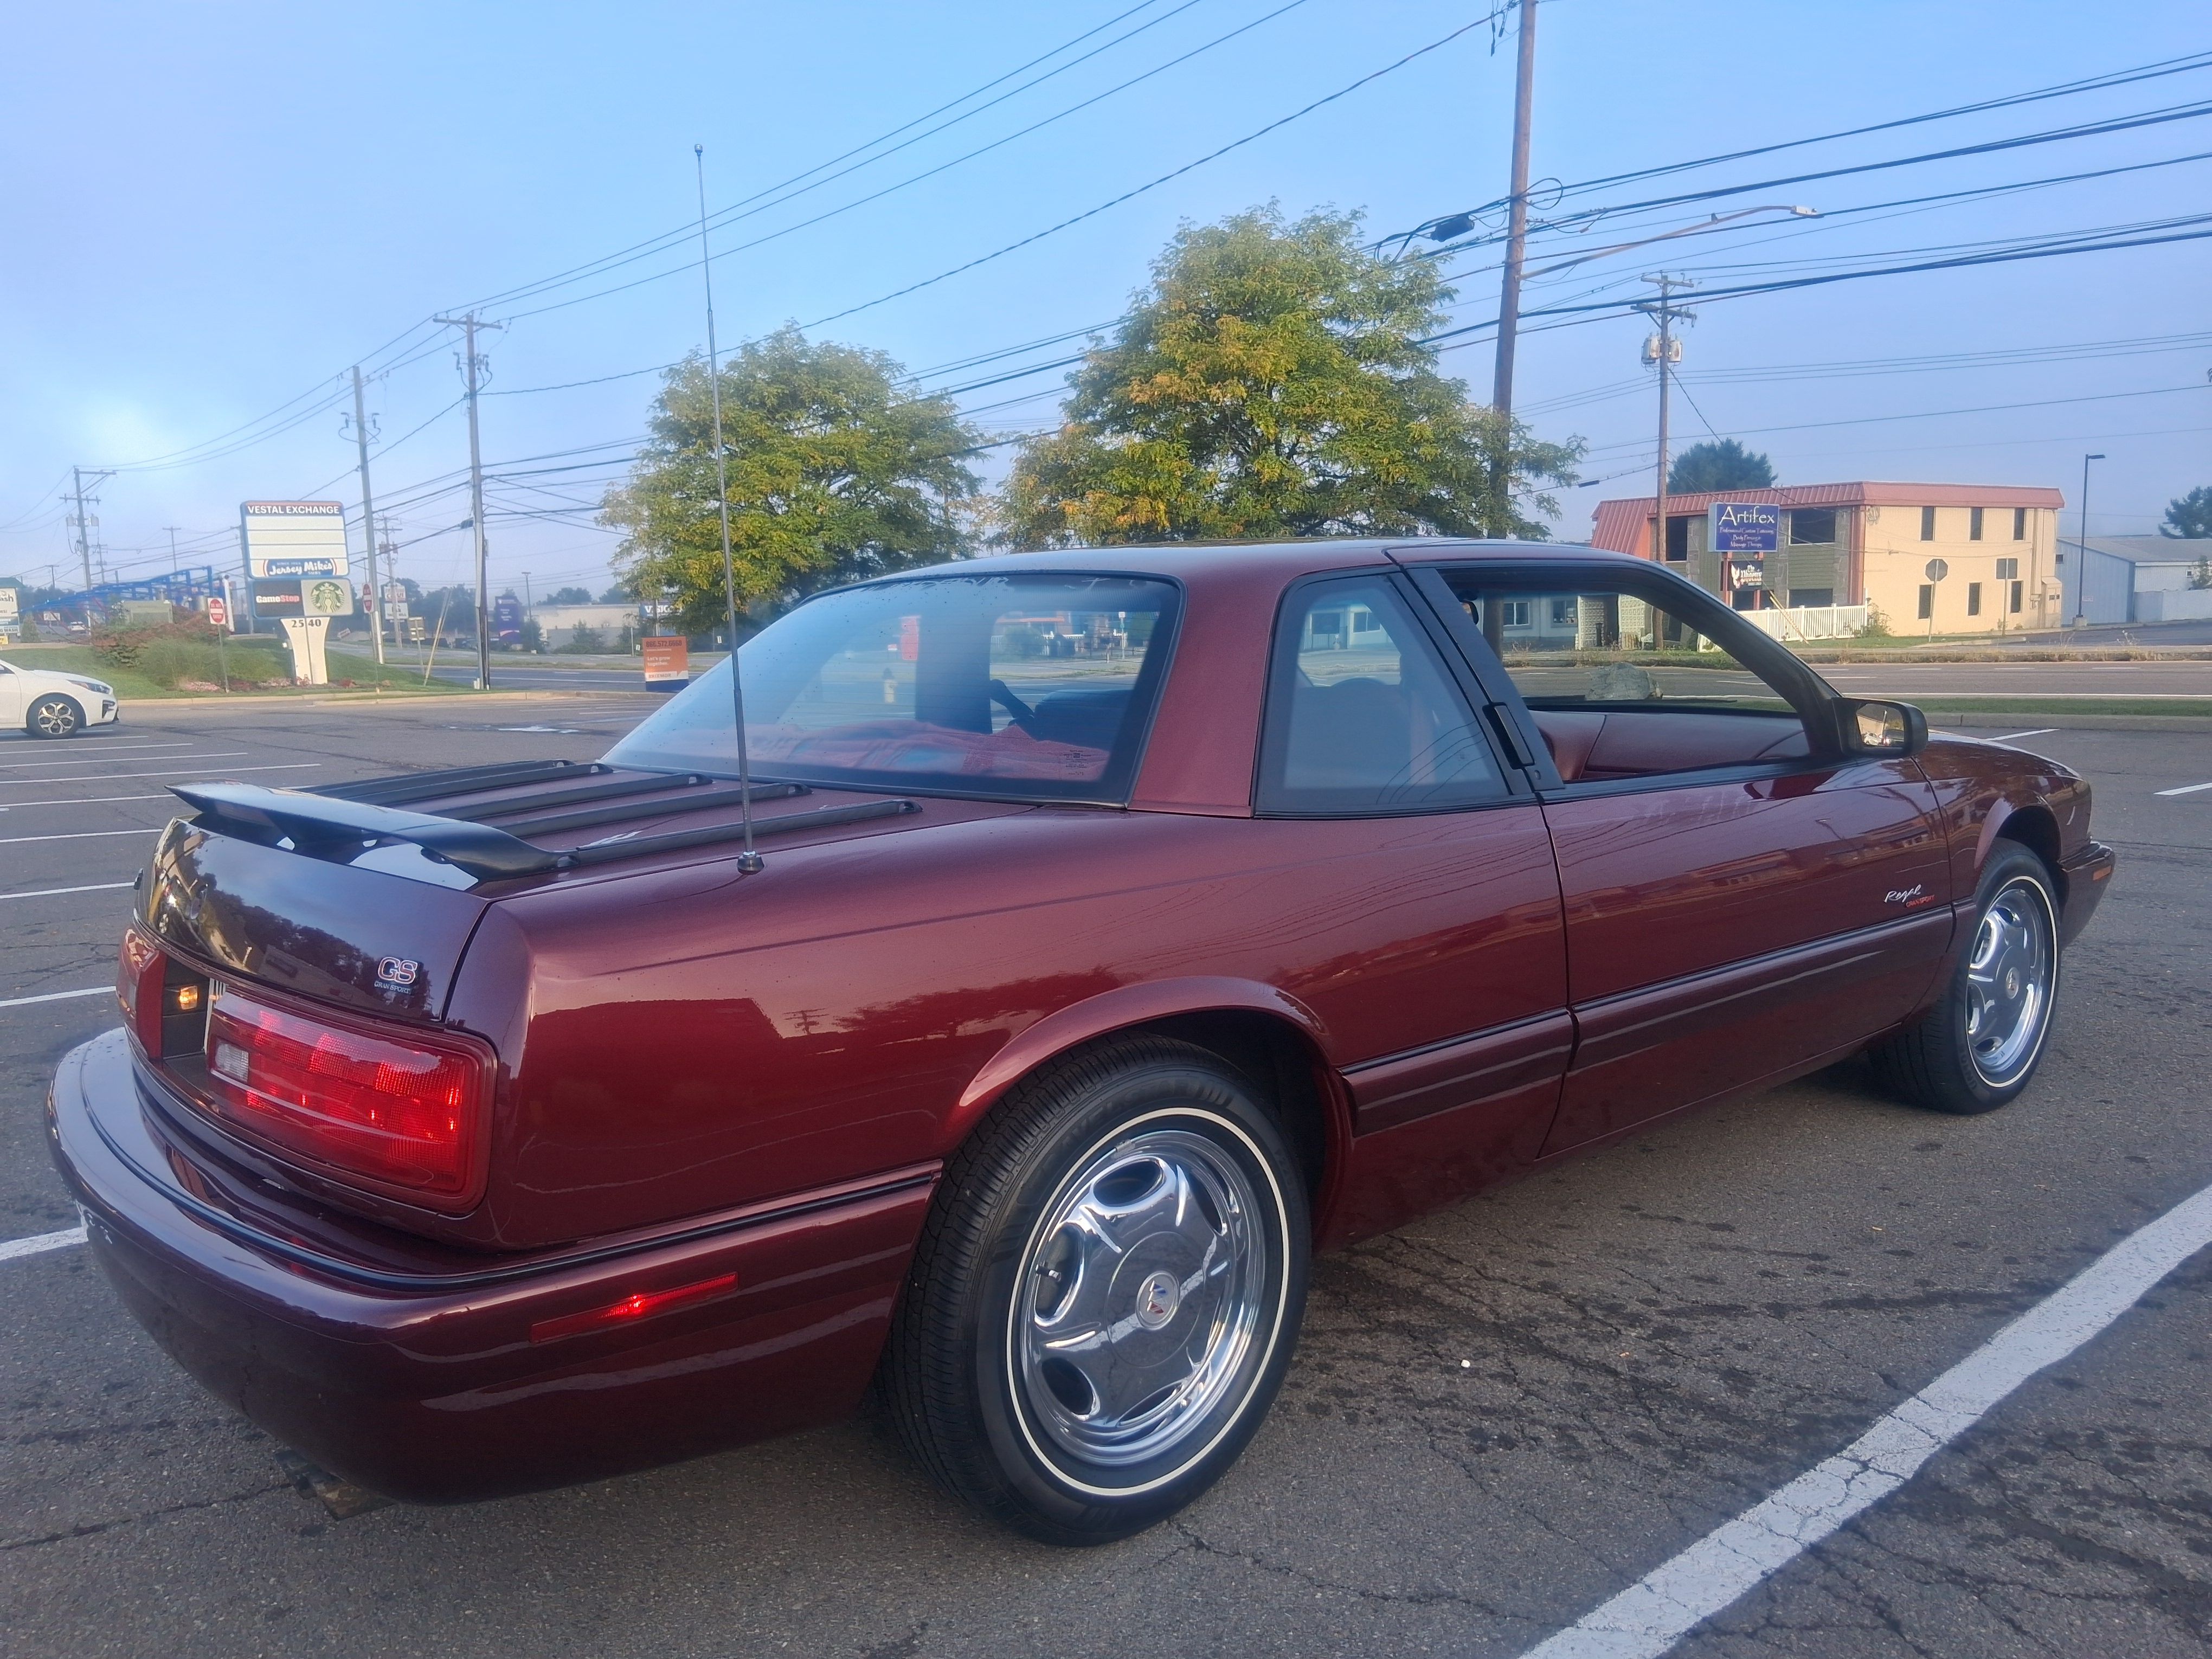
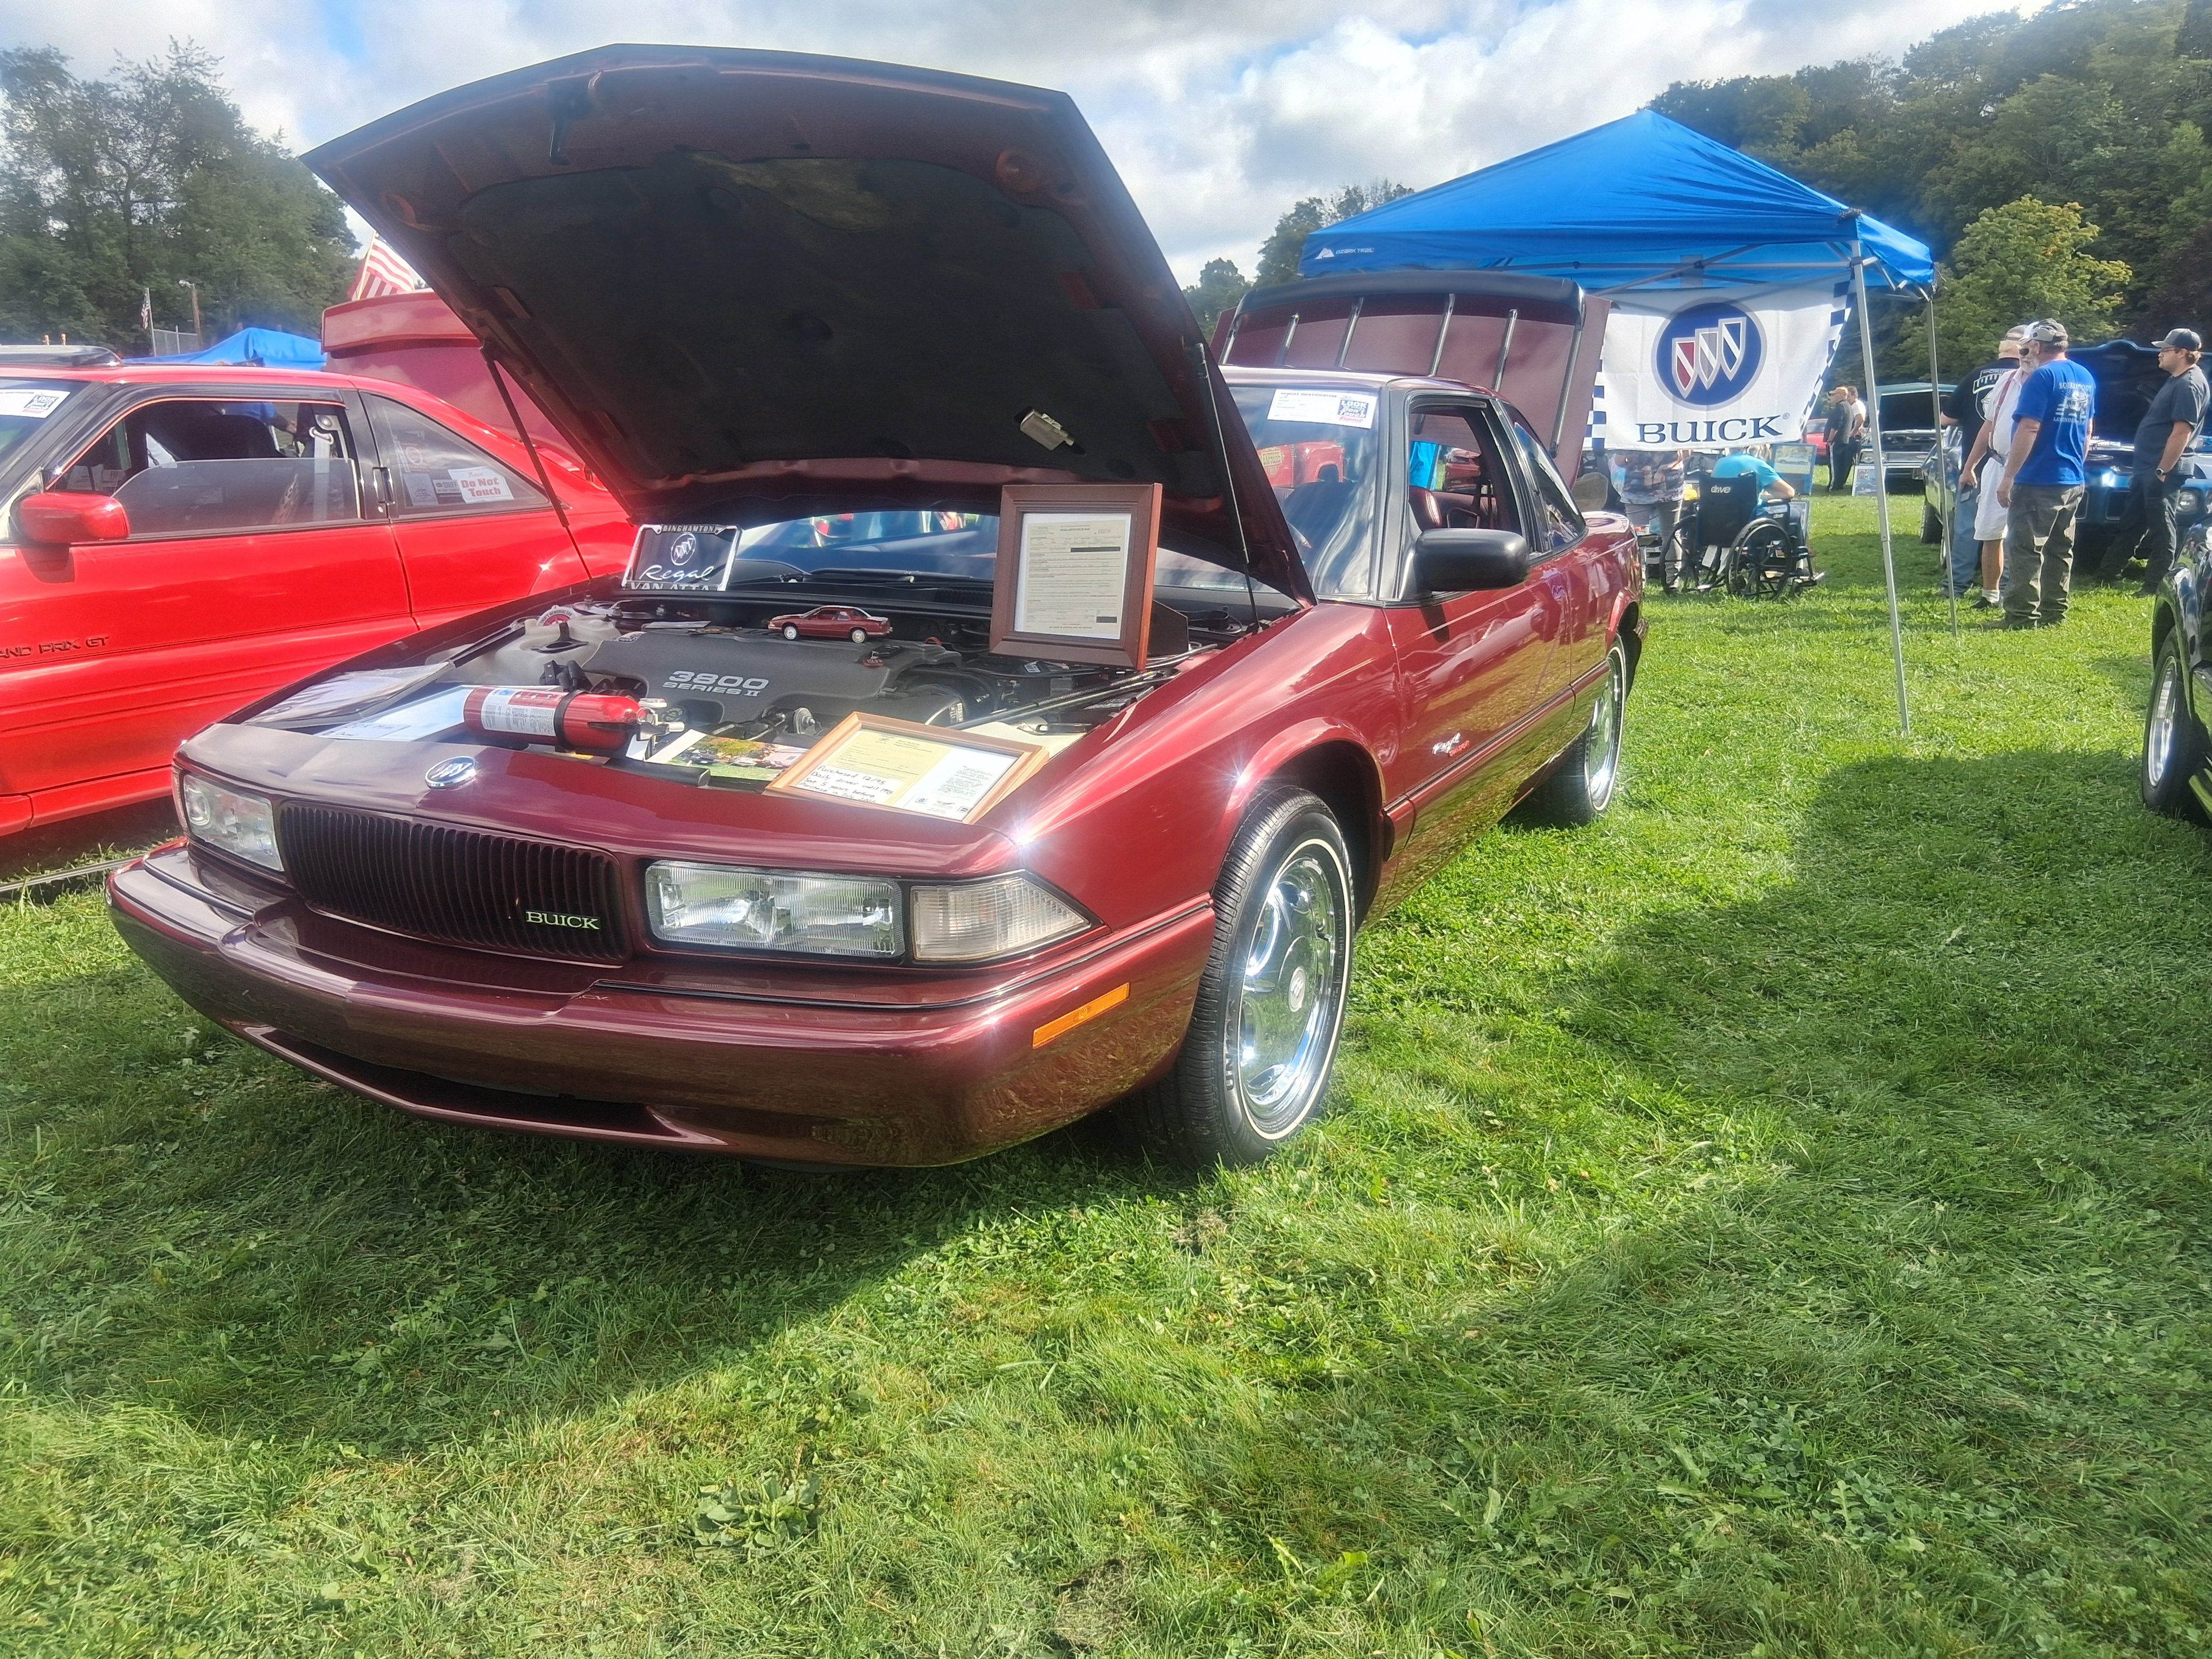
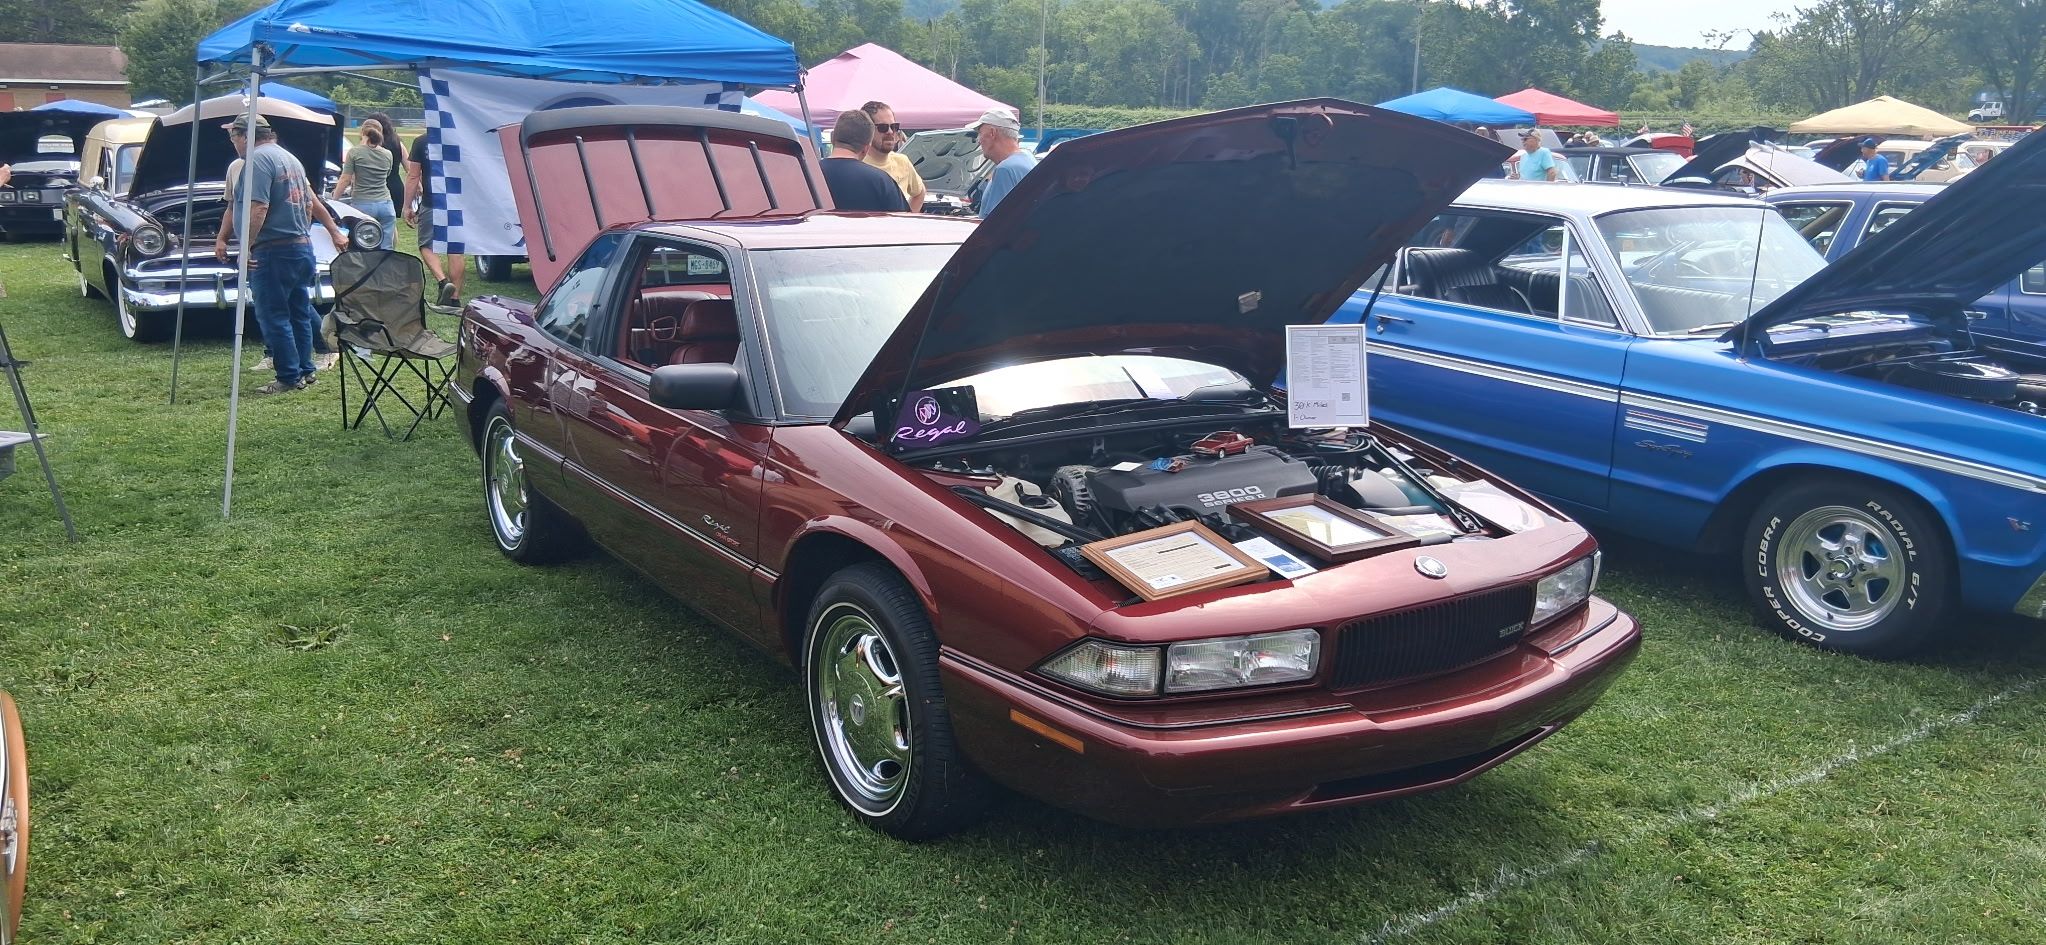
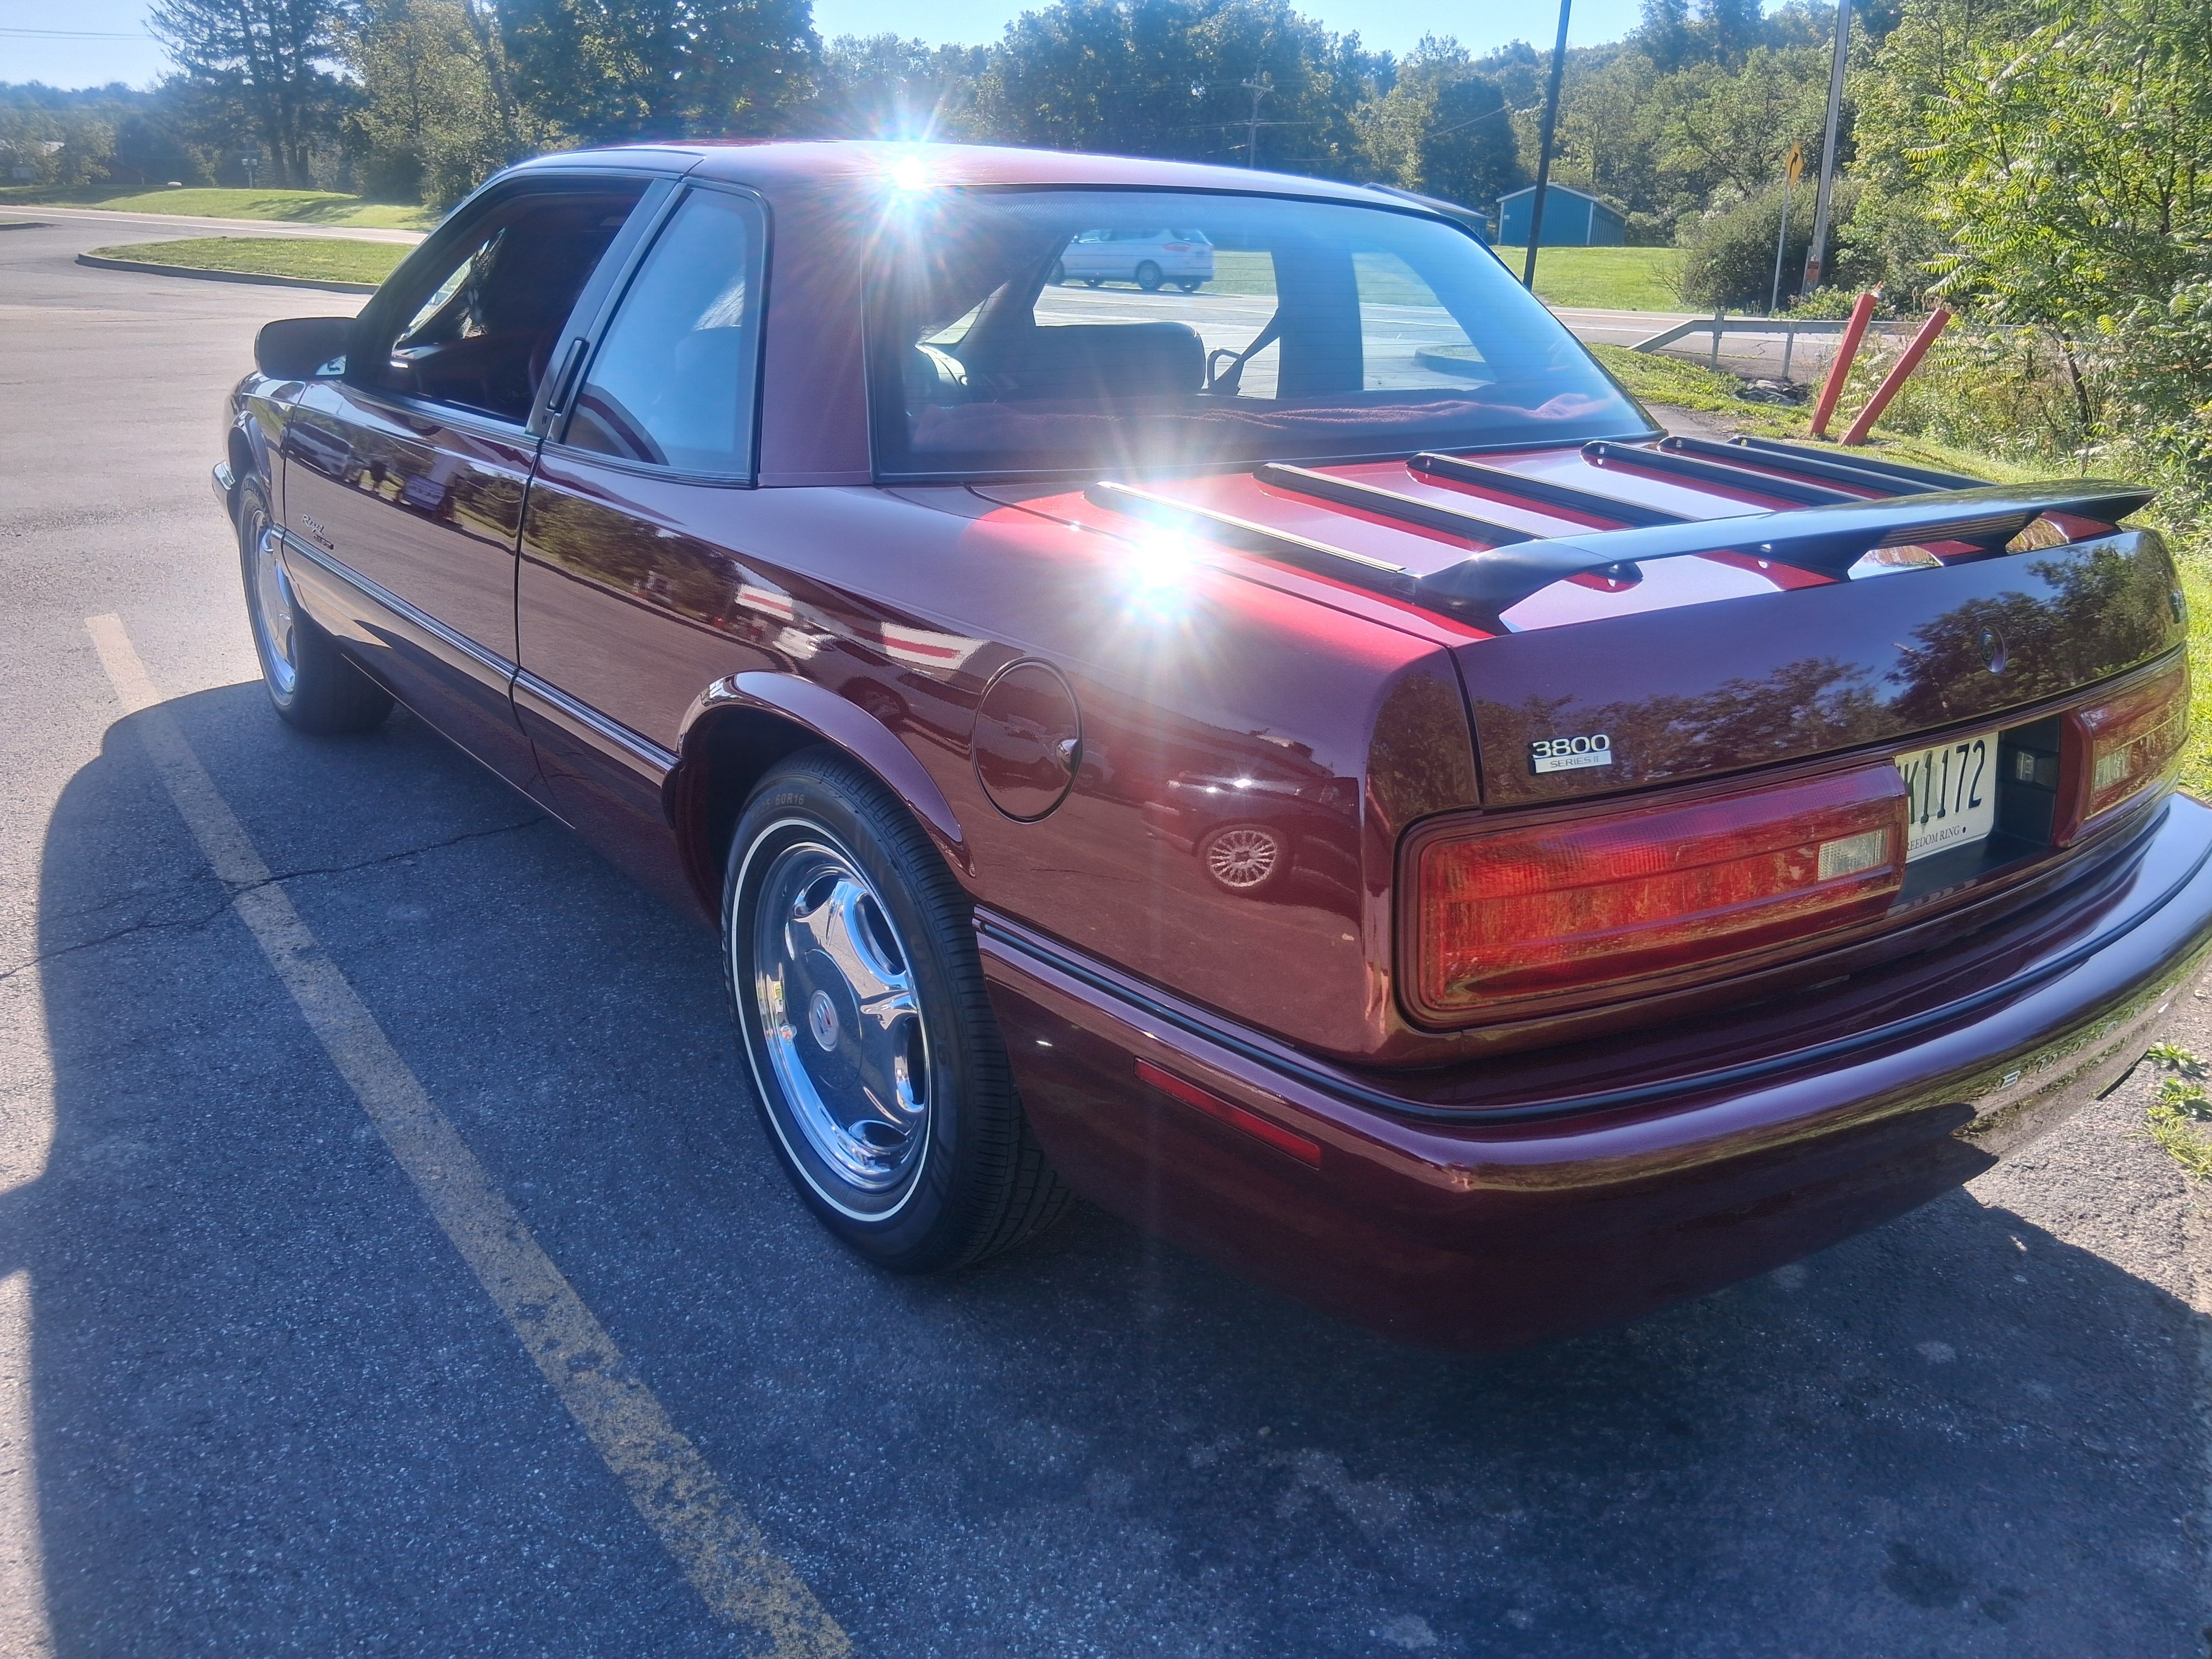
1996 Buick Regal GS Coupe Survivor
GnatGoSplat and 4 others reacted to 96RegalGS for a topic
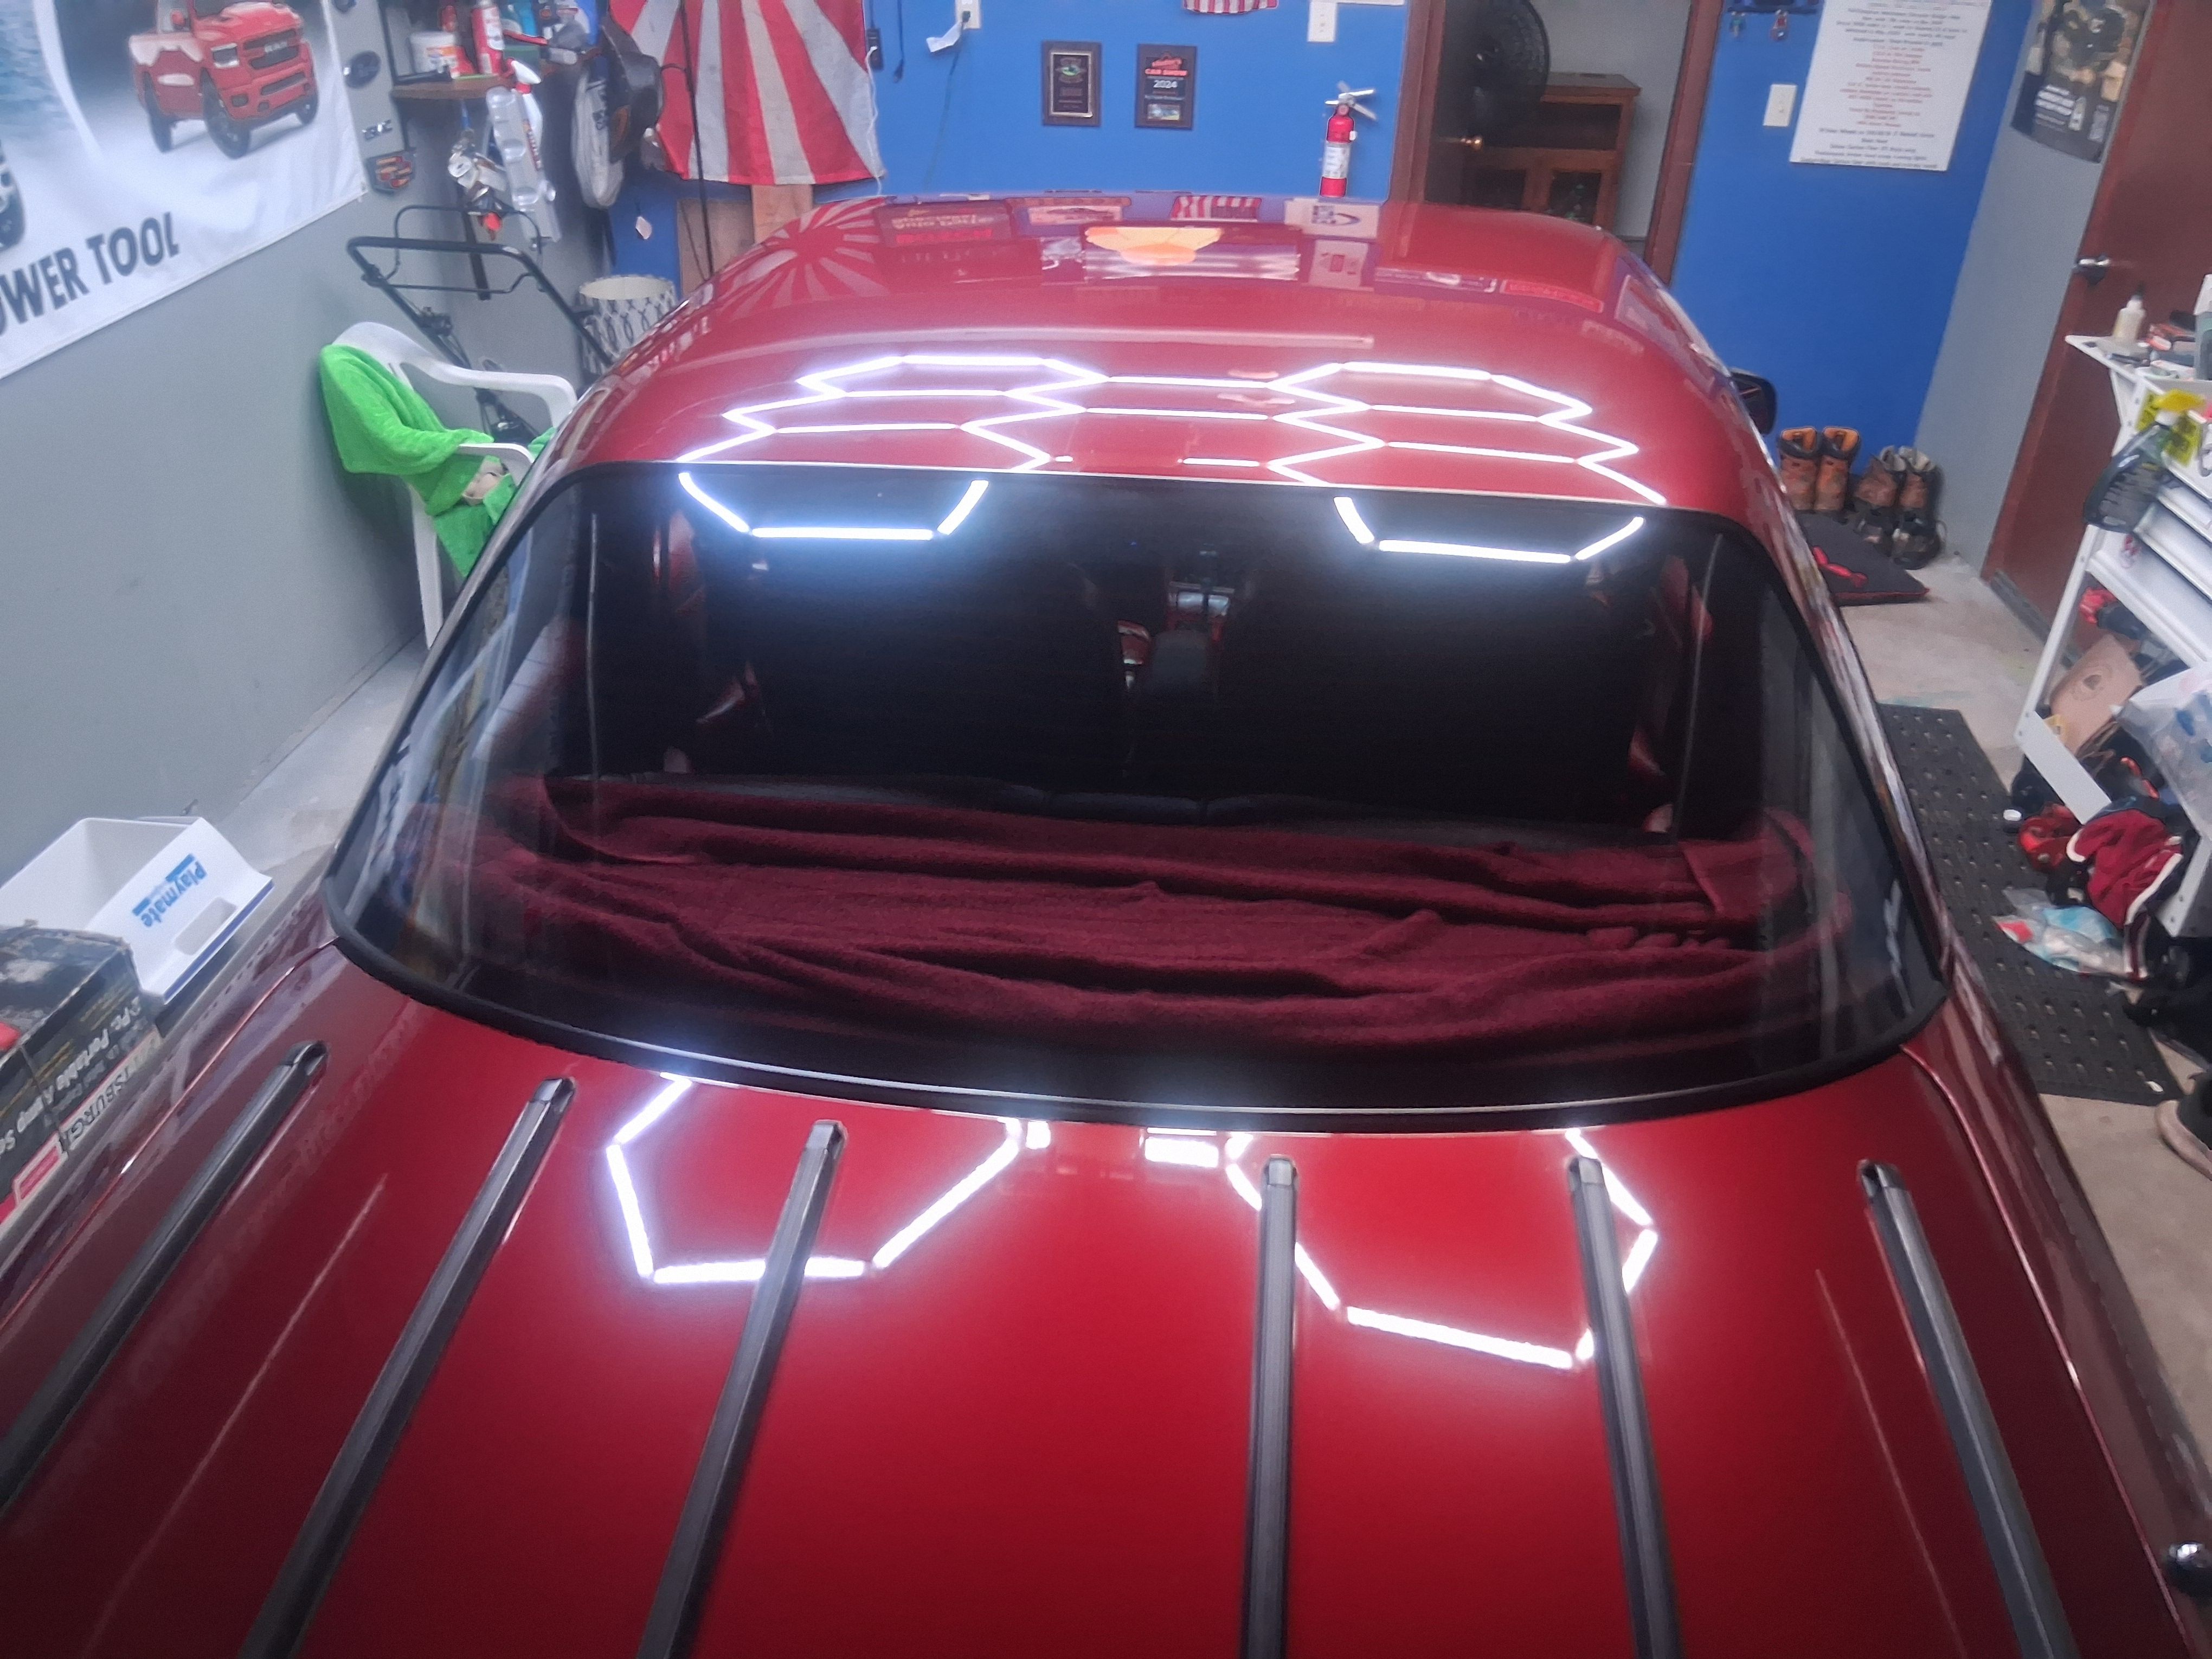
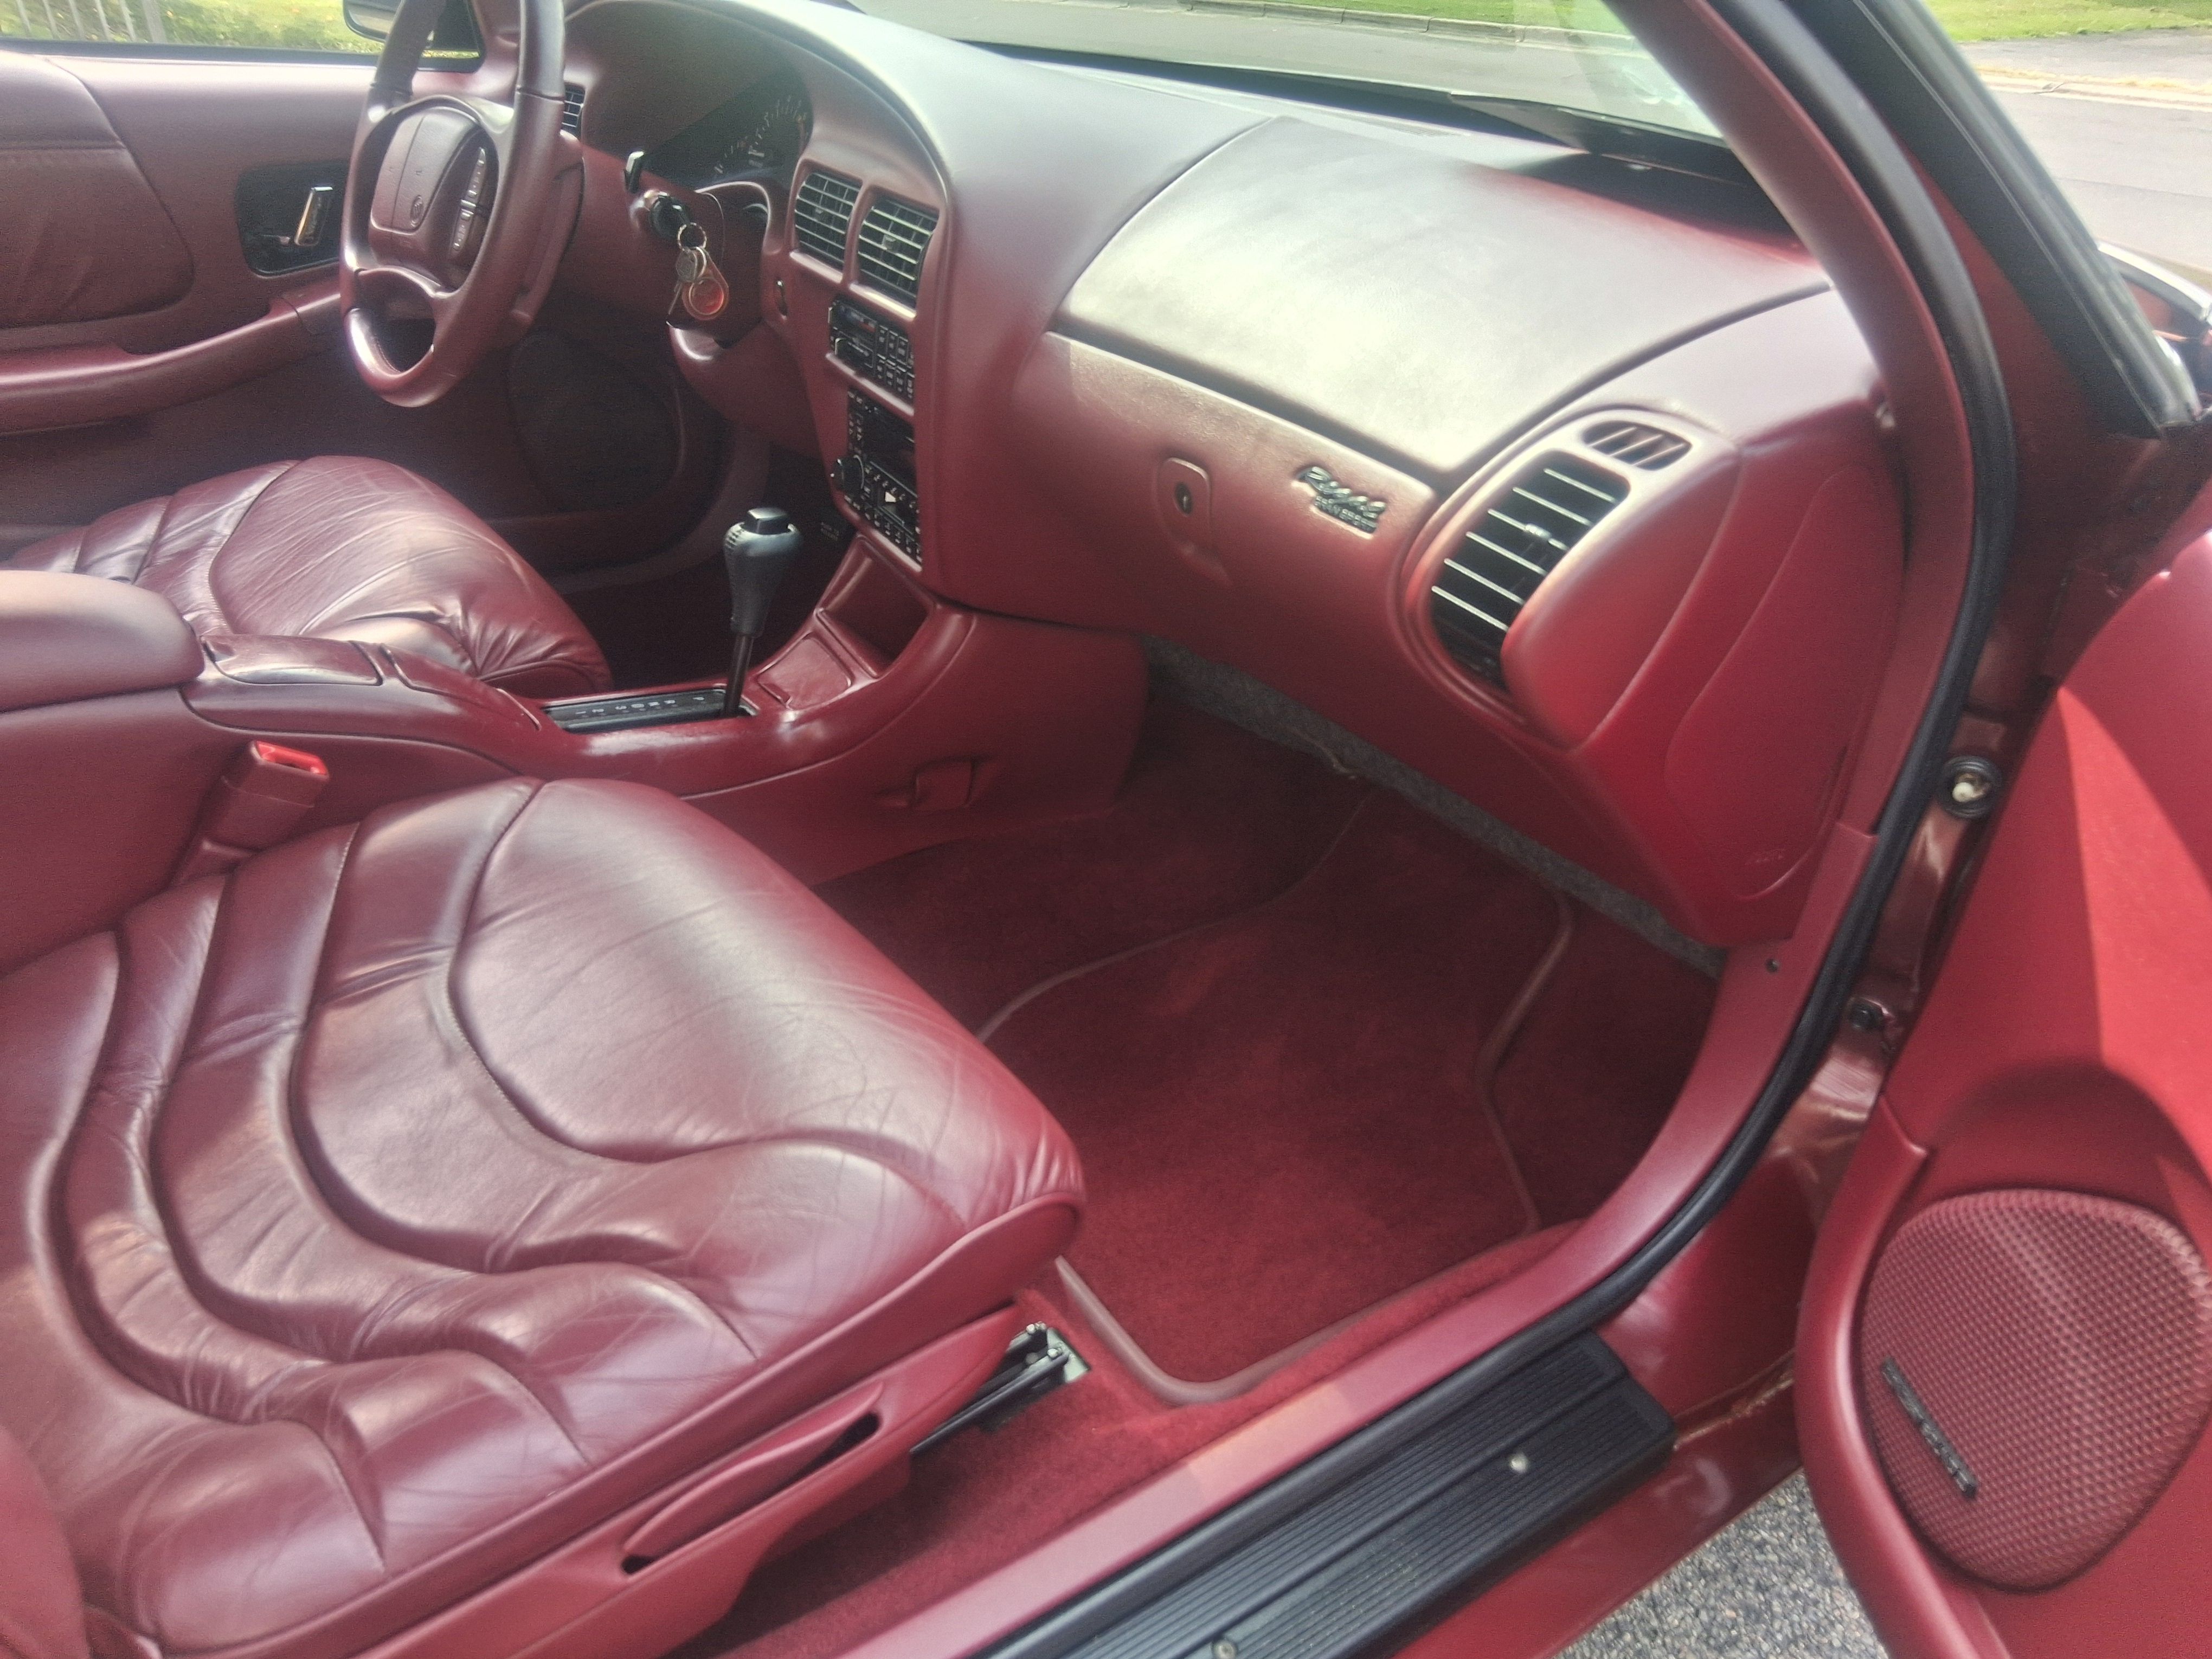
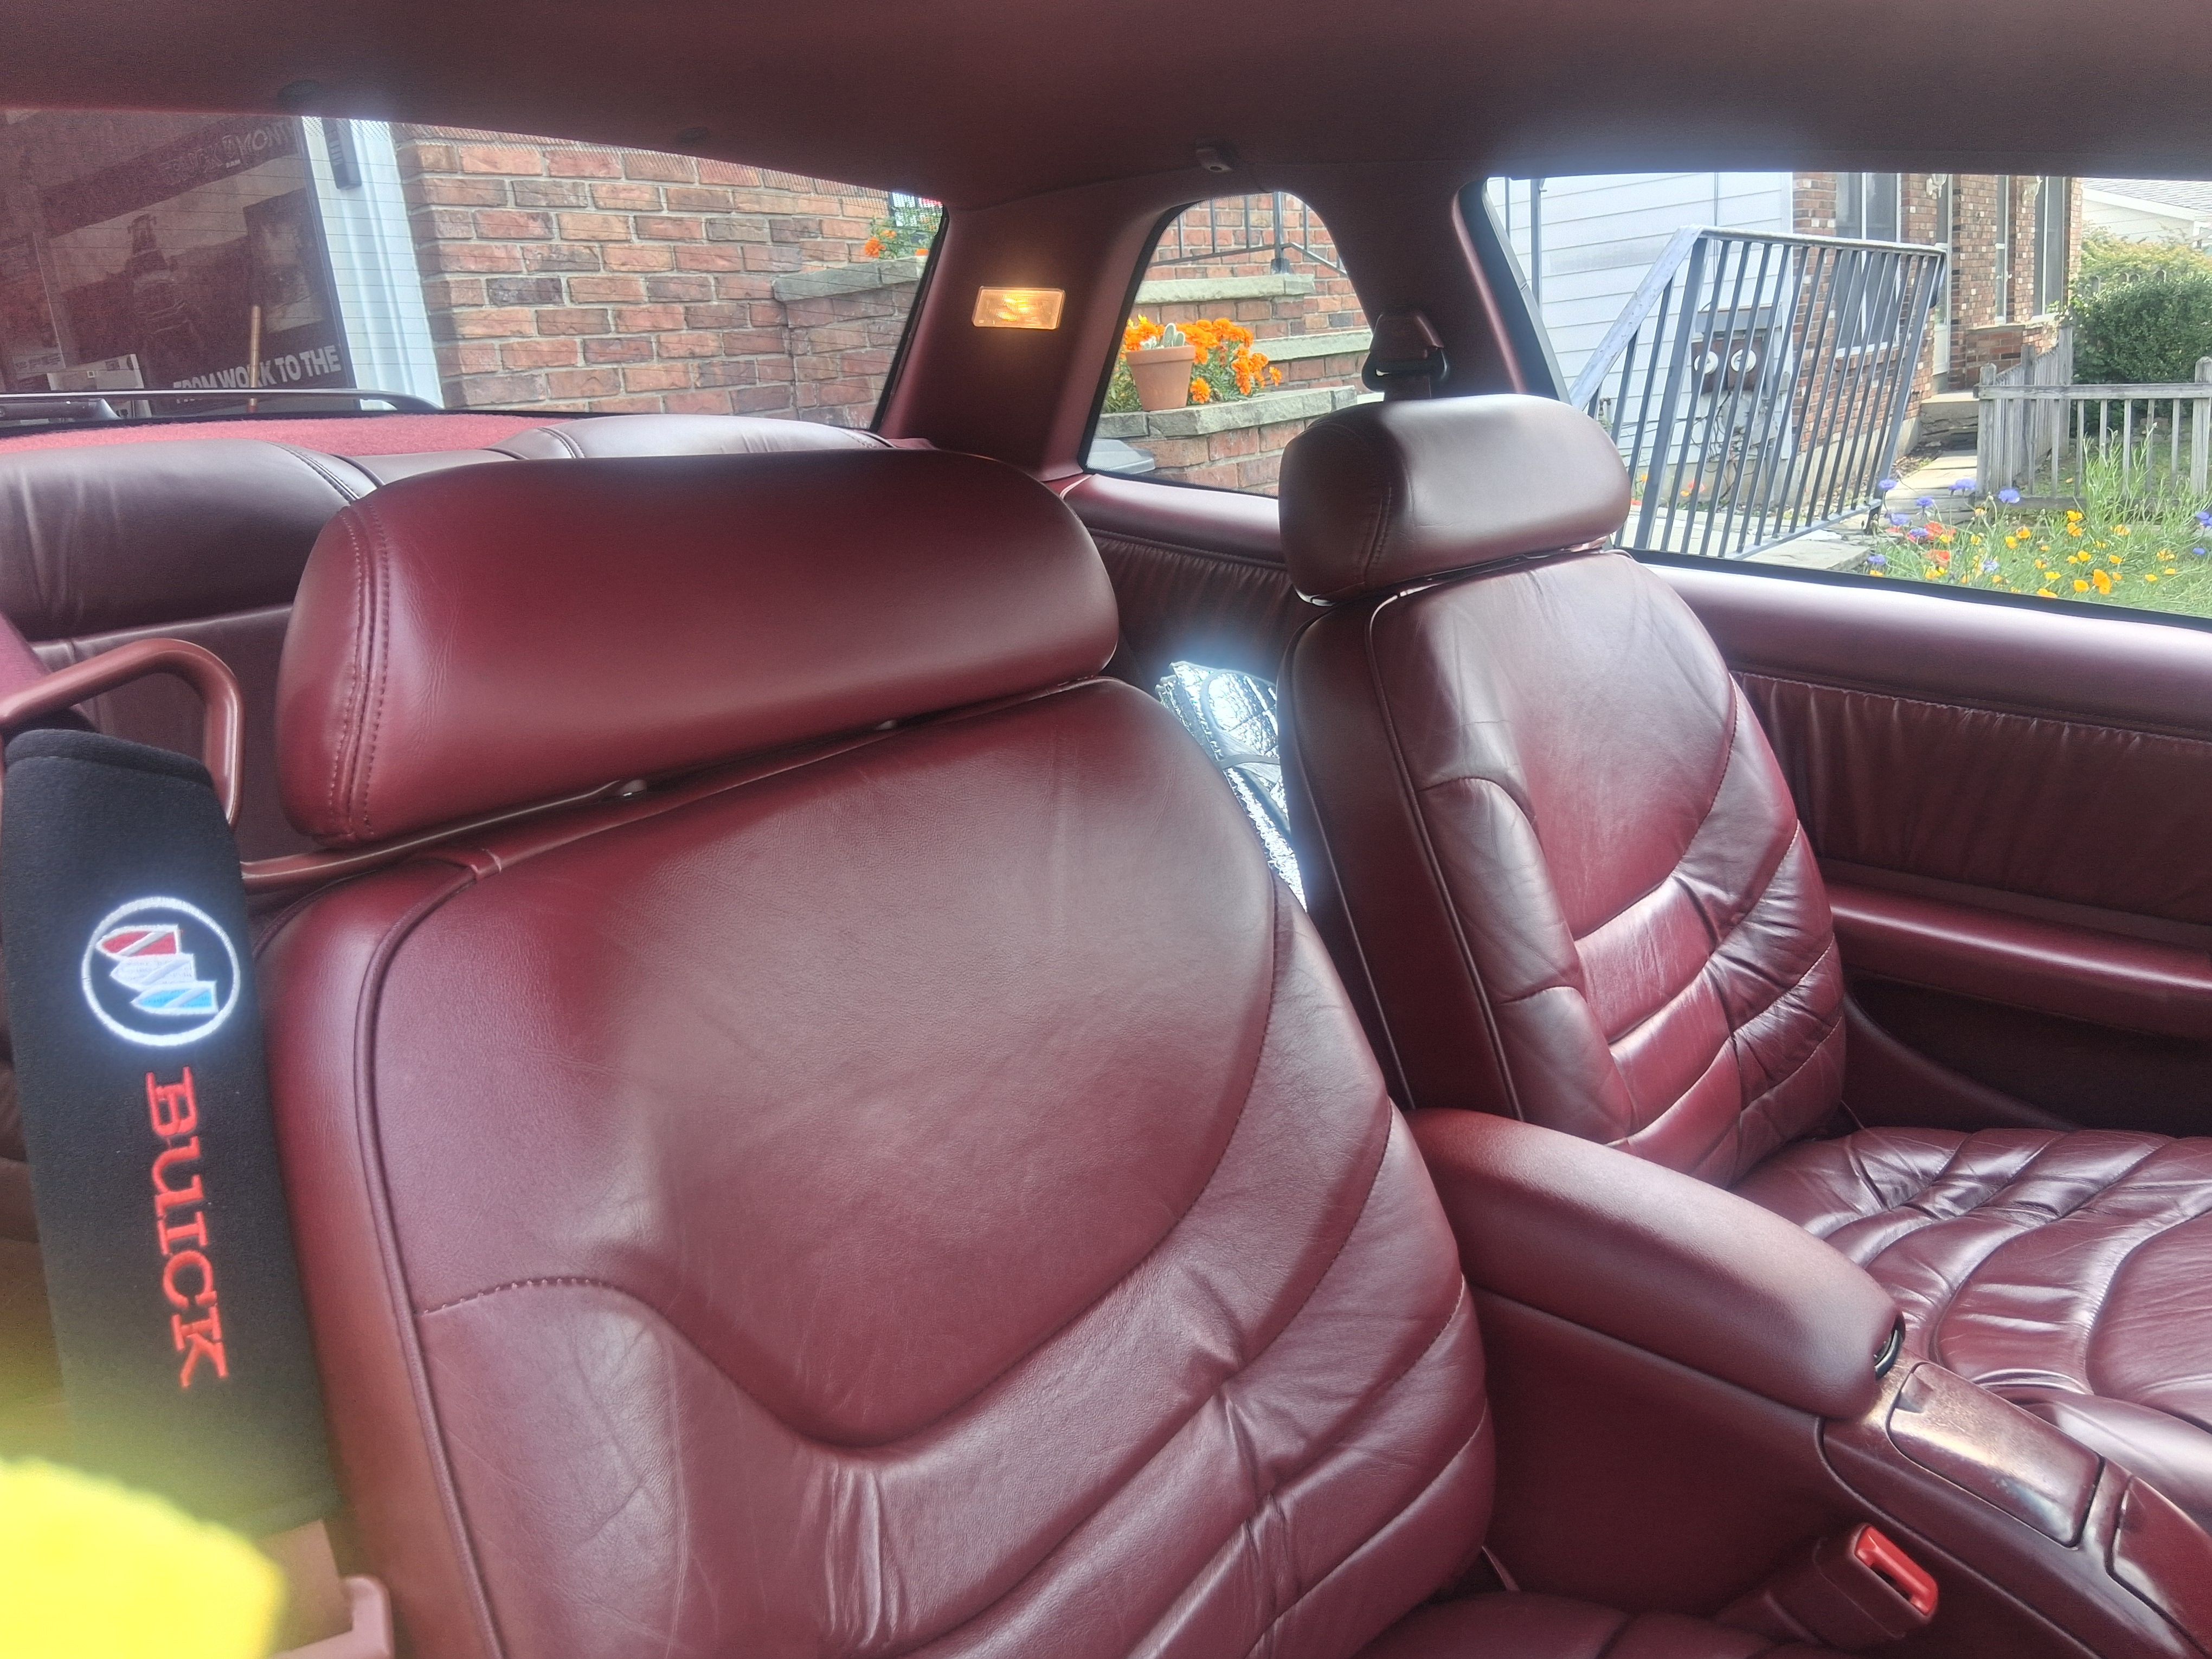
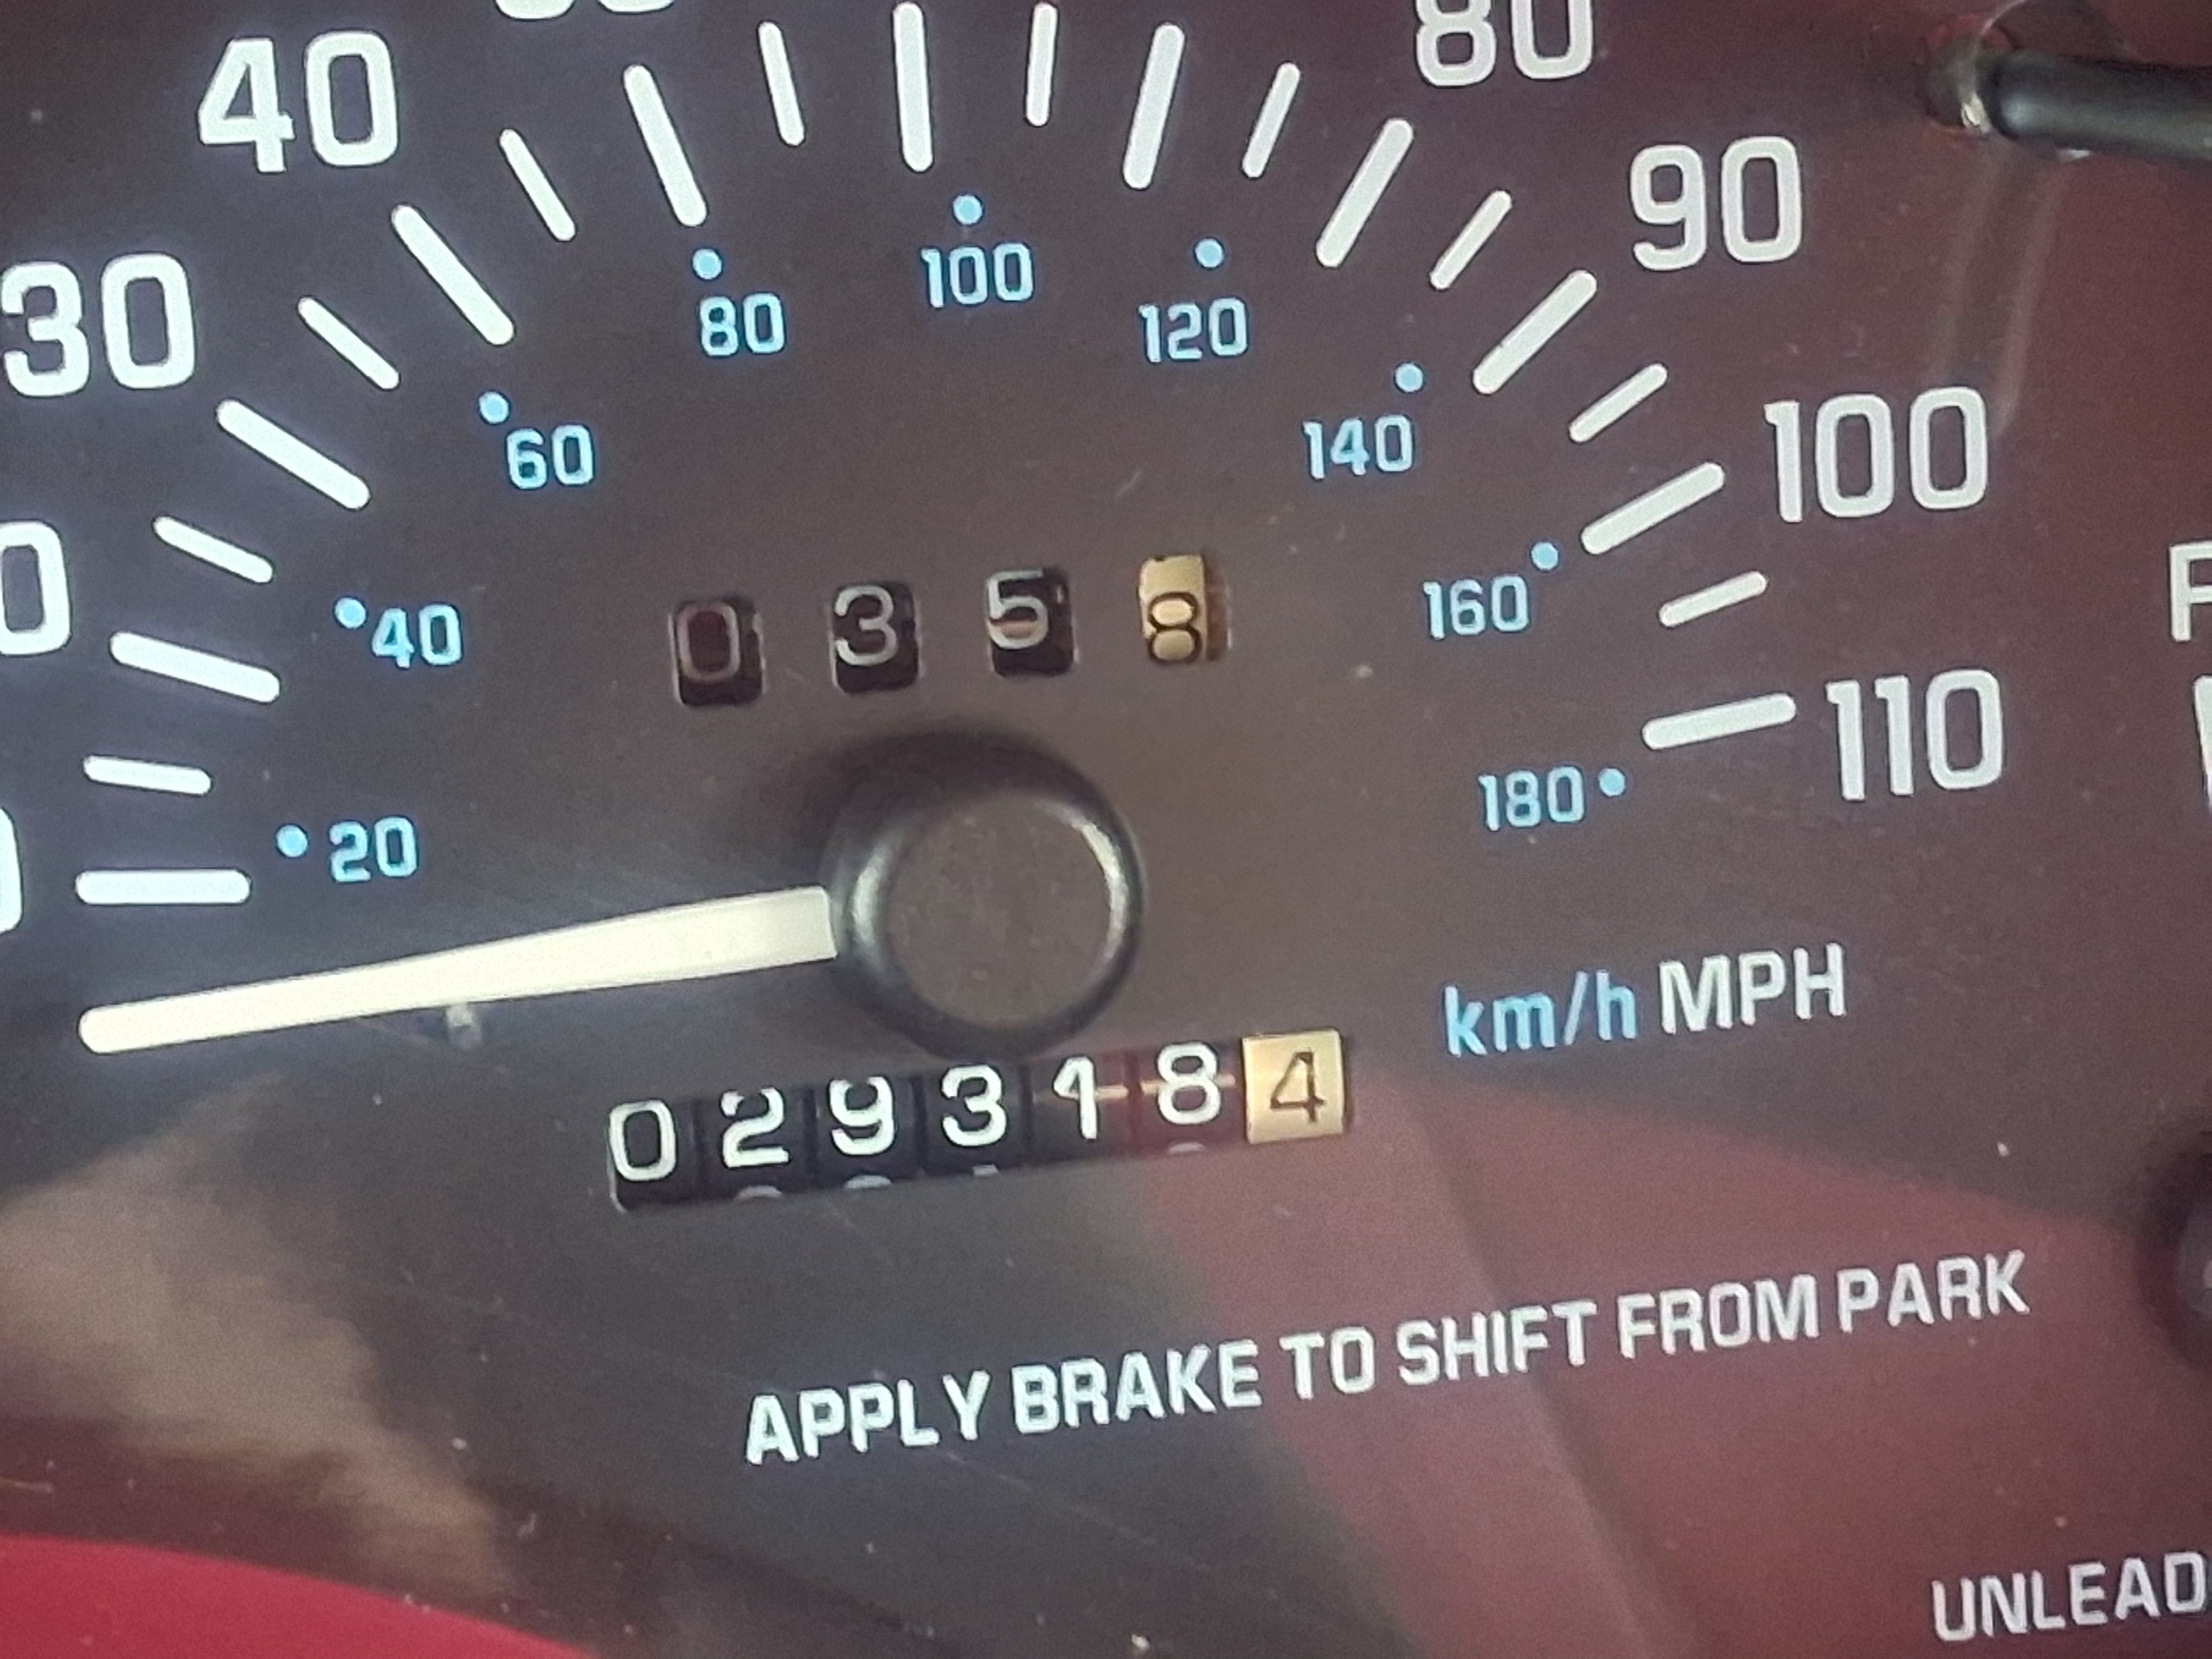
Hey, all! New to the W-Body forums and learning so much about these cars! I recently purchased a 1996 Buick Regal GS coupe from my grandma, who bought this brand new in December 1995 from Van Atta Buick in Vestal, NY. It was a daily driver for 2 years (has not seen salt since 1998), and became an exclusive summer driver after that. It did, of course not always see road time. They always had a couple other cars that they drove around, and sometimes the Regal would sit for an entire summer (or 2) without any new mileage on it! It was always kept in a enclosed, heated garage and waxed 2x a year (even if the car didnt physically go anywhere that year it was still cleaned up)! Fast forward to 2026, the Regal had been sitting for 6 years, not driven, merely tucked away, covered up, and forgotten about. Grandma decided she wants to sell the Regal, as sitting is doing nothing for its value (as it sat it had just over 29k miles on it, WITH THE ORIGINAL TIRES STILL ON IT). We came to an agreement on price and it became my car! Purchased just after July 4th, I simply gave it a really good bath, buff, polish, ceramic coating, and some little maintenance items before taking this absolute treasure of a survivor to local car shows, and simply enjoying the ride quality of a practically still new 96 Regal GS Coupe. Finished in the beautiful Dark Toreador Metallic with ruby red leather interior WITH the 3800 V6! I wonder how many of these are still out there, with this color and option combination and mileage! Check out the photos, admire it's beauty! Attached is also an odometer photo after I got the car home to me.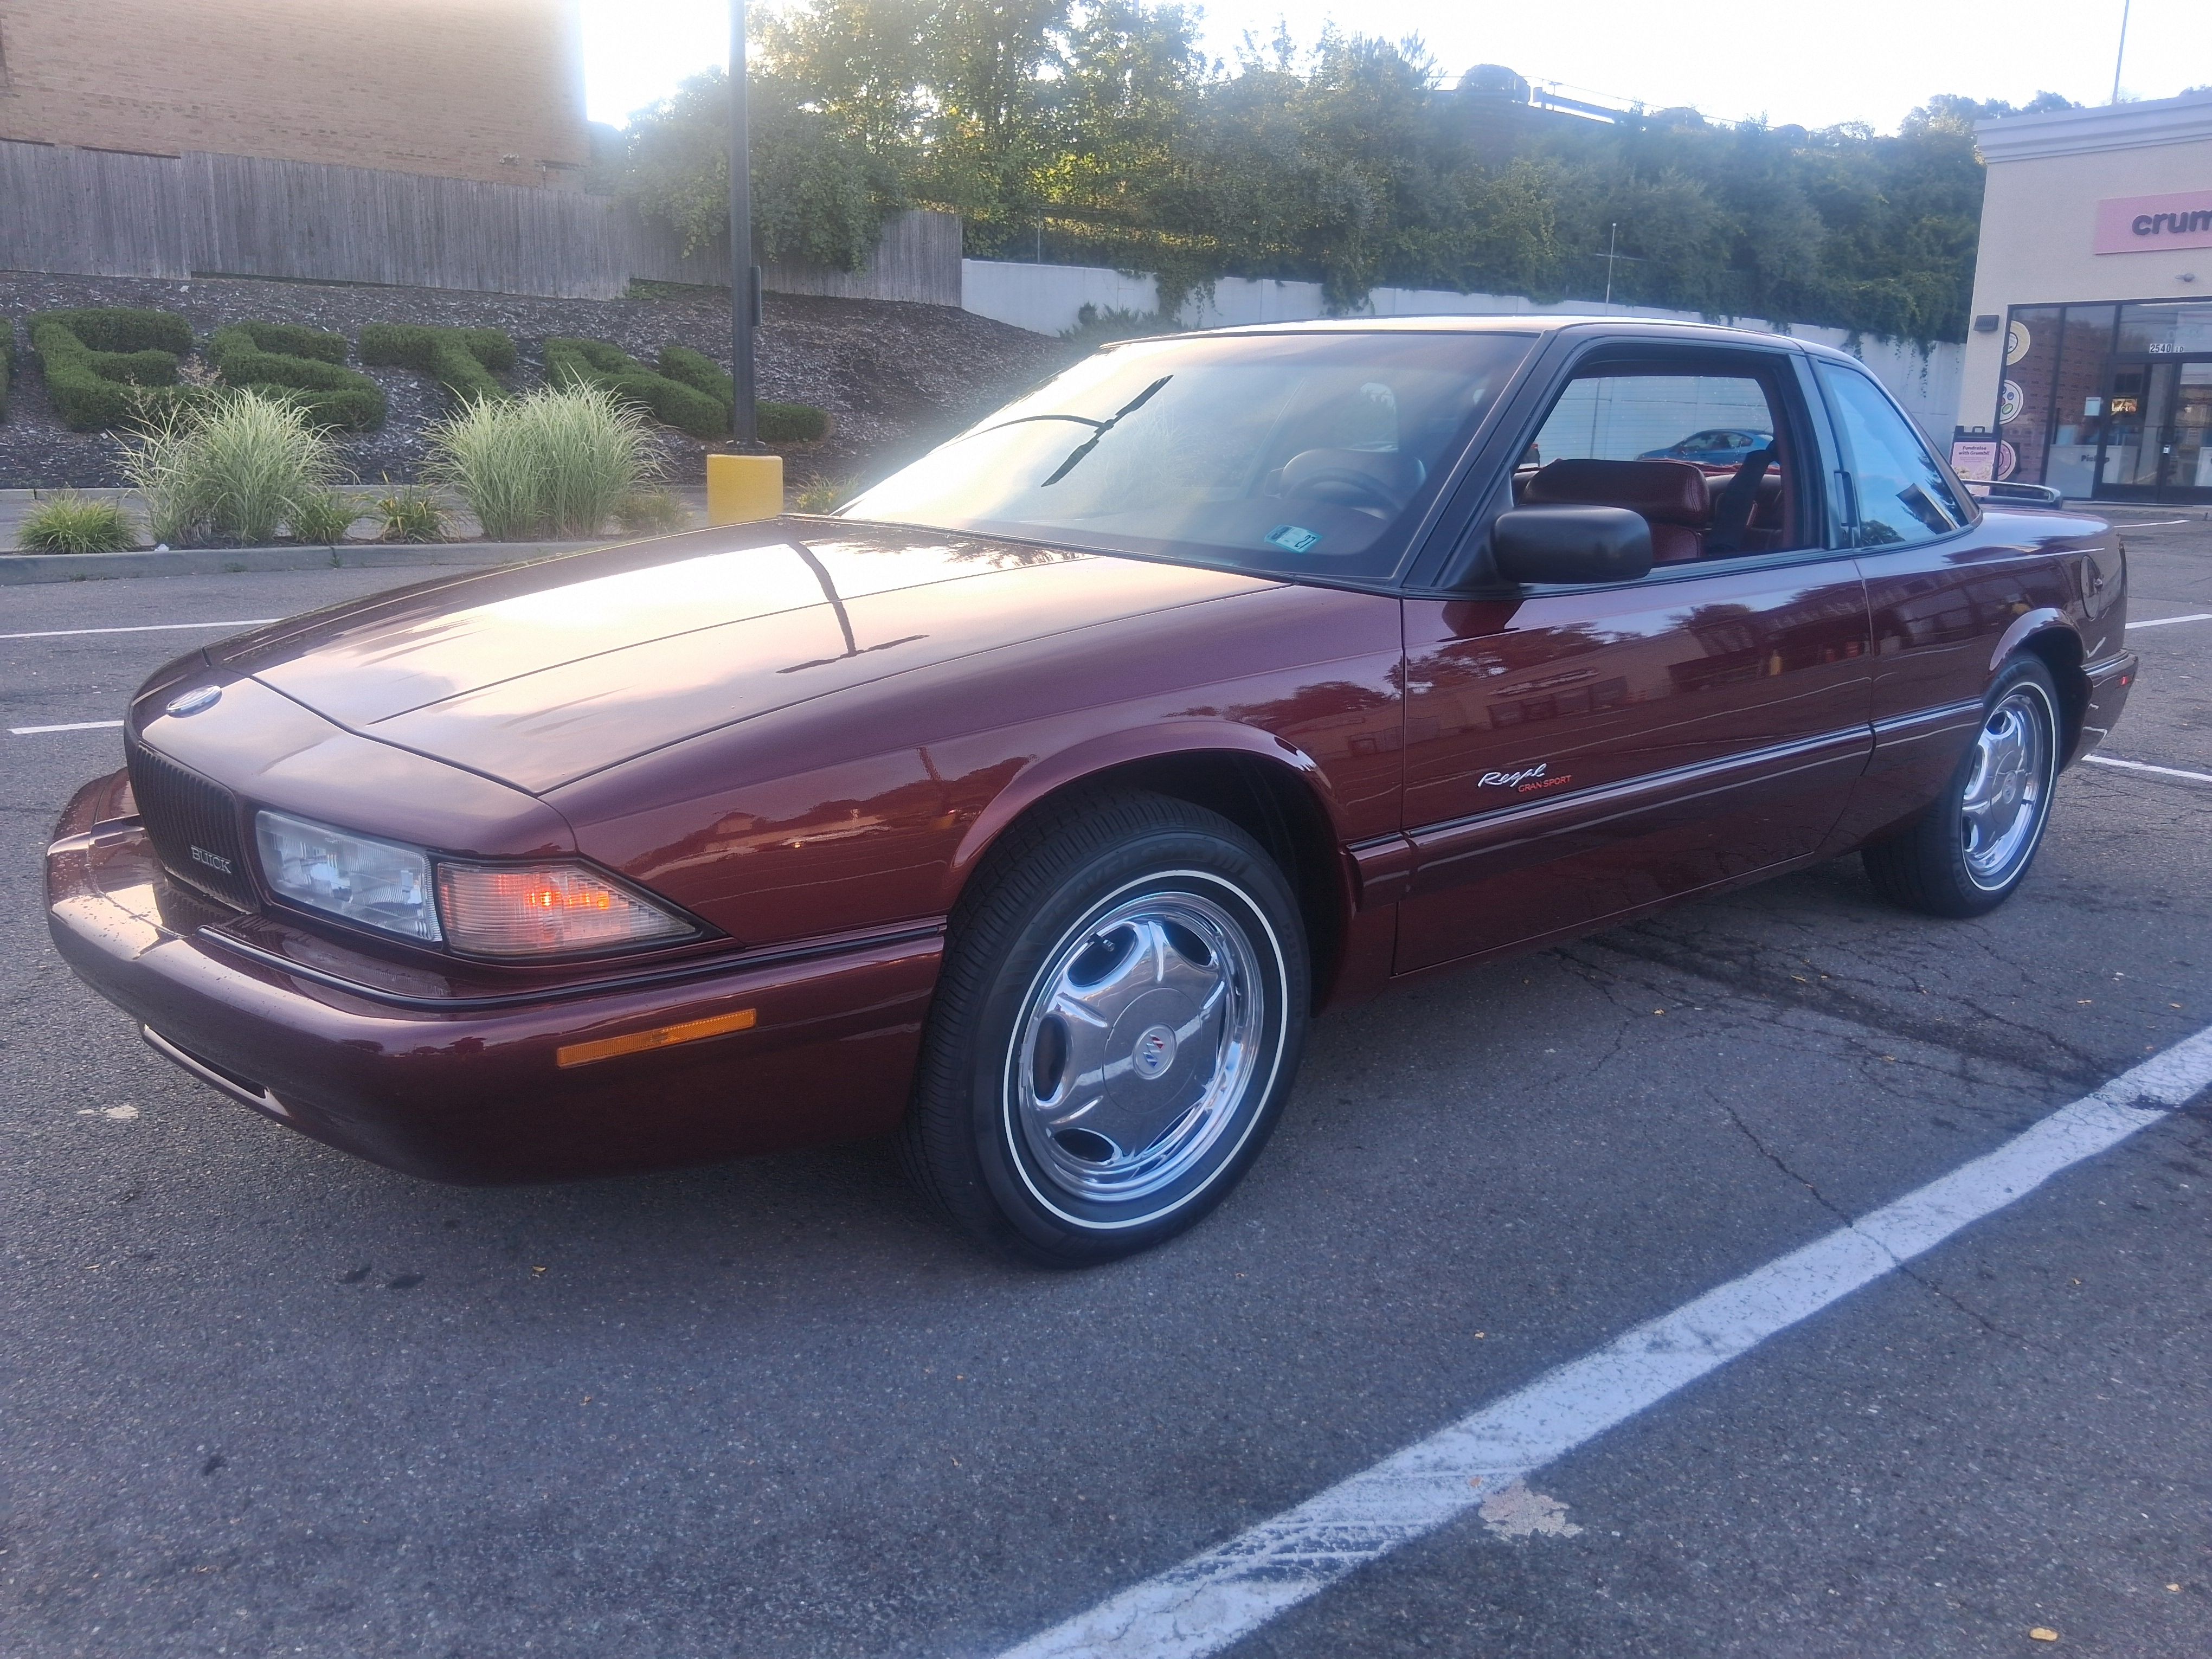
 5 points
 -
New member with 98 lumina
GnatGoSplat and 4 others reacted to Luminator98 for a topic
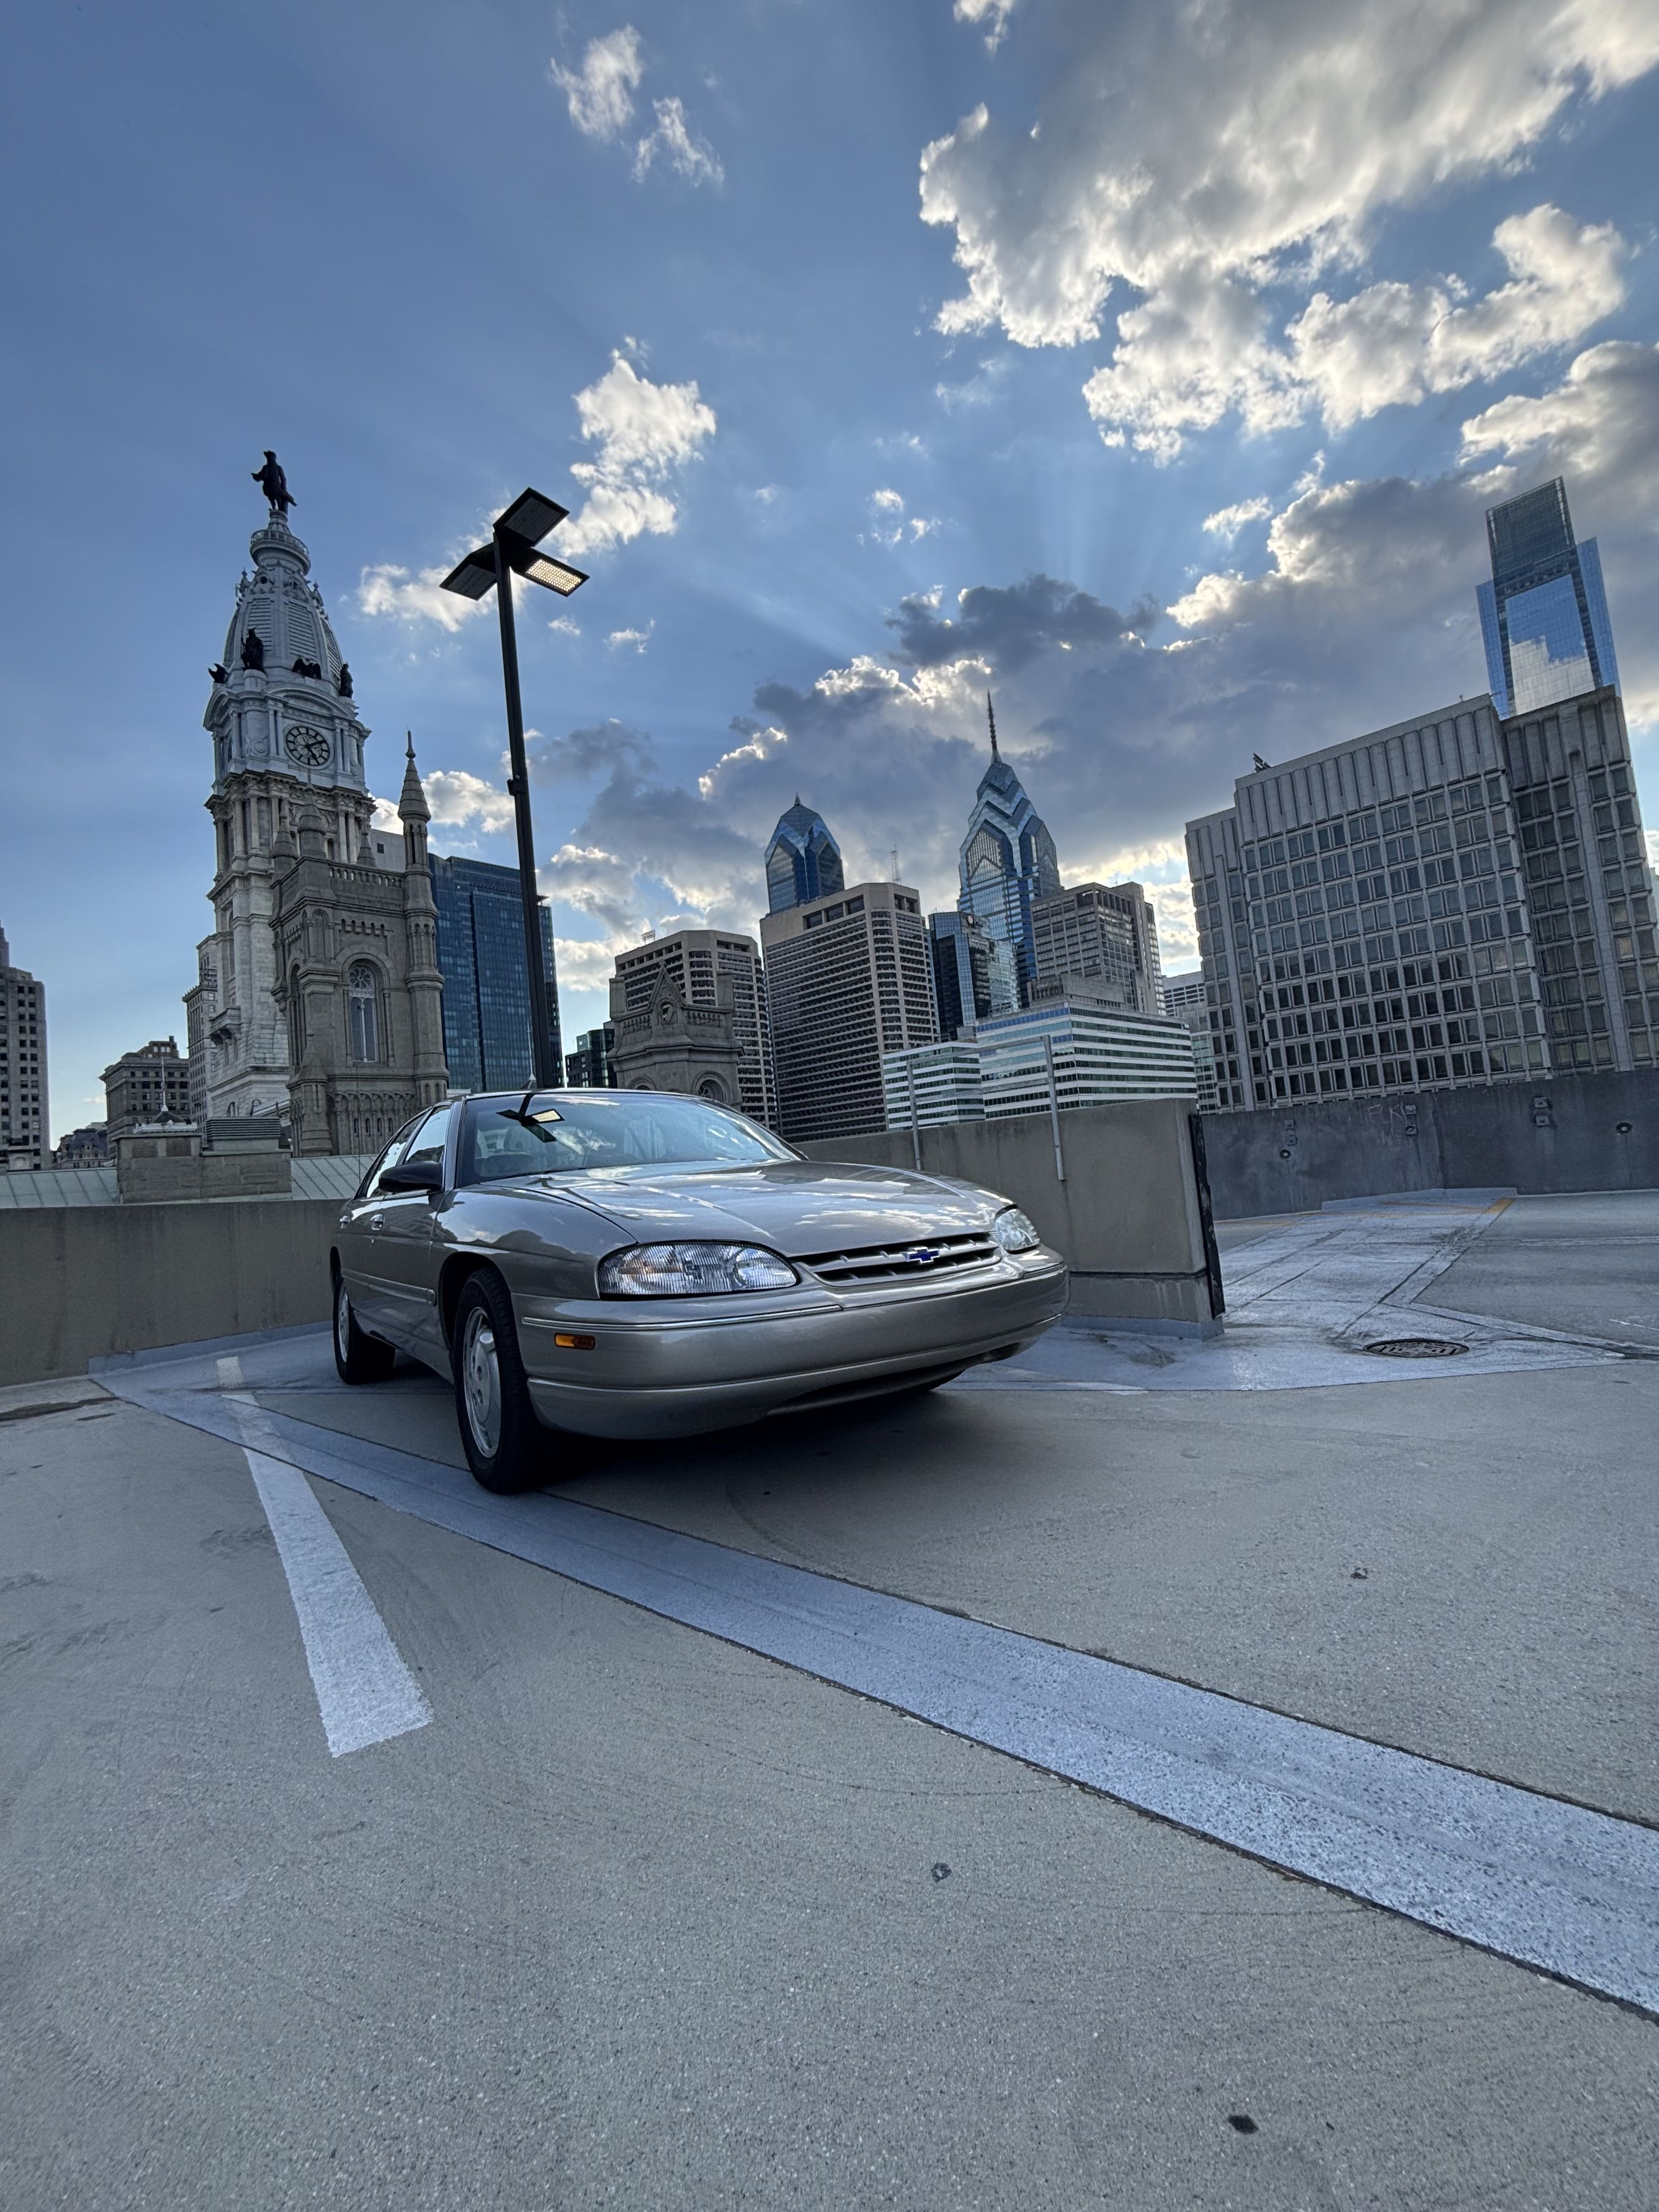
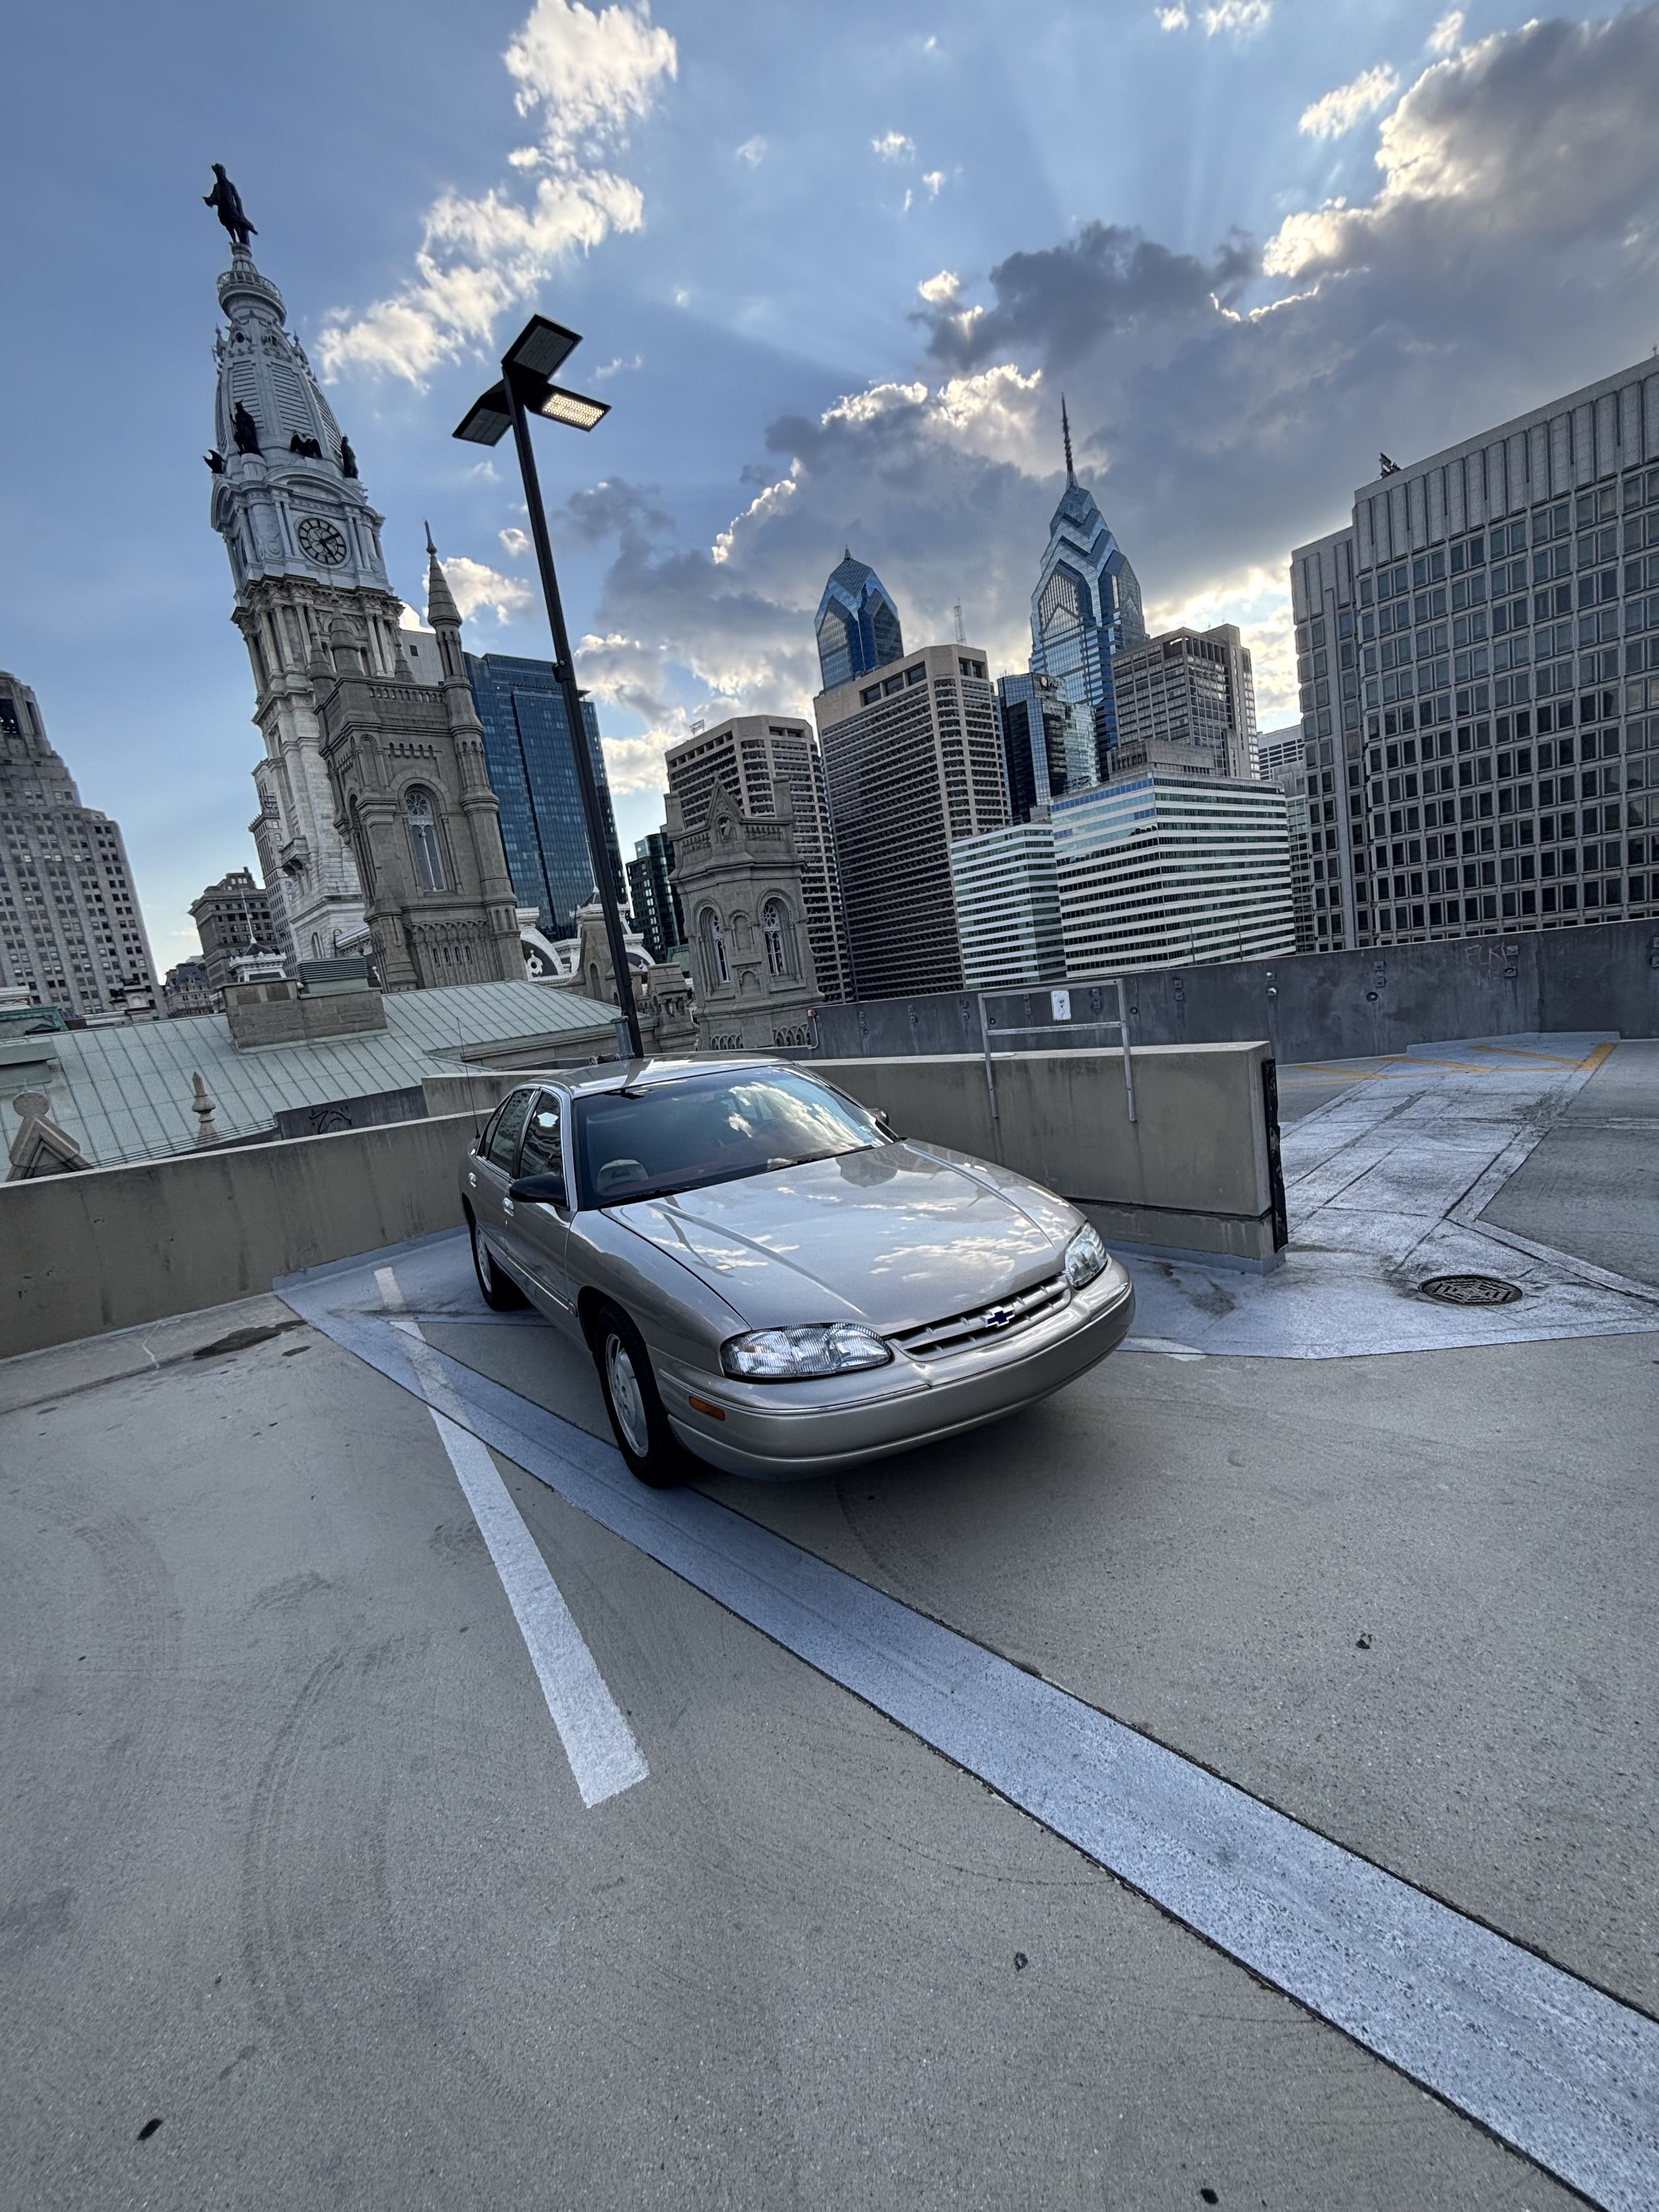
Hi, I’ve just stumbled onto this forum, and i figure I’ll probably need to post here eventually acquired my luminator last year, 2nd owner from a grandma. 70000 (got w 55000)miles. Here’s some pics; thx yall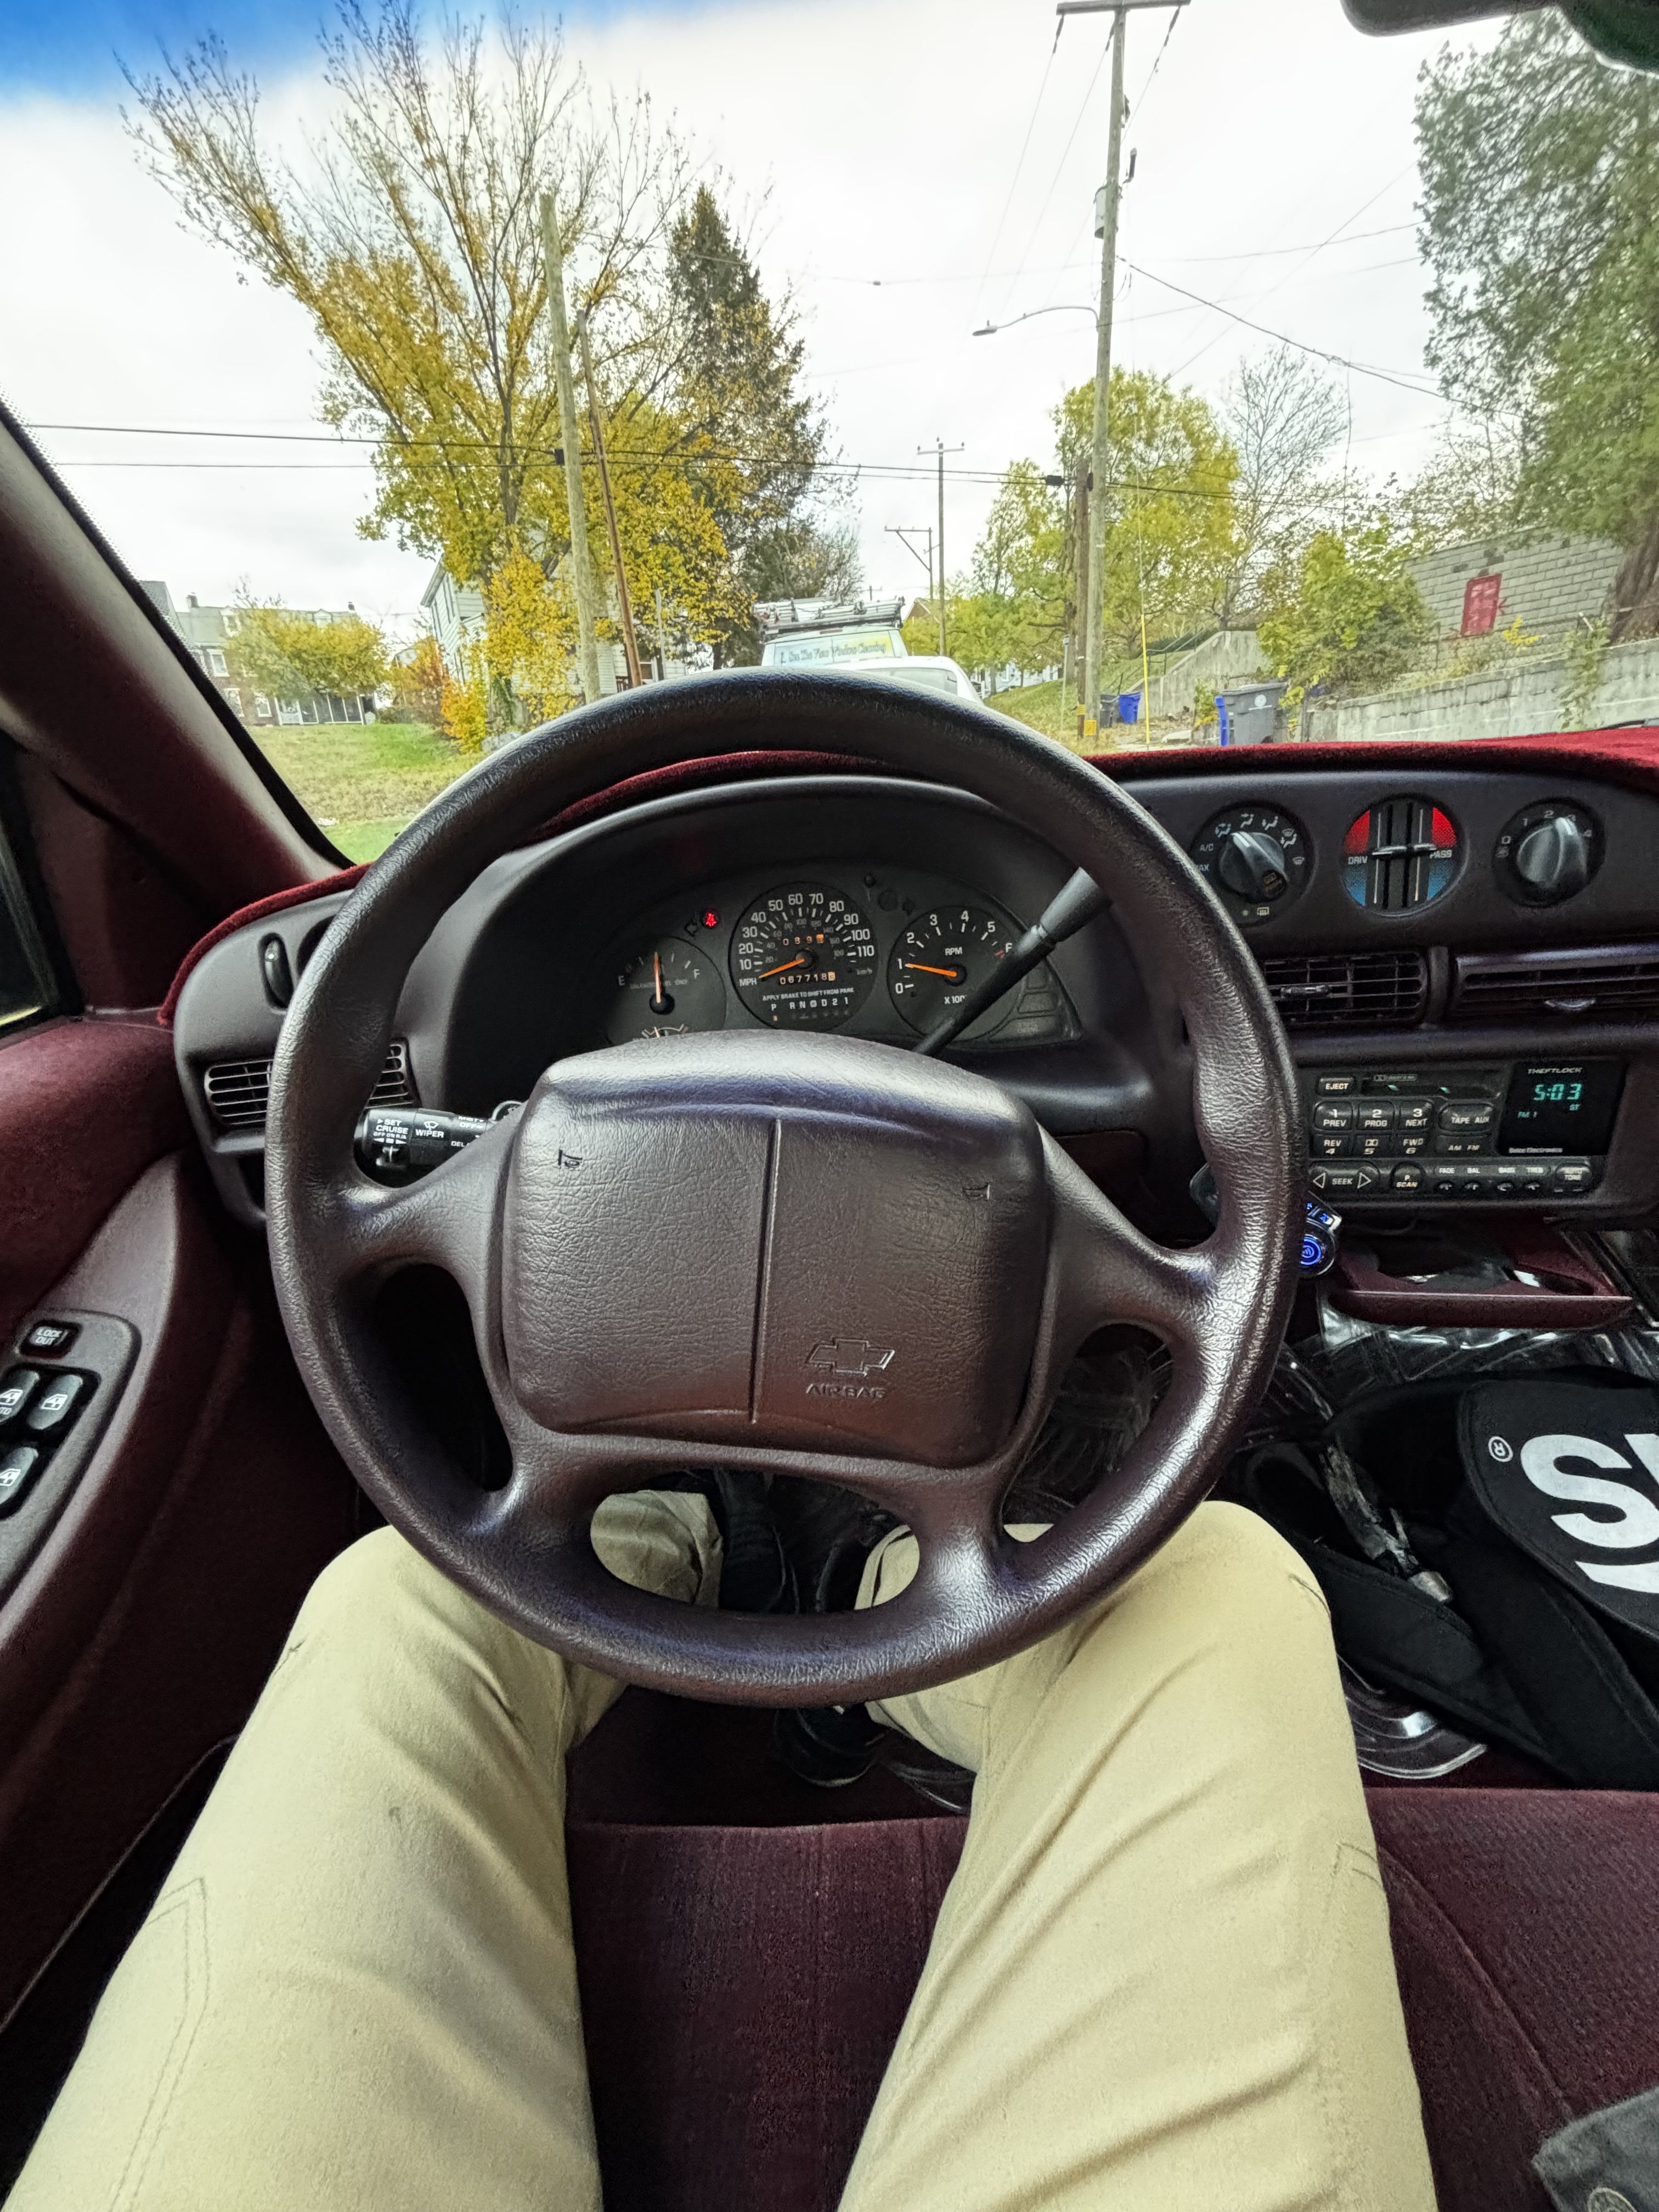
 5 points
 -

1988 MW with John Davis discussing the GM10 coupes
92Lumi and 4 others reacted to 94 olds vert for a topic
5 points -
Brake upgrade completed
GnatGoSplat and 4 others reacted to 55trucker for a topic
Well, I completed my front brake upgrade, gone are the 10 1/2" rotors & in their retired place are a pair of 12" rotors. My approach for this was to maintain the original W calipers & just install larger dia rotors in the same manner that GM did when replacing the 10 1/2" rotors with 11 1/4" rotors. The W calipers are more than adequate on their own merits. The 11 1/4" calipers are pushed further out from center by a later design in the caliper bracket adapter. Seeing as I didn't want to purchase & then alter the 95-96 adapters I reconfigured what I had on the car. To do this alteration one has to remove the adapter that is welded to the steering knuckle. One has to cut away the outer section of the *ears* that the caliper bracket is bolted to. I sourced a length of 1/4"x2"x 12" A36 hot rolled mild steel flatbar, this bar is already stronger than the stamping of the adapters & the flatbar is thicker than the adapter by .050 thou. Starting with the drivers side which being done 1st served as the guinea pig for any mistakes I know I would make. I cut off the adapter, gave it a blasting, laid it out on a workbench & proceeded to mock up what the new longer *ears* would look like to get what was needed. Out of the 12" of flatbar I cut 4 *ears* each the same size, from there I laid out on each one the location where I would need to drill the 9/16 hole for the thru bolt. The *ears* have to be shaped into a circular manner on their edge so as to fit into the valley on the backside of the caliper brackets & be able for me to pivot them to get the appropriate angle before tacking them to the adapter. This mod requires that the new *ears* be overlaid onto the backside surface of the adapter. The new rotors *hat* is 1/4" deeper than the original rotor so the need for 1/4" flatbar to move the caliper back inward to get the proper location for the new rotors. Now the adapter has to be fastened back into place on the knuckle behind the hub assembly, install the new rotor onto the hub & lock it into place with a couple of wheel nuts, bolting loosely the *ears* to the cast caliper bracket I can now place the bracket over the rotor to get an approx location where the position will be that is the same as the original caliper was placed. I now install the caliper & the new pads into the bracket & slide the entire assembly over the new rotor, getting an accurate height position for the caliper on the rotor I now need to check that all of the caliper pad is contacting the rotor face. Seeing as the 12" rotor has a larger diameter one needs to make sure that the outer edge of the rotor will clear the inside edge of the stationary bracket but get all of the caliper pad on the rotor surface. I had to remove the brackets & mount them into a bench vise an carefully remove approx .030 tho of surface inside the very upper edge of the upper & very bottom edge of the lower portion to expand the radius to get the needed rotor clearance as it spins inside the stationary bracket. After doing this I can now reinstall the assembly, position the assembled caliper & bracket, position the new *ears* over the cut off ends of the adapter, tighten down the bolts to hold the *ears* where I want them & now tack the upper & lower *ear* into position. I repeated this same procedure for the right side but it went much faster seeing that after completing the left side I now have a template use for the right side. The welding was simple, remove everything from the car, bolt the cast caliper bracket to the adapter to prevent the adapter from warping while welding, mount them into a vise and run the beads, a flat downhand is best for this, the 71M wire puts down a nice wide bead to get maximum coverage for strength in a single pass. This welding procedure requires a minimum of a 200 amp mig, the wire I used was a deep penetration fabrication flux core wire for argon/c02 for heavy fab work such as construction/ship building. A 70S is not recommended. After getting everything assembled back together the last thin to cover is the new rotors hub opening, the W hubs are 70mm dia, the new rotors are 71 mm opening, this means that a 1mm shim is required to slide into the center of the rotor to properly center it over the hub. This was relatively easy, I pick up some 1mm stainless sheet steel & cut two shims 1/4" wide & to length & slipped them into the center of the rotor around the hub stub, then slide the rotor onto the hub. Worked perfect. It's been 2 weeks now since completion, after bedding in the new pads I have done some mild to moderate brake stops, working up to a few panic stops. The difference is instantly noticeable. The car just hauls down to a stop in a much quicker, shorter amount of time. Now since a few years ago when I did the booster upgrade the pedal feel at that time was instantly changed. Going from a hard, less than desirable *no assist* feel to a one can literally stop the car by using ones hand on the brake pedal, the booster supplies so much assist the pedal is like a feather to press. The pads because of their shape do not cover the entire rotor contact face, approx 70% of the rotor surface is made use of & that's the outer portion of the rotor. I have to believe that the smaller 11 1/4" rotors see this as well, not having had any in my hands to compare the contact area with the 10 1/2" rotors I'm pretty sure that THOSE rotors may have a larger dia hat area that reduces the contact area to something similar to the 10 1/2" rotors, these Ford Crown Vic rotors have a *hat* area that is the same as the 10 1/2" rotor hat. All in all...well worth my time & effort & what did it cost me? ...the price of a pair of new rotors & pads & a length of flatbar..jpg.c4d6348e317bf2f79de33f95de565a47.jpg)
.jpg.0e61bb96673f2a83f65452fdc4a05a1d.jpg)
.jpg.faf86374a321ccd1979b46c71d014121.jpg)
.jpg.1160a1a16f045a43f9bb706b17d861cb.jpg)
.jpg.faa3ad49cb0e98fb57af02de2cee9833.jpg)
.jpg.2499ebca0f944ad096f21d7d55a6e438.jpg)
.jpg.03583582174edba078f7fdf0d9d6006e.jpg)
.jpg.56a4efaa0dfa8acfdeaf1b59bea73f25.jpg)
.jpg.6ed0ec32047bde2b9a2fe658b86d536e.jpg)
.jpg.9de49998adeeee03fbb7af7bef36f6f8.jpg)
.jpg.5deadf0cce8c646a017ef6d4c0adde97.jpg)
.jpg.9b80a75b67e9357769866c3d5322f430.jpg)
.jpg.baa09a4659642dbc0124eb156ff12aee.jpg)
.jpg.1585e0611eff3ca984dd2eda87e828f8.jpg)
.jpg.3e99bac60b306bccf08afd7fc5f023ca.jpg)
.jpg.1dddd8e640c1dc894f11ba6d7019134e.jpg)
.jpg.38031f65f77090da5984152b5149054b.jpg) 5 points
5 points -
TGPForums.com Future
primergray and 4 others reacted to LukeZ34 for a topic
TGPforums.com is now working again. It is still in archive status, meaning no new member registrations are allowed, but the forum is searchable without the need for a registered account.5 points -
OIL LEAK - 1994 Cutlass LQ1
primergray and 4 others reacted to bluecalais79 for a topic
UPDATE: Got the car back yesterday. A fantastic job was done by the mechanic. Maybe it's just me but the motor seems to be quieter and it's running much better, must be all those new intake gaskets(?). I checked this morning, there is no more oil coming from the oil pump drive, so it looks like the RTV will probably hold. Unfortunately the car is still leaking oil, coming from the lower part of the motor. Not anywhere near as bad as it was though, so for now it will be something I can live with. They also cleaned the engine compartment out of all the oil & grease, changed the oil, and installed a new EGR replacing the original one. Thanks to all for the advice on this one, this is one less major issue this LQ1 now has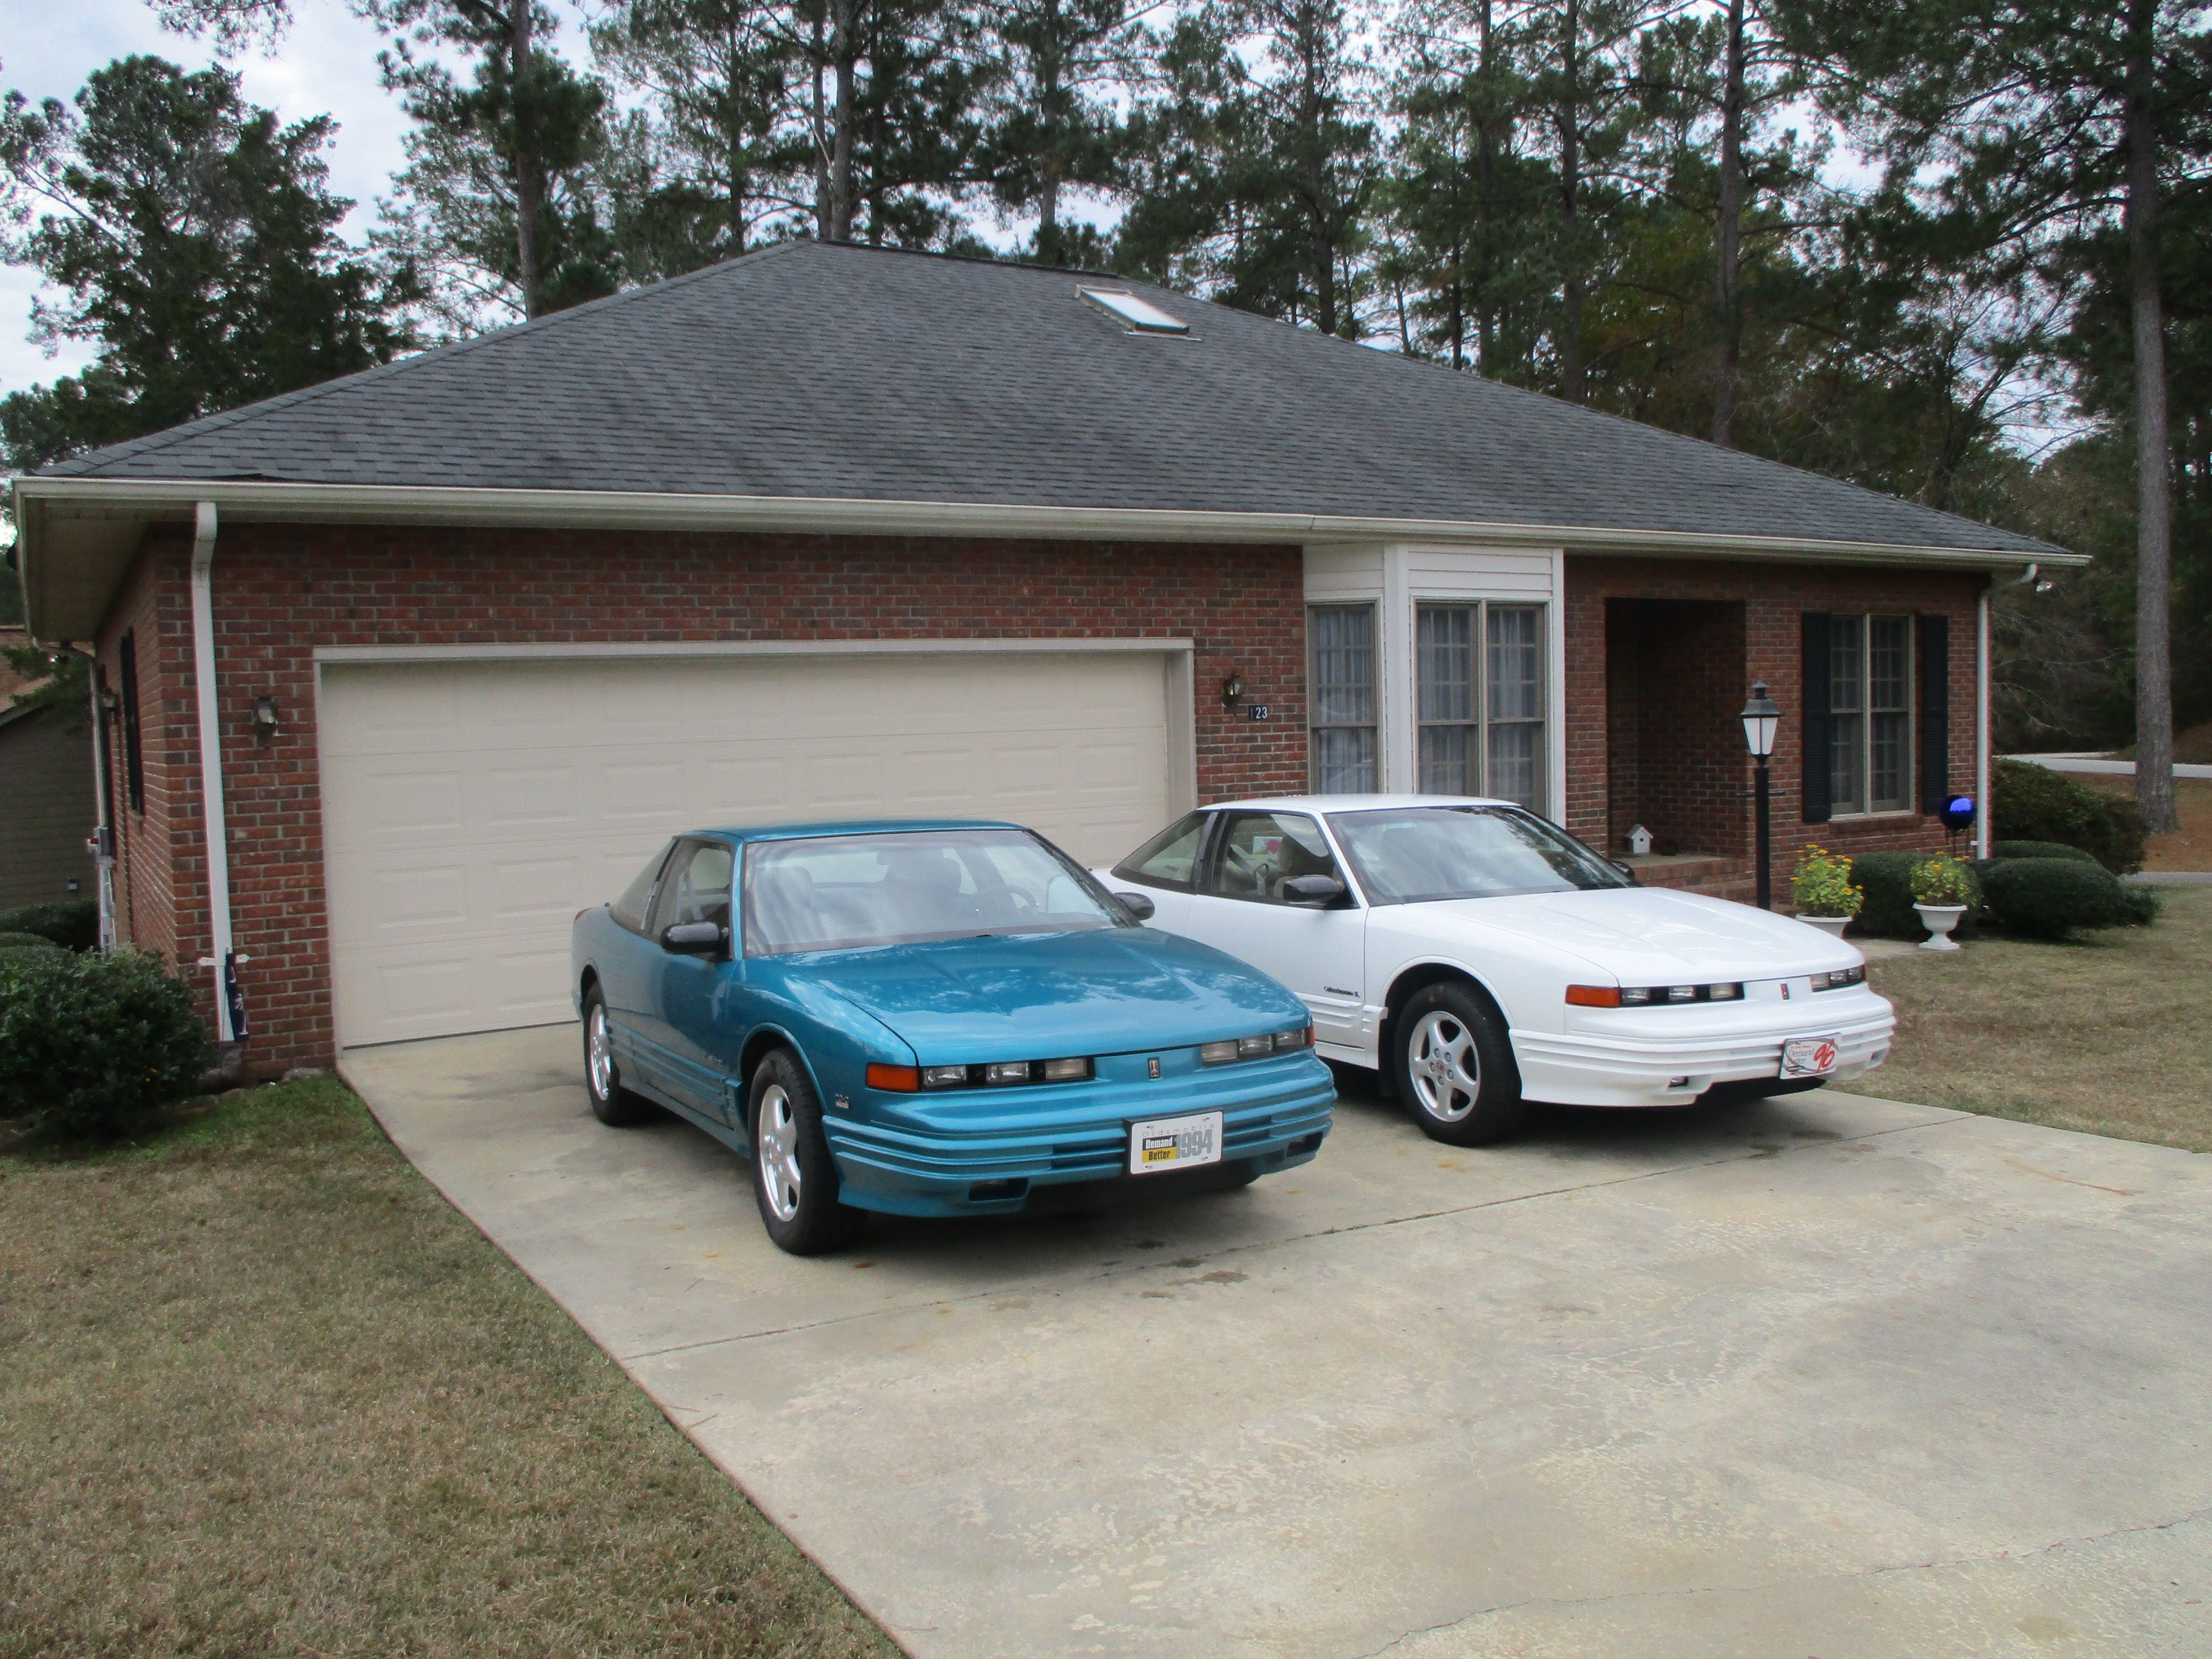 5 points
 -

Old to W body's, new to this forum
SuperBuick and 4 others reacted to AWBODYGUY for a topic
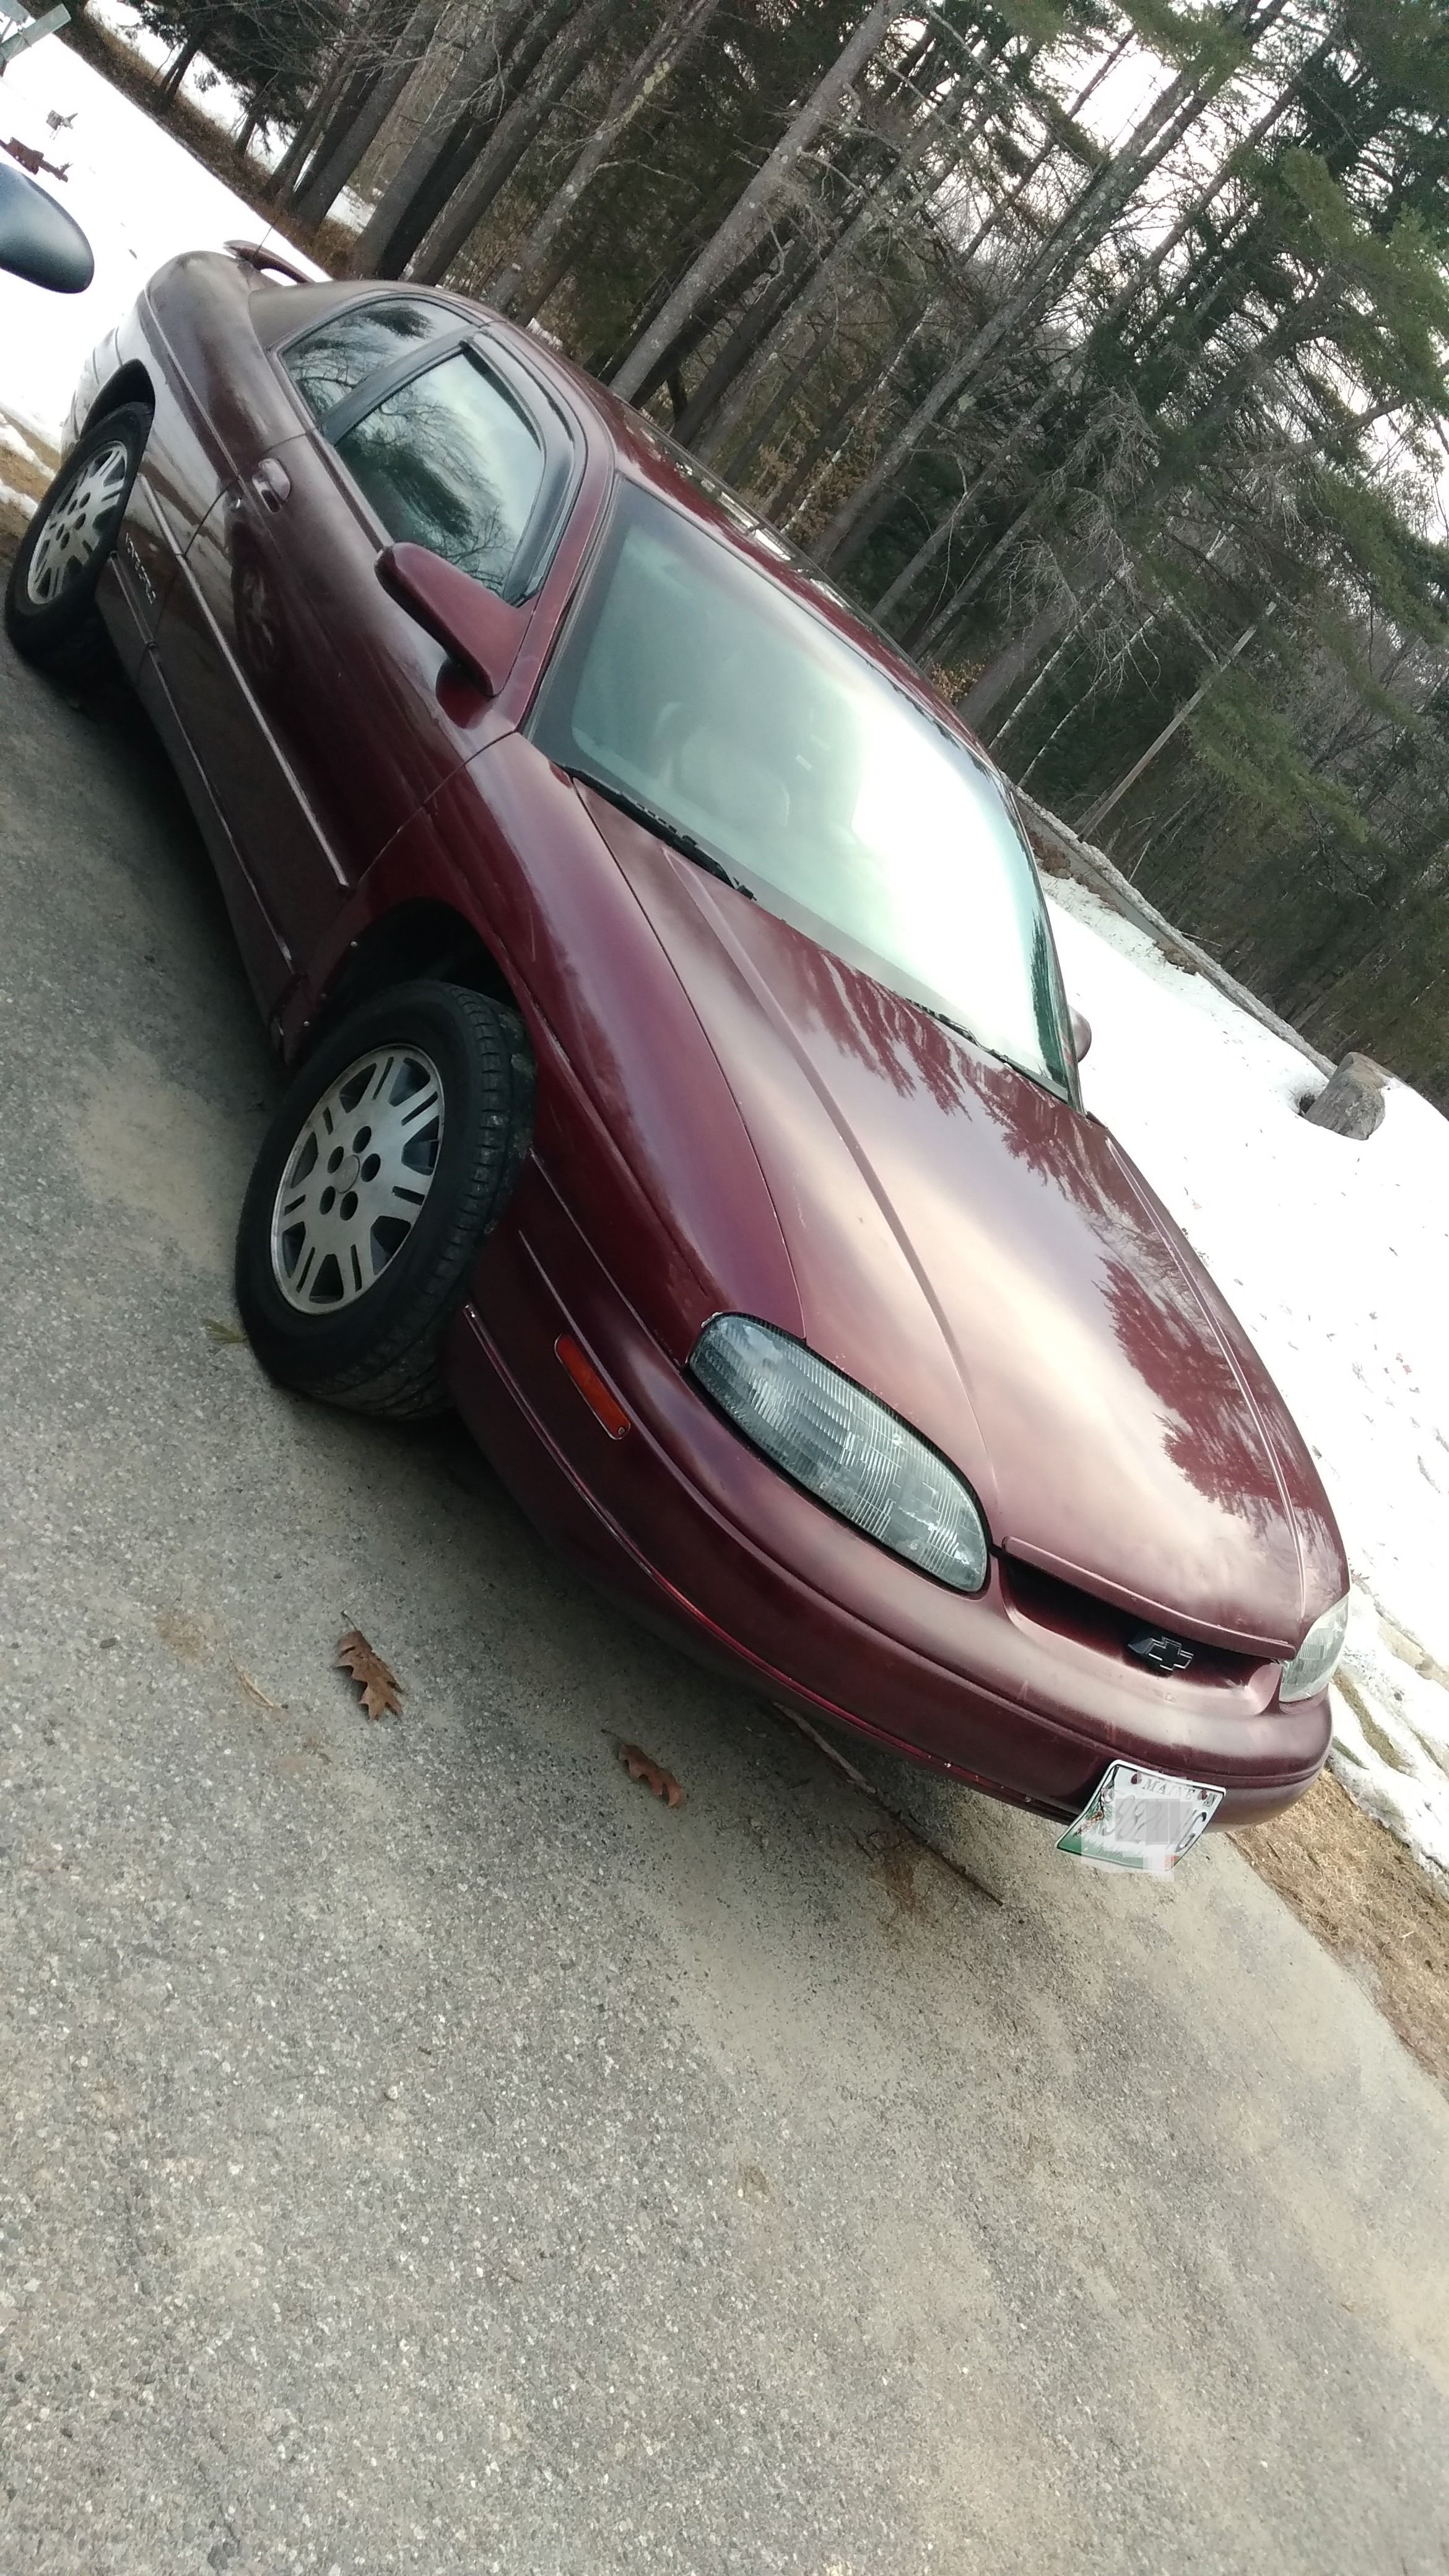
Good day, I have been a W body enthusiast since high school 04. In my student parking lot, we had a 93 Gran prix, 94 olds cutlass supreme, 94 cavalier z24, 95 monte, and my lumina z34. These cars were everywhere! My first car was a 94 lumina z34 (still have it). In 2012 I put a 4.9 PFI in it and it is almost complete. I just need to replace the rear suspension and odds and ends. I have a 99 Monte (needs some work), and I just picked up a decent (needs some work) Cutlass supreme. I am buying a new top for the cutlass on Friday. I want to get black canvass instead of the white (the car has black leather interior). They come in black, grey, white, red. What do you all think would be the best color? Just curious. Very few of these ole buggies still around (at least in my area). I thought I would join the forum to see what you all are up to (I feel very late to the party). I already have seen some super nice examples of these cars (nice job everyone!). Ill post more as spring hits and I can get them out, and work on them more. Also, not adverse to loading them up on the trailer for any meets that might happen. Thank you! Hope you all have a wonderful day!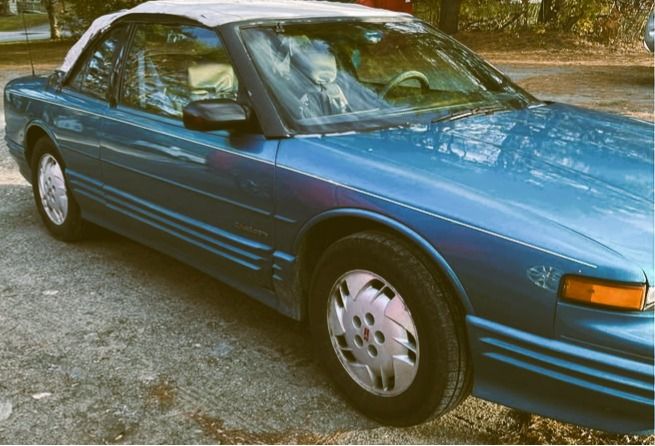
 5 points
 -

1988 MW with John Davis discussing the GM10 coupes
92Lumi and 4 others reacted to Schurkey for a topic
What they liked the best: The brakes. What folks complain about the most on this site: The brakes. I've said it before, I'll say it again: The biggest problem with Gen 1 brakes is not the brakes per se, it's the brake booster.5 points -
New to this place. Hello.
GarrettLowell and 3 others reacted to Aceknox23 for a topic
Hi, I have a 92 Chevy Lumina Z34 automatic with the V6 DOHC. It's all stock. I am new to fixing cars and got it a year ago. Any tips or suggestions is appreciated. The current thing I'm working on it wiring and brakes.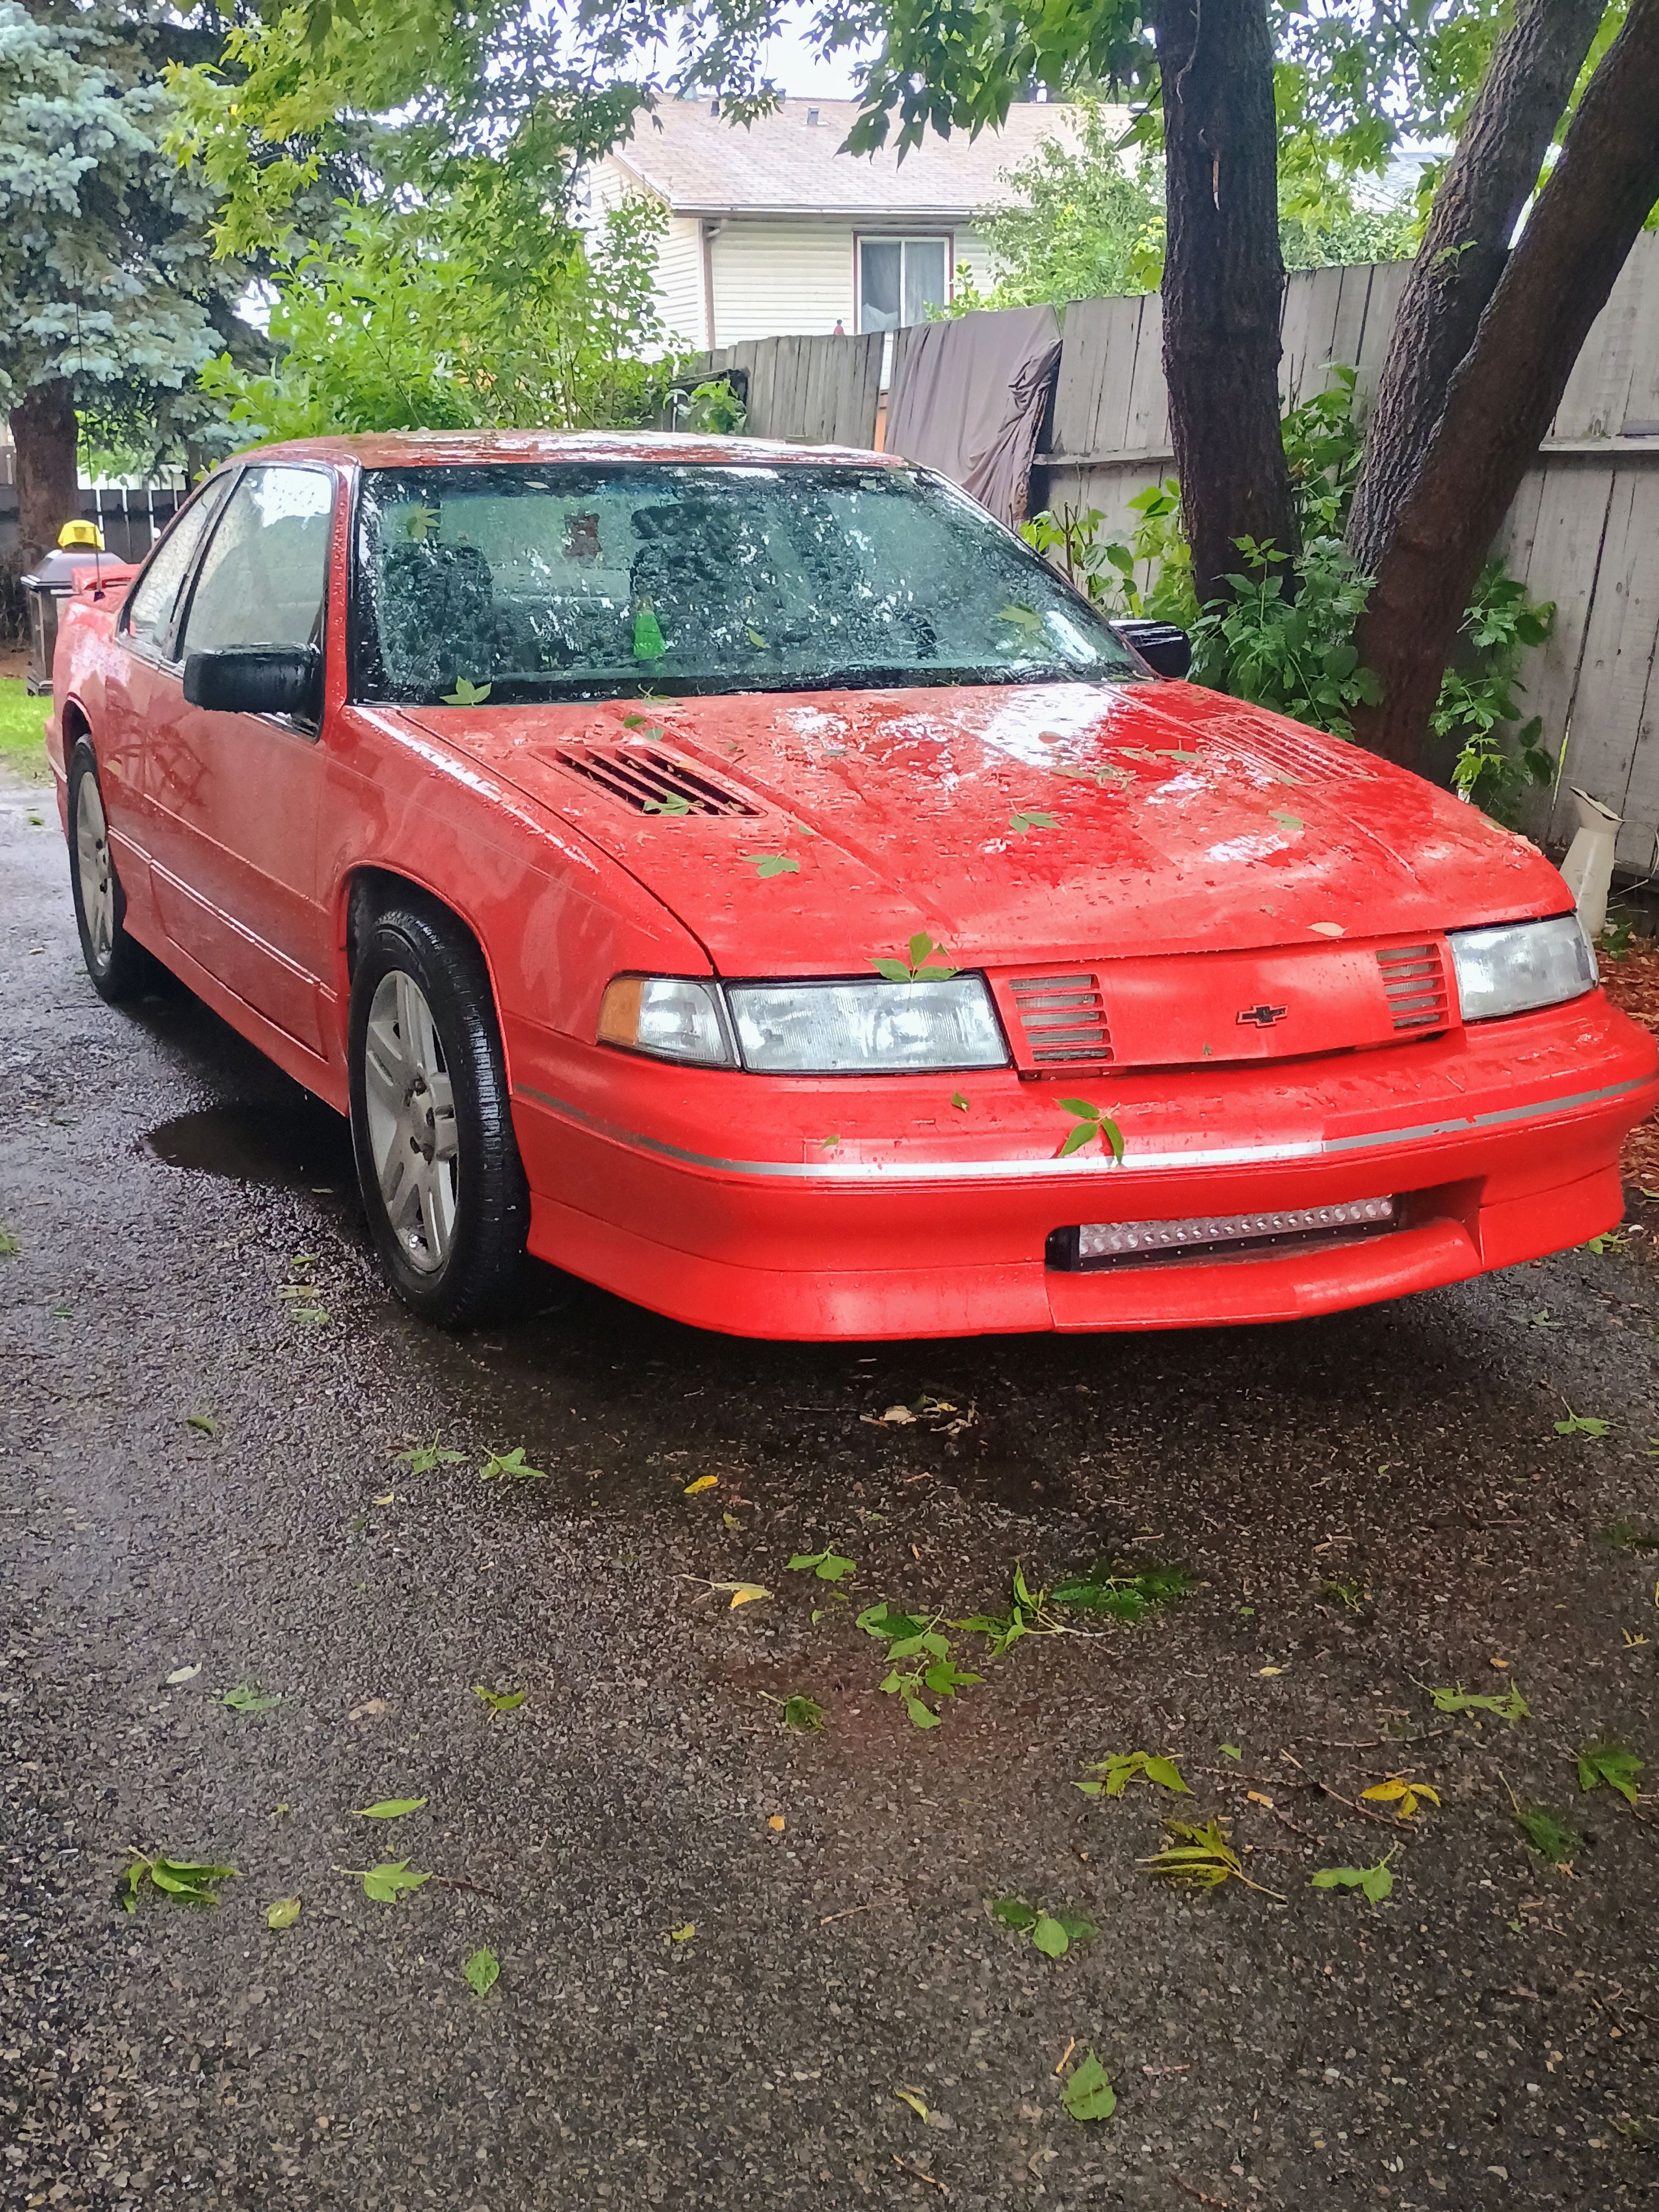 4 points
 -
OIL LEAK - 1994 Cutlass LQ1
primergray and 3 others reacted to bluecalais79 for a topic
DOUBLE UPDATE - some really great news to report here. I was hoping for this and it just might be coming true..........I have been monitoring the amount of oil dripping in my flat pan since the return of the car, and its getting less and less. It may just be this was residual oil already on places on the motor that were not able to be wiped off, and I just might something here, an almost non-oil leaking LQ-1. Even the wife noticed how well the car is running, and if she notices, now that can't be bad, can it...........4 points -

Old to W body's, new to this forum
RPE1992GPSE and 3 others reacted to GnatGoSplat for a topic
Welcome! I think black top will look great on it. Better late than never! Not as bustling as it was back in the day, but there's a few of us W-body old timers left. I wouldn't mind seeing pics of the 4.9L in a W-body.4 points -
Old to W body's, new to this forum
RPE1992GPSE and 3 others reacted to 94 olds vert for a topic
anyways, welcome to the site. 4 points
 -
New here with a 03 Monte Carlo SS
GnatGoSplat and 3 others reacted to rc_customsli for a topic
Hey everyone, My name’s Ryan, I’m from Long Island, NY, and I’m new to the Monte Carlo platform. I recently picked up a 2003 Monte Carlo SS and I’m excited to finally start a build thread and be part of the community. By trade I’m a licensed marine engineer, so I’m very hands-on mechanically and enjoy learning the technical side of things. On the automotive side, I’ve worked on and tuned a variety of platforms, everything from basic bolt-ons and wiring to full tuning using HP Tuners, Hondata, and standalone setups. I enjoy both the mechanical and tuning sides of builds and documenting the process. For the Monte, the plan is to start simple, catch up on maintenance, fix worn components, and do some basic bolt-ons while I sort out the body and cosmetics. Once the chassis and body are in better shape, the goal is to turn things up. I’m currently torn between a Gen V M90 top swap or going turbo, but either way the end goal is a "reliable", fun street car that still rips when you get into it. I’ll be sharing progress, asking questions, and learning as I go. Looking forward to seeing everyone’s builds and being part of the community.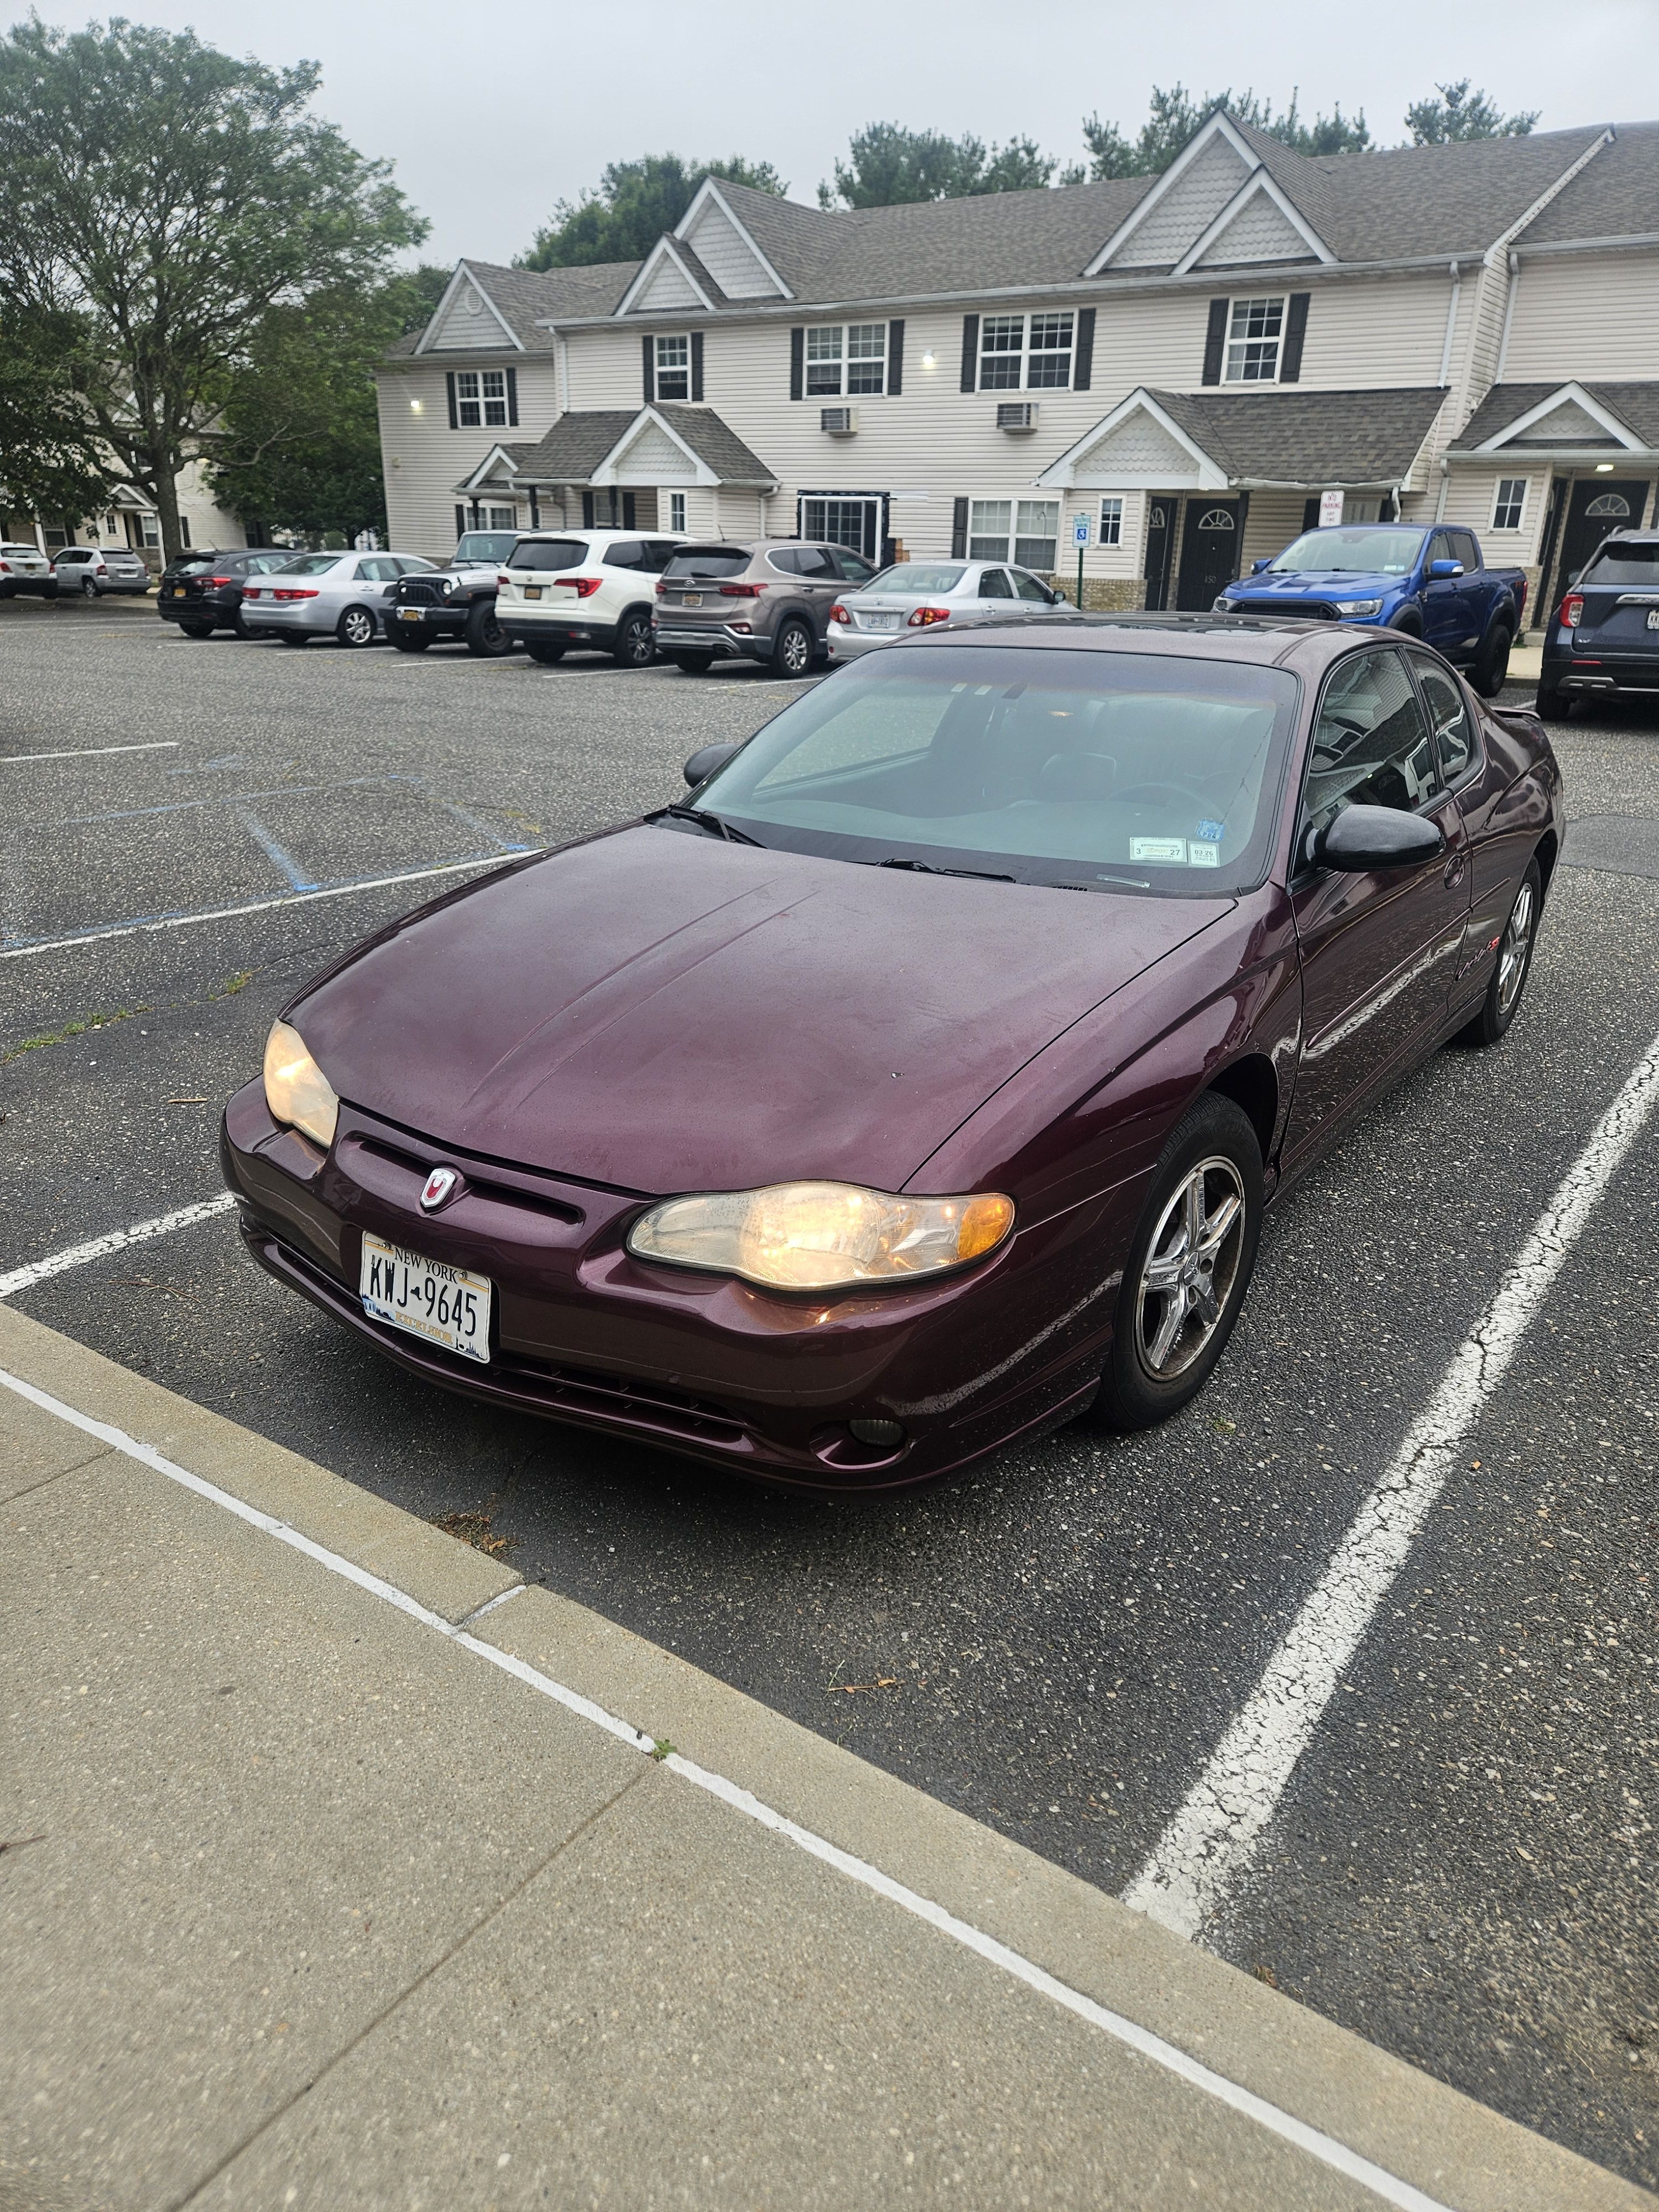
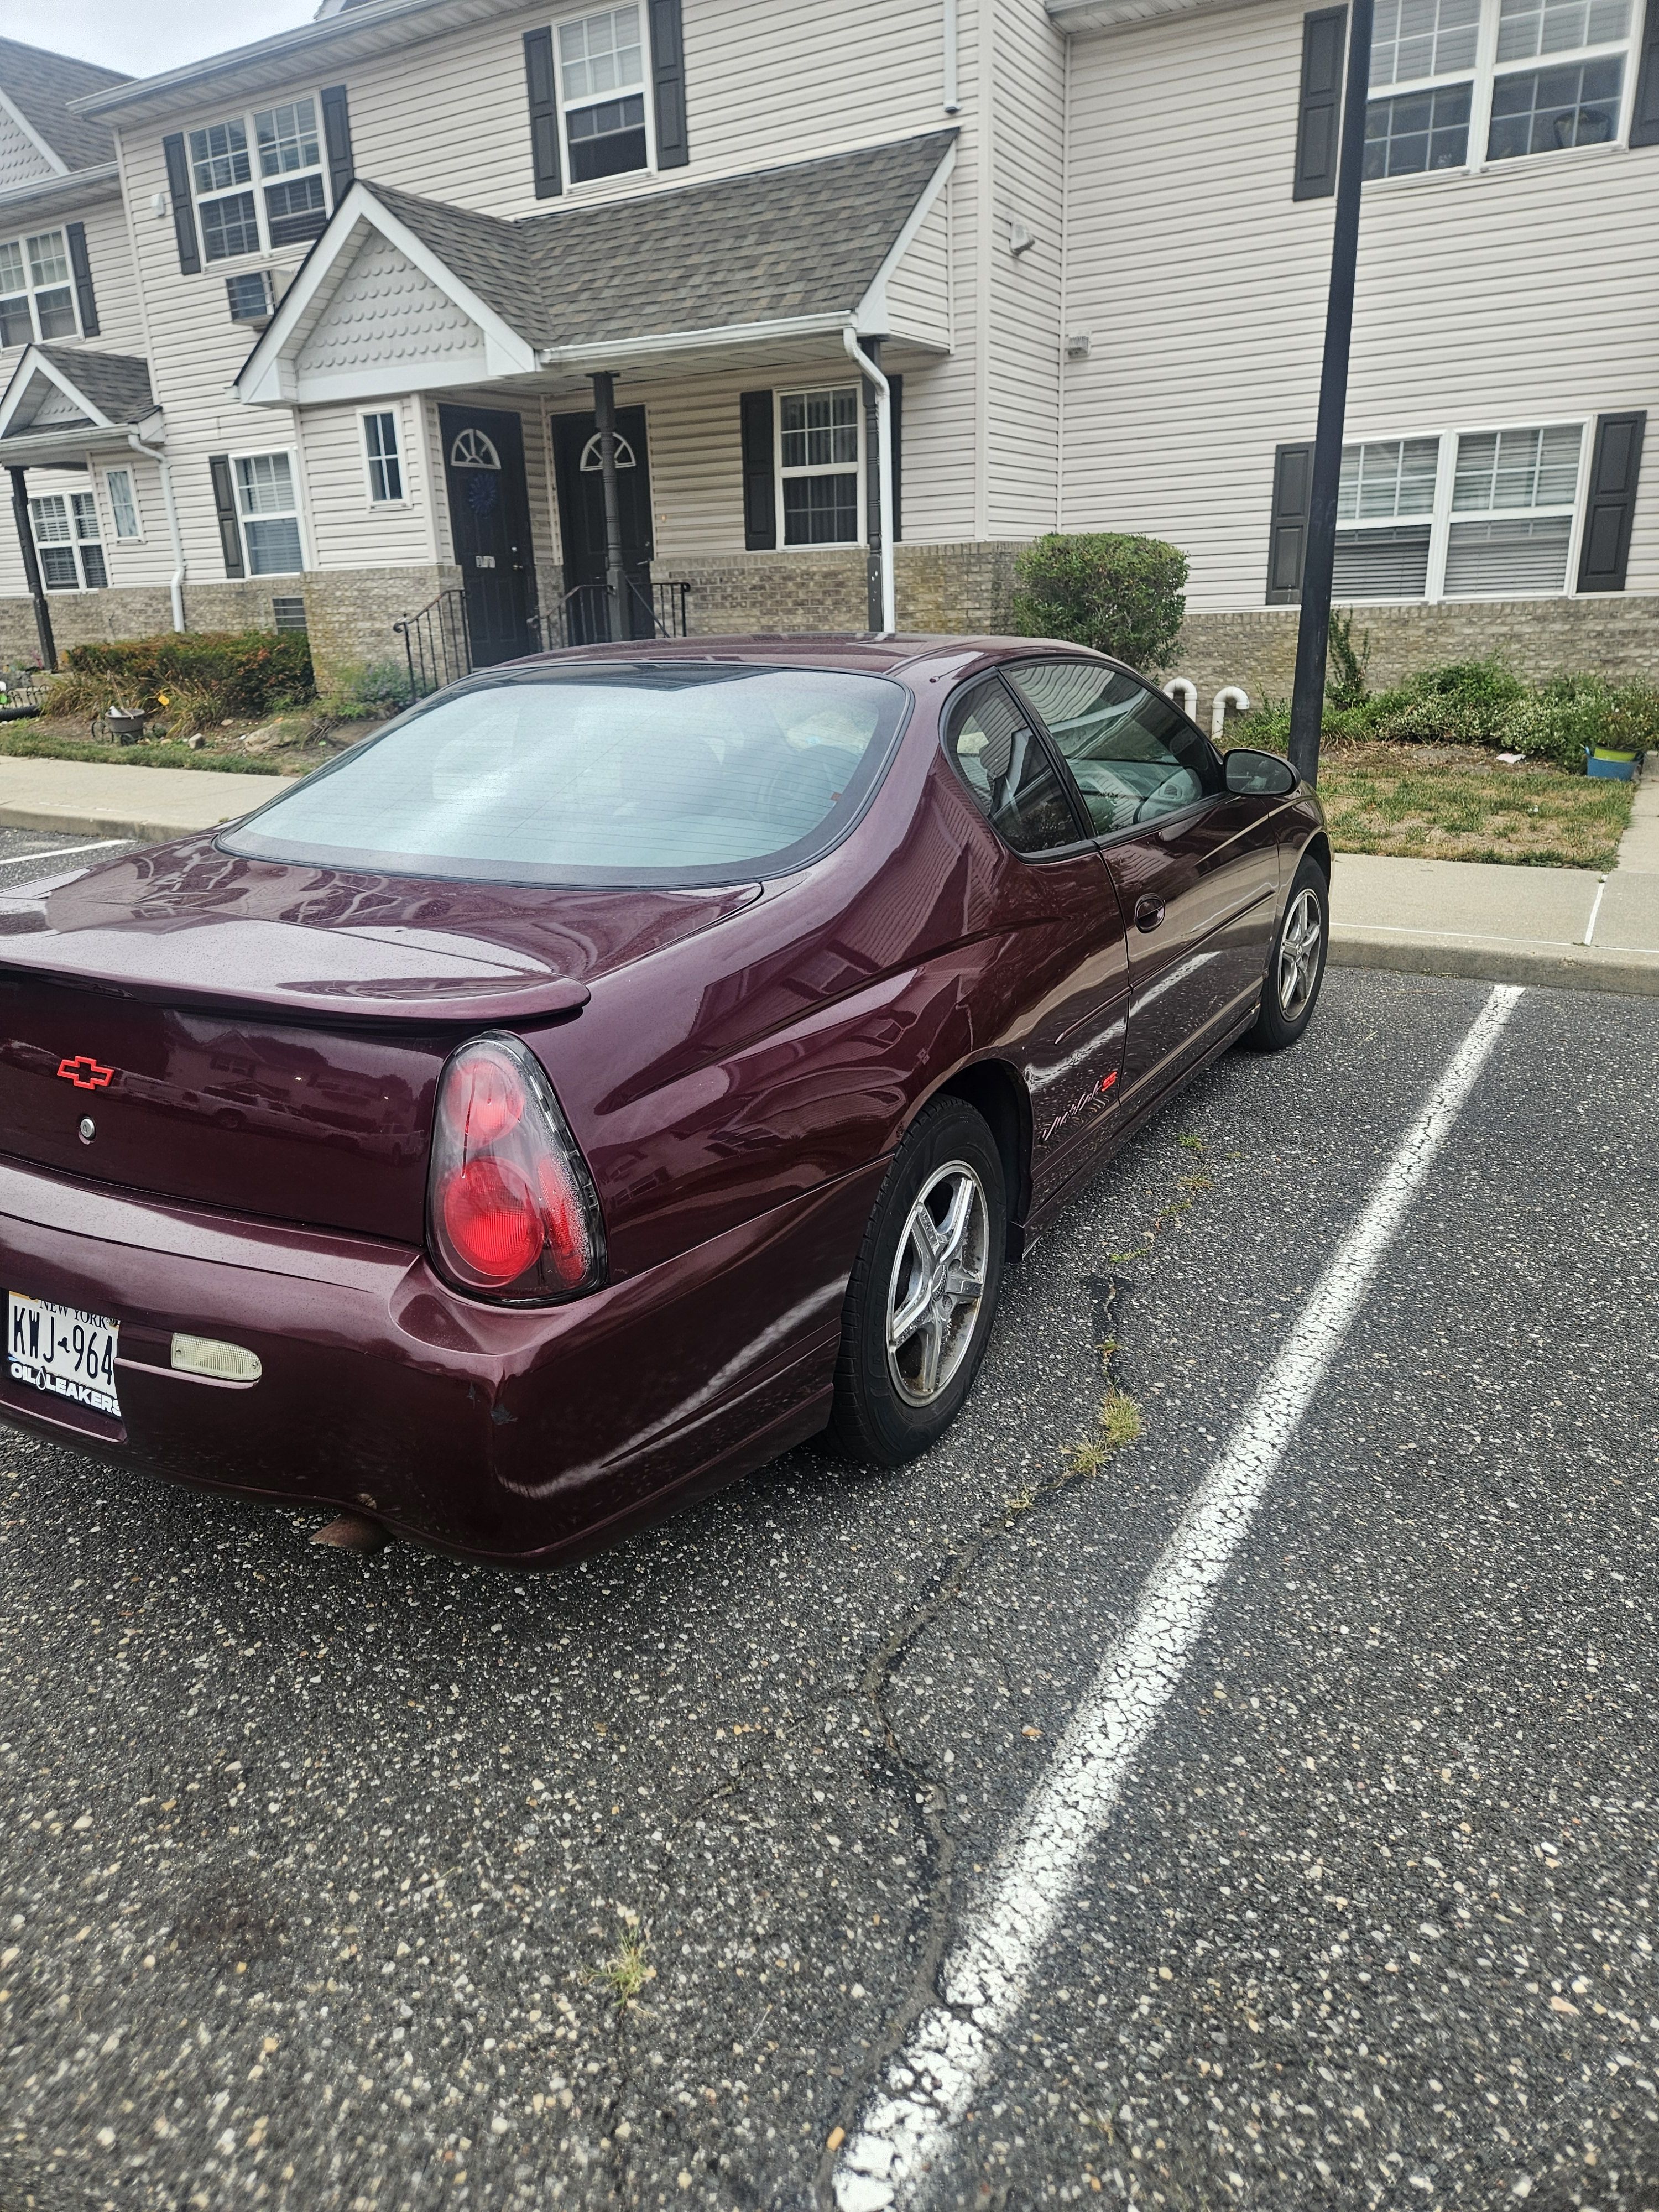
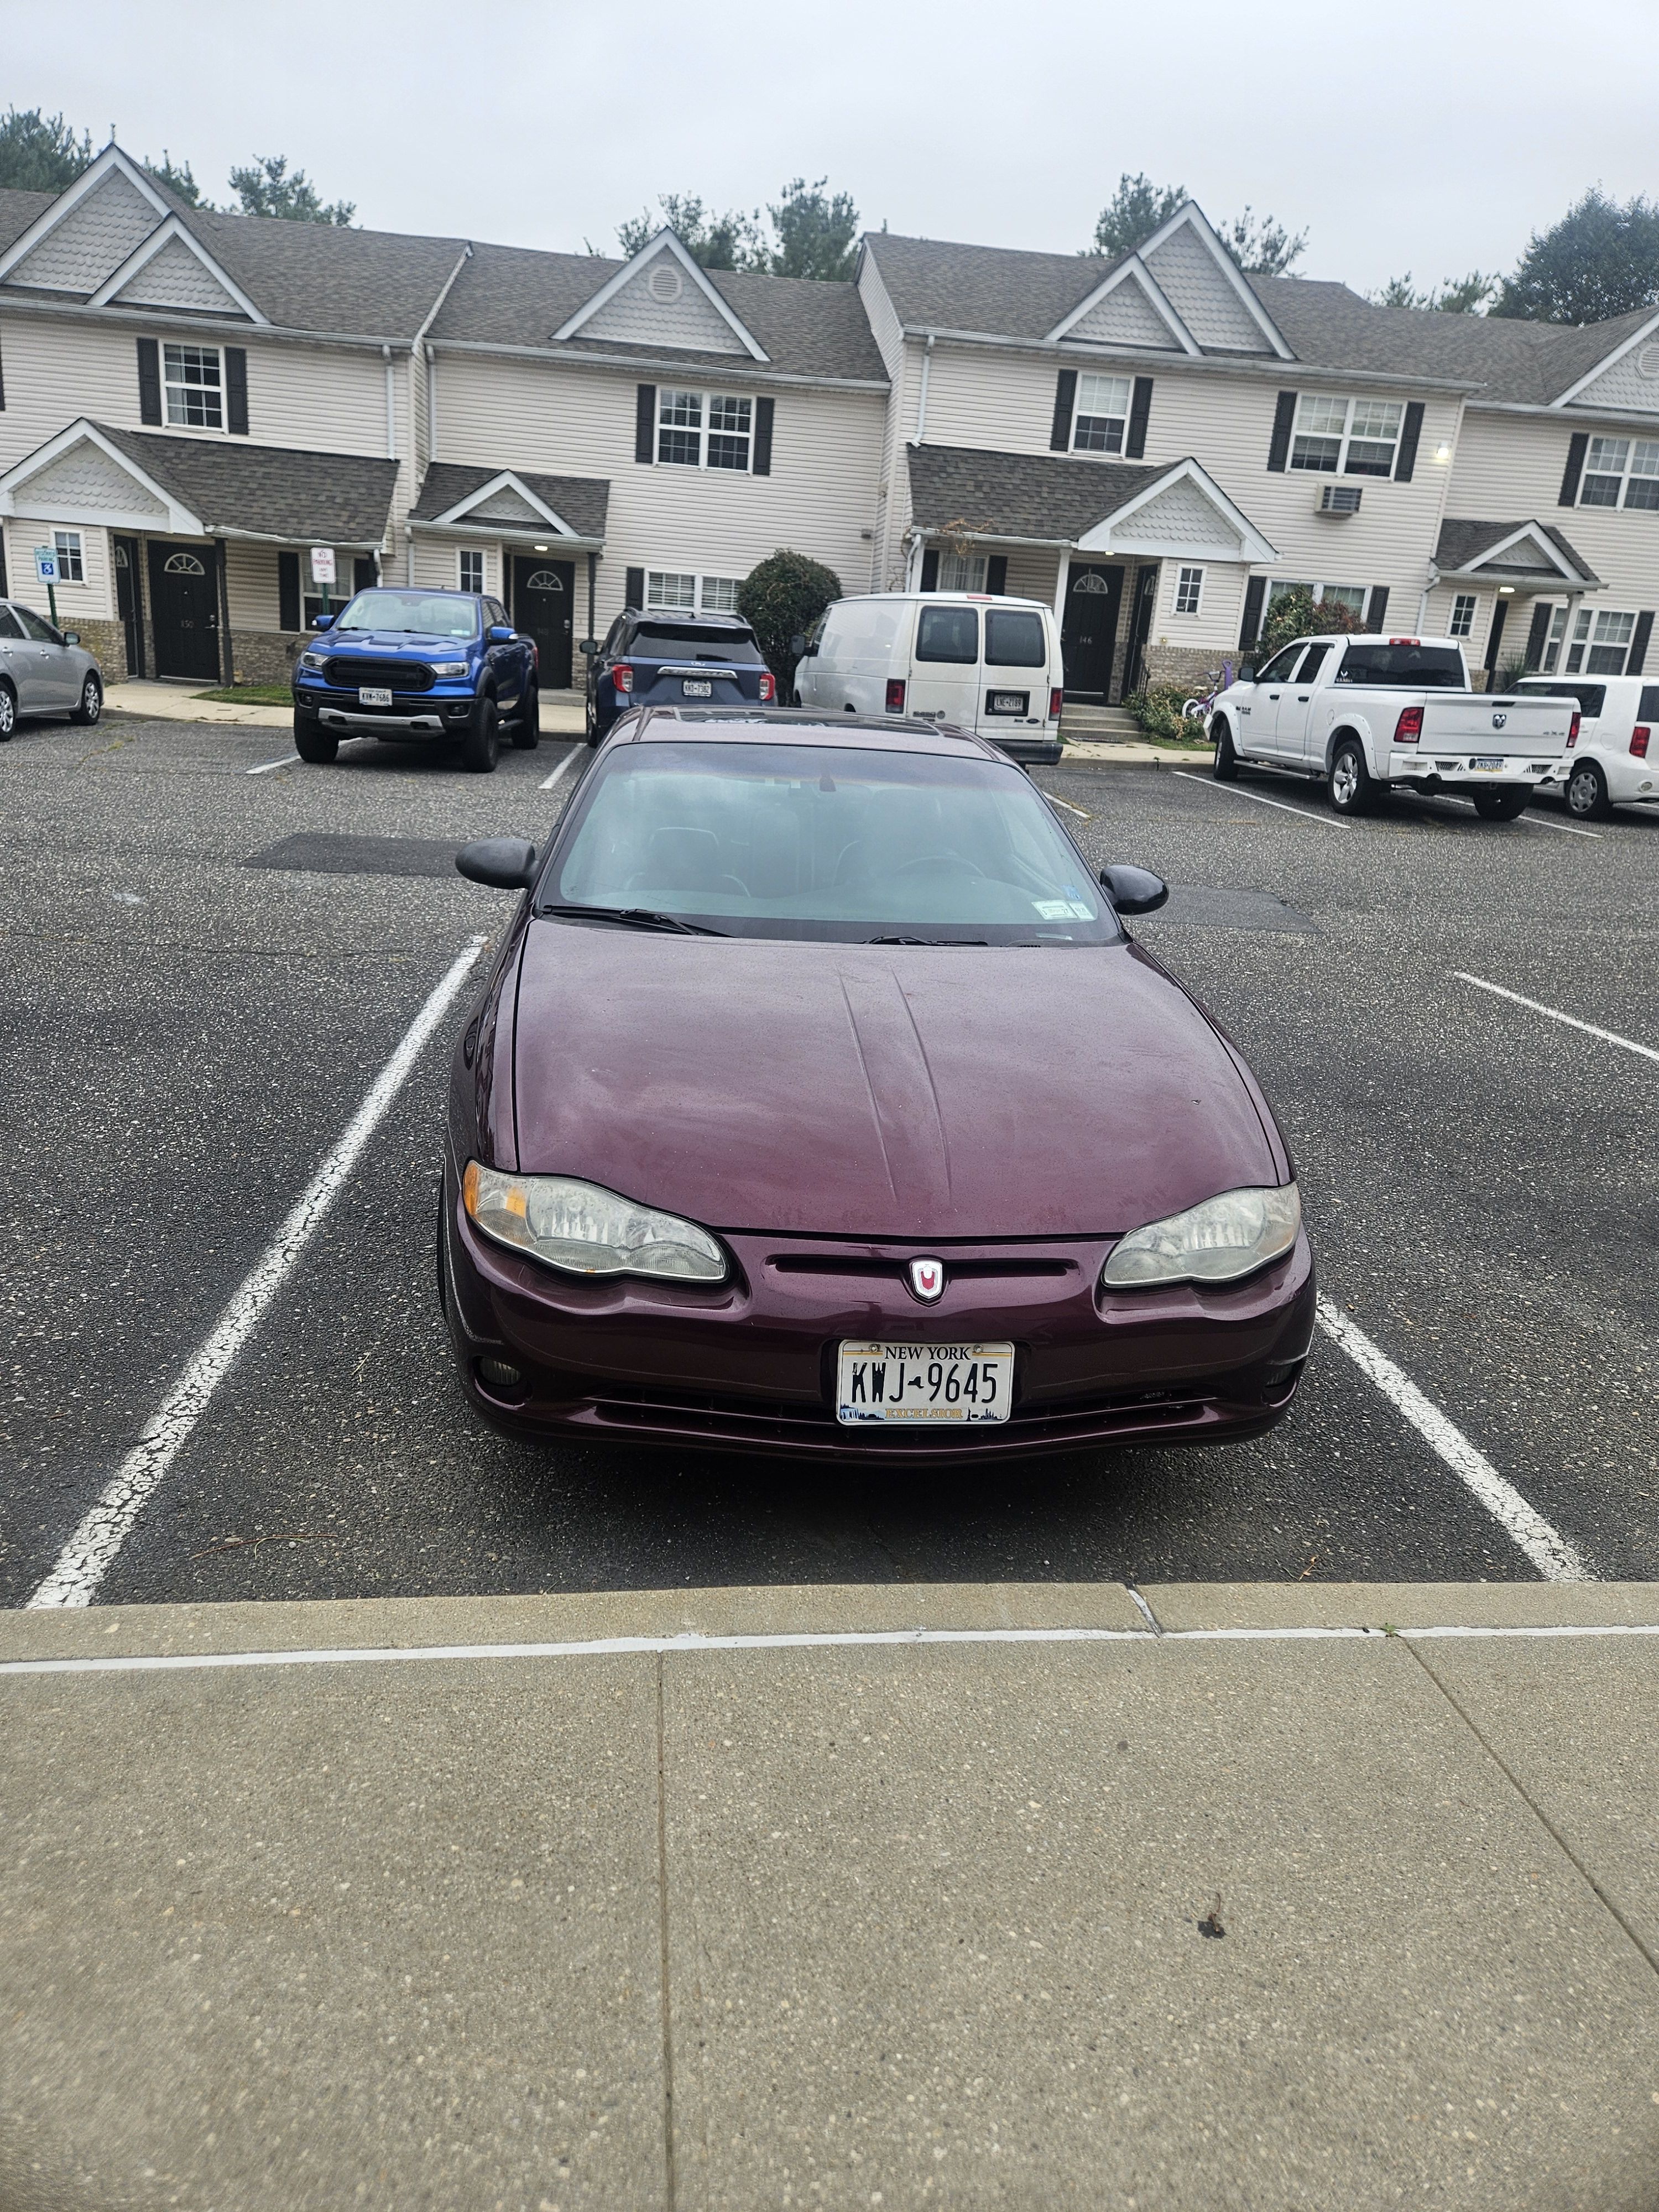 4 points
 -
3.8sc swap into 94 Oldsmobile cutlass Supreme convertible
GnatGoSplat and 3 others reacted to 55trucker for a topic
The *actuator* was discontinued approx 20 years ago.......finding an NOS piece would be a challenge. The item IS serviceable..........4 points -
1988 MW with John Davis discussing the GM10 coupes
92Lumi and 3 others reacted to Black92GS for a topic
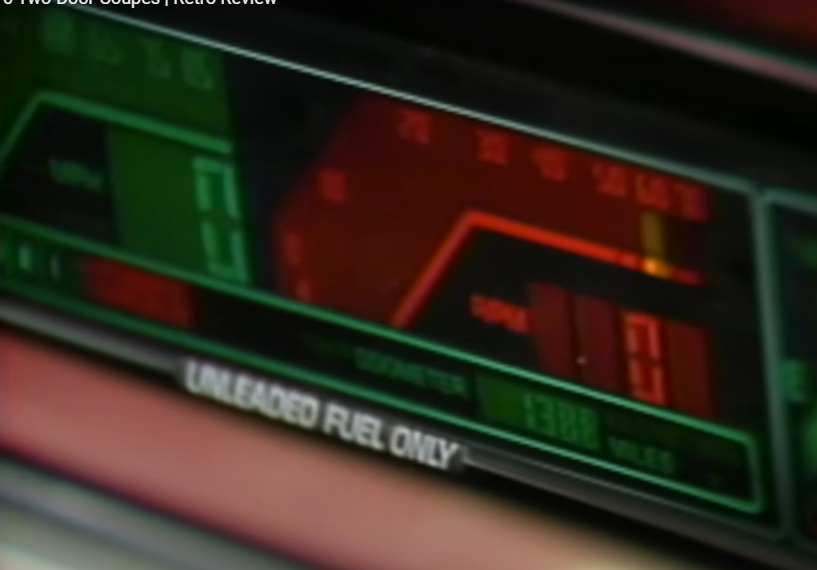
Gotta love that quality 80s GM fit and finish! And that Regal is very oddly equipped. Bench seat, manual locks and windows, no rear reading lights.....but it has alloy wheels. Then there is this: That cluster must be from a pre-production vehicle, as the tach was never red like that on any of the production ones. My old 88 Regal was a November 87 build, and the tach was green like the rest of the cluster.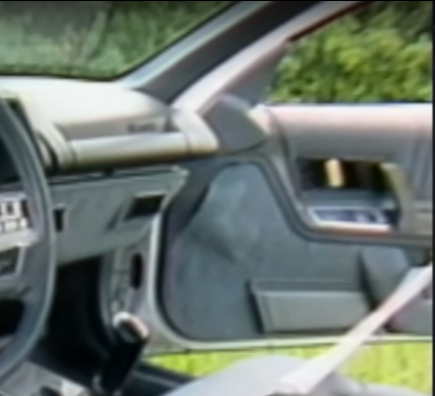
 4 points
 -
Which Turbo GP stays and which goes.
pwmin and 3 others reacted to White93z34 for a topic
Here's a picture from back when the black car was in better days.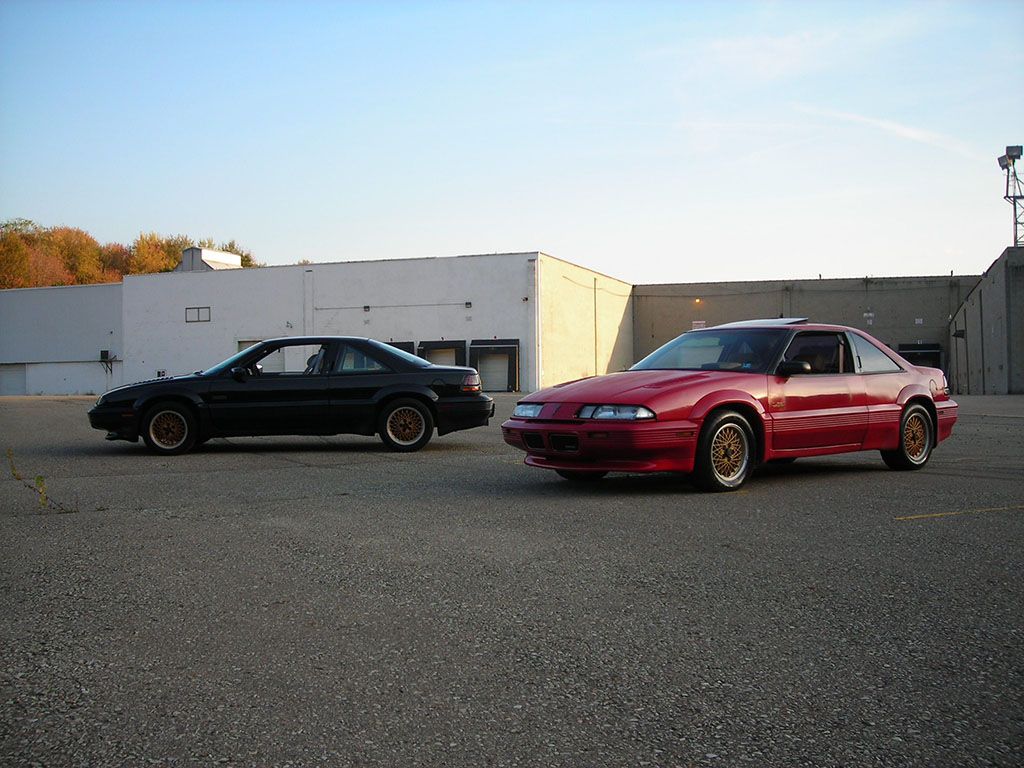 4 points
 -
Which Turbo GP stays and which goes.
primergray and 3 others reacted to White93z34 for a topic
I'll have to find some pictures. Best ones I have are from 10+ years ago when the black one was in far better shape. Long story short, engine blew up, it sat outside. Then I ended up with it and moved it to indoor storage but the time outside had already taken its toll. Right now its very dusty and sad looking and buried in the back of storage so its hard to even see it right now. Last couple weeks I've been daily driving my red one. Made me realize how much I've missed the turbo cars. I think technically speaking red/gray was the most rare color combo. If you'd have asked me years ago I'd have been on board with the gray interior all day long. Now I think the tan works with the gold wheels and badging. I'm torn because the chassis of the black car IS that much better. But I've put insane amounts of work into making the red one as good as it presently is. Not sure if rarity of the color combos really moves me like it would used to. Maybe I can use that to my advantage to get more money out of the black one. Some guy on FB wanted to buy both but wanted to pay a very small sum for them. I dono I think they tend to wear arrest me red better then black. I think whatever happens the sale of one and a bunch of parts will fund the restore of the other. I'm still very much torn as the black one when it was running really drove fantastically. I'm just rambling at this point.4 points -

Which Turbo GP stays and which goes.
primergray and 3 others reacted to pwmin for a topic
If you like the red, keep the red one. It will be easier. I would go the torturous route because I would want the black/gray cloth one. That is what I want if I can find one. Or maybe the red one and swap to the gray cloth.4 points -
Which Turbo GP stays and which goes.
GnatGoSplat and 3 others reacted to jiggity76 for a topic
For me, definitely the Black one. It being Black...and having Medium Slate Gray cloth, that is uber rare in the TGP World. You know me, rarity is a big deal and that one is definitely incredibly rare and sought after. I firmly believe that even though it's not in the better shape, you'll regret selling it later.4 points -
89 olds swaybar
Raffaelli and 2 others reacted to sadolboy48 for a topic
Alright, went and picked up the part (long drive) took a few hours to put it in. Had to take outer tie rods loose and do a WHOLE bunch of wiggle jiggle to get it fished up in there but finally got it done. Drives like a dream! Handles so much better than it ever did. The 30mm is a lot beefier than the one i had. Thank you all for all your help.3 points -
LS4 swap begins
94 olds vert and 2 others reacted to carkhz316 for a topic
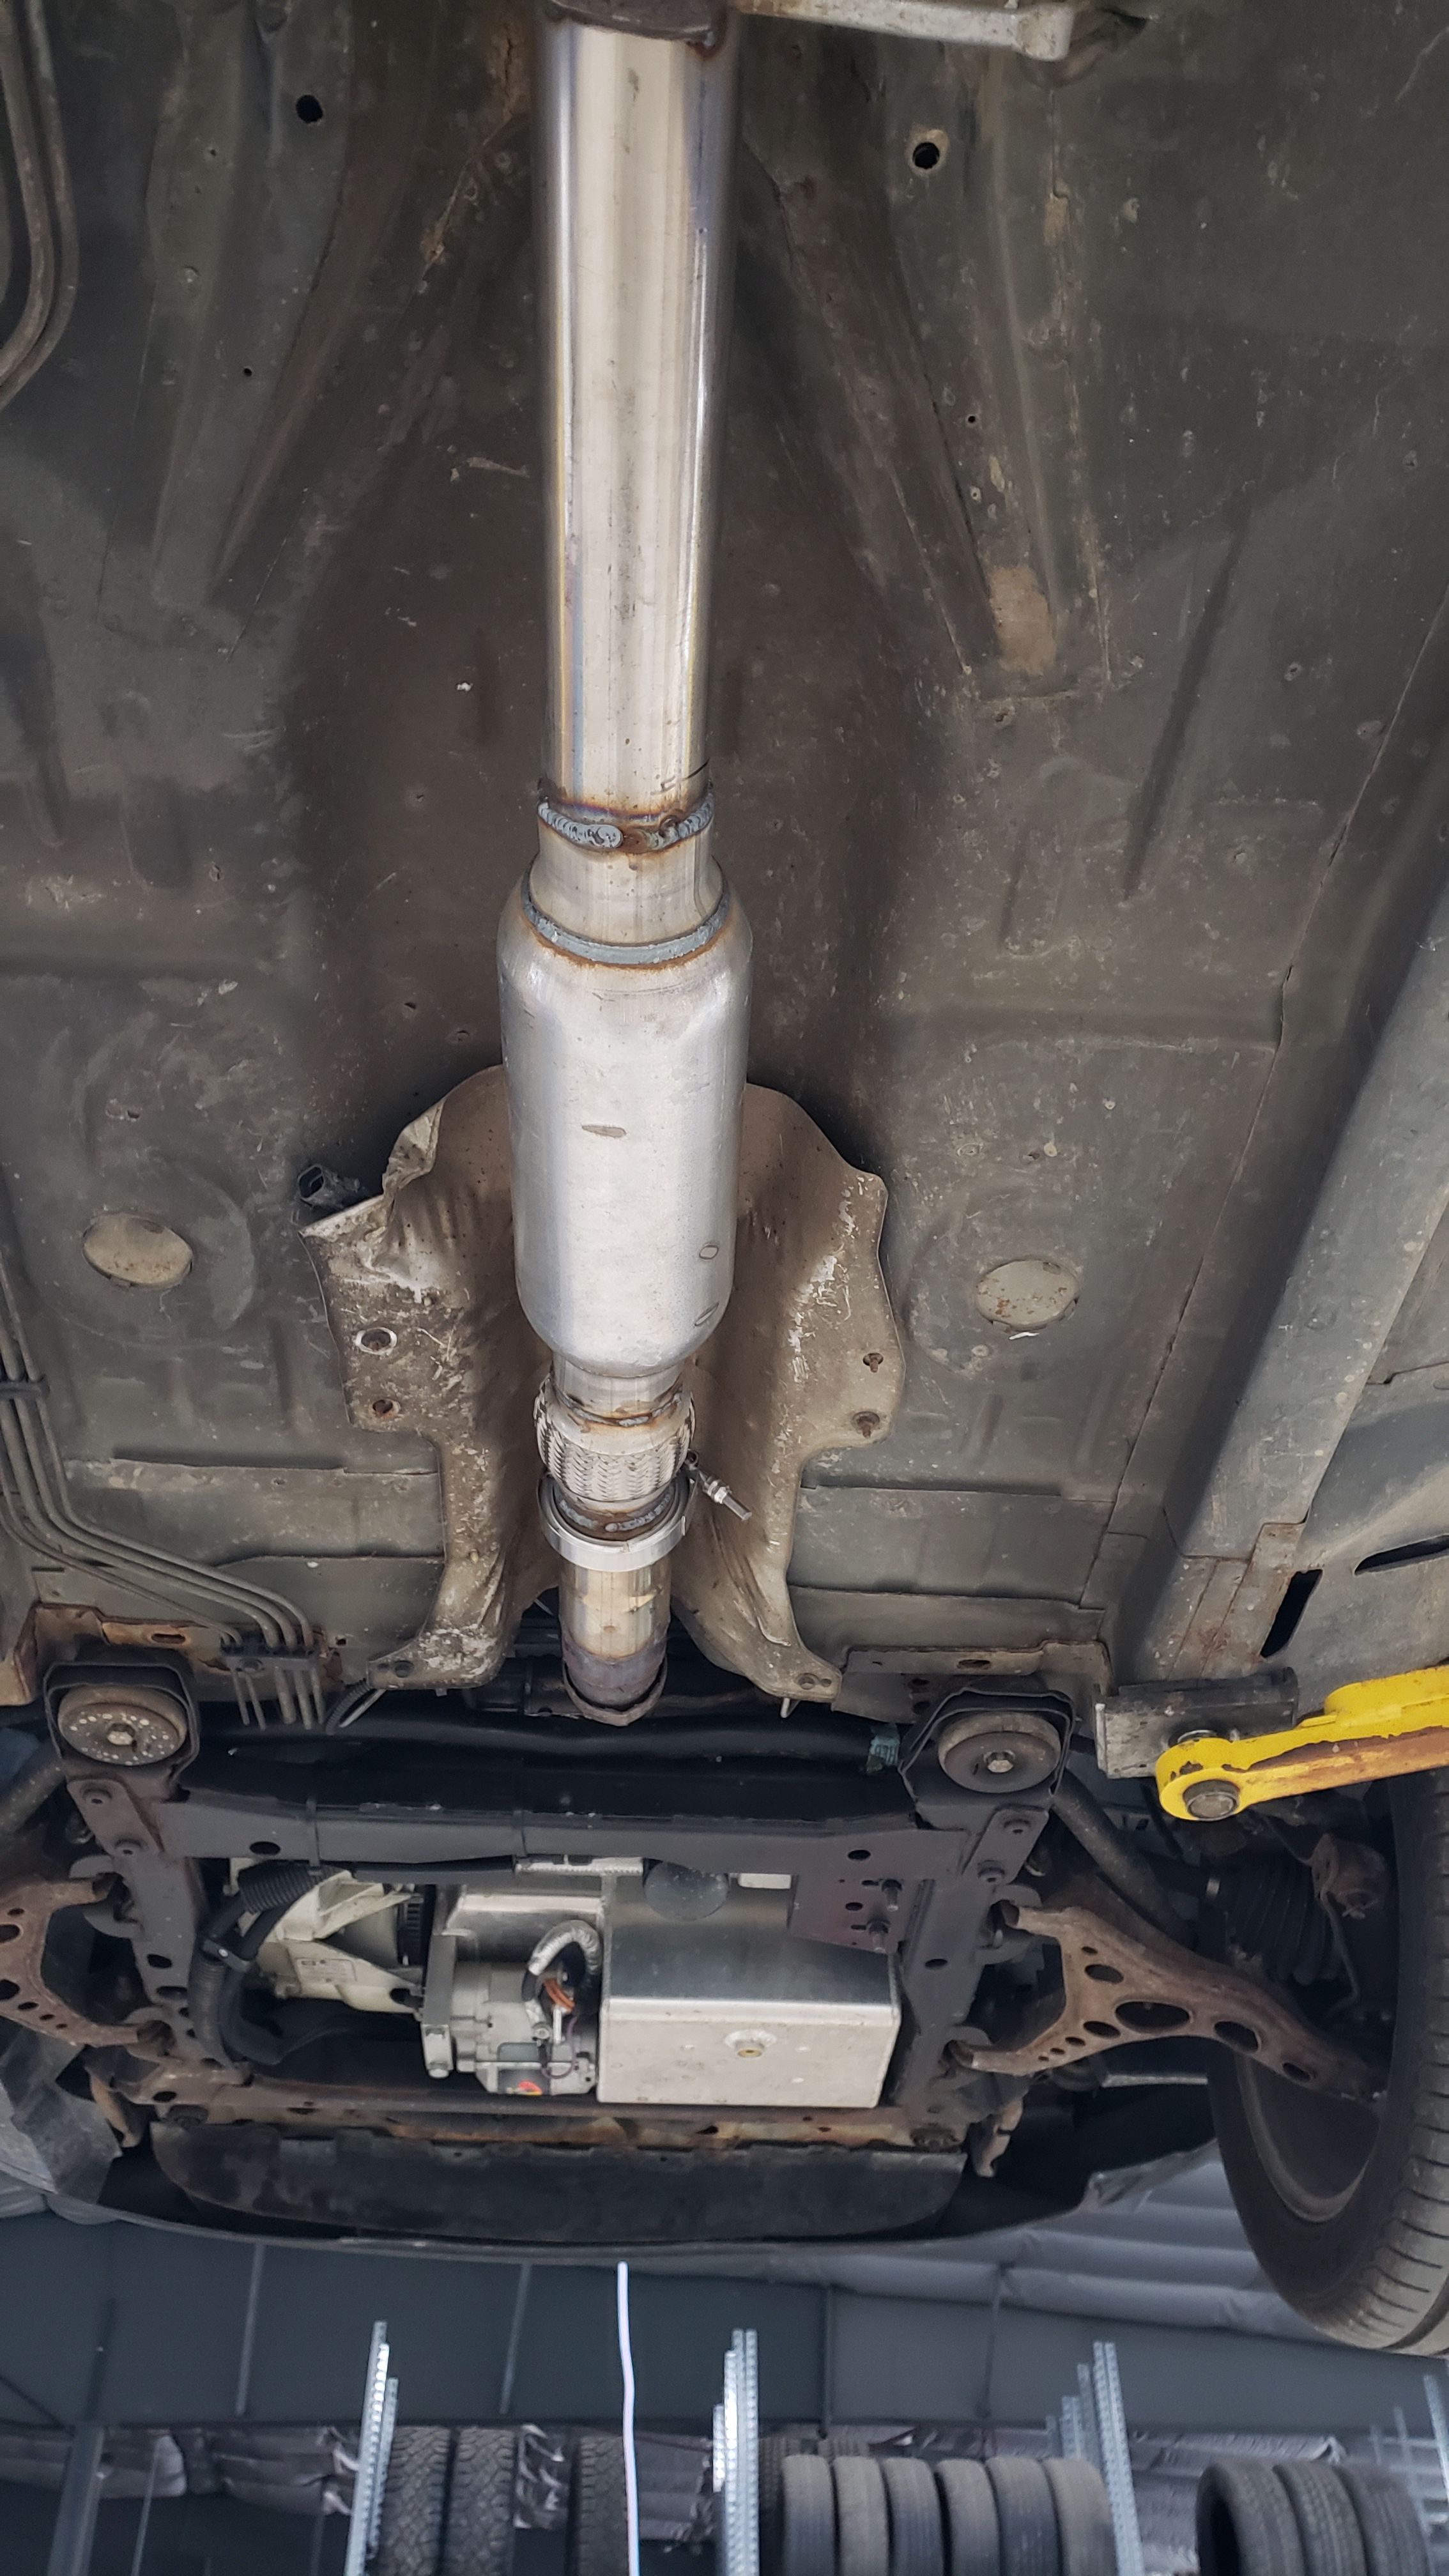
Exhaust v1.2. I wasn't happy with how loud it turned out despite the mufflers. I'm sure the 3" exhaust isn't quieting it down at all, but the mufflers are Borla Pro XS which are supposed to be a "quieter" muffler. So, I added a inline chambered muffler from Remco which toned it down a bit. It sounds less like a dumpy bass drum now. The reason for the 3" is that I plan on going turbo next year and figured I'd set myself up for it.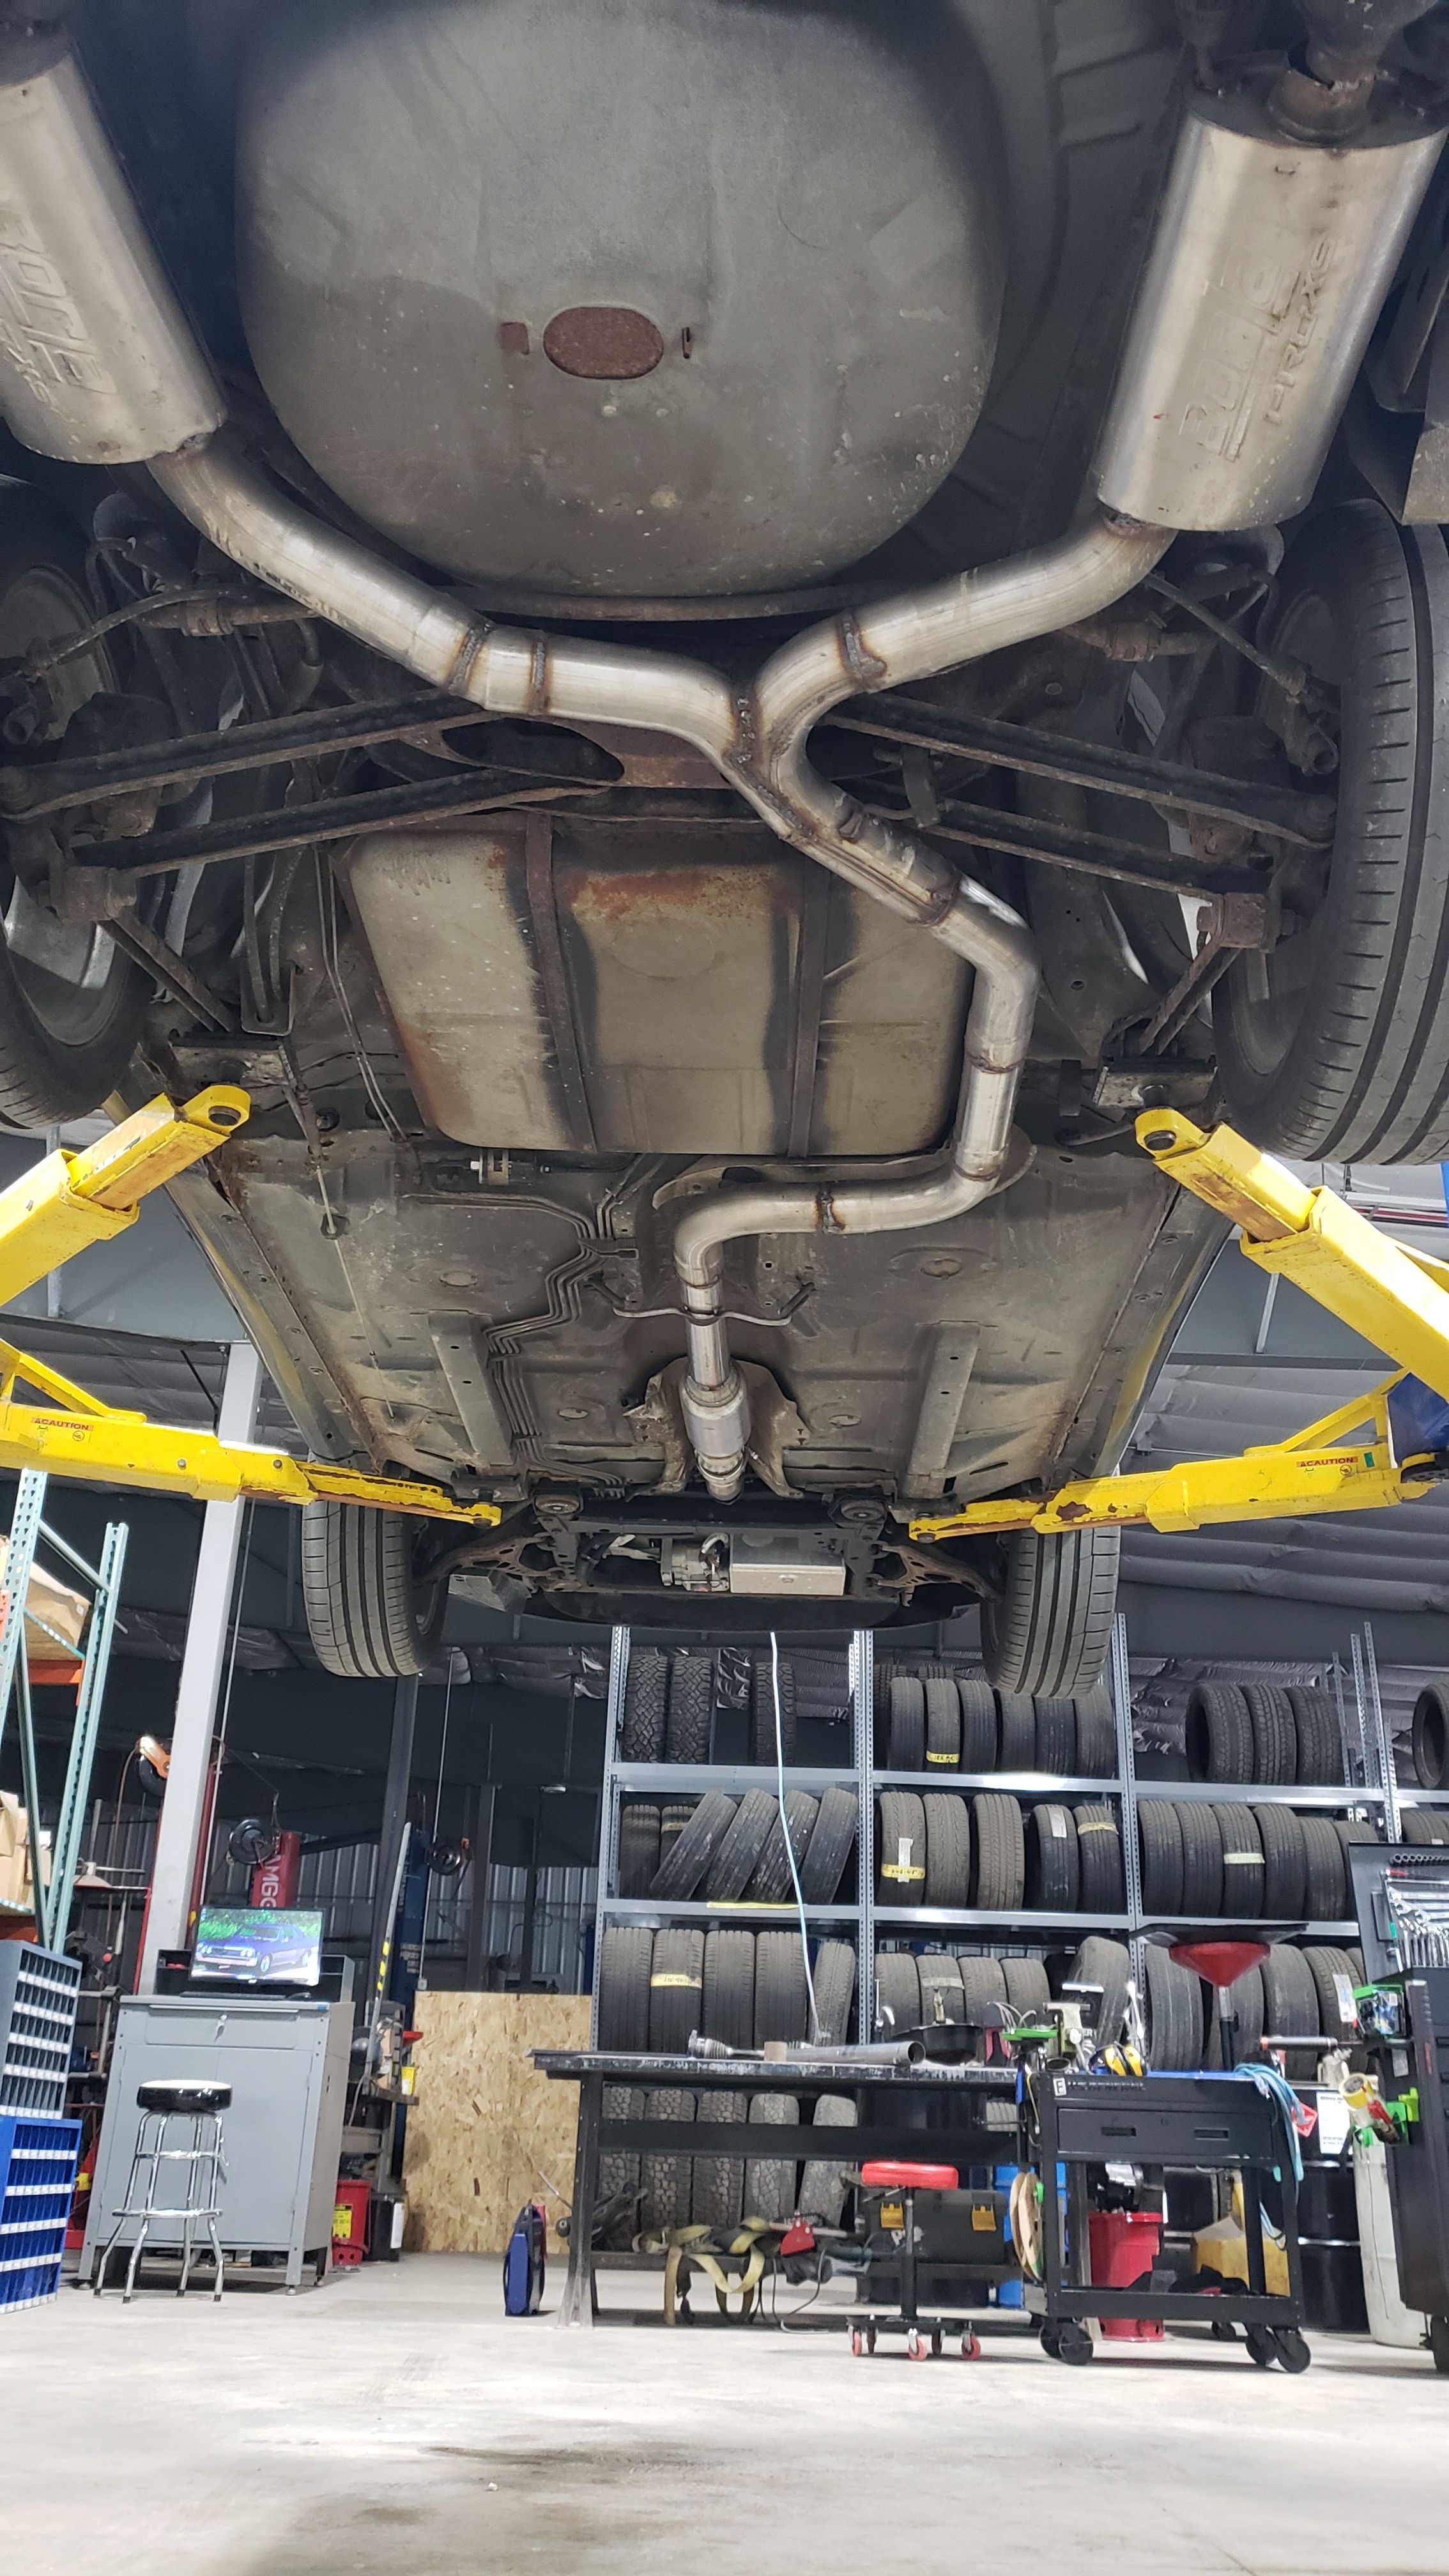
 3 points
 -
LS4 swap begins
GnatGoSplat and 2 others reacted to carkhz316 for a topic
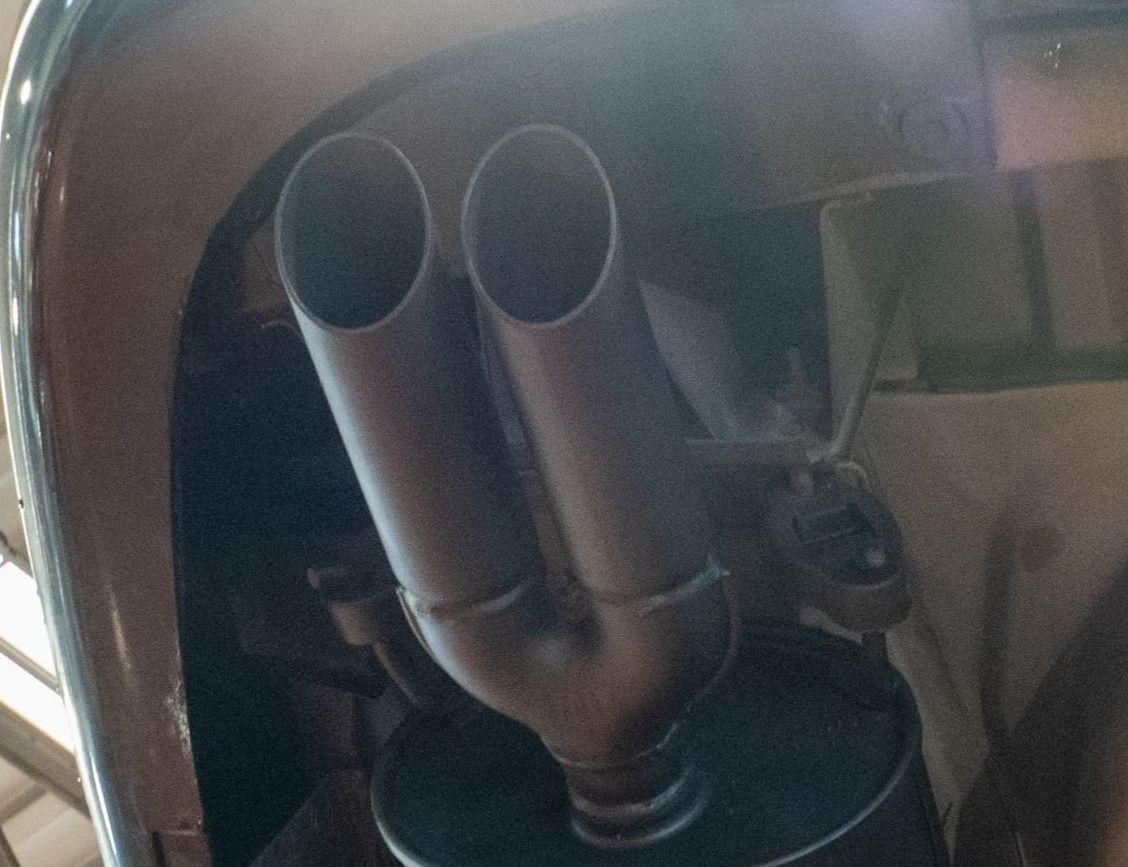
And a few years later and I'm finally building a proper exhaust for it. I bought a universal kit off Amazon and put this together this weekend, along with a couple used Borla mufflers that were given to me. It's louder than I was expecting, but is mostly just too much bass and rumble for my liking. I attribute it to the 3 inch pipe and straight through design of the mufflers. I have since ordered a smaller inline chambered muffler that I'm going to install where the factory cat/ resonator were installed to see if it tones down the deep rumble a bit. Aside from that, does anyone know where I can get new or like new OEM looking exhaust tips for this car or have recommendations for a lookalike? I'd certainly appreciate any suggestions but ideally would like to copy the original style.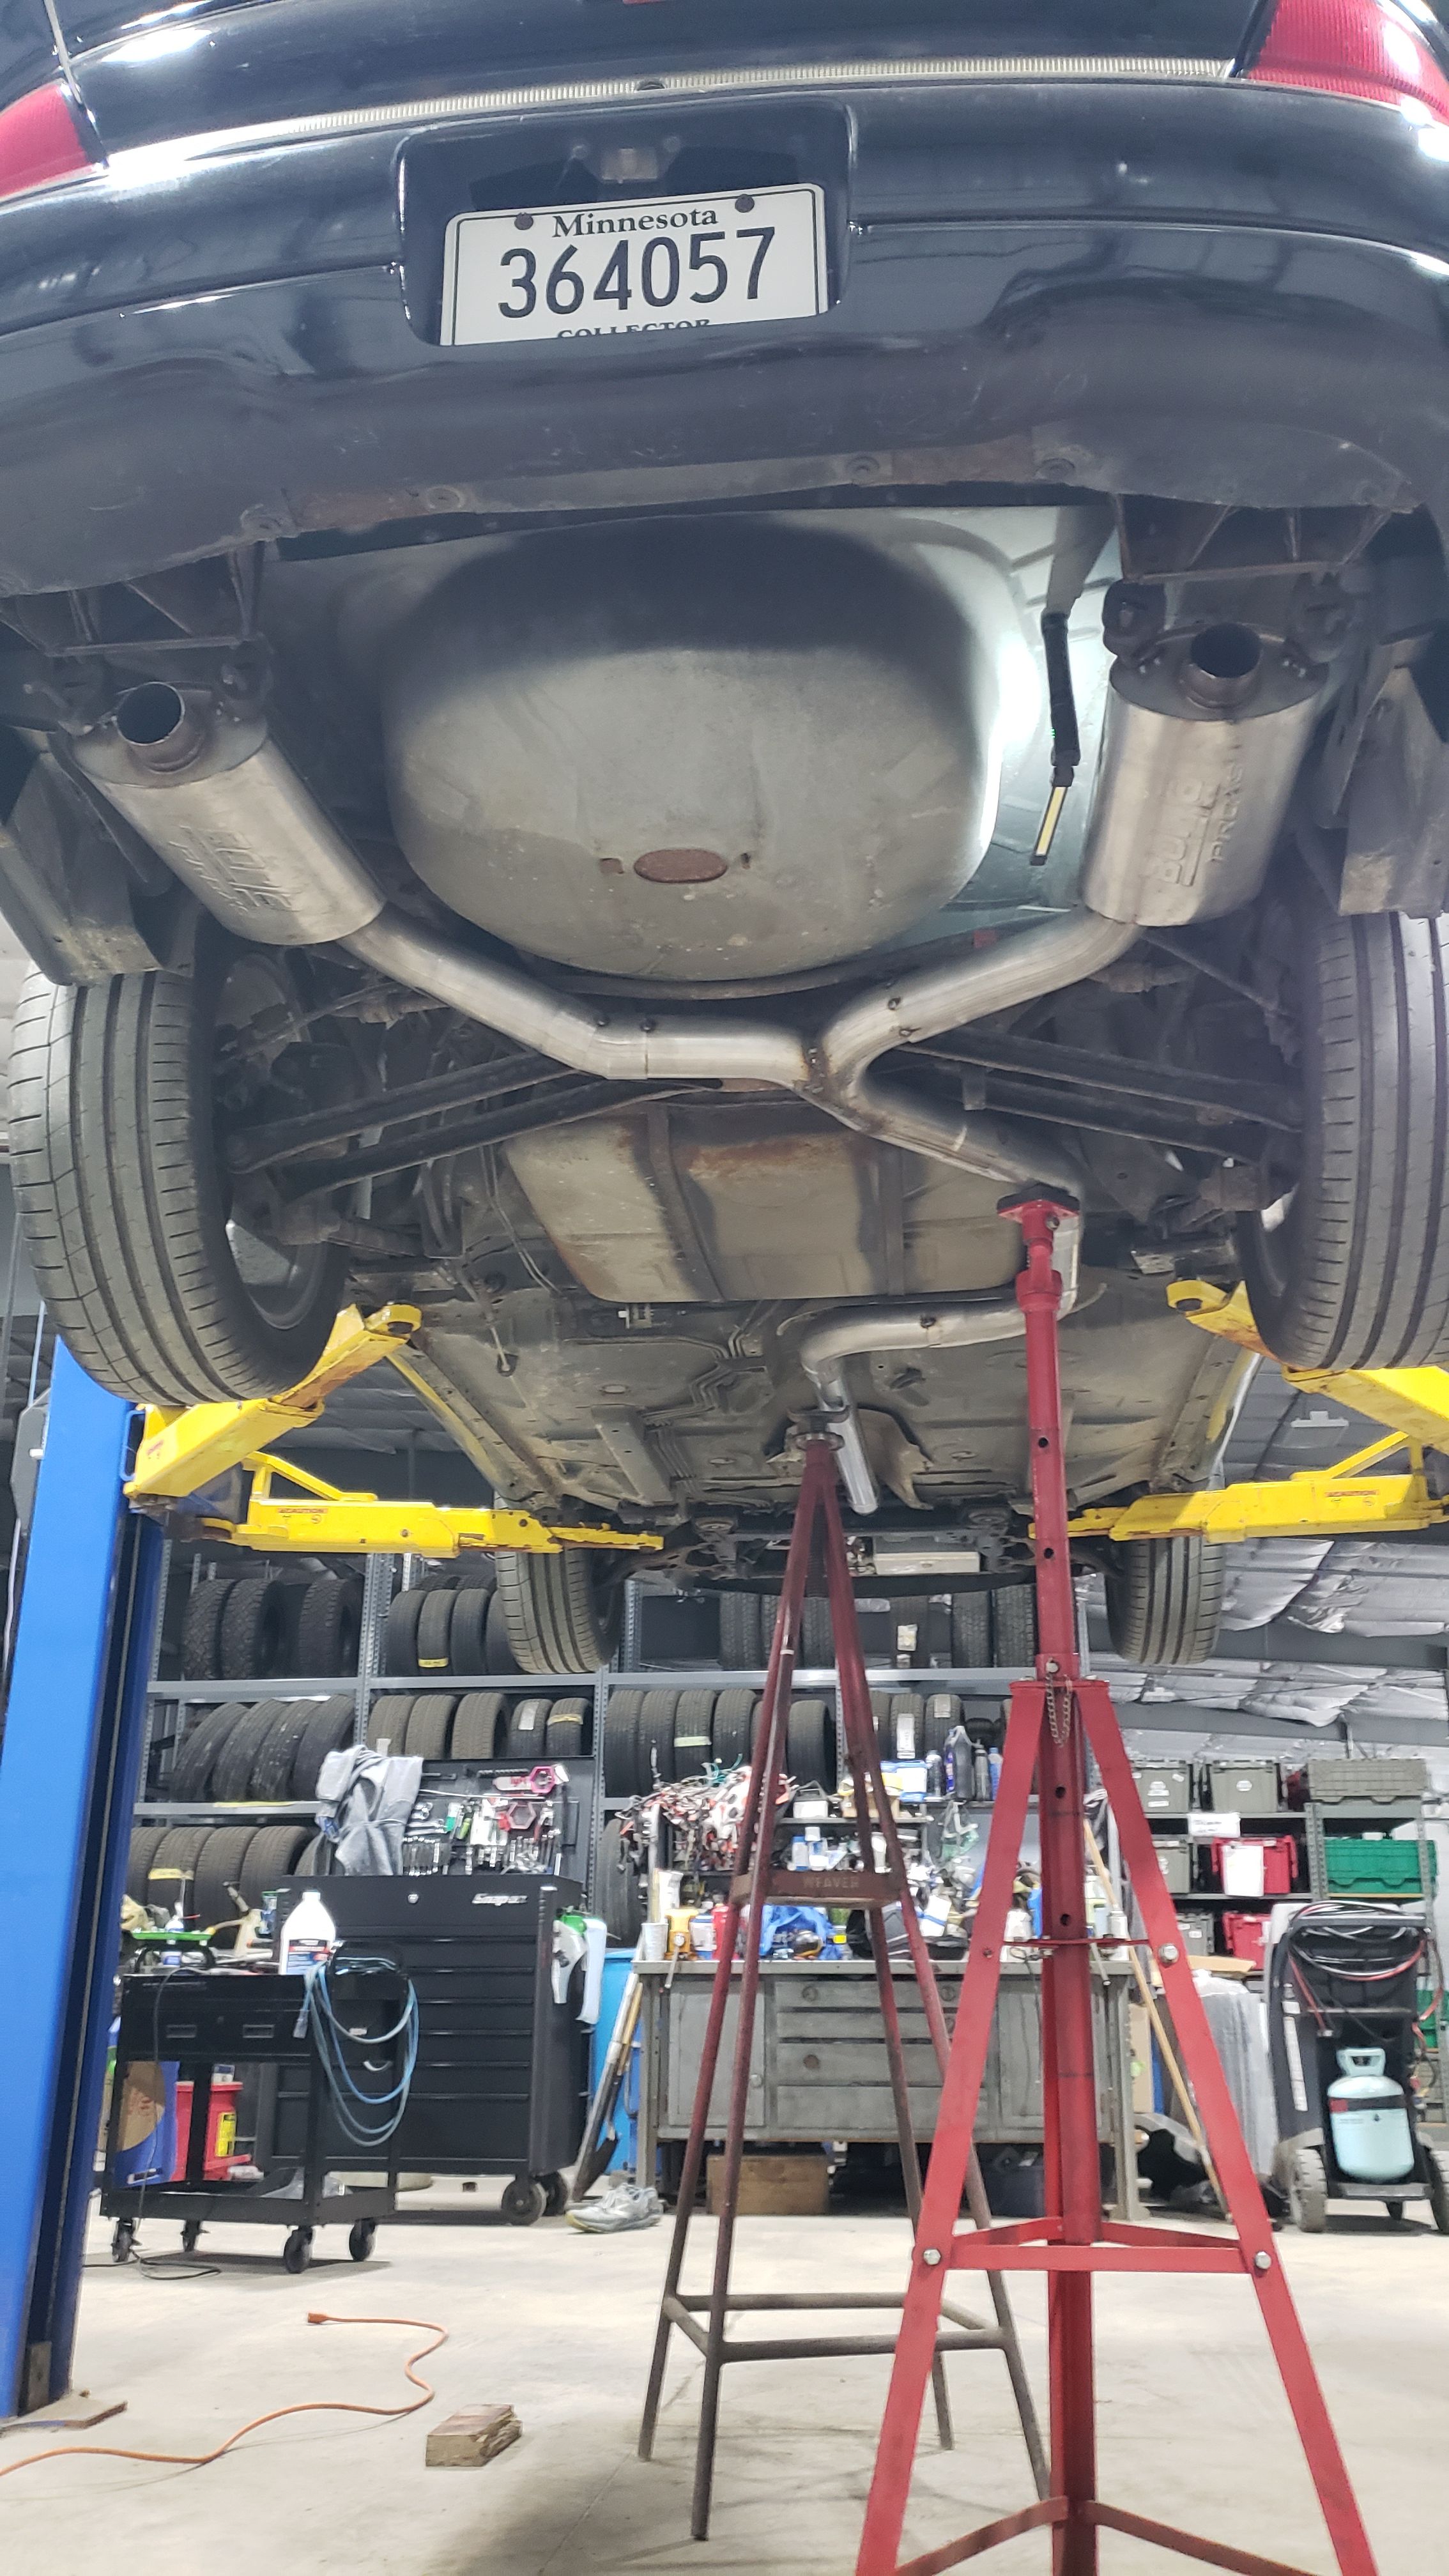
 3 points
 -

New to this place. Hello.
primergray and 2 others reacted to Psych0matt for a topic
I'm glad that joke is still funny3 points -
New to this place. Hello.
primergray and 2 others reacted to 94 olds vert for a topic
I thought the same thing, but then I saw the valance is intact so you know it's fine.3 points -
Should I go back to stock?
RPE1992GPSE and 2 others reacted to GnatGoSplat for a topic
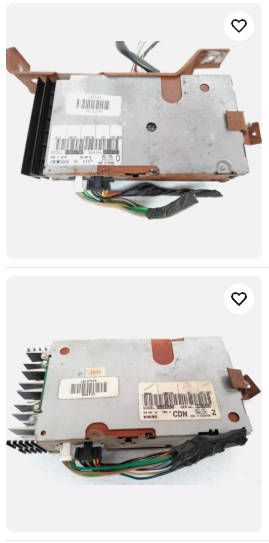
Oh, I didn't know about the J-bodies having the same radio, but it makes sense. I think some 3rd-gen F-bodies used the same radio as the Grand Prix. I'd read the same thing about the amps on the GMT400 forum while searching for info on these, as I'd wondered if I could just replace my CDM module rather than repairing it, but ended up deciding that'd be pointless as probably all of them need those capacitors by now. Anyway, I can confirm the amplifiers are 100% the same between the non-EQ and 5-band EQ models. There is no difference whatsoever between the amplifier stages. They're both using a pair of Delco DM165 2-channel amplifier ICs. In fact, I used my 5-EQ CDM (from GP radio) as a DM165 donor for my non-EQ Cutlass radio because one of its DM165s was blown. There's only one difference between the non-EQ and 5-EQ models and that's the presence of the EQ IC. In the non-EQ model, there are shorting jumpers (yellow arrows in the image) to connect the EQ input solder pads to EQ output pads. That said, there is a newer CDM with different amplifier ICs. You can tell them apart because the amplifier heatsink has vertical fins instead of horizontal. It's very likely that one does have more powerful amps. In this pic, top is old (like I have) and bottom is the newer one. The GMT400 thread did mention the old and new style are completely interchangeable. They communicate via E&C Databus, which has been somewhat hacked. https://stuartschmitt.com/e_and_c_bus/ I think Tech 1 and Tech 2 have the ability to read it with the right cartridge and cable. If it uses a CDM similar like the top one in the previous pic, then I'd bet on it.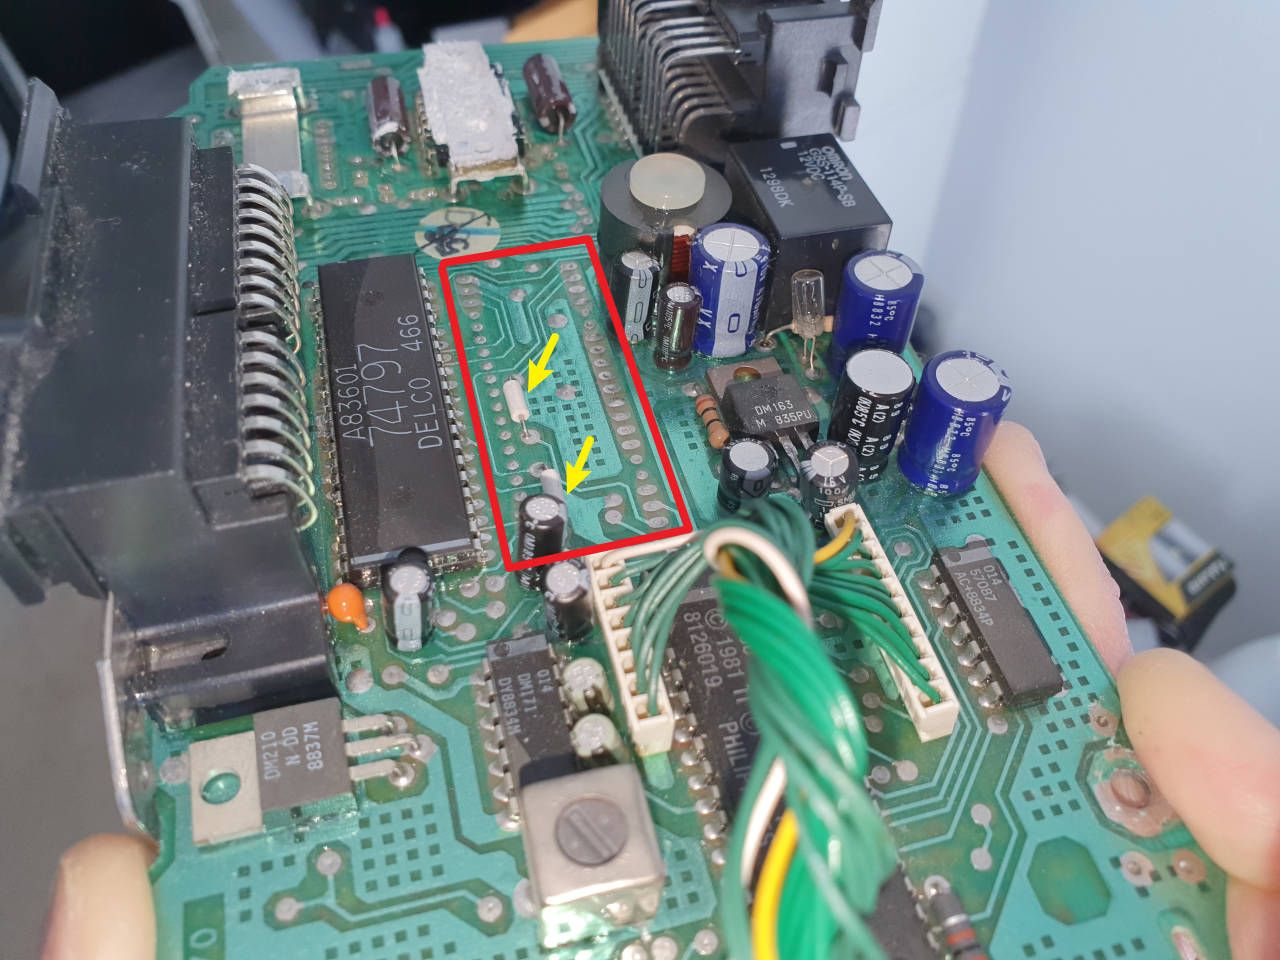
 3 points
 -
OIL LEAK - 1994 Cutlass LQ1
GnatGoSplat and 2 others reacted to bluecalais79 for a topic
UPDATE: the car is going to the mechanic on 2/23 for this job. It will be going to a chevy dealer whose mechanic has decades of experience which is exactly what I was looking for. This mechanic is semi-retired and picks & chooses the jobs he wants to do. When he learned I'm the original and 4th owner he took the job. I was asked to supply all the parts which I think I will need. Included with these parts will be a new EGR valve and a new Low Coolant Sensor (due to the coolant being partially drained). I made a copy of Gnat's photo so thanks again for this. I will be seeing how the mechanic feels about just going the RTV route in lieu of pulling the rear head. Not only will the job be alot cheaper, I'd really prefer not opening that Pandora's box of potential additional issues if the head needs to be taken off.3 points -

TOM ( SUPERBUICK)
SuperBuick and 2 others reacted to Amanita for a topic
Damn, that's a rare one!3 points -
OIL LEAK - 1994 Cutlass LQ1
94 olds vert and 2 others reacted to bluecalais79 for a topic
Thanks all for this. As of the moment the car is in storage do it will be a while before I can check it out, but I will say I get more & more confident this will be the cause. It has been happening for a long time. Form the day I bought this car in Oct., 1994, I always wondered where a quart of oil was going every 1000 miles or so. My money is on this as pictured above, it was probably badly sealed to begin with. And these things don't get better, only worse. I went in and checked my 2020 repair bills from when I had the intake manifold gaskets replaced. The mechanic also replaced the gasket for the part 10130955 as you see in the photo but no mention is made on whether the distributor plug seal was addressed so I am going to assume it was not. While it's a shame all that work that was done to the motor back then would have to be re-done just to get at what needs to be repaired, so be it. Even if I decide to get the rear head pulled to replace the O-ring rather than trying my luck with sealant, that's still way better than having the entire motor pulled. I might as well go the whole 9 yards and have both head gaskets replaced for a one and done job. I should be getting the car out of storage within the next few weeks, I'll keep all posted on how things progress, and thanks again, much appreciated!3 points -

Old to W body's, new to this forum
SuperBuick and 2 others reacted to RPE1992GPSE for a topic
You're in the right place because we love our W-bodies here. Welcome!3 points -
3.8sc swap into 94 Oldsmobile cutlass Supreme convertible
Ian and 2 others reacted to Bake82 for a topic
Here is info for the the swap based on my own experience of swapping my 88 cutlass w-body. 3800 swap w-body From 98/99 Monte Carlo z34/lumina LTZ with 3.8NA Needed - power steering lines (buy new) - Heater hoses (buy new) - Exhaust downpipe (or have one made) - AC system - all lines/parts from the engine bay (compressors can be from the gtp too) Best to have from the Monte Carlo/lumina but not mandatory - engine bay wiring harness - Cv shafts (buy new if you don’t have them) From gtp donor - motor - Trans - Trans cooler lines - rad hoses - Motor mounts - Cv shafts - PCM - Engine bay wiring harness Notes: cv shafts if using an HD trans you need to use the gtp passenger inner with the 1st Gen shaft and outer joint. If you get them from the Monte you can use the stock Monte drivers side. Wiring: if you can’t find the Monte Carlo harness you can use the gtp harnesss, and merge it into the 1st Gen c100 connector. With the Monte harness it comes with the c100 you just need to remove a few pins around and overall much easier but can be hard to find. You’ll need the GM service manuals for your donor harness and your original car to match the c100 connector. If using a Monte harness you will probably want to add the BBV wiring. This will also convert the car to obd2 PCM: you will need to get the vats/security removed(it’s possible it won’t be an issue but be aware it probably will be) and probably want to remove a few other codes. Rad: you could use your original, but the donor gtp rad will be bigger and fits into the chassis. I’d say it’s recommended but not 100% necessary.3 points -
1988 MW with John Davis discussing the GM10 coupes
92Lumi and 2 others reacted to Black92GS for a topic
Its likely a pre-production thing that never carried over, as that episode was filmed prior to the 88 cutlass being released.3 points -

1988 Pontiac Grand Prix SE w/Getrag 282 5-Speed
primergray and 2 others reacted to amiko for a topic
Greetings forum members! New member, so thought I'd take a moment to introduce myself. Last Spring (2025) I acquired a relatively pristine (54k miles) 88 Pontiac GP SE. I hadn't even known they made these with a 5-speed, so I hadn't explicitly been looking, yet lo and behold here we are. I've got it on good authority I'm only the second owner. It started life in central NY but spent the last 10 years parked in a sweltering hot garage in central Florida. It was never ever even registered in FL. So it's got some internal heat damage, which I've been repairing. The door upholstery glue had given up years ago. The stereo was a mess, but I replaced all of the capacitors on the amplifier boards and even plumbed in a bluetooth module to the cassette inputs. I'm not much of an auto mechanic myself, I do cybersecurity for a living, but I don't mind getting my hands dirty on projects like this. On the serious mechanical side, I've had it at a local "rural mechanic" who's did a flush on all of the fluids, changed out the master/slave cylinders, and replaced the brakes. I seem to have dodged the bullet of any serious rust or corrosion, but I know these are prone to rotting out their rear strut towers so I plan on installing a strut tower brace and blast the insides with as much cavity wax as they'll take. Any other "gotchas" tips, tricks, or suggestions for keeping something like this roadworthy? Google's AI guestimates, based on statistical analysis of scrap rates versus production numbers, there may only be 15-25 "roadworthy" versions of this model, trim, and transmission combinations left anywhere I didn't buy this planning on a super rare preservation "duty" yet here I am...any suggestions would be greatly appreciated. Don't worry, despite living in the salt-belt, I don't plan on driving it in winter for that reason...I do hope to drive it during the warmer months though! An 88 GP was my very first car when I turned 16, so I'd always been looking for a decent one, "just for fun". I never planned on ending up with a bigfoot-riding-a-unicorn of rarity...something I'm not all together happy about...yet here we are!.jpg.2219ddc82af1460f30f426ab927e4a60.jpg)
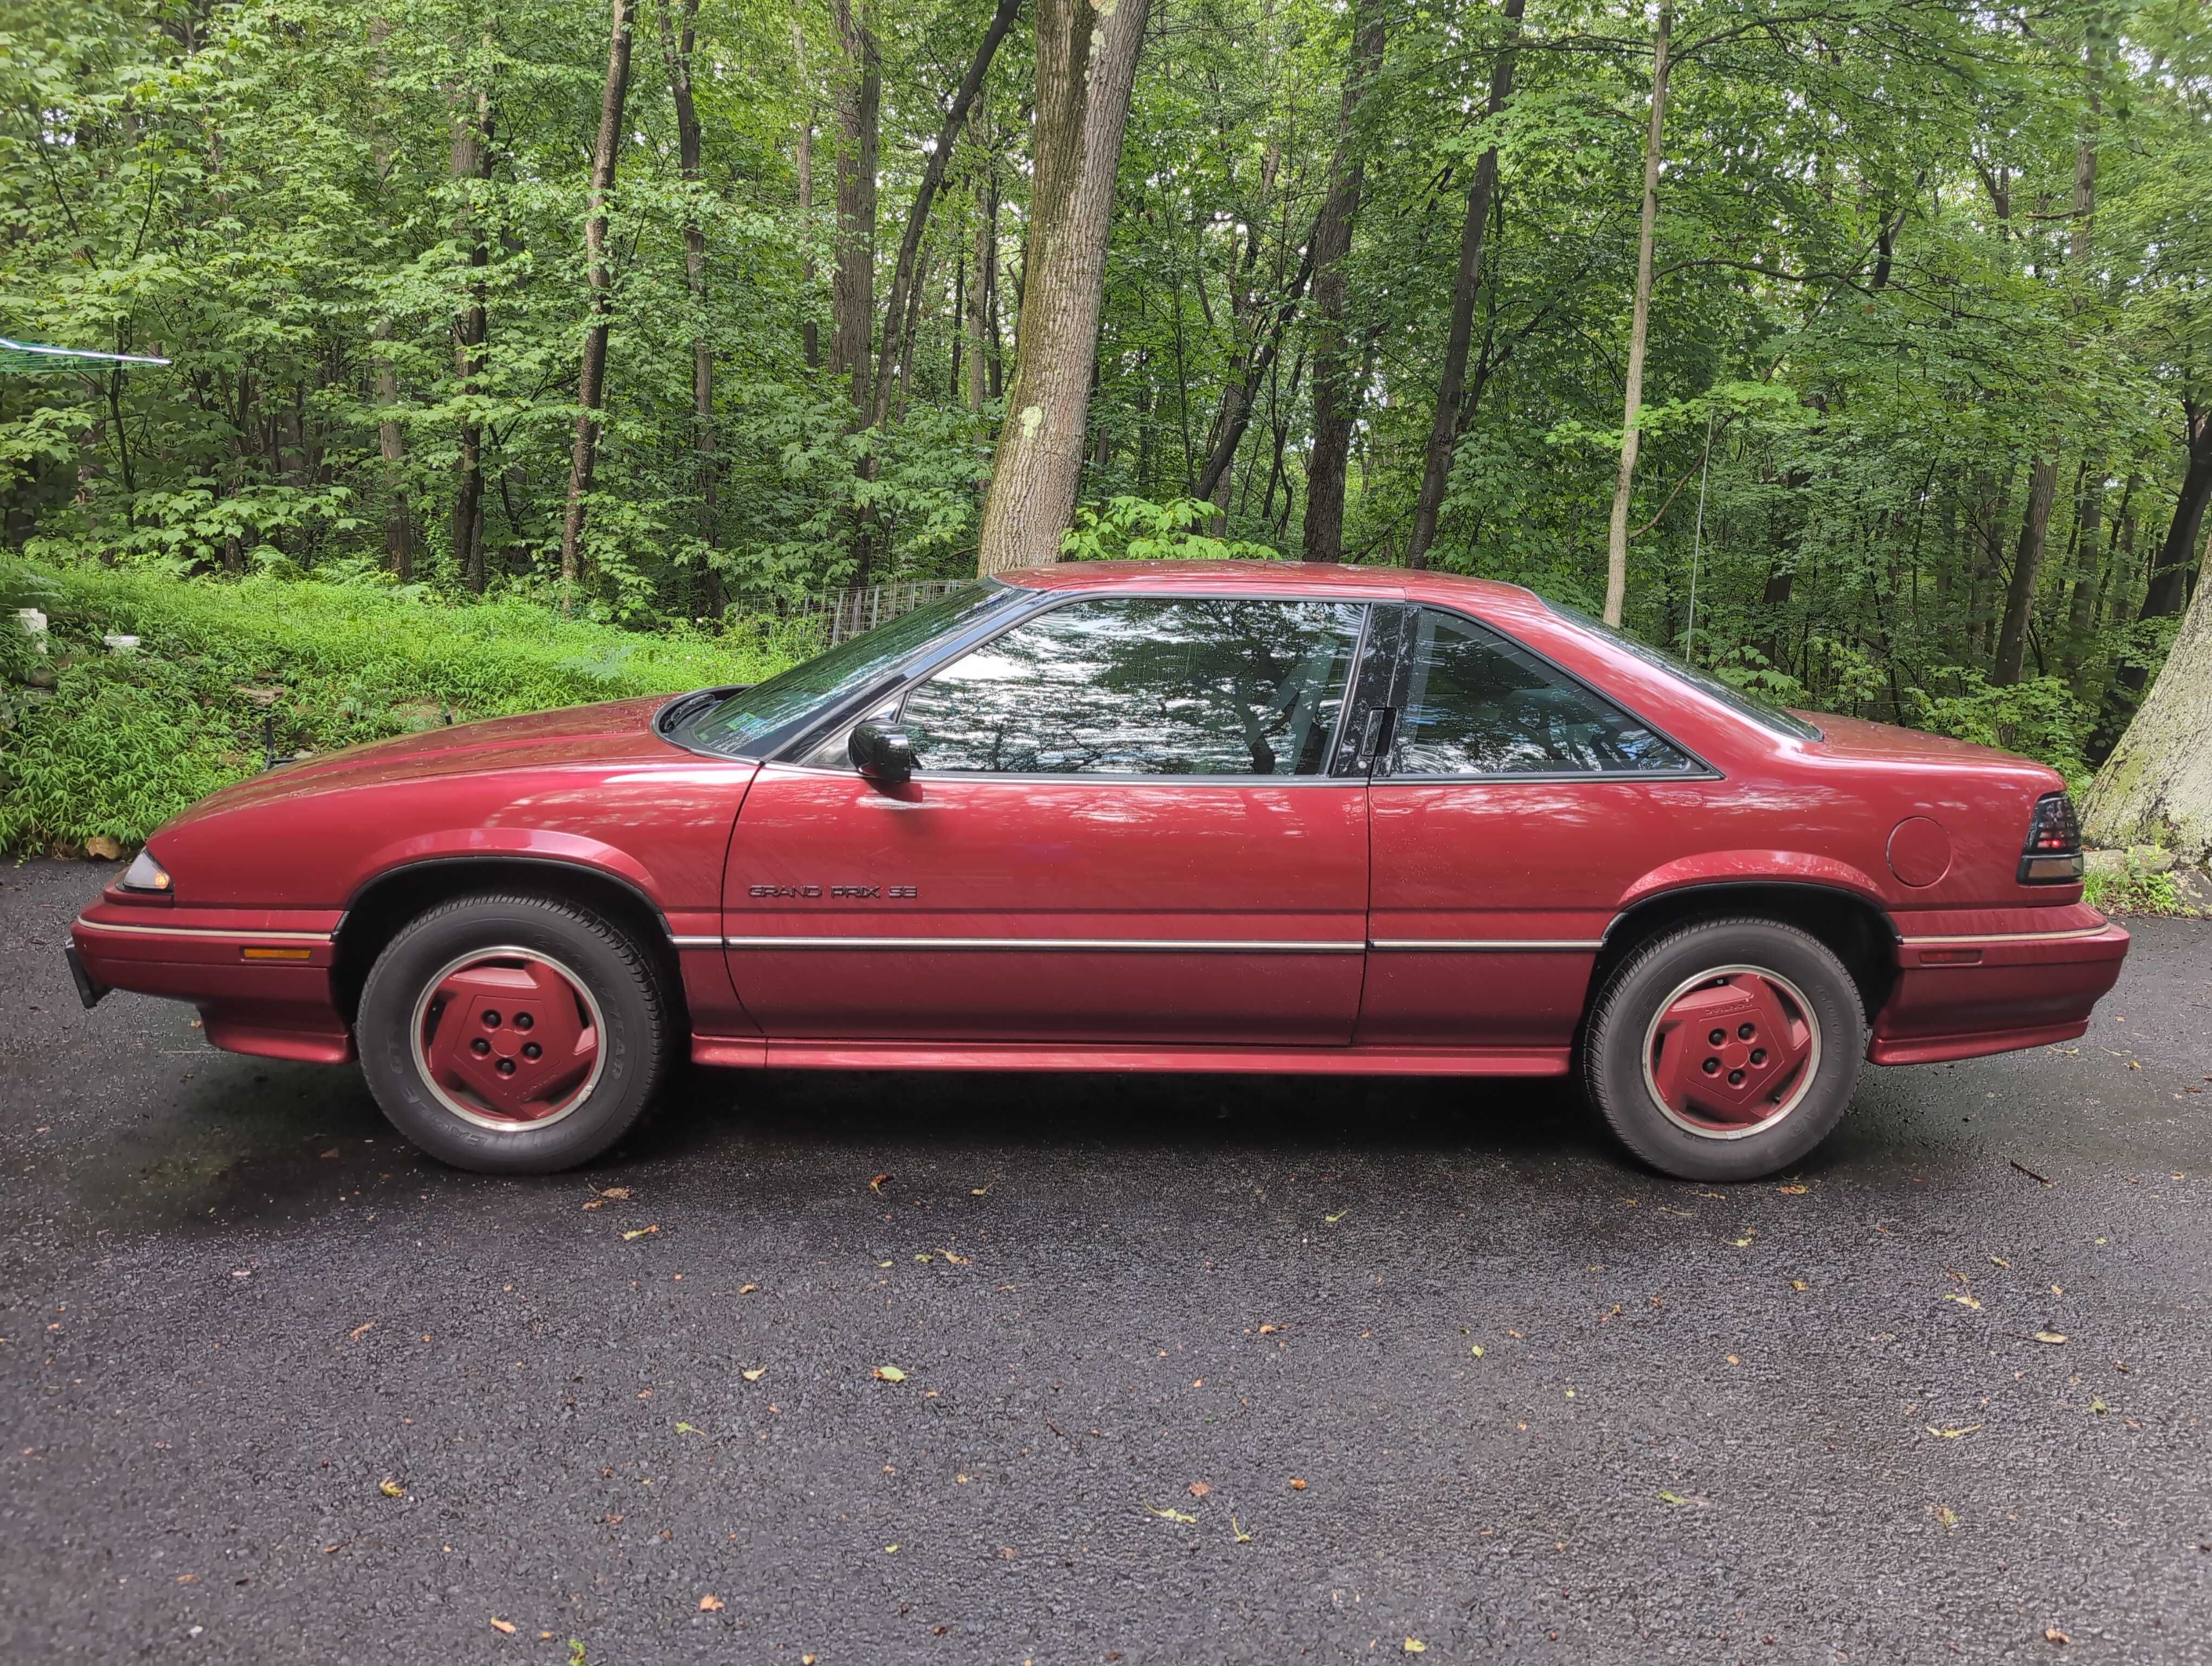
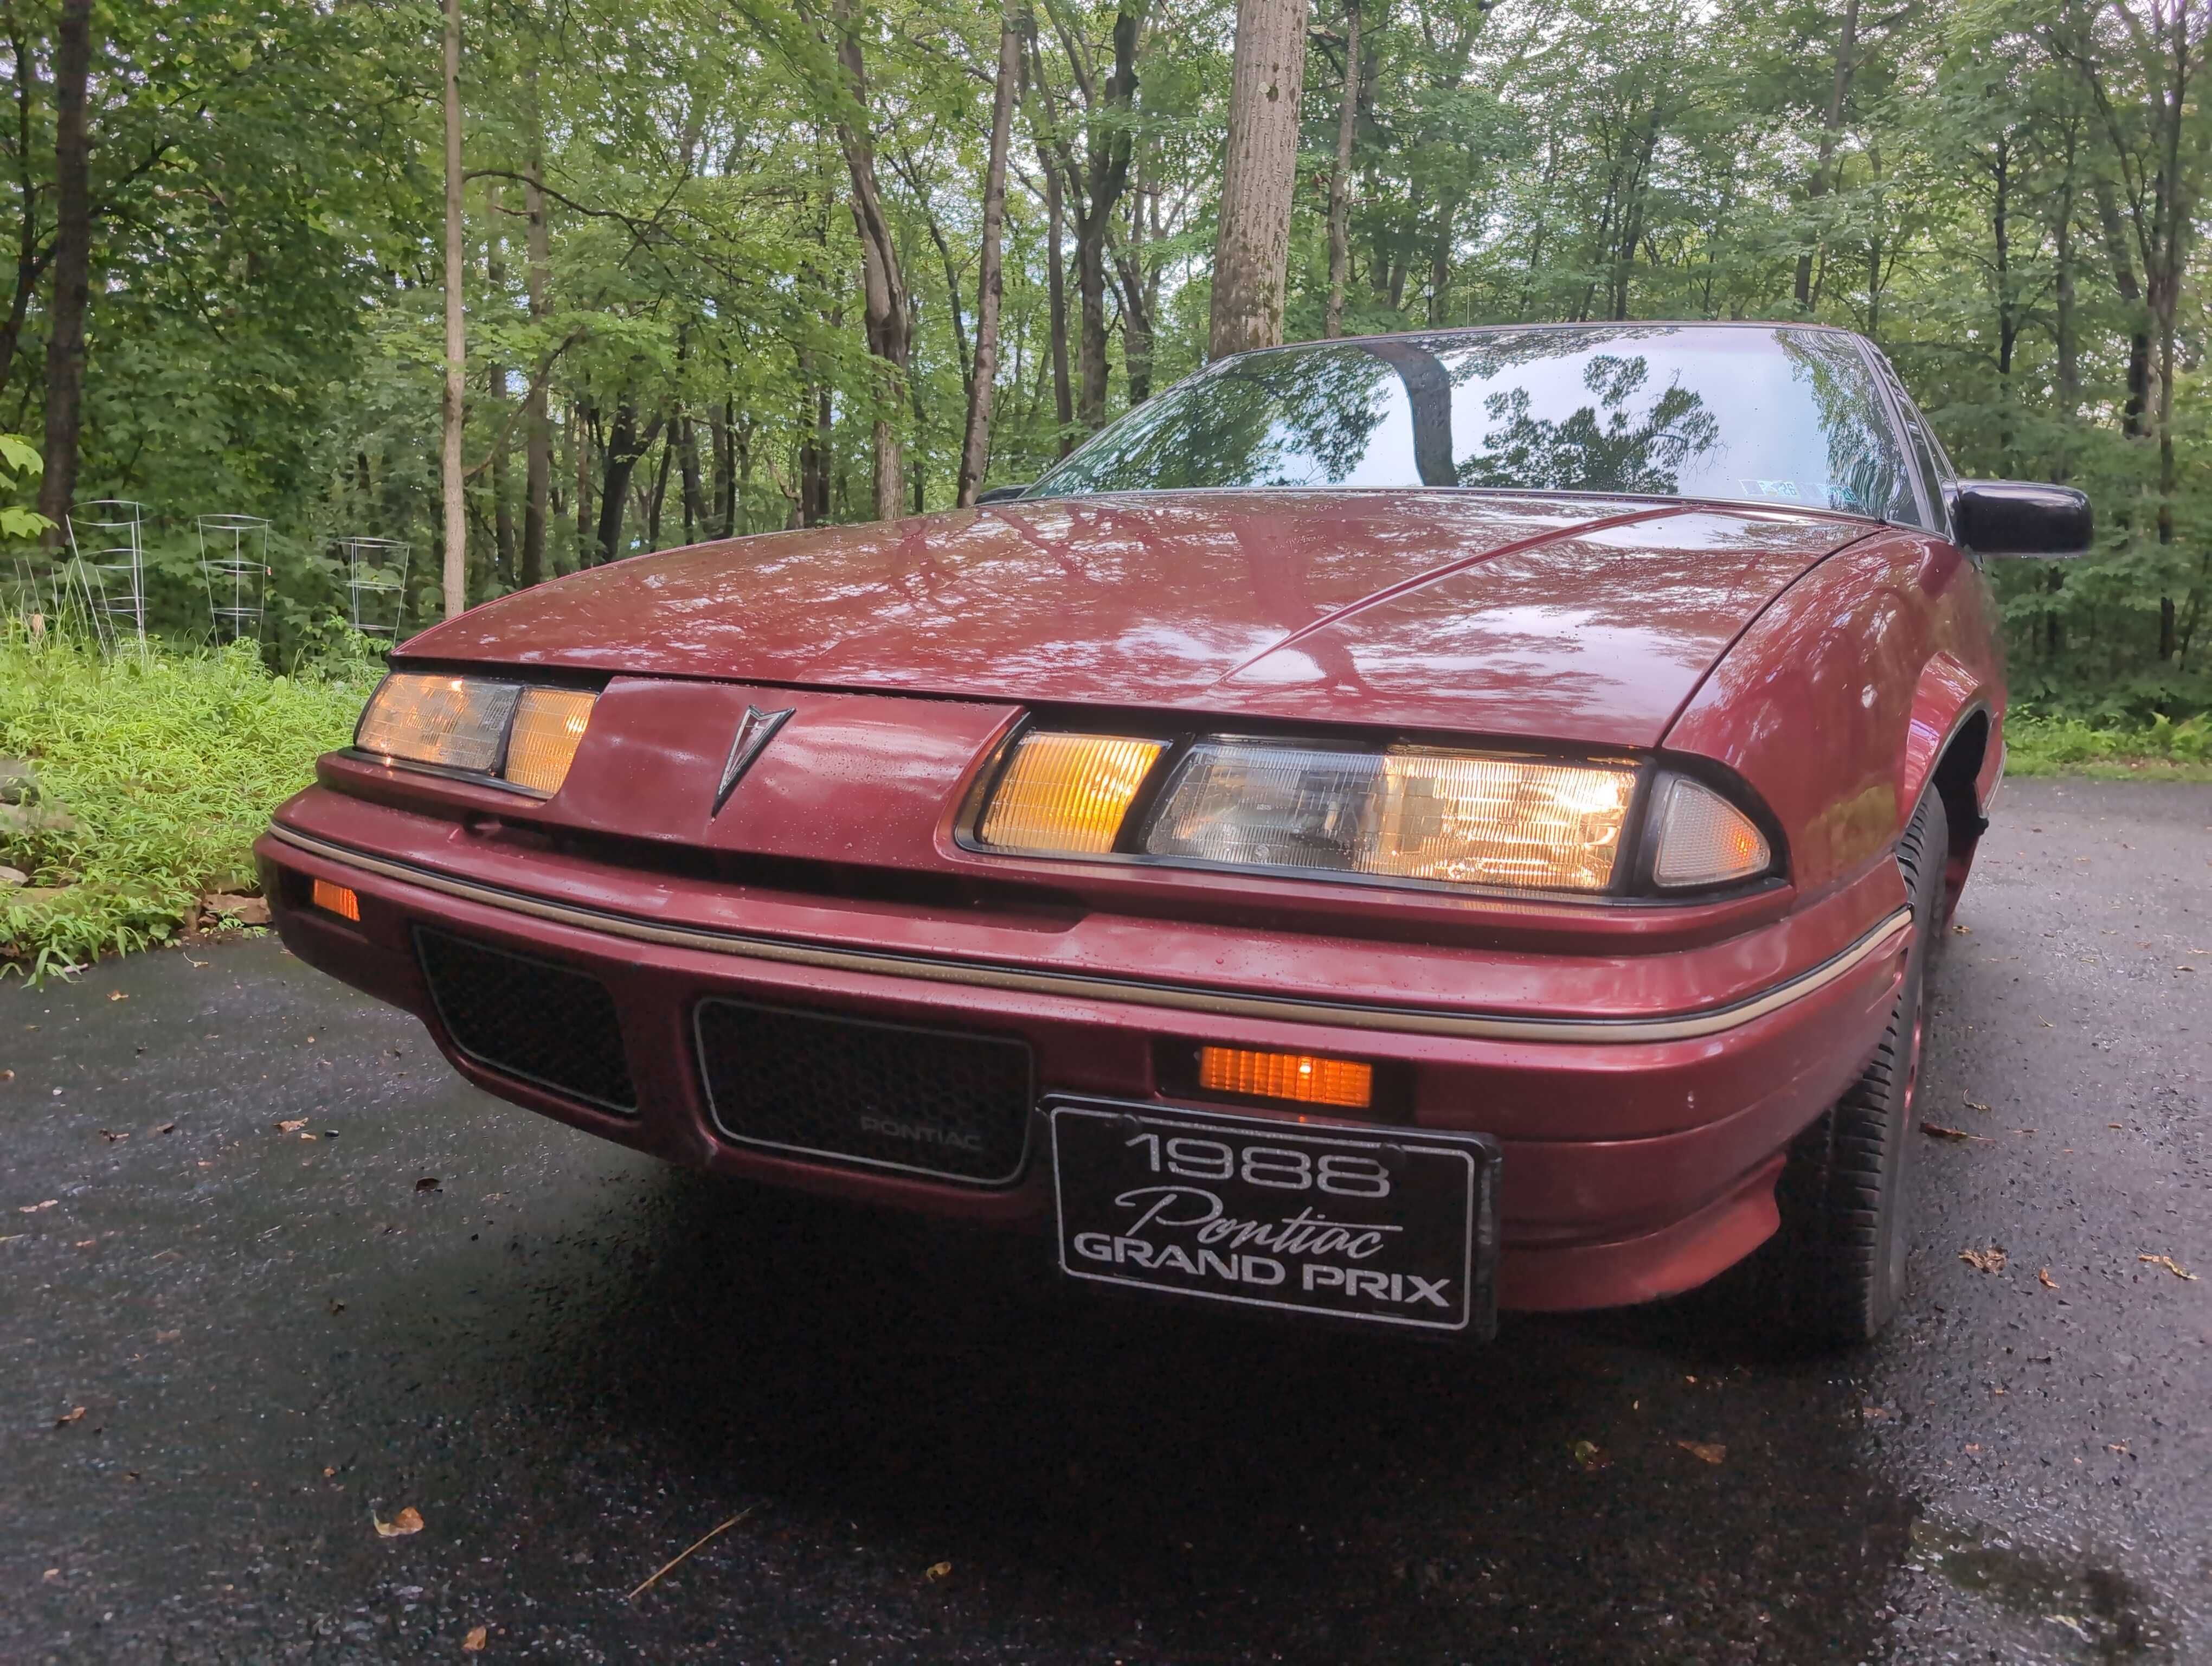 3 points
 -
0-60 and 1/4 Mile time comparison (via old motorweek episodes)
92Lumi and 2 others reacted to SuperBuick for a topic
So I was watching old motorweek episodes on the 1st gen W-Bodies, and grabbed some screen caps comparing the times motorweek got. I realize this isnt bible but its interesting nonetheless! Of note - the quad 4 manual cutlas was the fastest of all to 60, but had a lower trap speed than the TGP and Z34. Clearly the Quad 4/manual was a good choice for this car performance wise - and their commentary on handling was that it was excellent (the most praise of the four) The TGP had the quickest 1/4 mile time, but not trap speed. The video showed very little wheelspin which clearly aided it off the line. The Z34 5-speed had a ton of wheelspin and tire smoke which seems to have limited its 0-60, but its trap speed is by far the highest. Clearly without the wheelspin this would be the “fastest” w-body and demonstrates the best power to weight. The 90 STE turbo was painfully slow compared to the rest, and especially the TGP. Given that its the same powertrain and the coupes and sedans are negligibly different weight-wise, this was either on a very hot day, or they just didnt have a very fast example (maybe a “friday car”)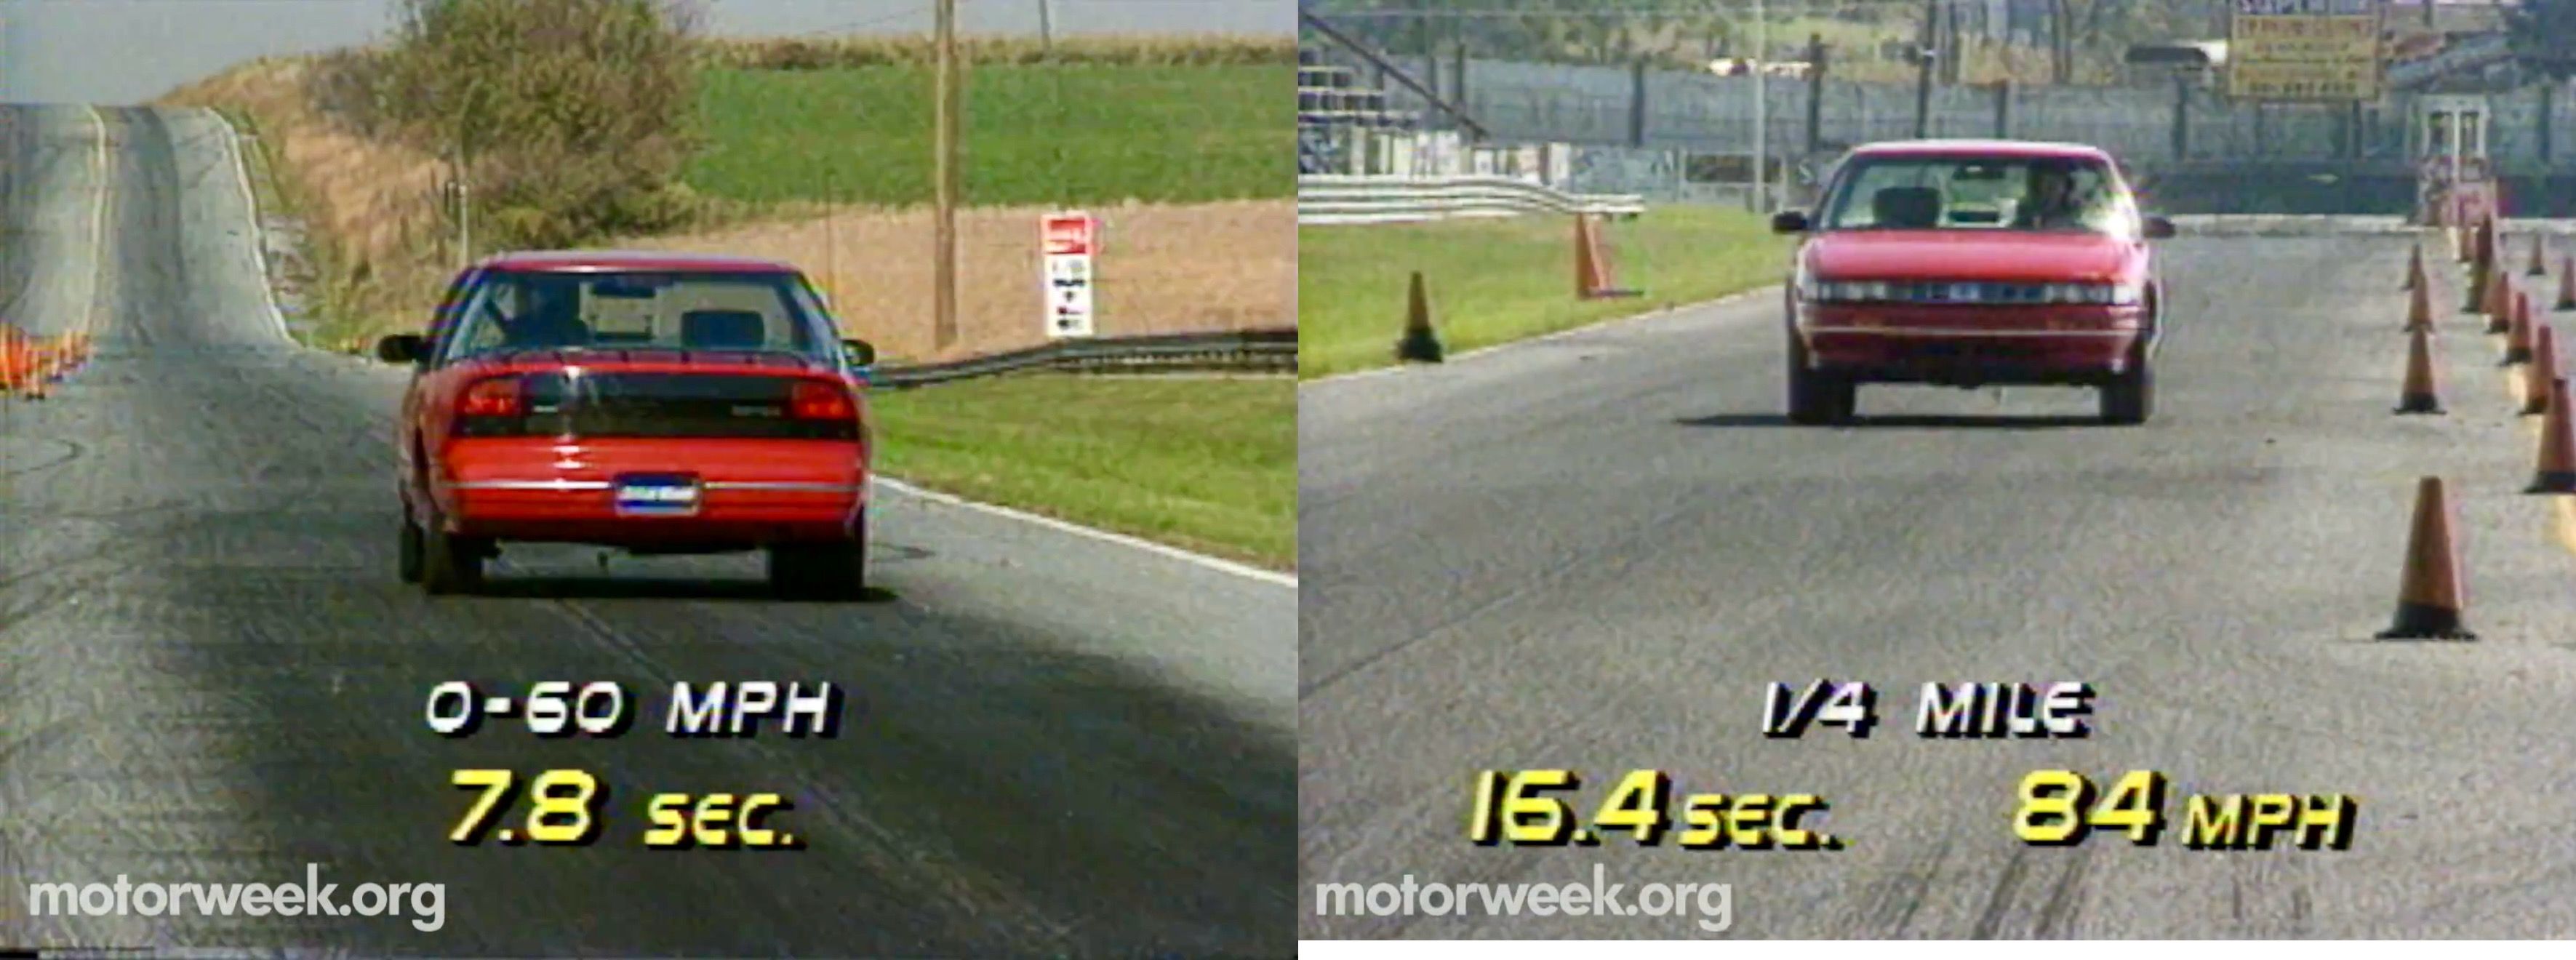
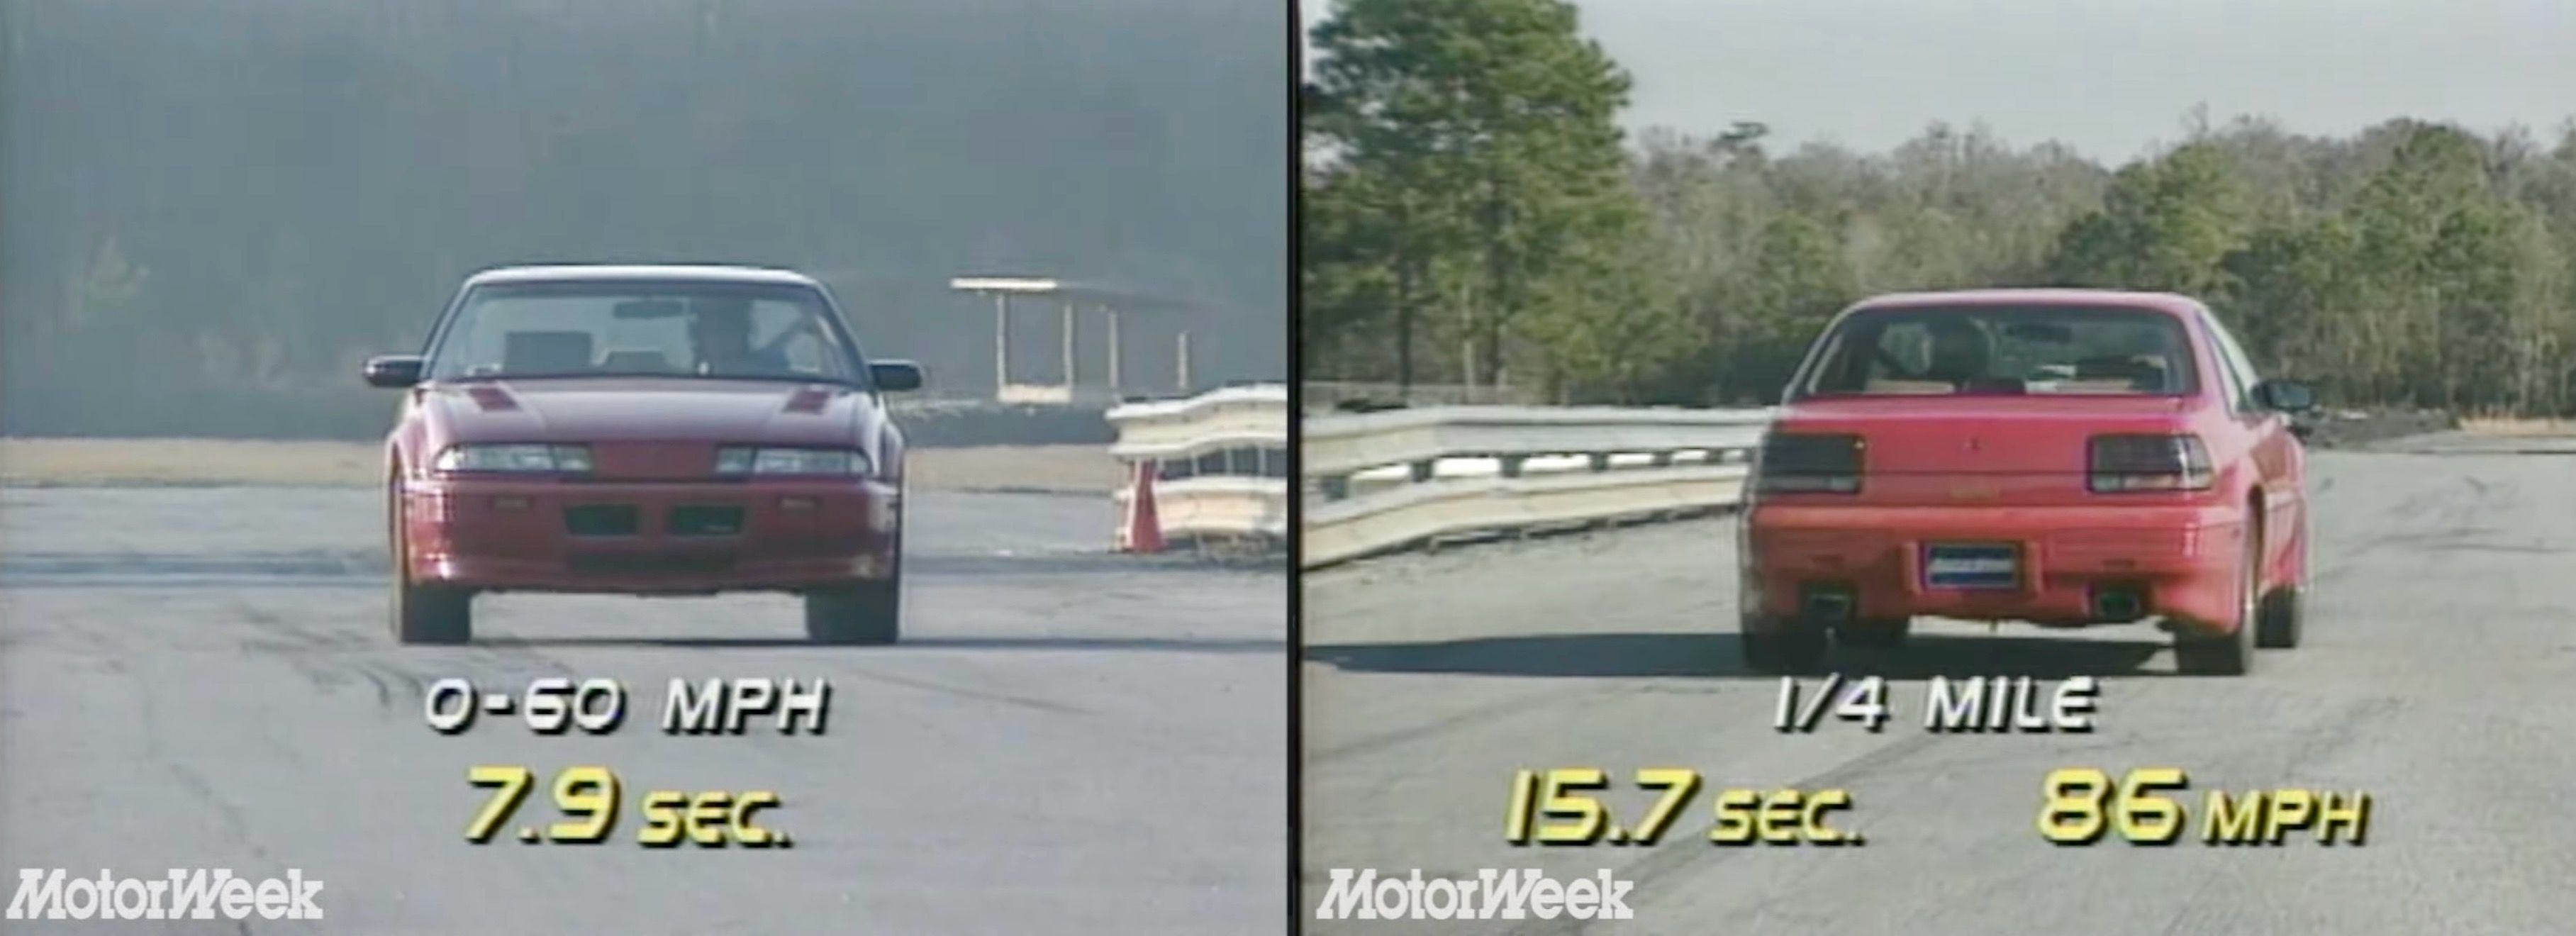
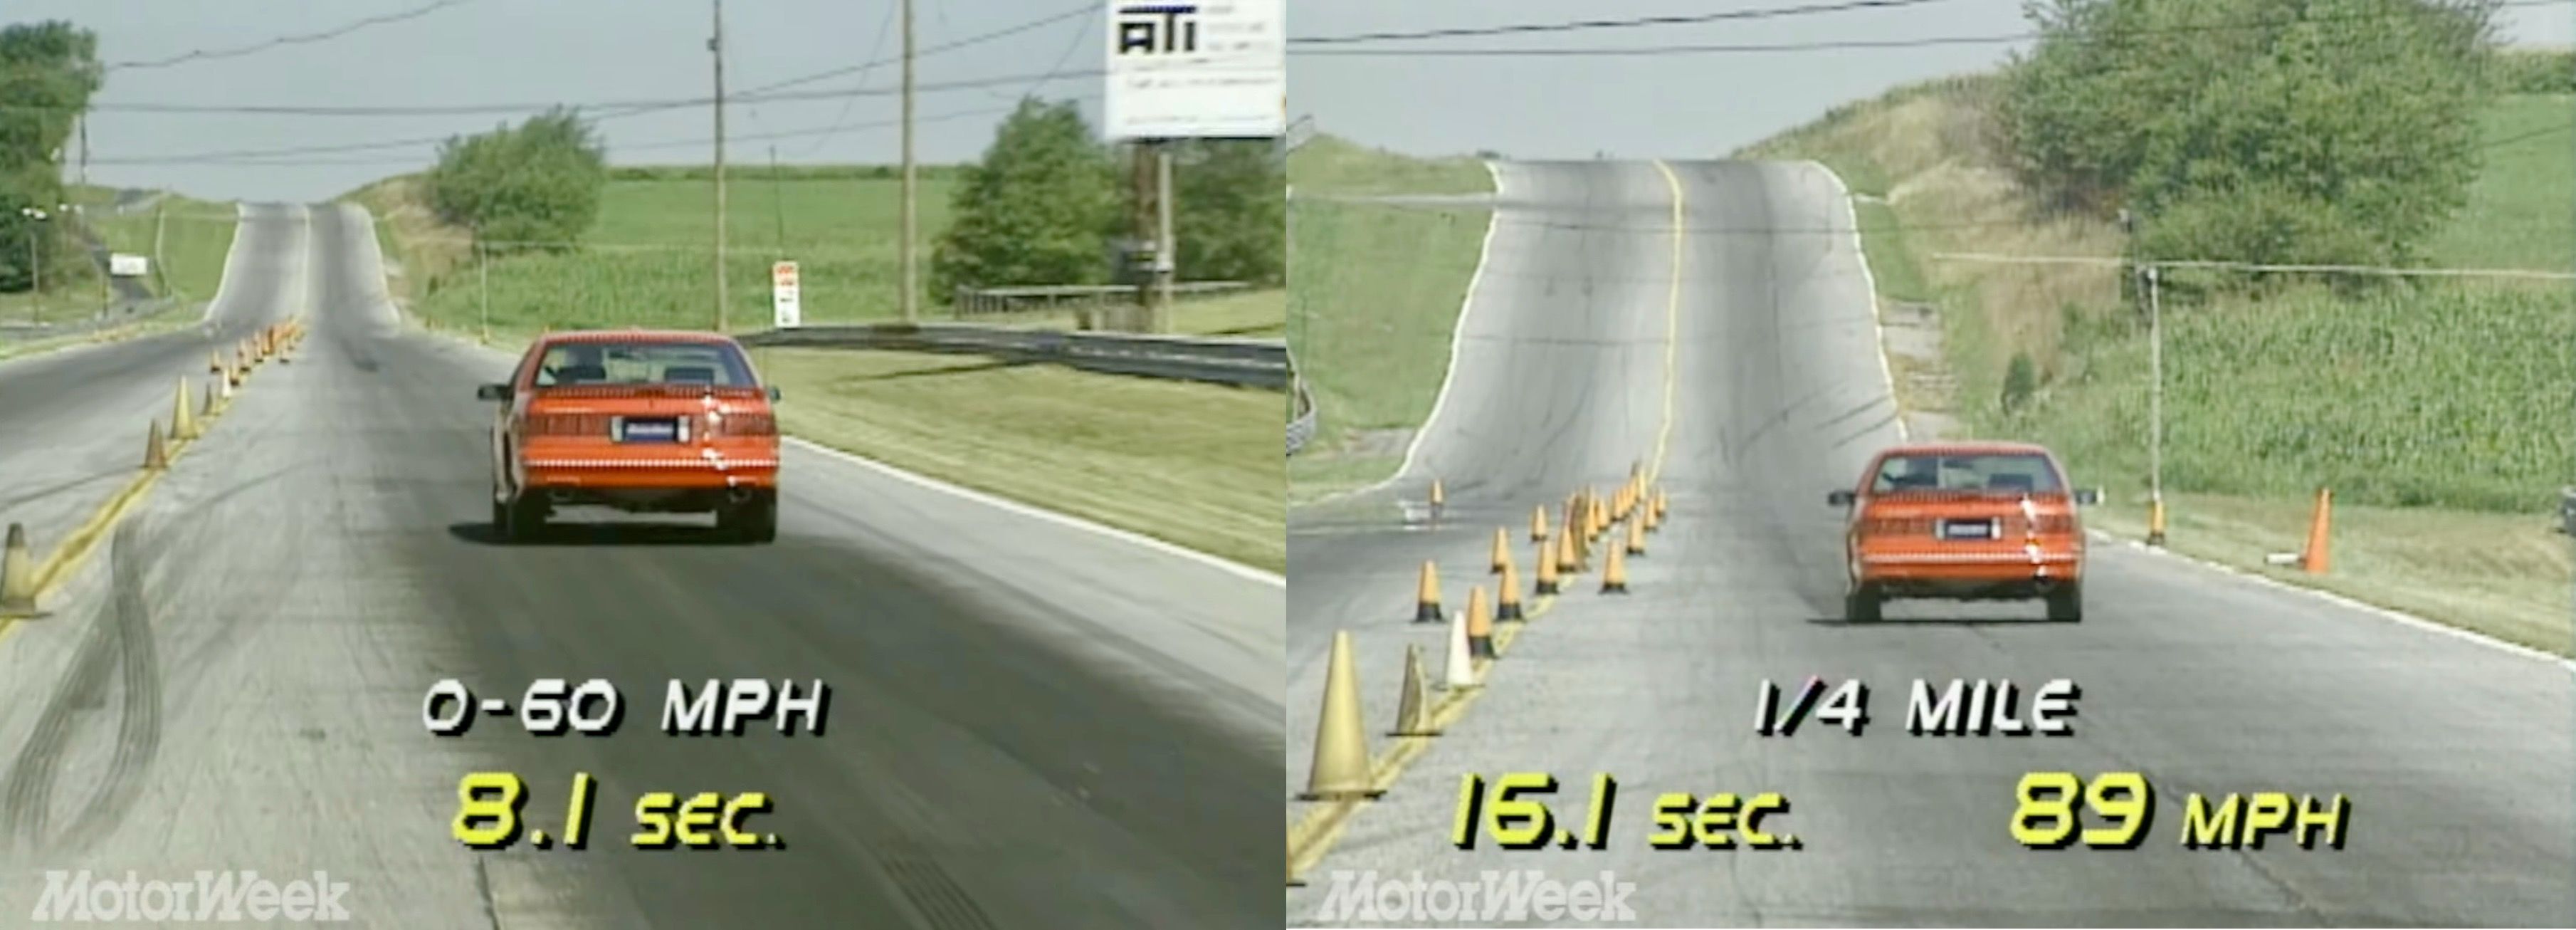
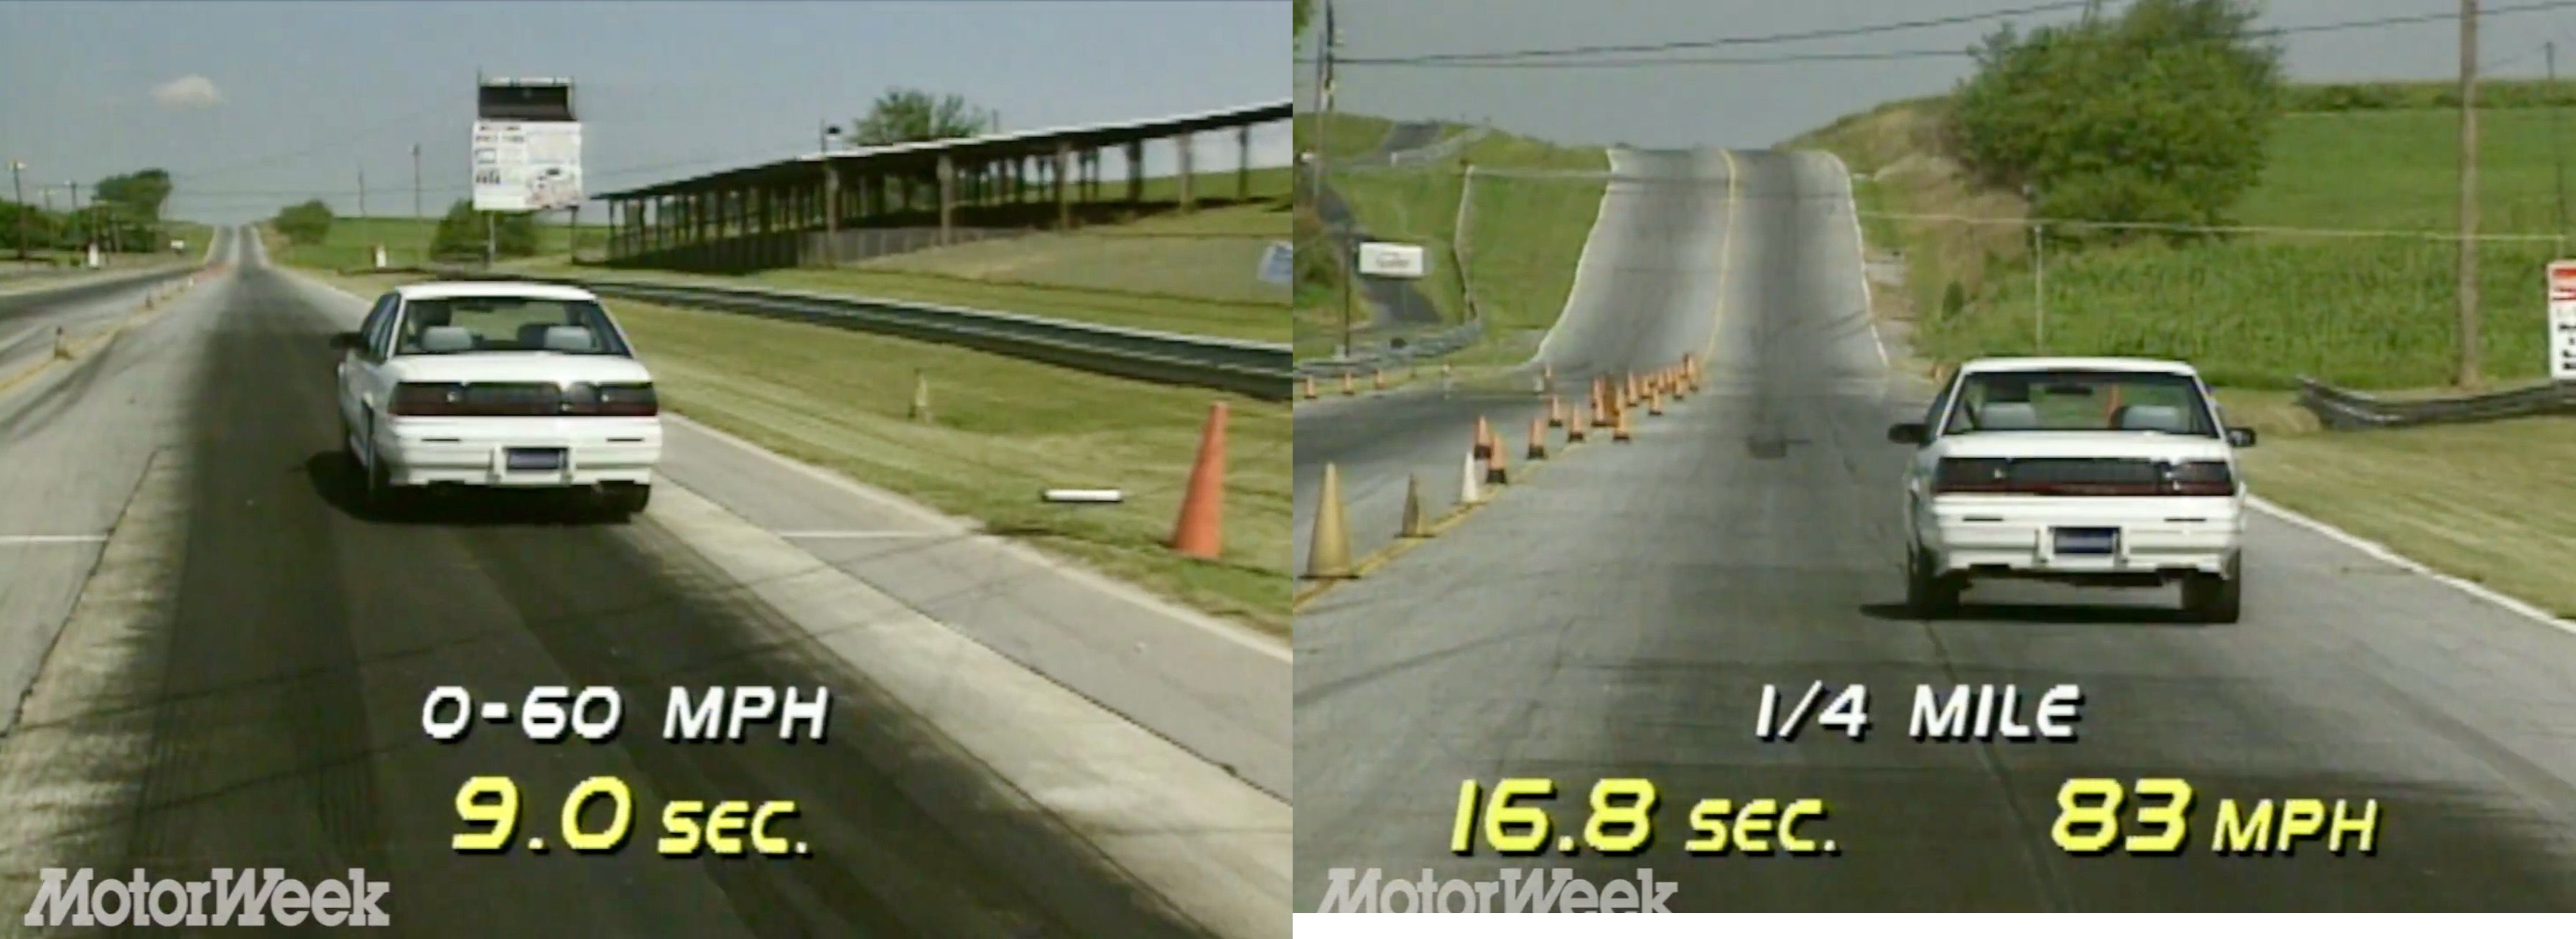 3 points
 -
Actual Dyno CHARTS.
Mach 5 and 2 others reacted to pwmin for a topic
The Monte. This was a long time ago and it's putting out less now for sure.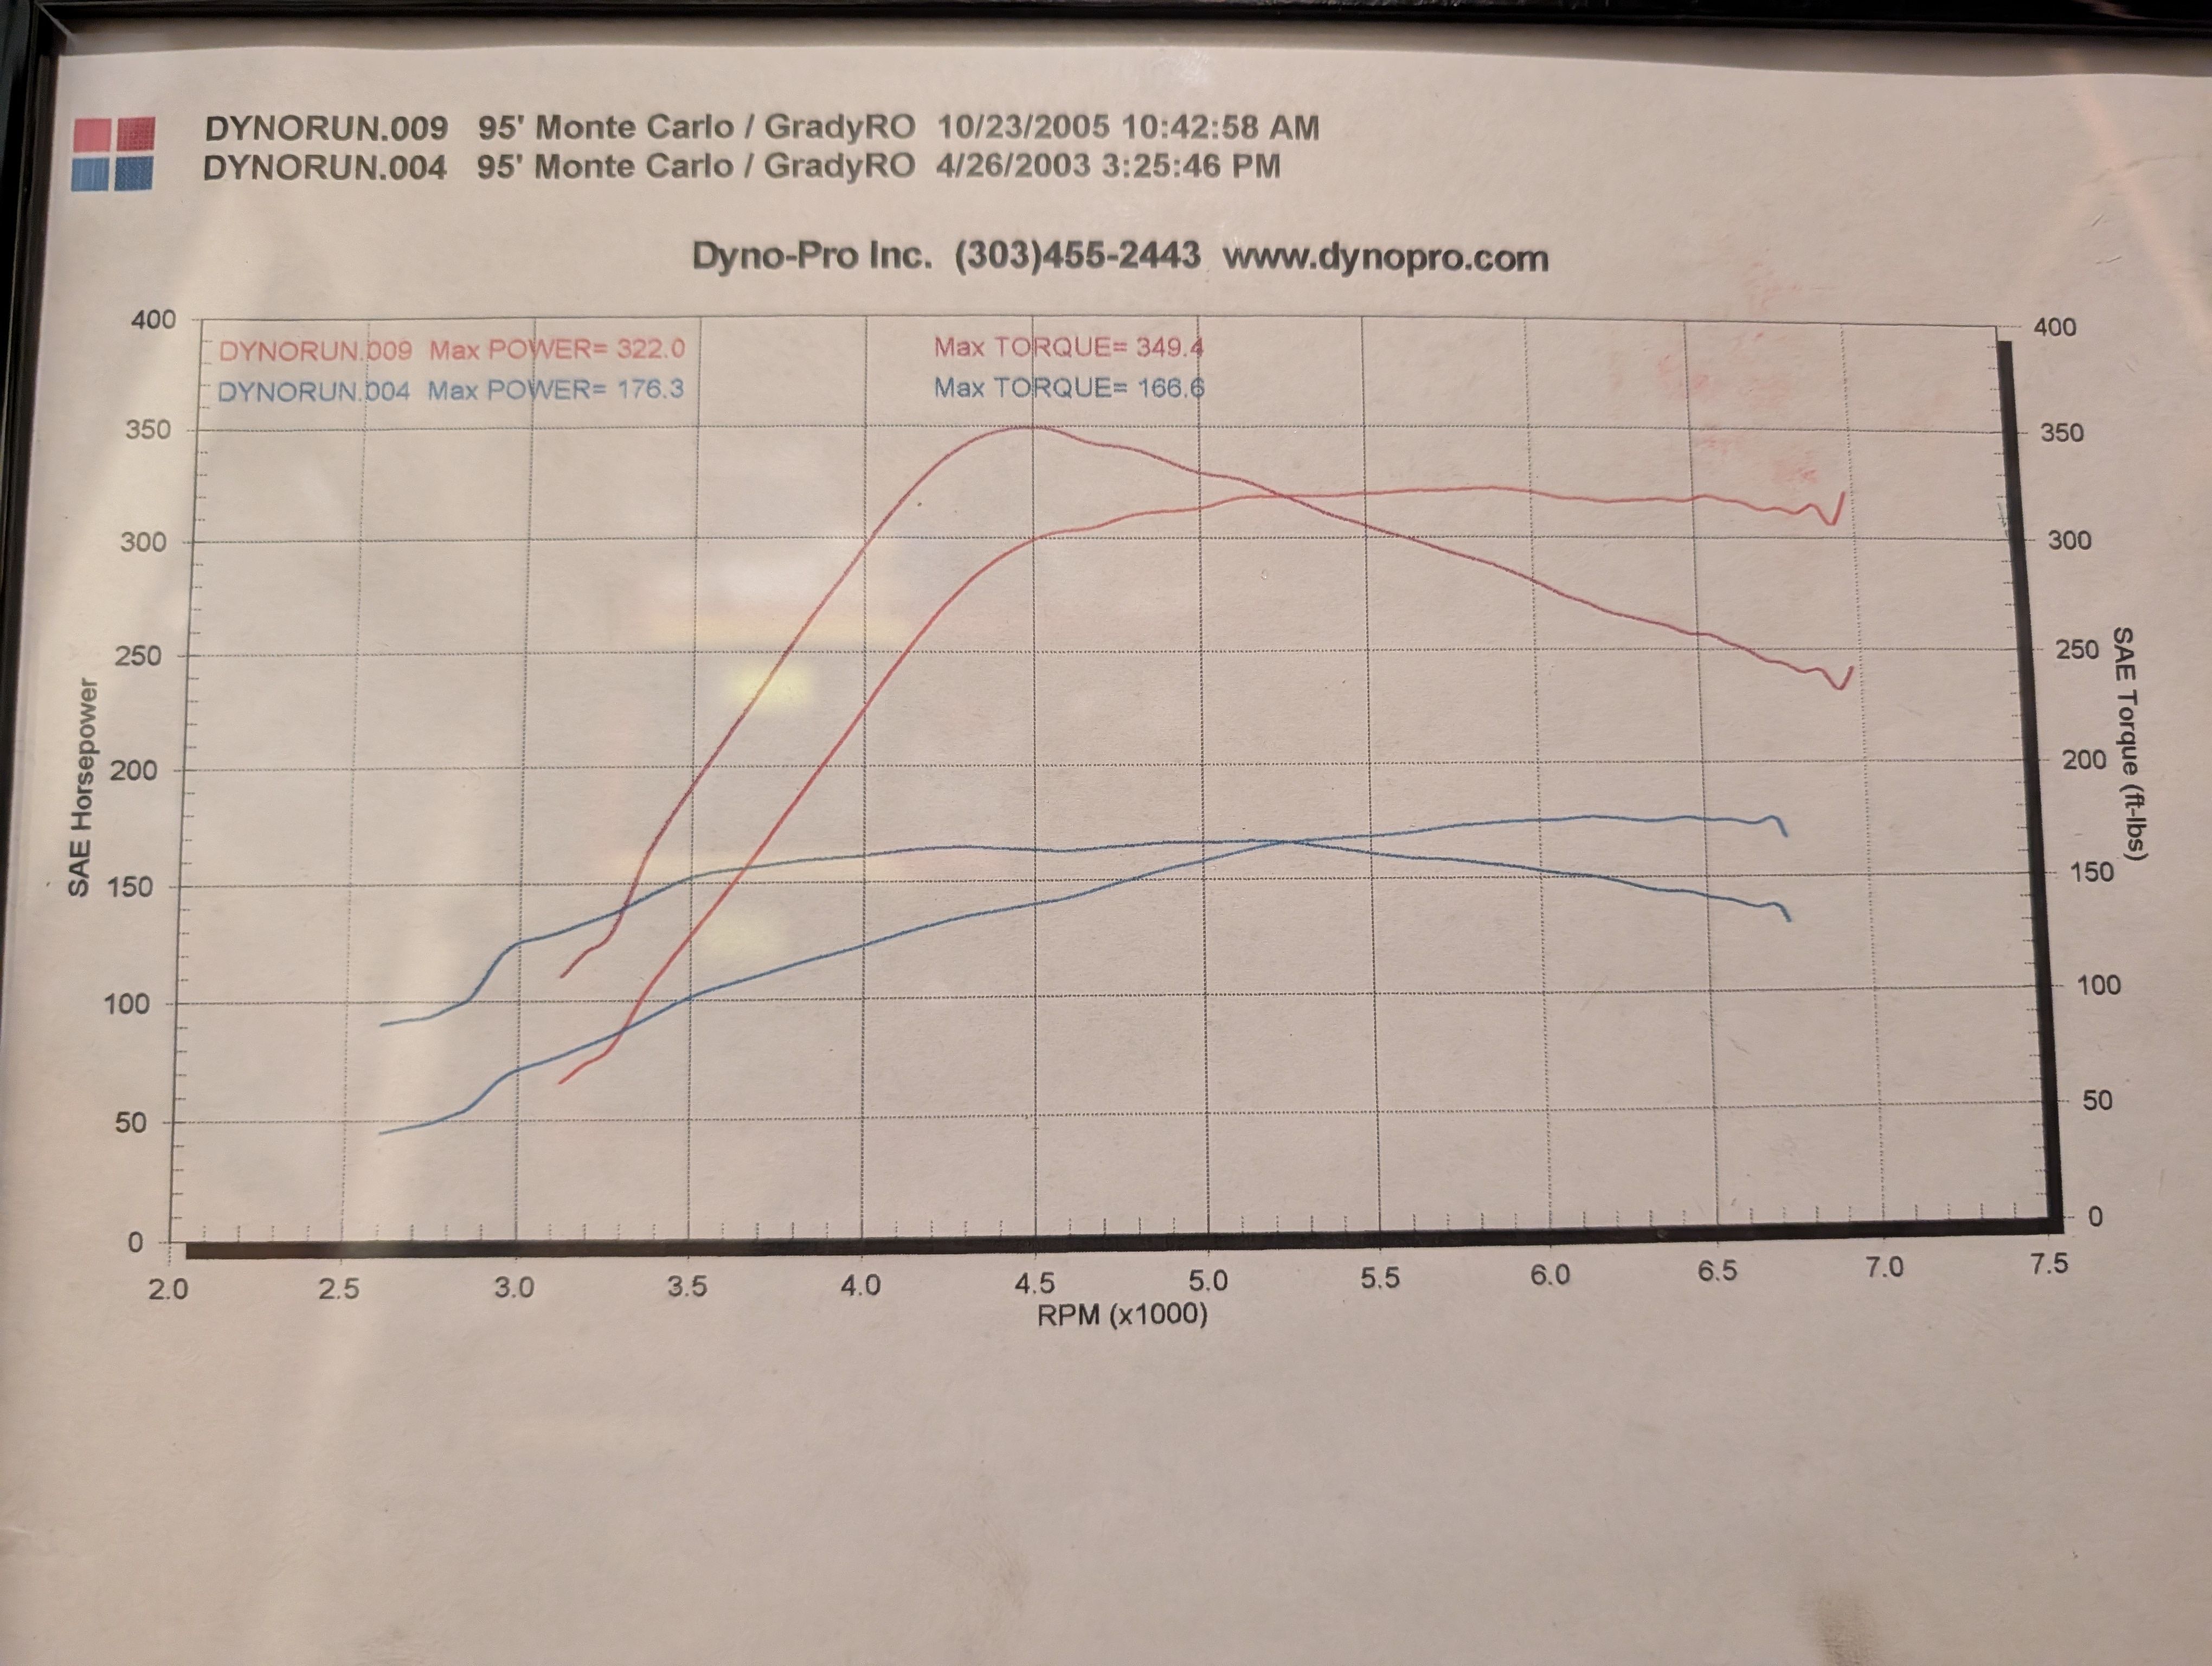 3 points
 -
Actual Dyno CHARTS.
Mach 5 and 2 others reacted to Vegeta for a topic
3.5l LZ4 with an F23 in a FWD race car. Port work, WOT-Tech VVT Delete with Big Race Cam Kit. 75mm Throttle Body, Megasquirt MS3X. All credit to Dan @ R&R Motorsports for putting this together and sharing the results.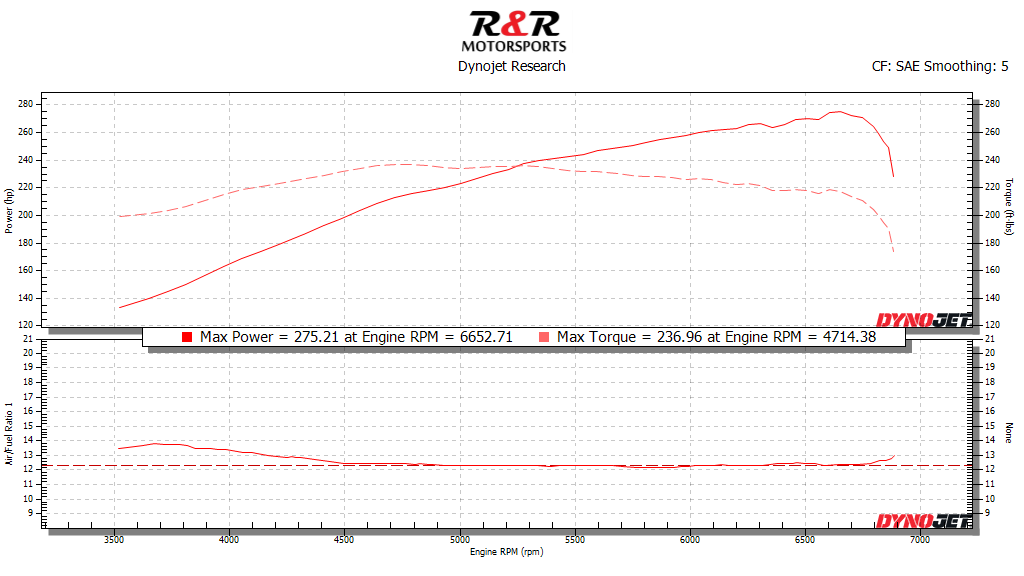 3 points
 -

It's begun! - 2nd Gen W-Body 3800 5-speed F23 Swap
SuperBuick and 2 others reacted to GtpKo for a topic
Nothing really. Nothing of that sort is absolutely necessary for a manual swap. All that is necessary is to get rid of the trans stuff so you don't have a constant 6+ error codes and MIL light. Even that isn't really necessary as you can drive fine with no tune changes as long as the PCM is wired to think it's in D at all times. I'm going to leave fueling and timing up to a ZZP remote tune once I switch over to E85, no sense in messing with it now. Other than that, I think the F23 speed sensor is slightly off from the 4T65E as it would read 70 when I was going 73-74, so I adjusted that to match GPS speed. On a side note, I have been looking into extending the clutch master cylinder rod about 1" behind the clutch pedal as the pedal hits the firewall before it's fully pressed, so it might only be 90% released each time which I hope isn't causing extra wear.3 points -
Which Turbo GP stays and which goes.
94 olds vert and 2 others reacted to GnatGoSplat for a topic
If you like red better, I'd say keep the red. At least, from my POV, color is very important and I really like black. I know it's boring, but as an adult, I've only ever bought black cars as I like it so much. I'm not so big on rarity either, and I think you're right that the tan interior goes pretty good with the gold wheels. If you're not as hung up on color as I am, the next thing I'd find important is the body, more specifically, body parts that you can't easily swap like quarter panels. Does one have previous body work on a quarter panel, body filler, etc. while the other has clean original quarters? Body fillers might not give you any trouble for many decades if done well, just a skim coat, and stored indoors. I just feel like there's a lot of value in a really straight car. Other considerations, how much unobtainium do you still need for each car? Do you have the time to get the black one running, or will you get to it "someday" - but "someday" just never seems to get here (that's the story behind all my projects ).3 points -
Which Turbo GP stays and which goes.
primergray and 2 others reacted to Black92GS for a topic
Just my $.02....The one you enjoy driving the most is the one you keep. There is something to be said about a mechanically sorted, but less than visually perfect vehicle that you can simply jump in and drive without worry. As much as I hate to say it, any 1st Gen W that isn't a total beater is relatively rare these days. Individual rarities within that are almost irrelevant when it comes to market value of these cars and I would go for the colour combo I like better, rather than the rarer combo every single time.3 points