
Leaderboard


Popular Content
Showing content with the highest reputation on 07/23/2025 in Posts
-

TGP hood vent repair.
primergray and one other reacted to rich_e777 for a topic
Thank You Needed a win, its been awhile.2 points -

92 Oldsmobile cutlass supreme A/C evaporator replacement
GnatGoSplat reacted to Ian for a topic
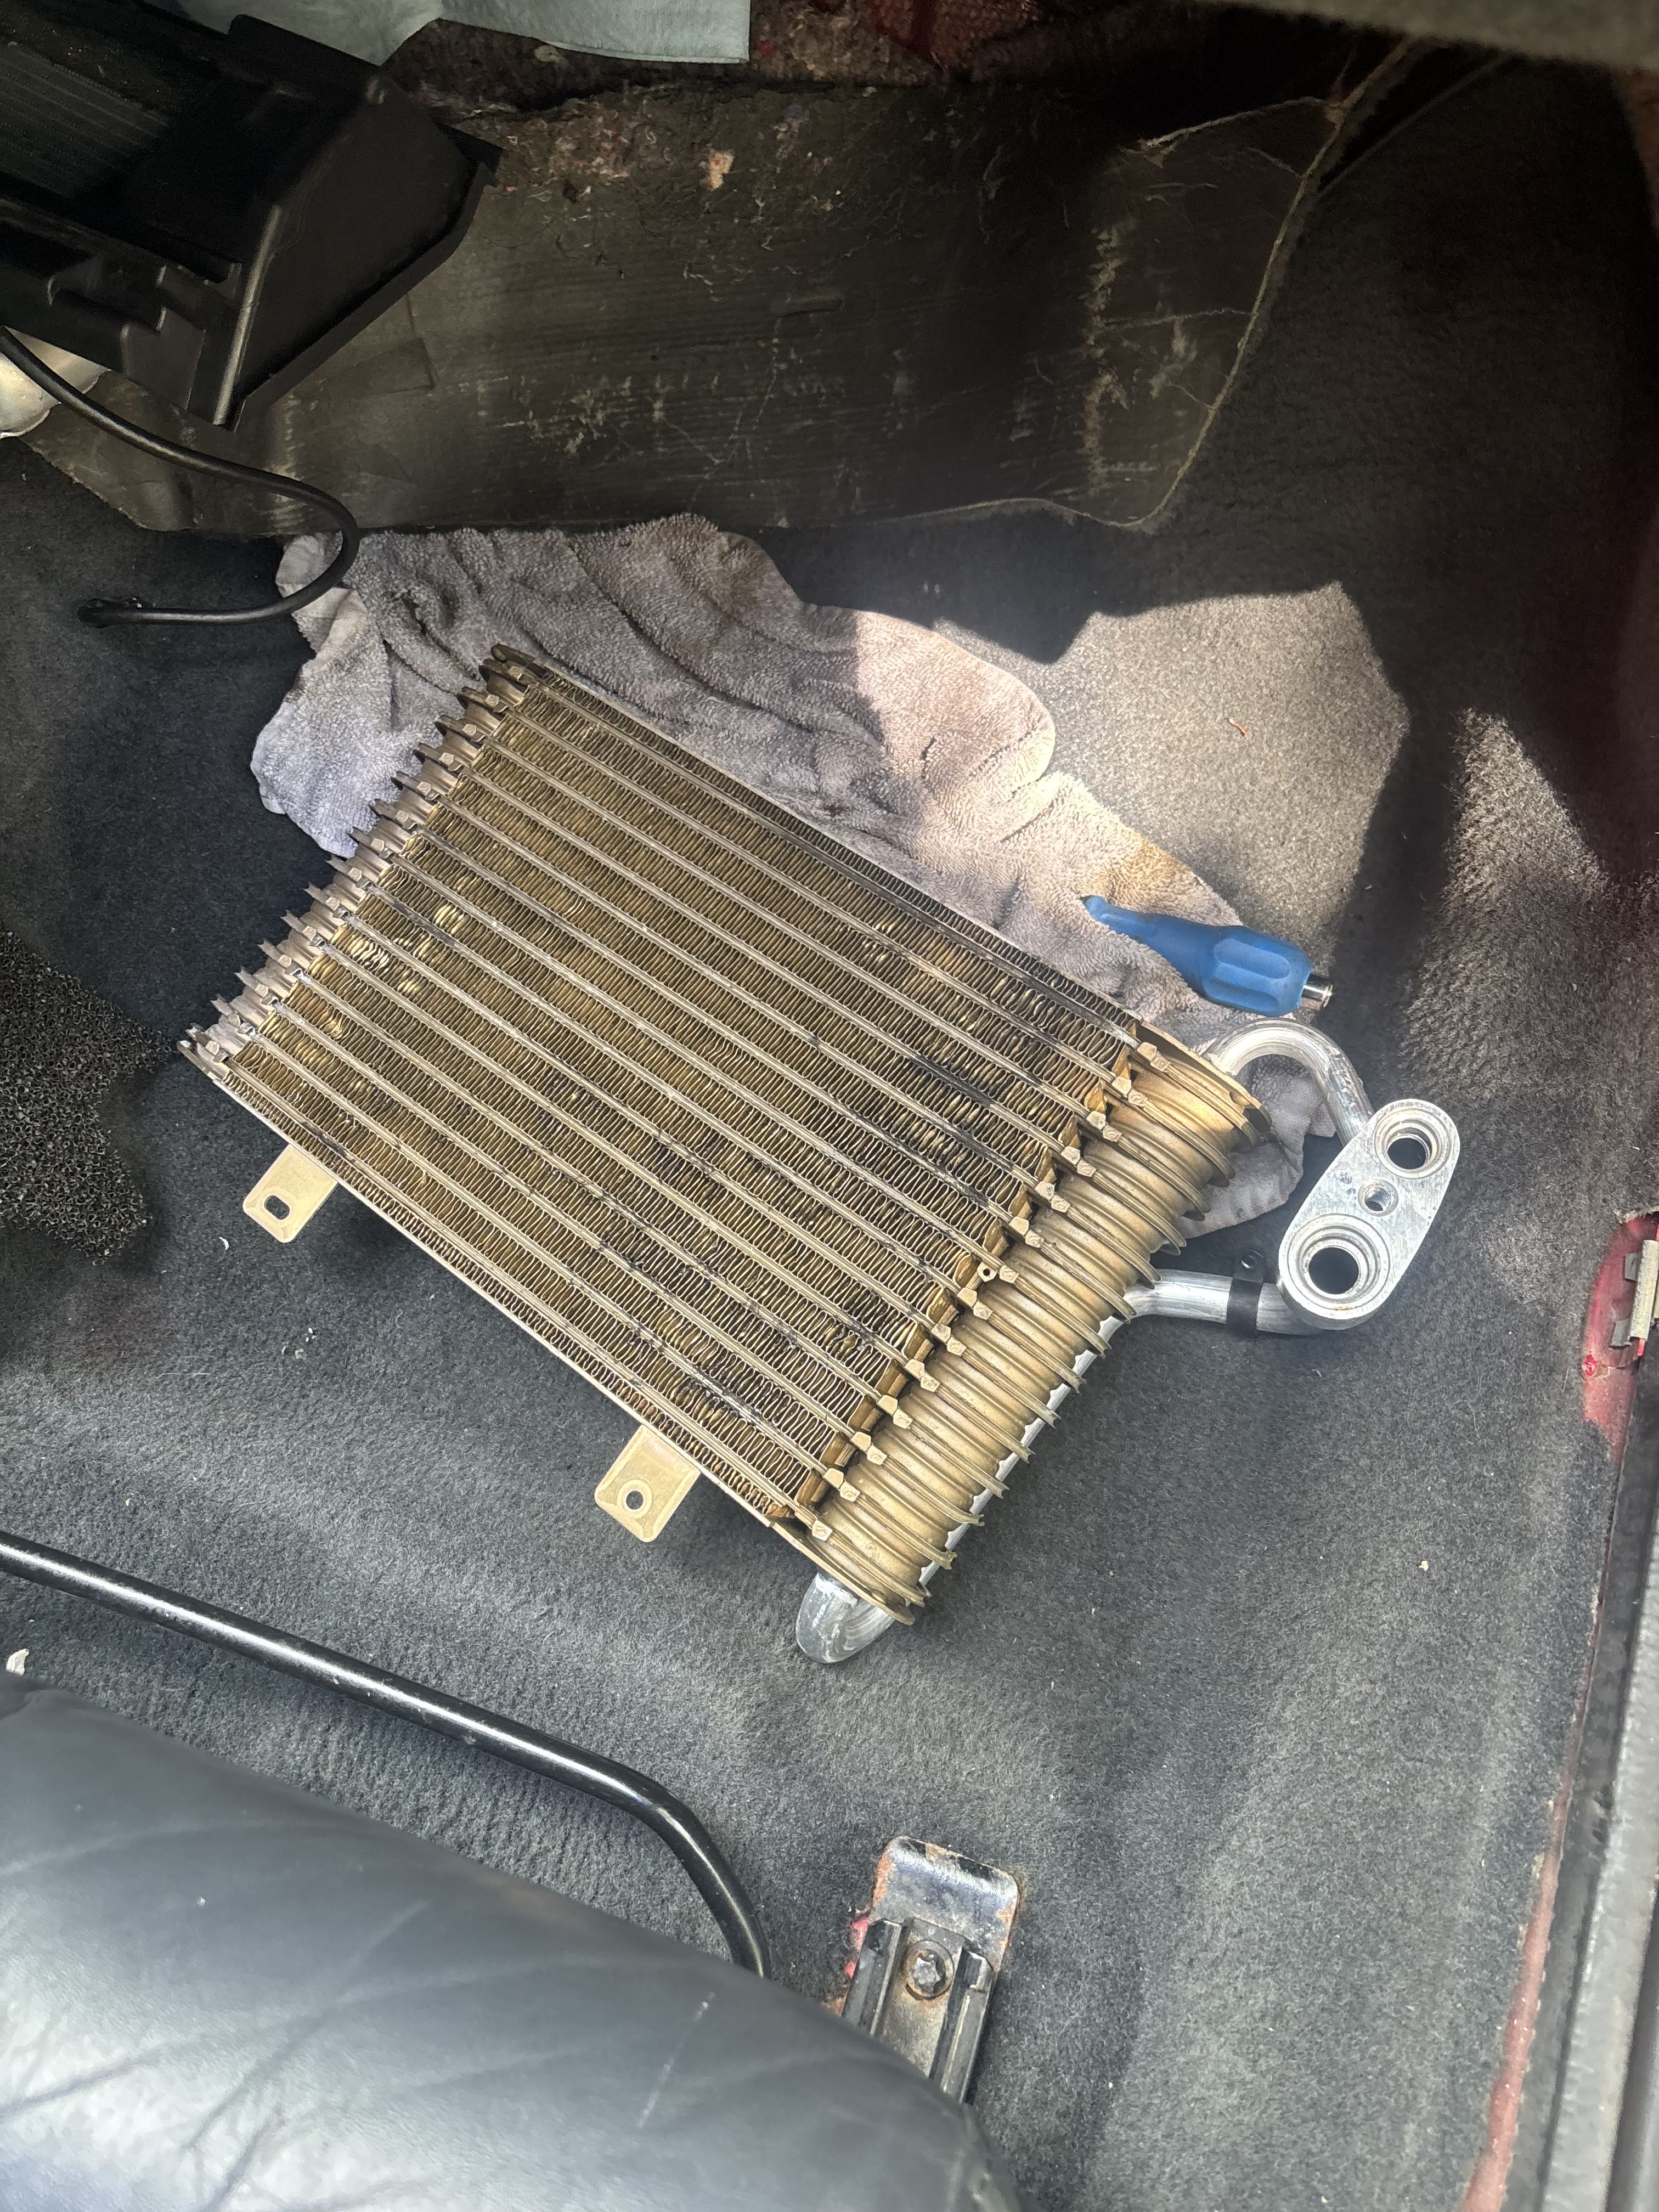
Thanks for the options but did not need it. since I have a recovery machine with R134a it was not a big deal to open the system and refill it. Yes it was previously converted. after recovering the system I removed the one bolt under the hood holding the lines to the evaporator. Also I removed the clamps for the heater hoses at the firewall. Making sure a pan is under where you remove the heater hoses so not to spill it on the ground. under the dash at the floor I removed both left and right kick panels and gave access to where the bottom of the heater box is. I removed the silver trim around the cluster and radio, unbolted the center stack with that vent, climate control, and pocket. Behind that is another carpeted pocket unbolted that which gave me access to the heater box.. Removed the first panel that direct the floor air flow. There seems to be some pipe that goes into the floor under the carpet no idea where it goes since the back doesn’t have air vents or under the seats lol removing that panel I can see the heater core two or 7 mm. This car seems to be made with 7 mm screw screws.LOL . I was able to pull the heater core to the left and that gave me access to the evaporator. Remove the two screws on the bottom and I was able to pull the evaporator into the car and let me tell you I’ve attached a picture of what it looks like before cleaning it and after cleaning it after reinstalling everything and putting a new O-ring on the AC lines, putting a vacuum on the system and allowing my machine to refill the system with the correct amountthe airflow out of my vents was like a new car and my AC finally blows ice cold. All in all I was only left with 27 mm screws. I have no idea where they’re from but everything is nice and tight and working great. Now I know this isn’t a tutorial with instructions step-by-step but this is just what I had to go through since I couldn’t find any information and didn’t wanna wait for my service manual to come in which yes I did order on eBay. i’ve attached a few pictures before and after. I did do a little bit more cleaning after the clean picture I’ve attached. It looks like a brand new unit now. I hope in the future if somebody has to go through this and doesn’t understand what I’ve typed then can always reach out to me with questions.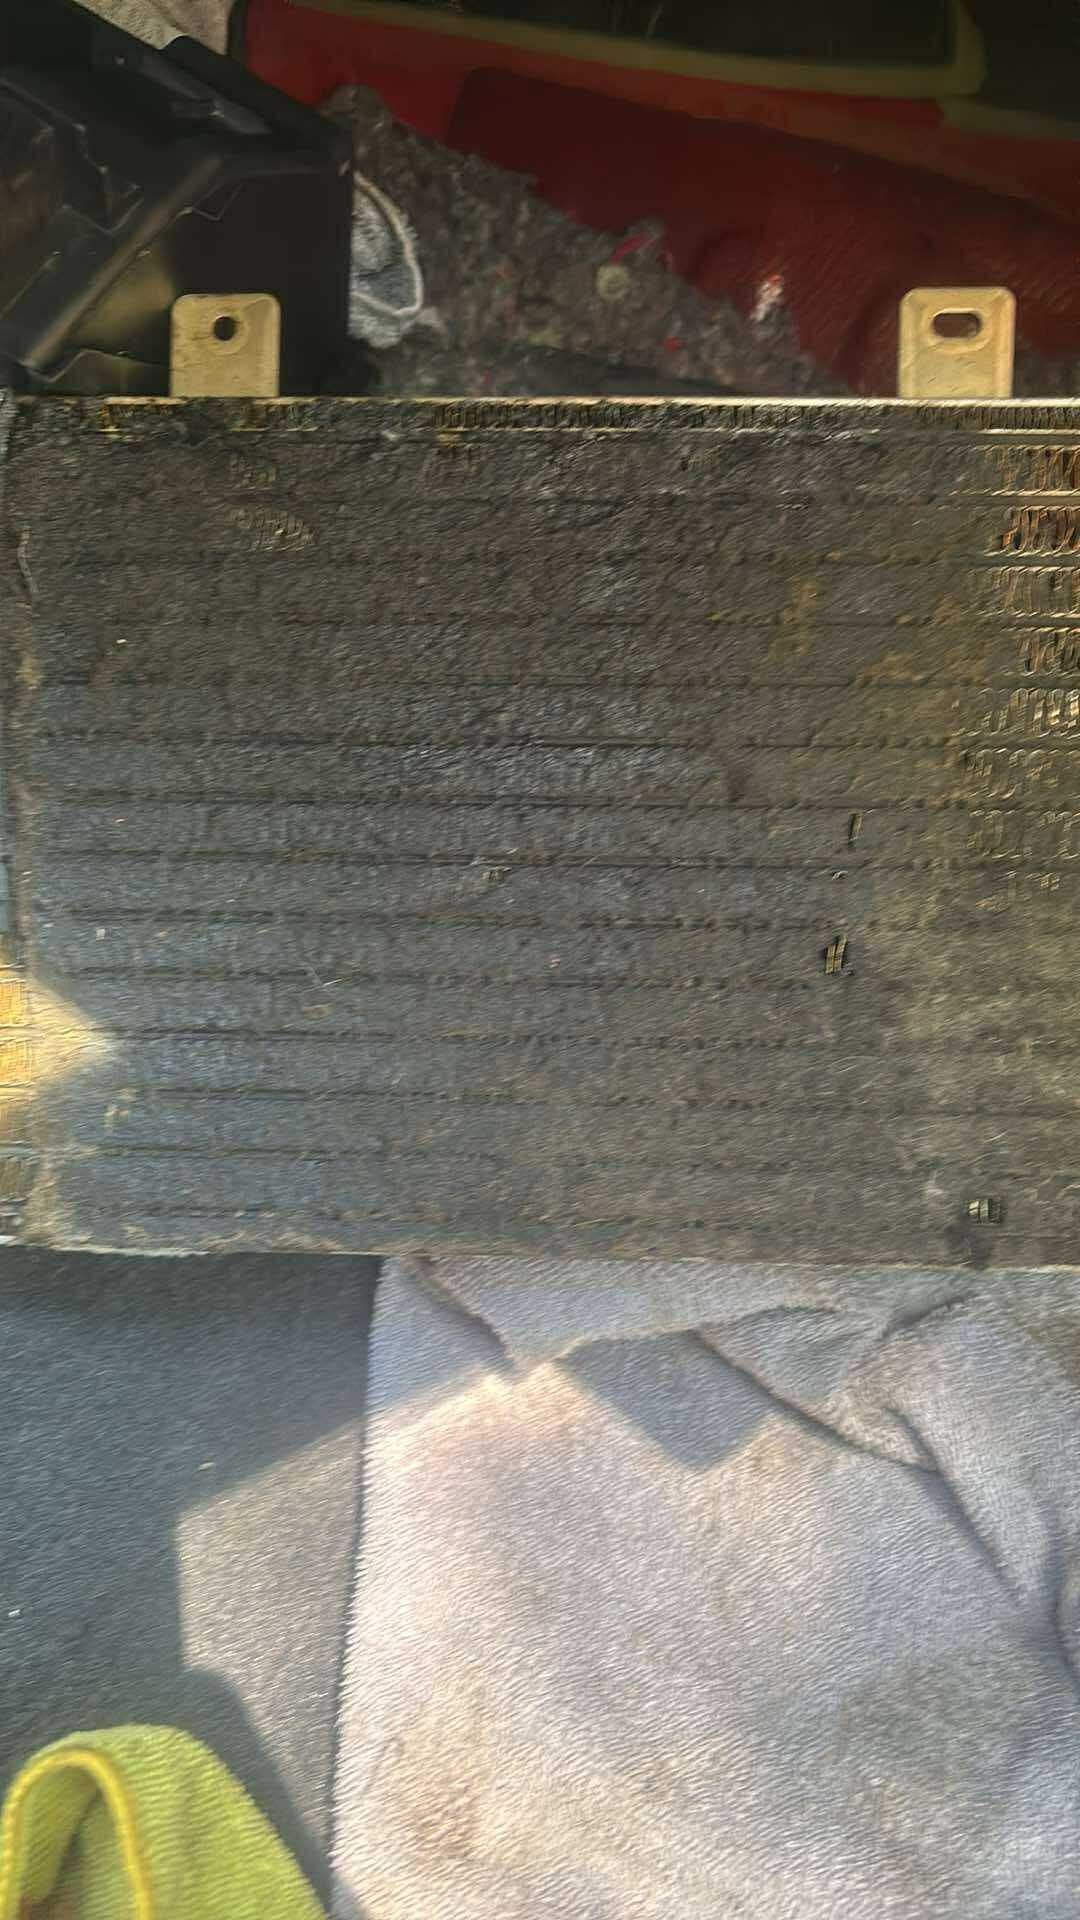
 1 point
 -

TGP hood vent repair.
rich_e777 reacted to jiggity76 for a topic
Looks fantastic! You did good!1 point -
TGP hood vent repair.
primergray reacted to rich_e777 for a topic
All that work and I ended up dropping and breaking that vent awhile back. Thanks to an extremely generous member here I have a replacement vent. I keep the pair inside packed in a box so I can`t break them without effort. Had an idea and went with it in securing the drip pans and screens. Using some things I had on hand I came up with some brackets that can be removed easily for cleaning or paint. I don't know if it helped or not, but I also used a small wire brush to clean out the posts and put a few drops of silicone lube in them before barely snugging up the mounting screws. Everything holds tight and secure when the hood is open and closed and looks good from the top, underneath maybe different but each side is mirrored to the other to the 1/16" with the exact same parts. It could look better with fabbed up metal stock instead, but the idea works and can be covered with some insulation in the future. It really doesnt look half bad with just the screens and pans, and Ive not even painted those yet. Seems like it could match the front grilles...1 point