Leaderboard

Popular Content
Showing content with the highest reputation on 01/07/2025 in Posts
-

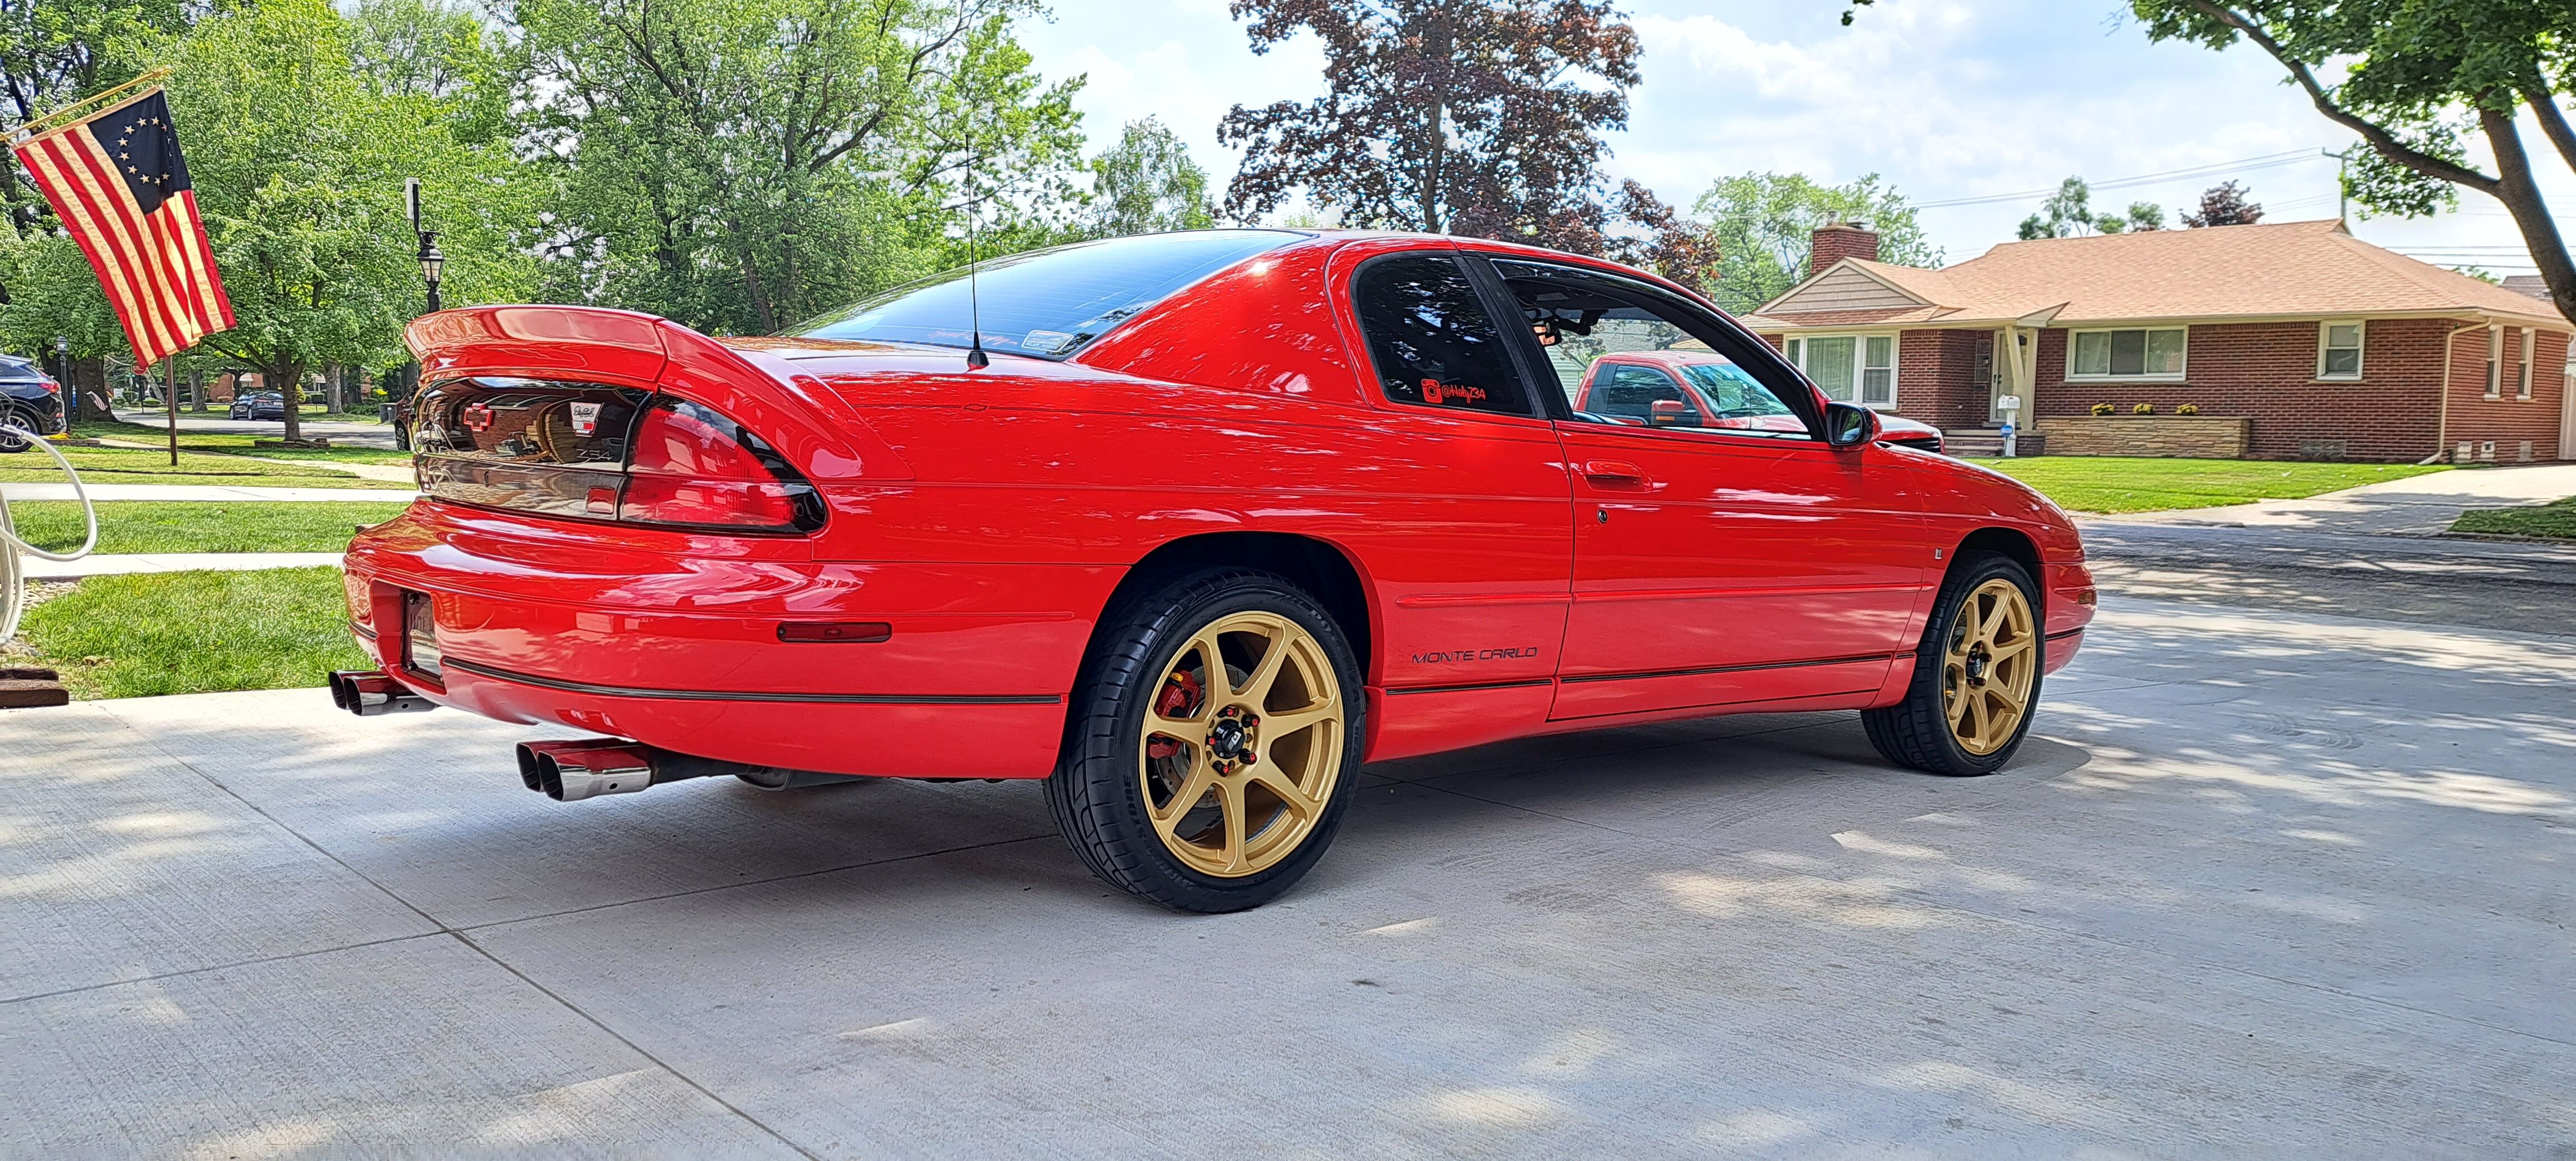
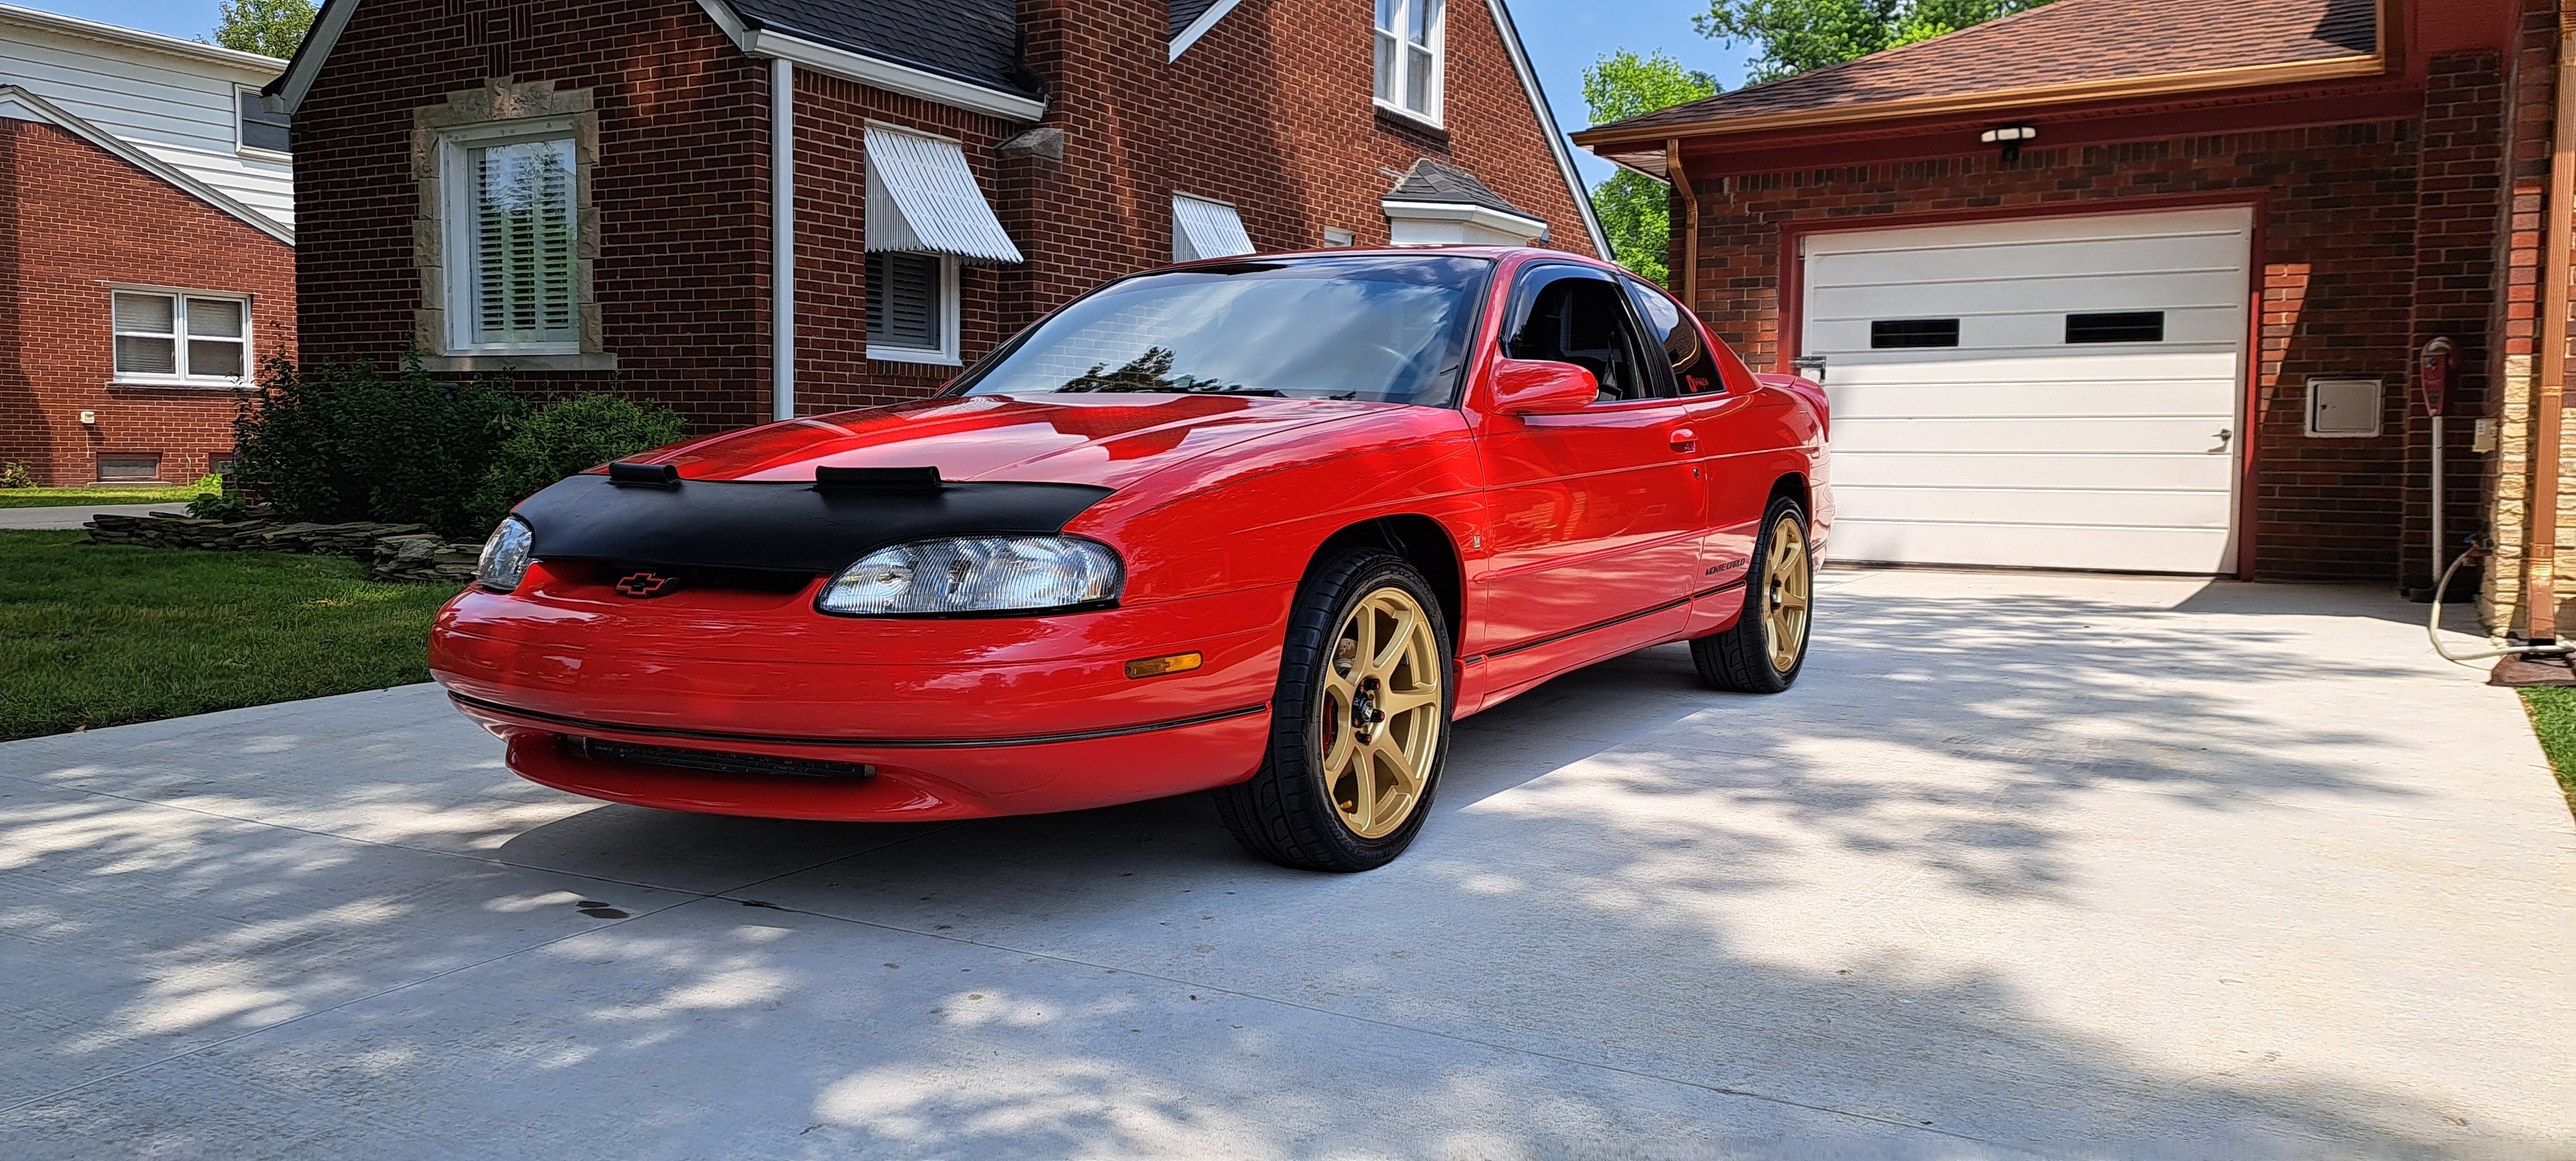
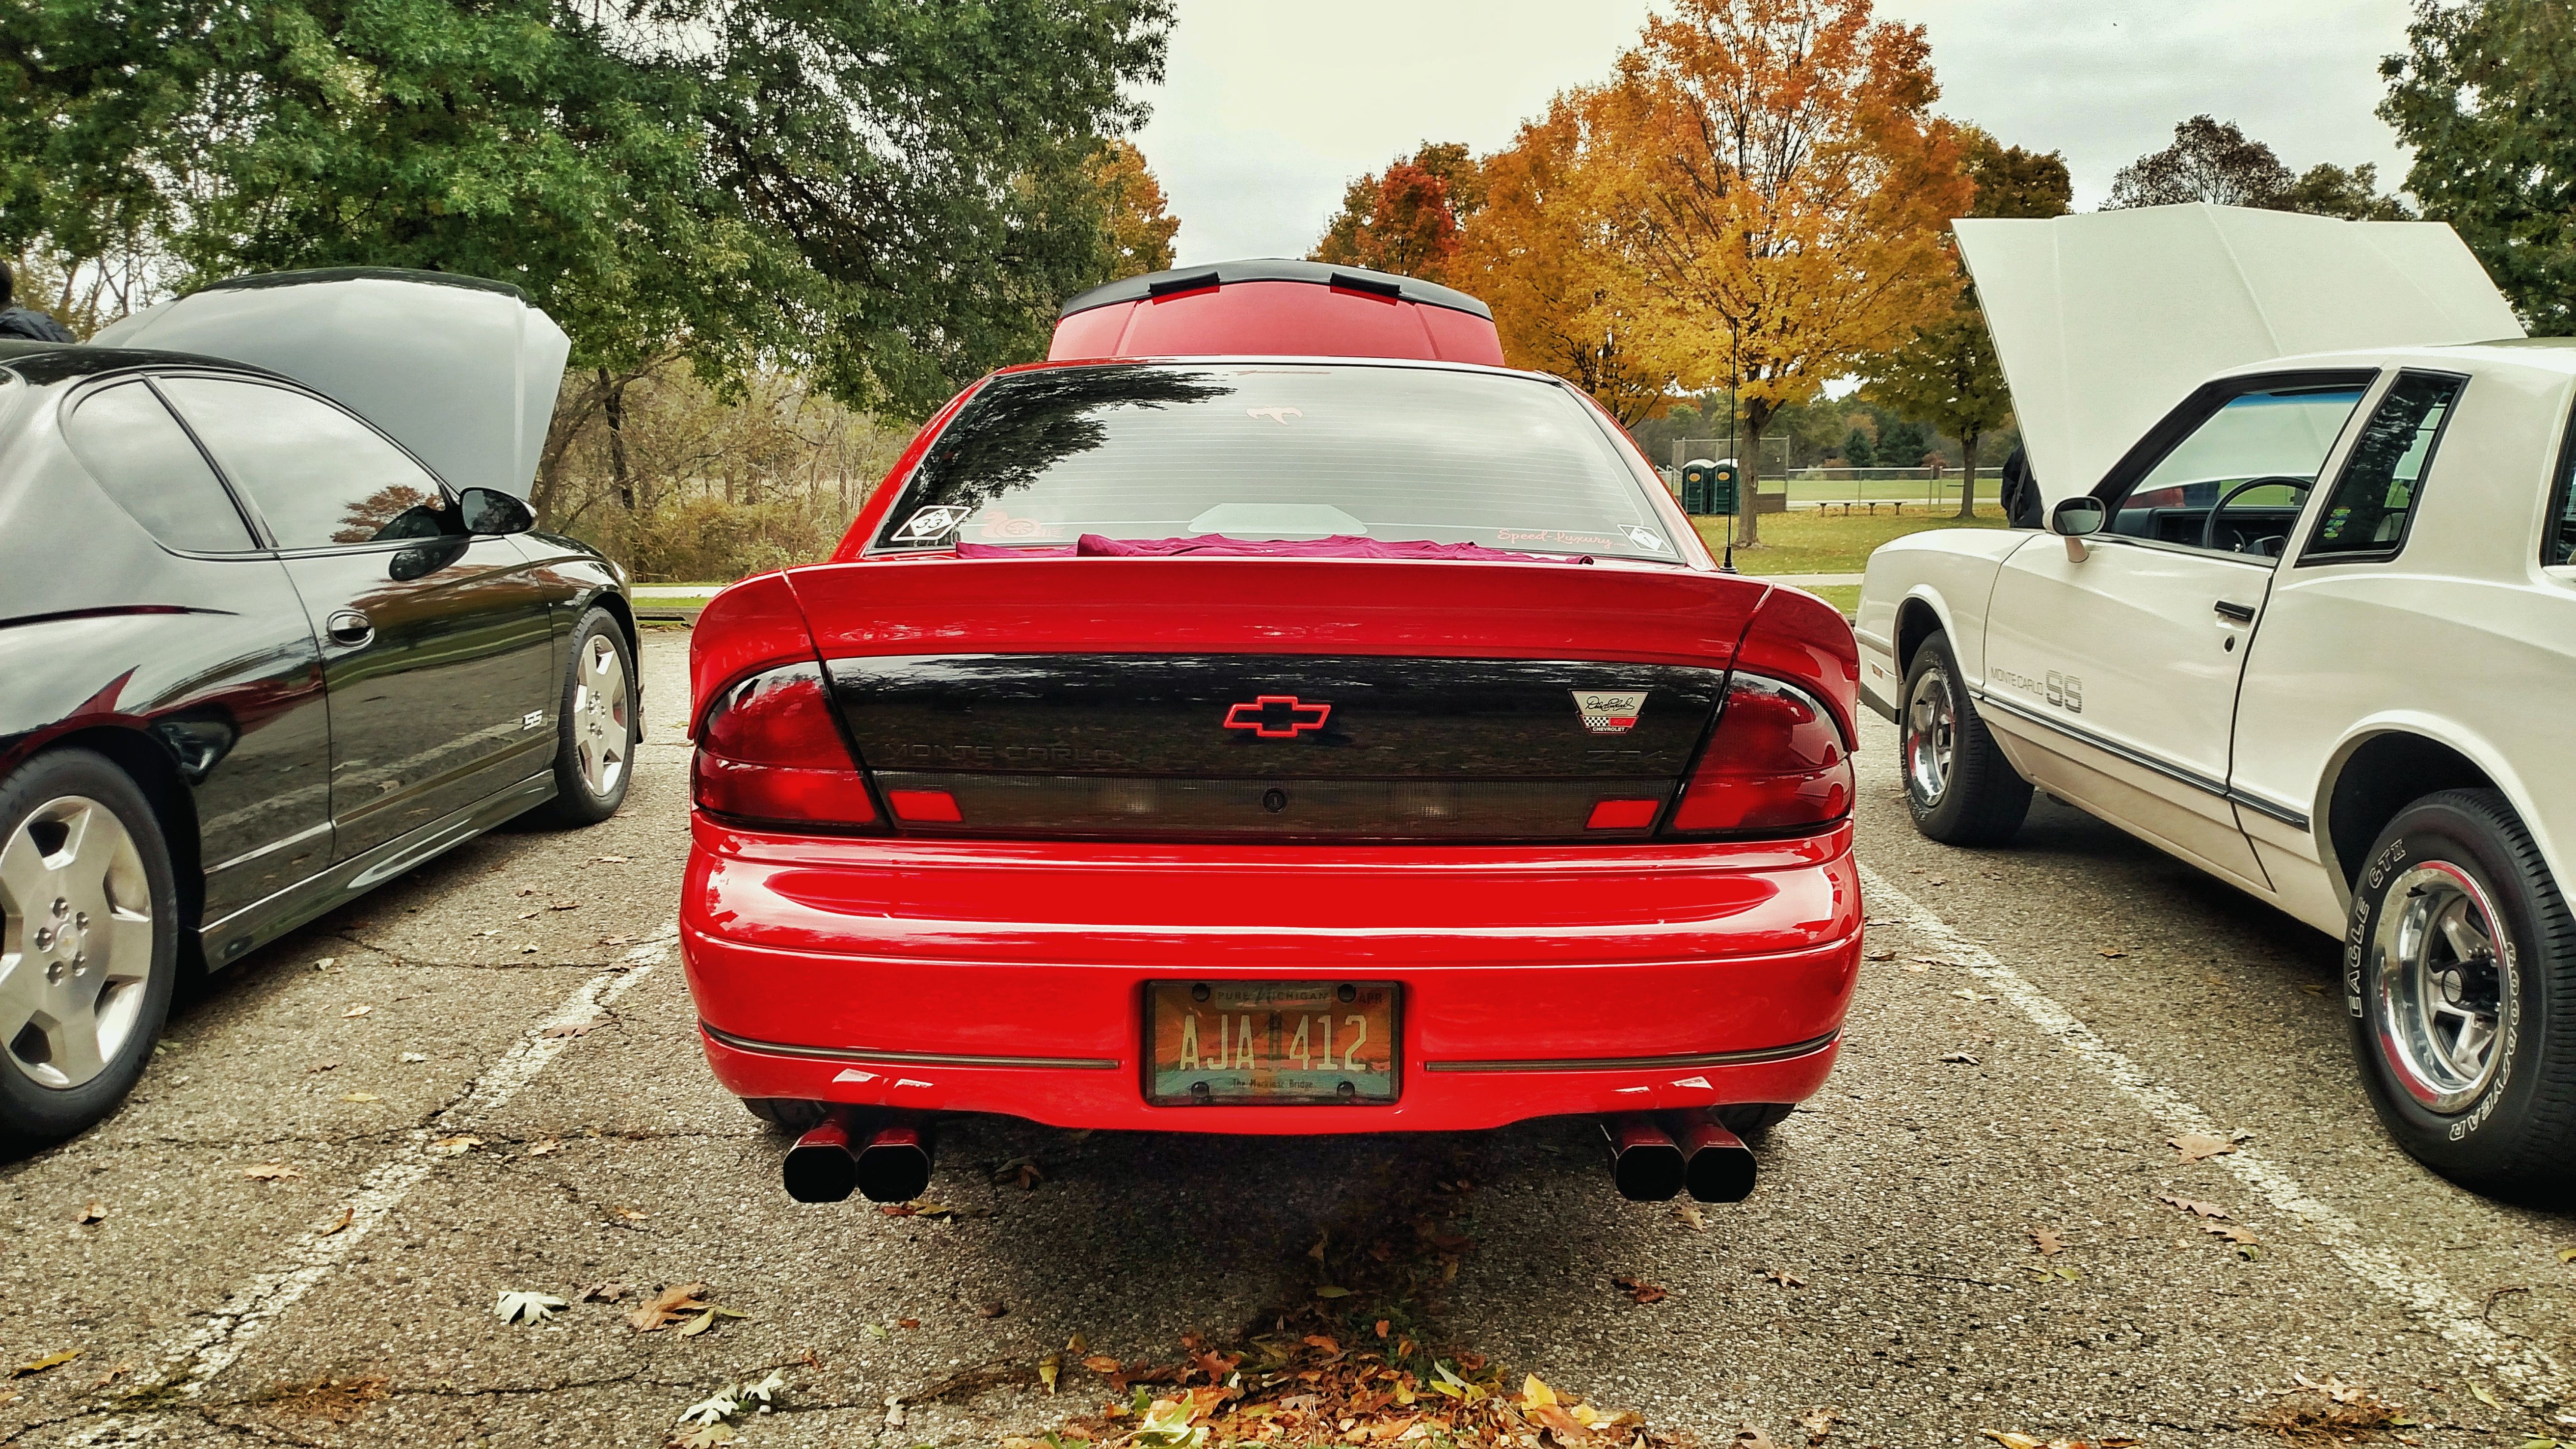
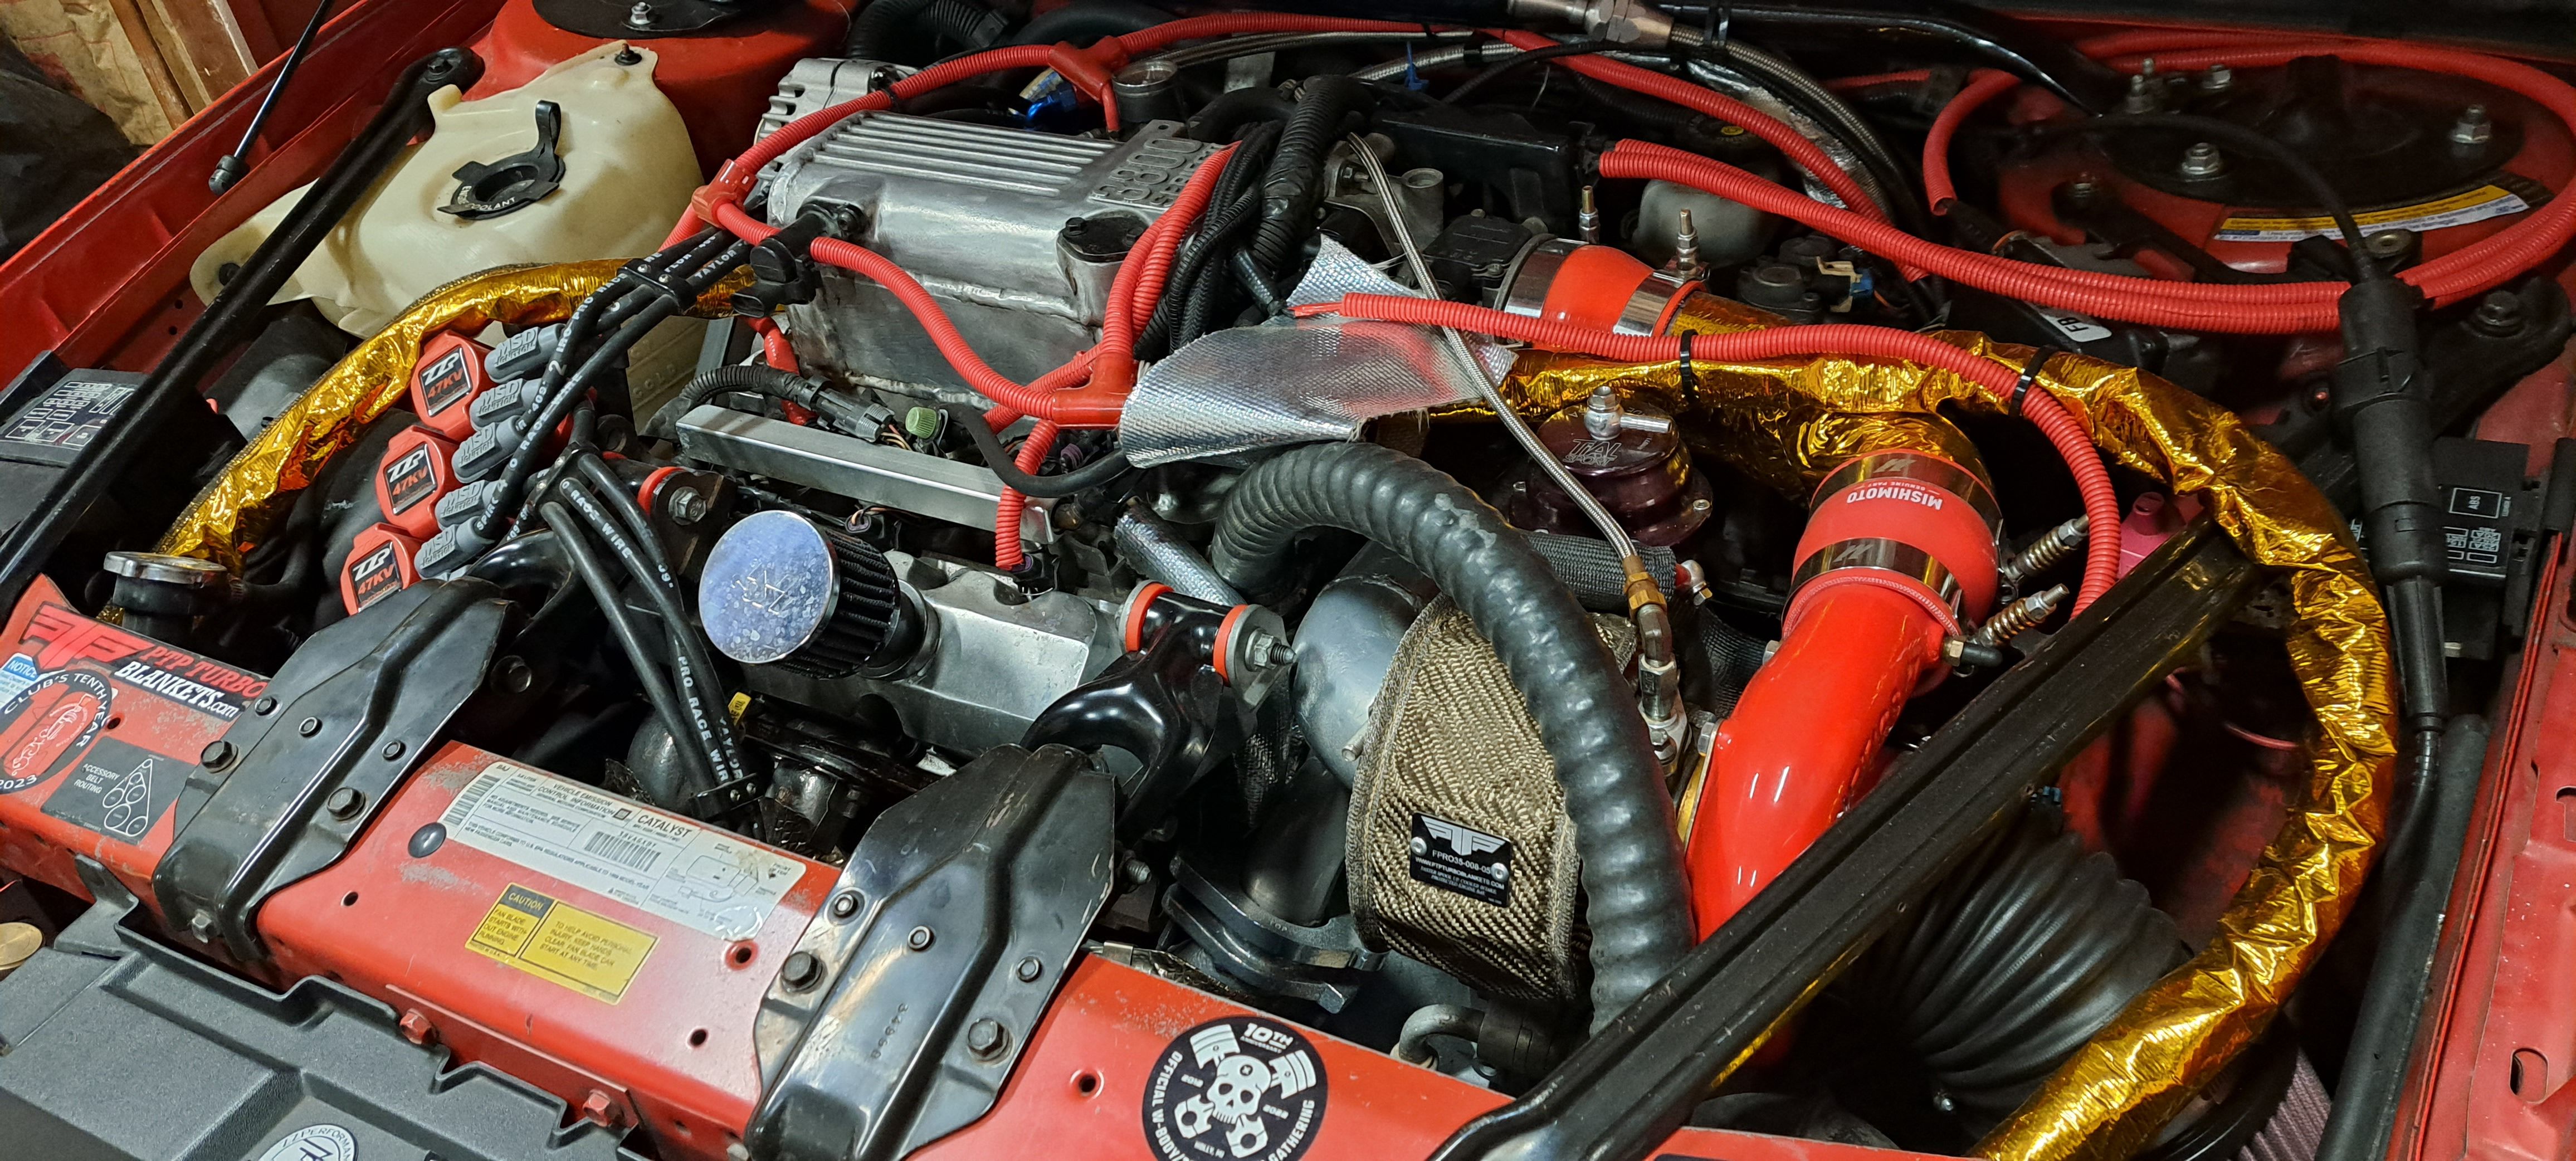
My Turbo 99 Z34 Monte Carlo
SuperBuick and one other reacted to HolyZ34 for a topic
It's been a while since I've logged in. I was more of a lurker back in those days... But I'm glad to see the forum is still up and operating!! Happy New Year Everyone!!


 2 points
 -
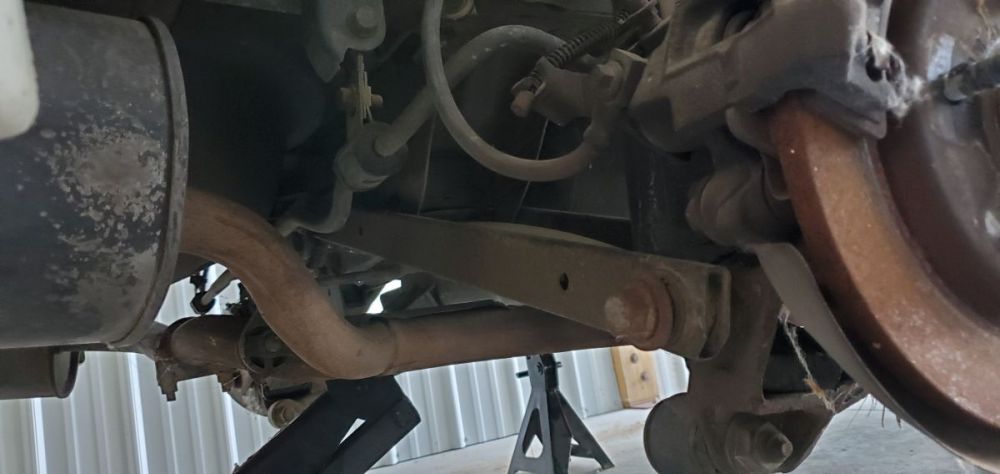
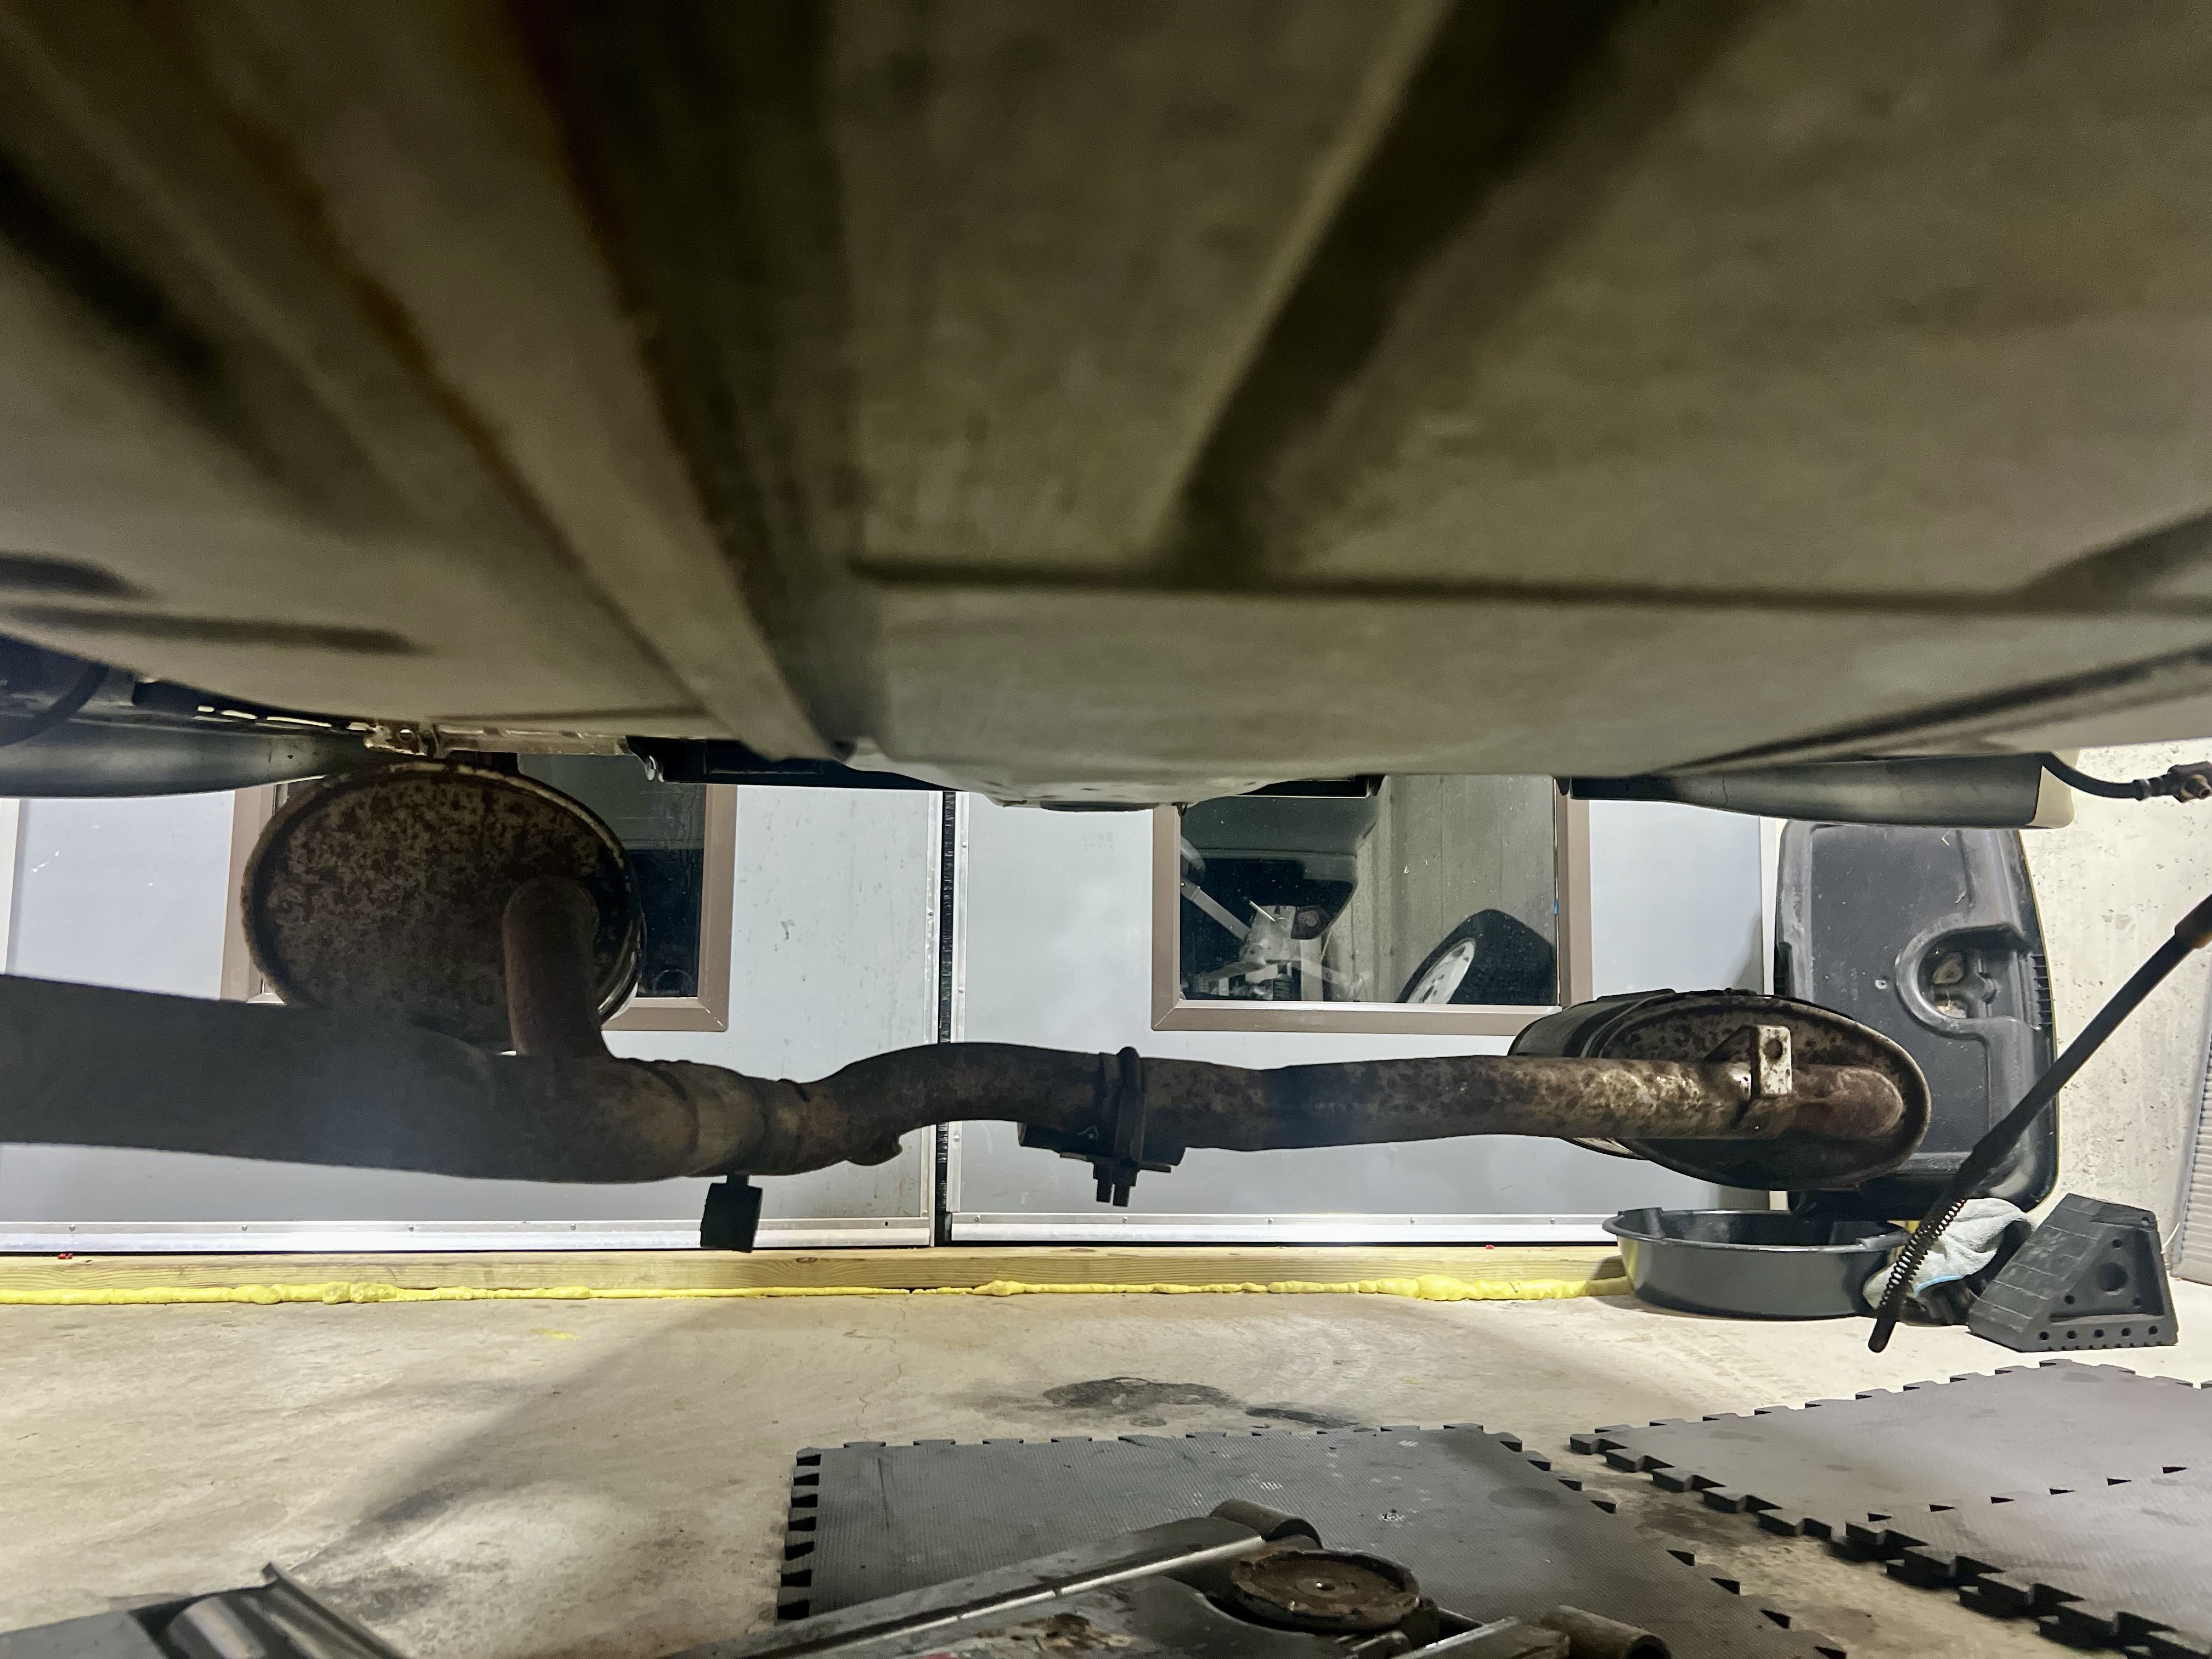
Factory exhaust fun fact
SuperBuick and one other reacted to 55trucker for a topic
Well..... one doesn't want anything that is aluminized, at the very least 409 stainless, you might look thru Walker's Quiet-Flow SS series, their recent all stainless lineup may include something close to the original mufflers. Consider that you may end up going to a pair of 4 1/2x9 3/4" 14"shell mufflers.......the left side IS a 12" shorty while the right should be a 14", the right IS a 7x9 shell.2 points -
Factory exhaust fun fact
SuperBuick and one other reacted to jiggity76 for a topic
Don't know if this will help...I just wanted to be part of the conversation. My STE's system.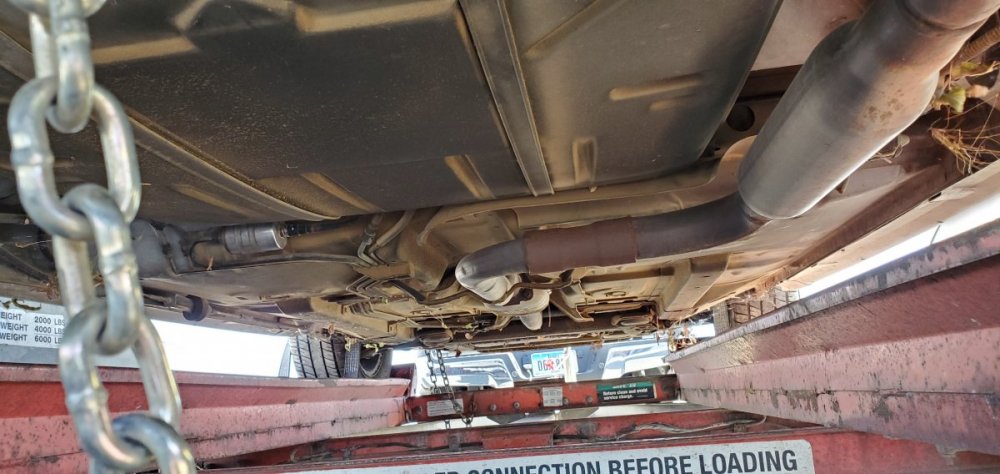

 2 points
 -
Factory exhaust fun fact
SuperBuick and one other reacted to 55trucker for a topic
That's OEM m'boy.....no muffler shop involved, the GT coupes that were fitted with the dual exhaust, & the STE's were fitted with that small left side muffler. It was done that way to get needed clearance under the floorpan, you notice that the left side floorpan has no heatshield in place to protect the fuel filler hose & the evap lines, but the right side does have a heatshield. That small muffler is fitted with a strap-on flimsy heat deflector that does literally nothing. If you toss the original rusted out mufflers don't toss the trumpets, keep them, those are near to the point of being unobtanium. 2 points
 -

Factory exhaust fun fact
GnatGoSplat reacted to SuperBuick for a topic
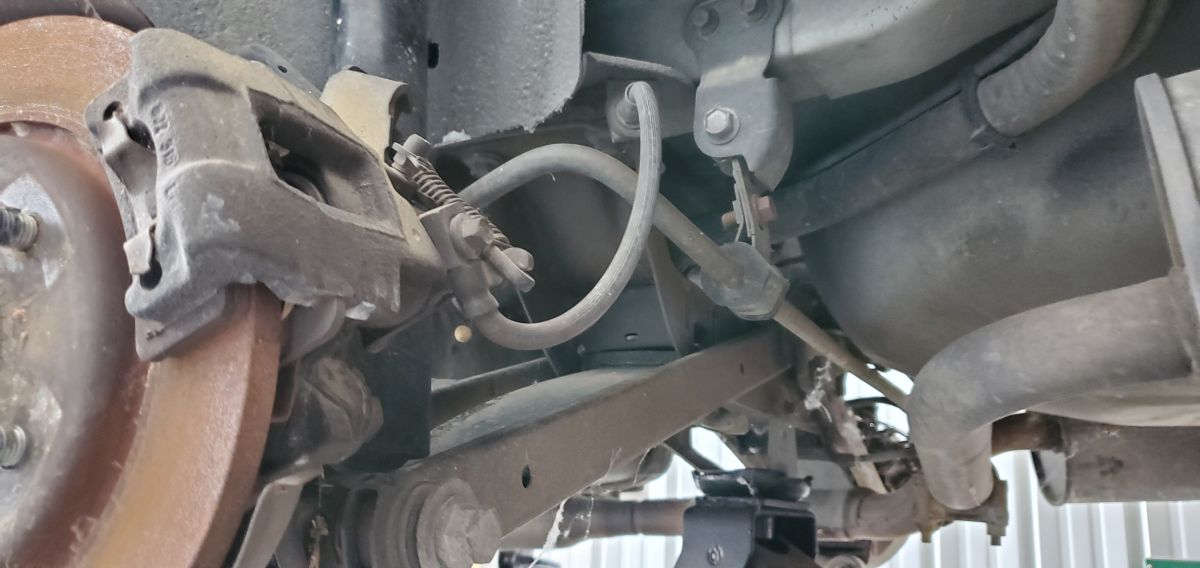
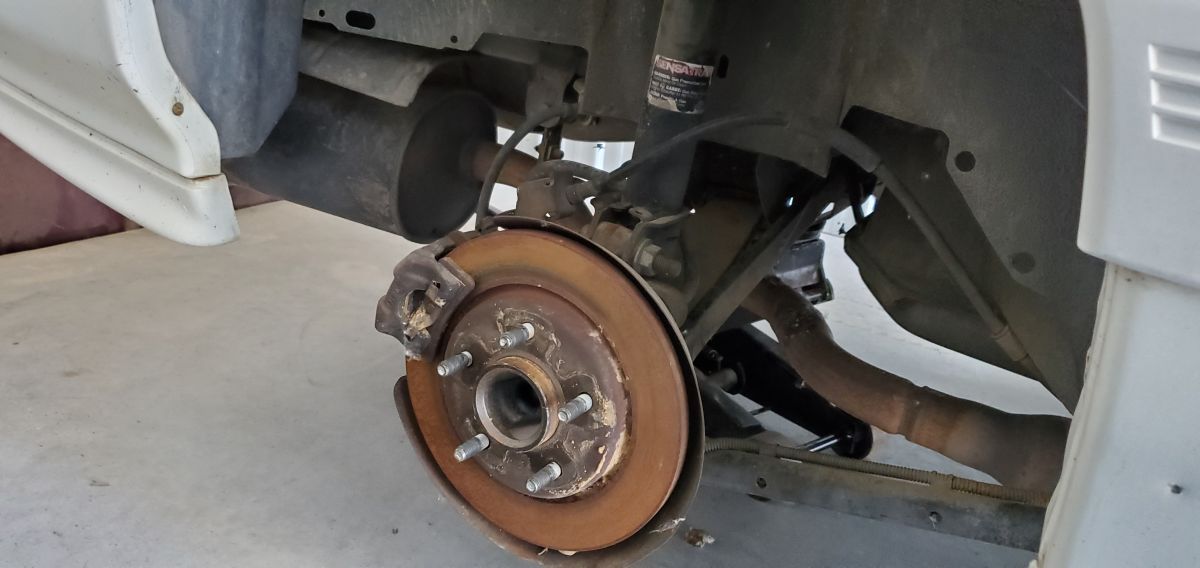
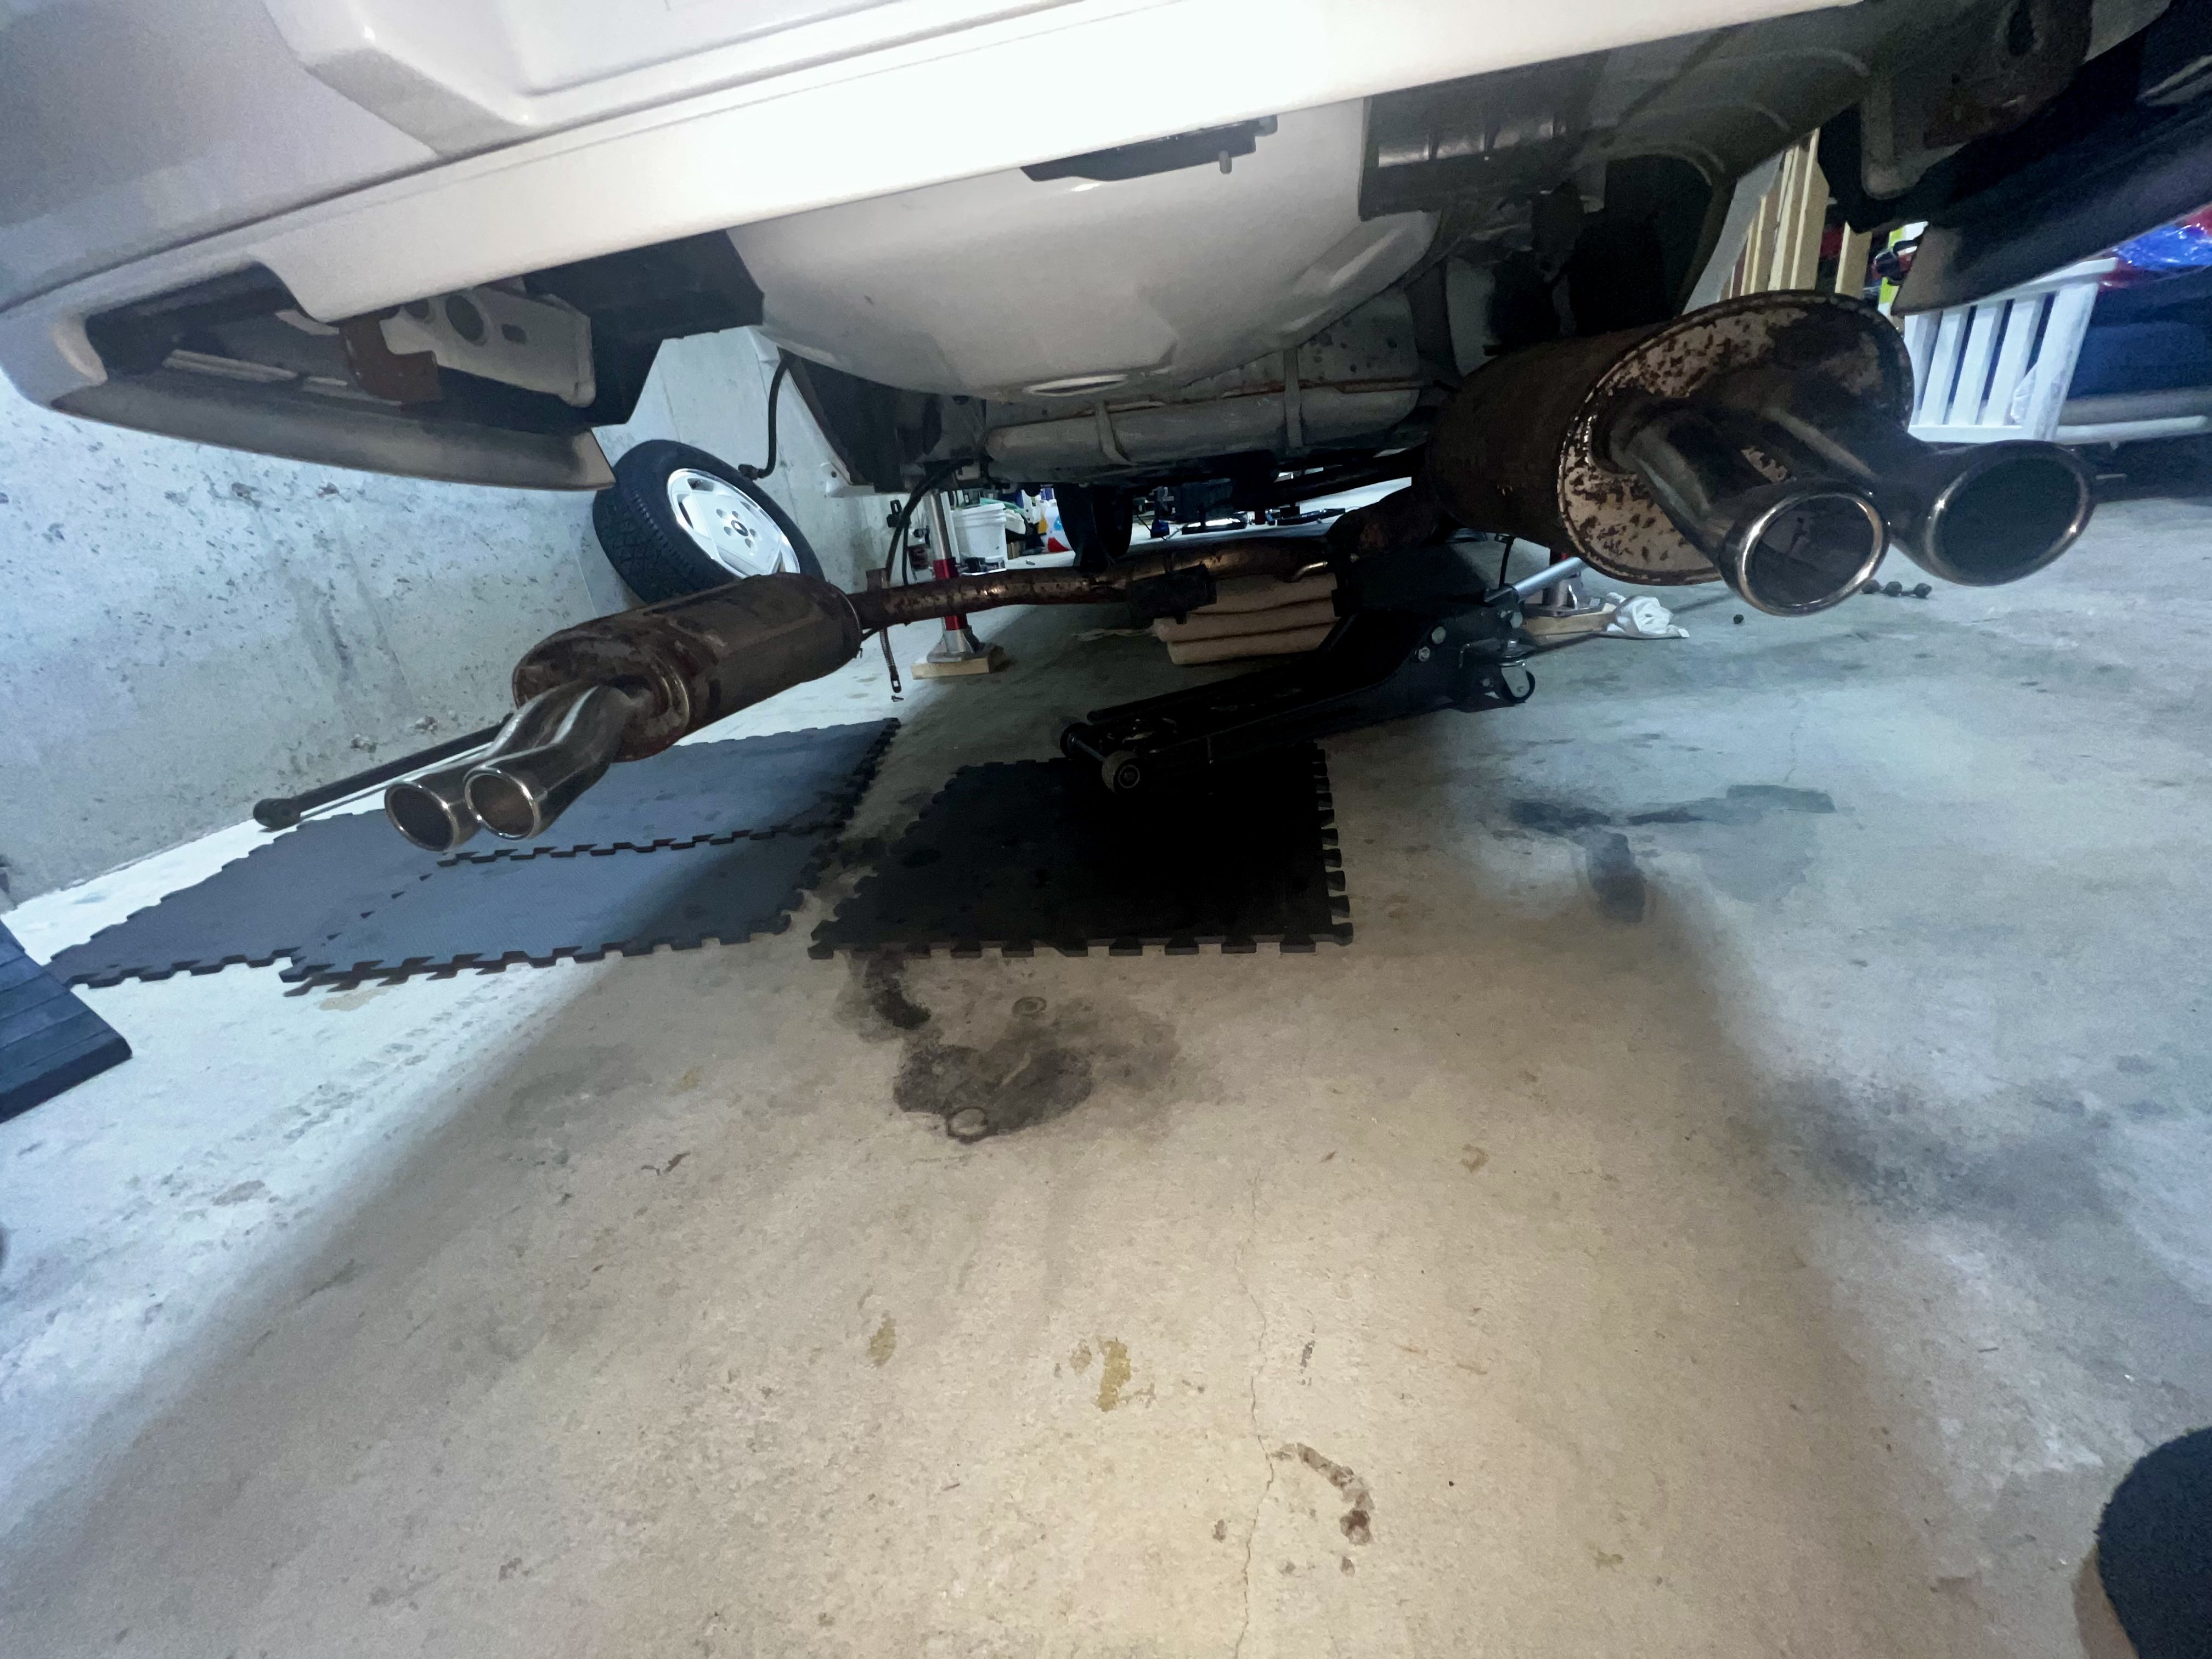
When I got my 1991 STE, the rear mufflers were rusted out so I never paid them much attention, knowing they would have to be replaced. When I got the 1992 STE the exhaust was in excellent shape so I never paid it much attention knowing I would just hit it with steel wool. Well anyways - this weekend I pulled the 1991 exhaust completely out because Im pulling out the rear brake and suspension parts I put INTO it this summer to put on the 1992. I noticed that the mufflers are different side to side and thought wow, couldnt the muffler shop have at least TRIED to match them more closely….? You know where this is going… Not sure if its an STE thing or a 3.4 thing (though im almost CERTAIN my z34 wasnt this way), but yes this is the factory configuration!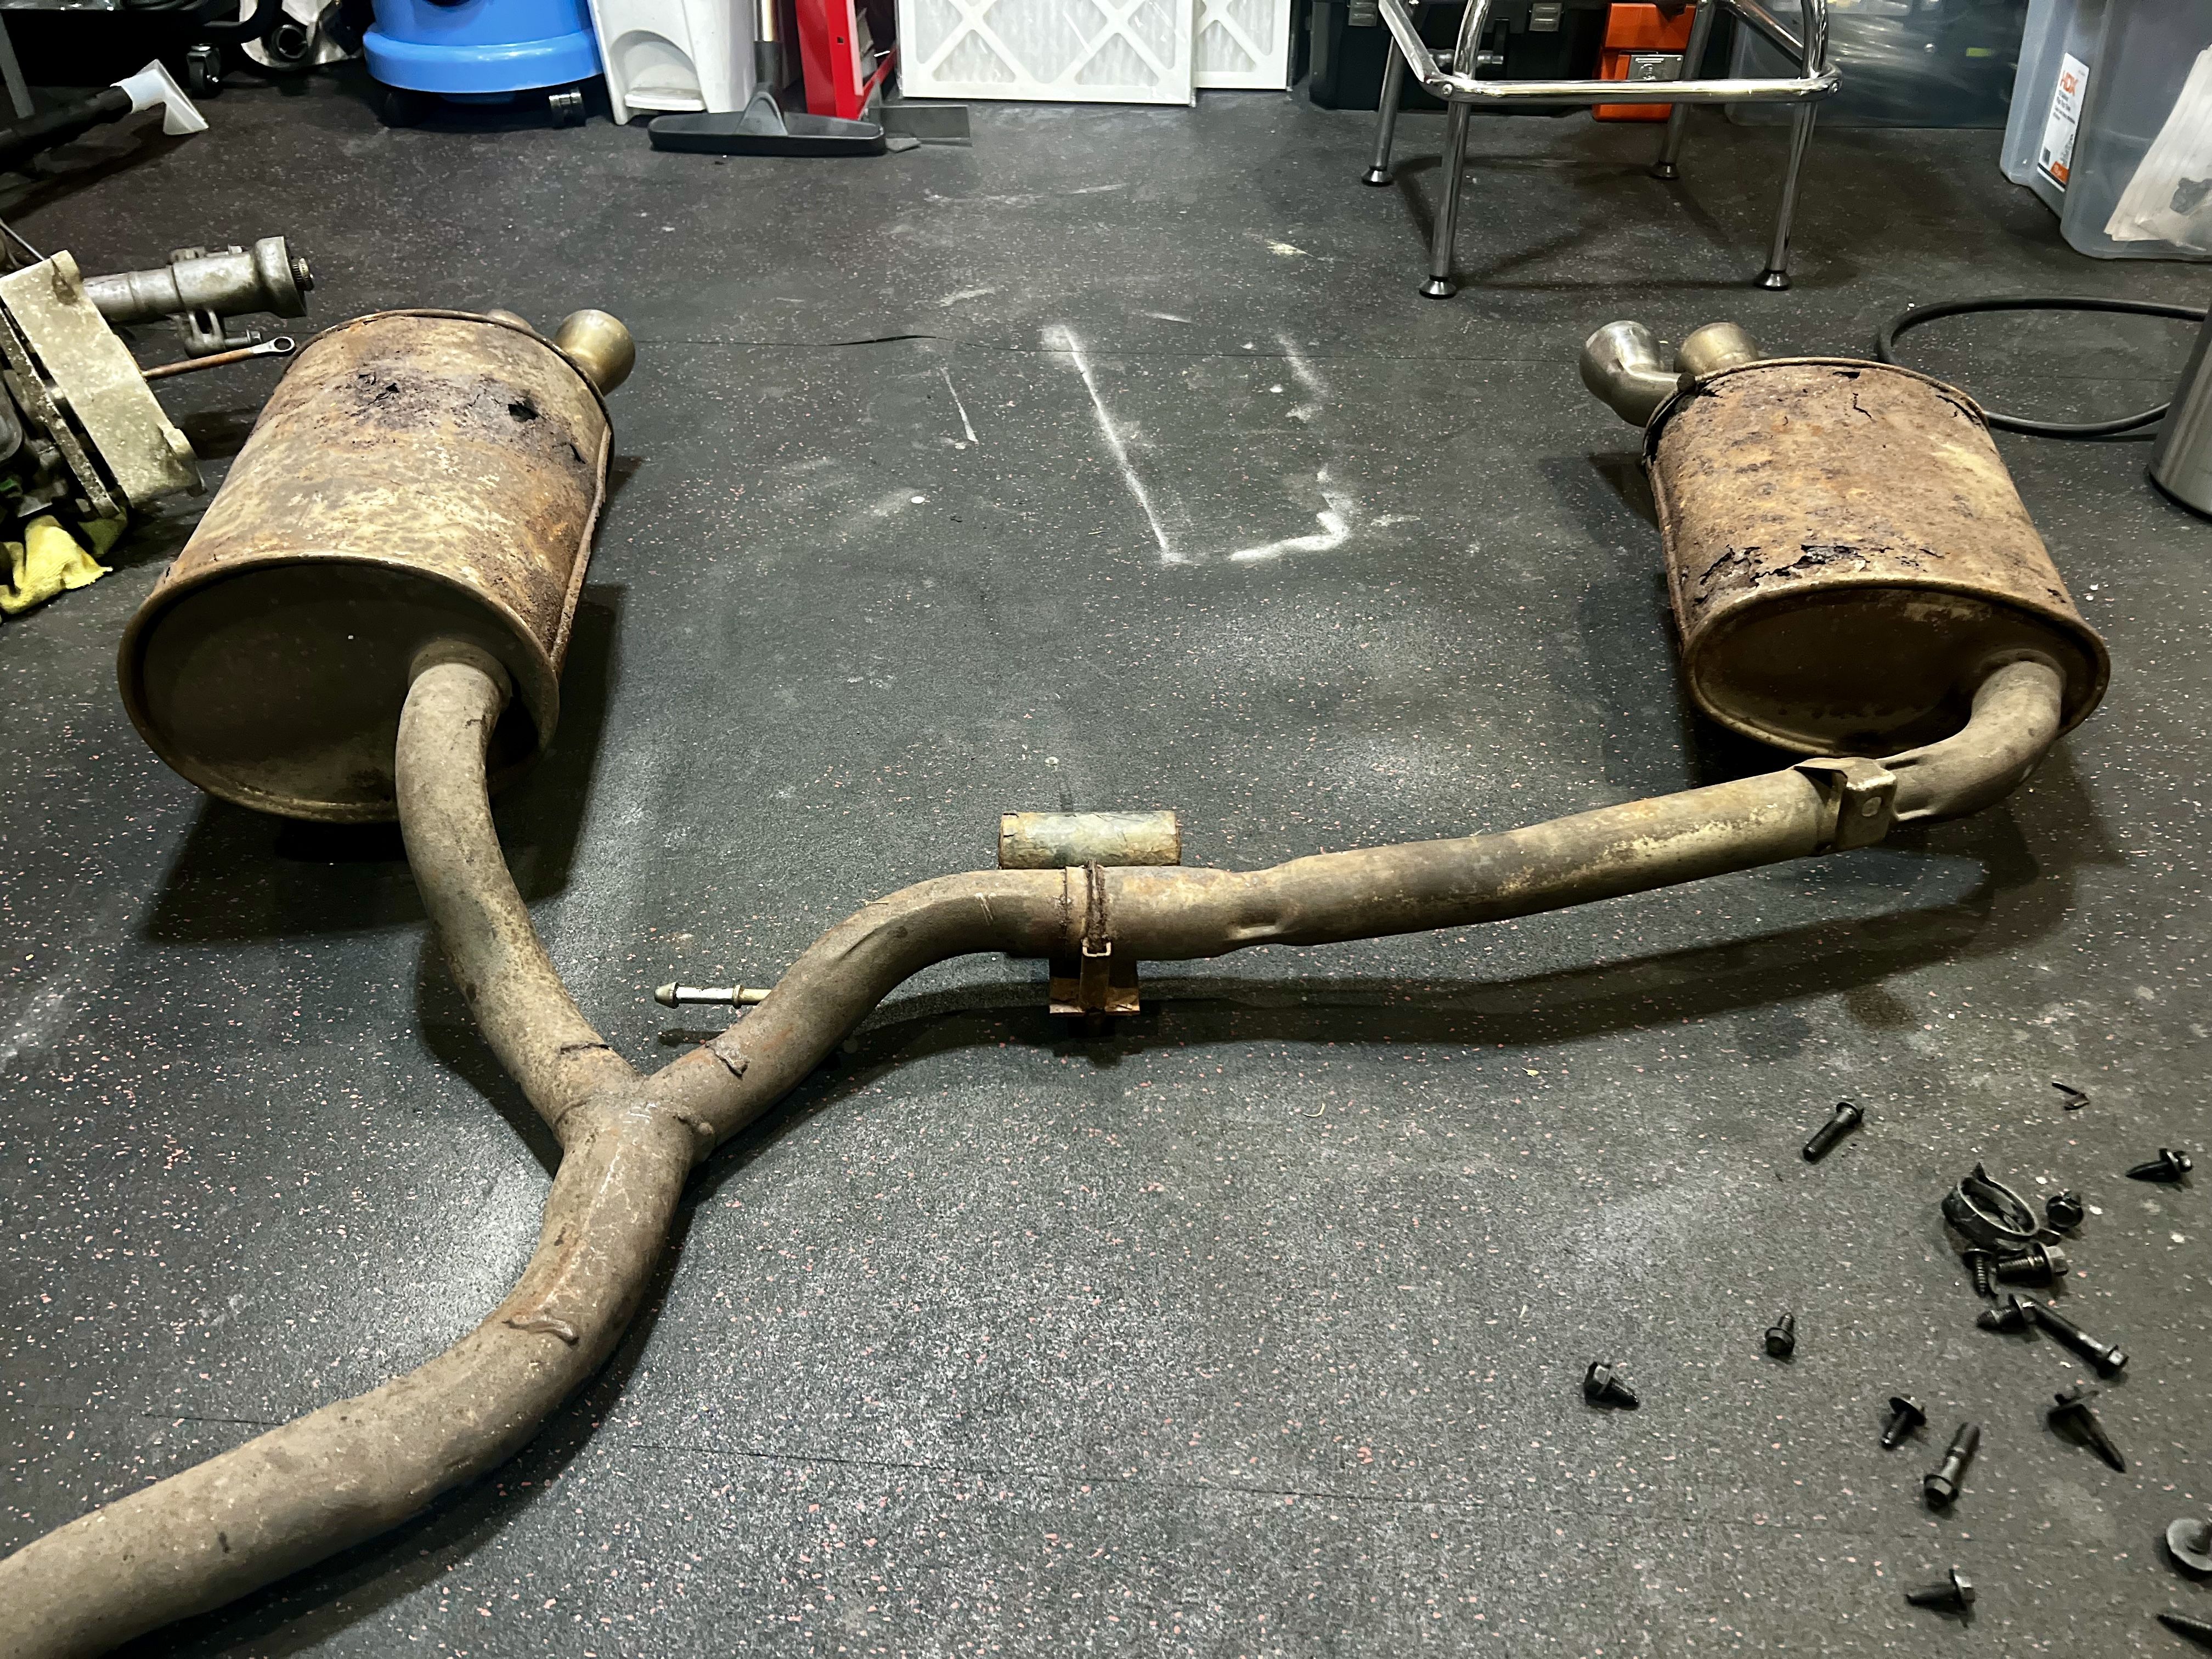
 1 point
 -
Cutlass Supreme early development pics.
tornado_735 reacted to jiggity76 for a topic
A friend of mine bought this off of Ebay and wanted to share it with everyone. Pretty cool historical information of the car's development.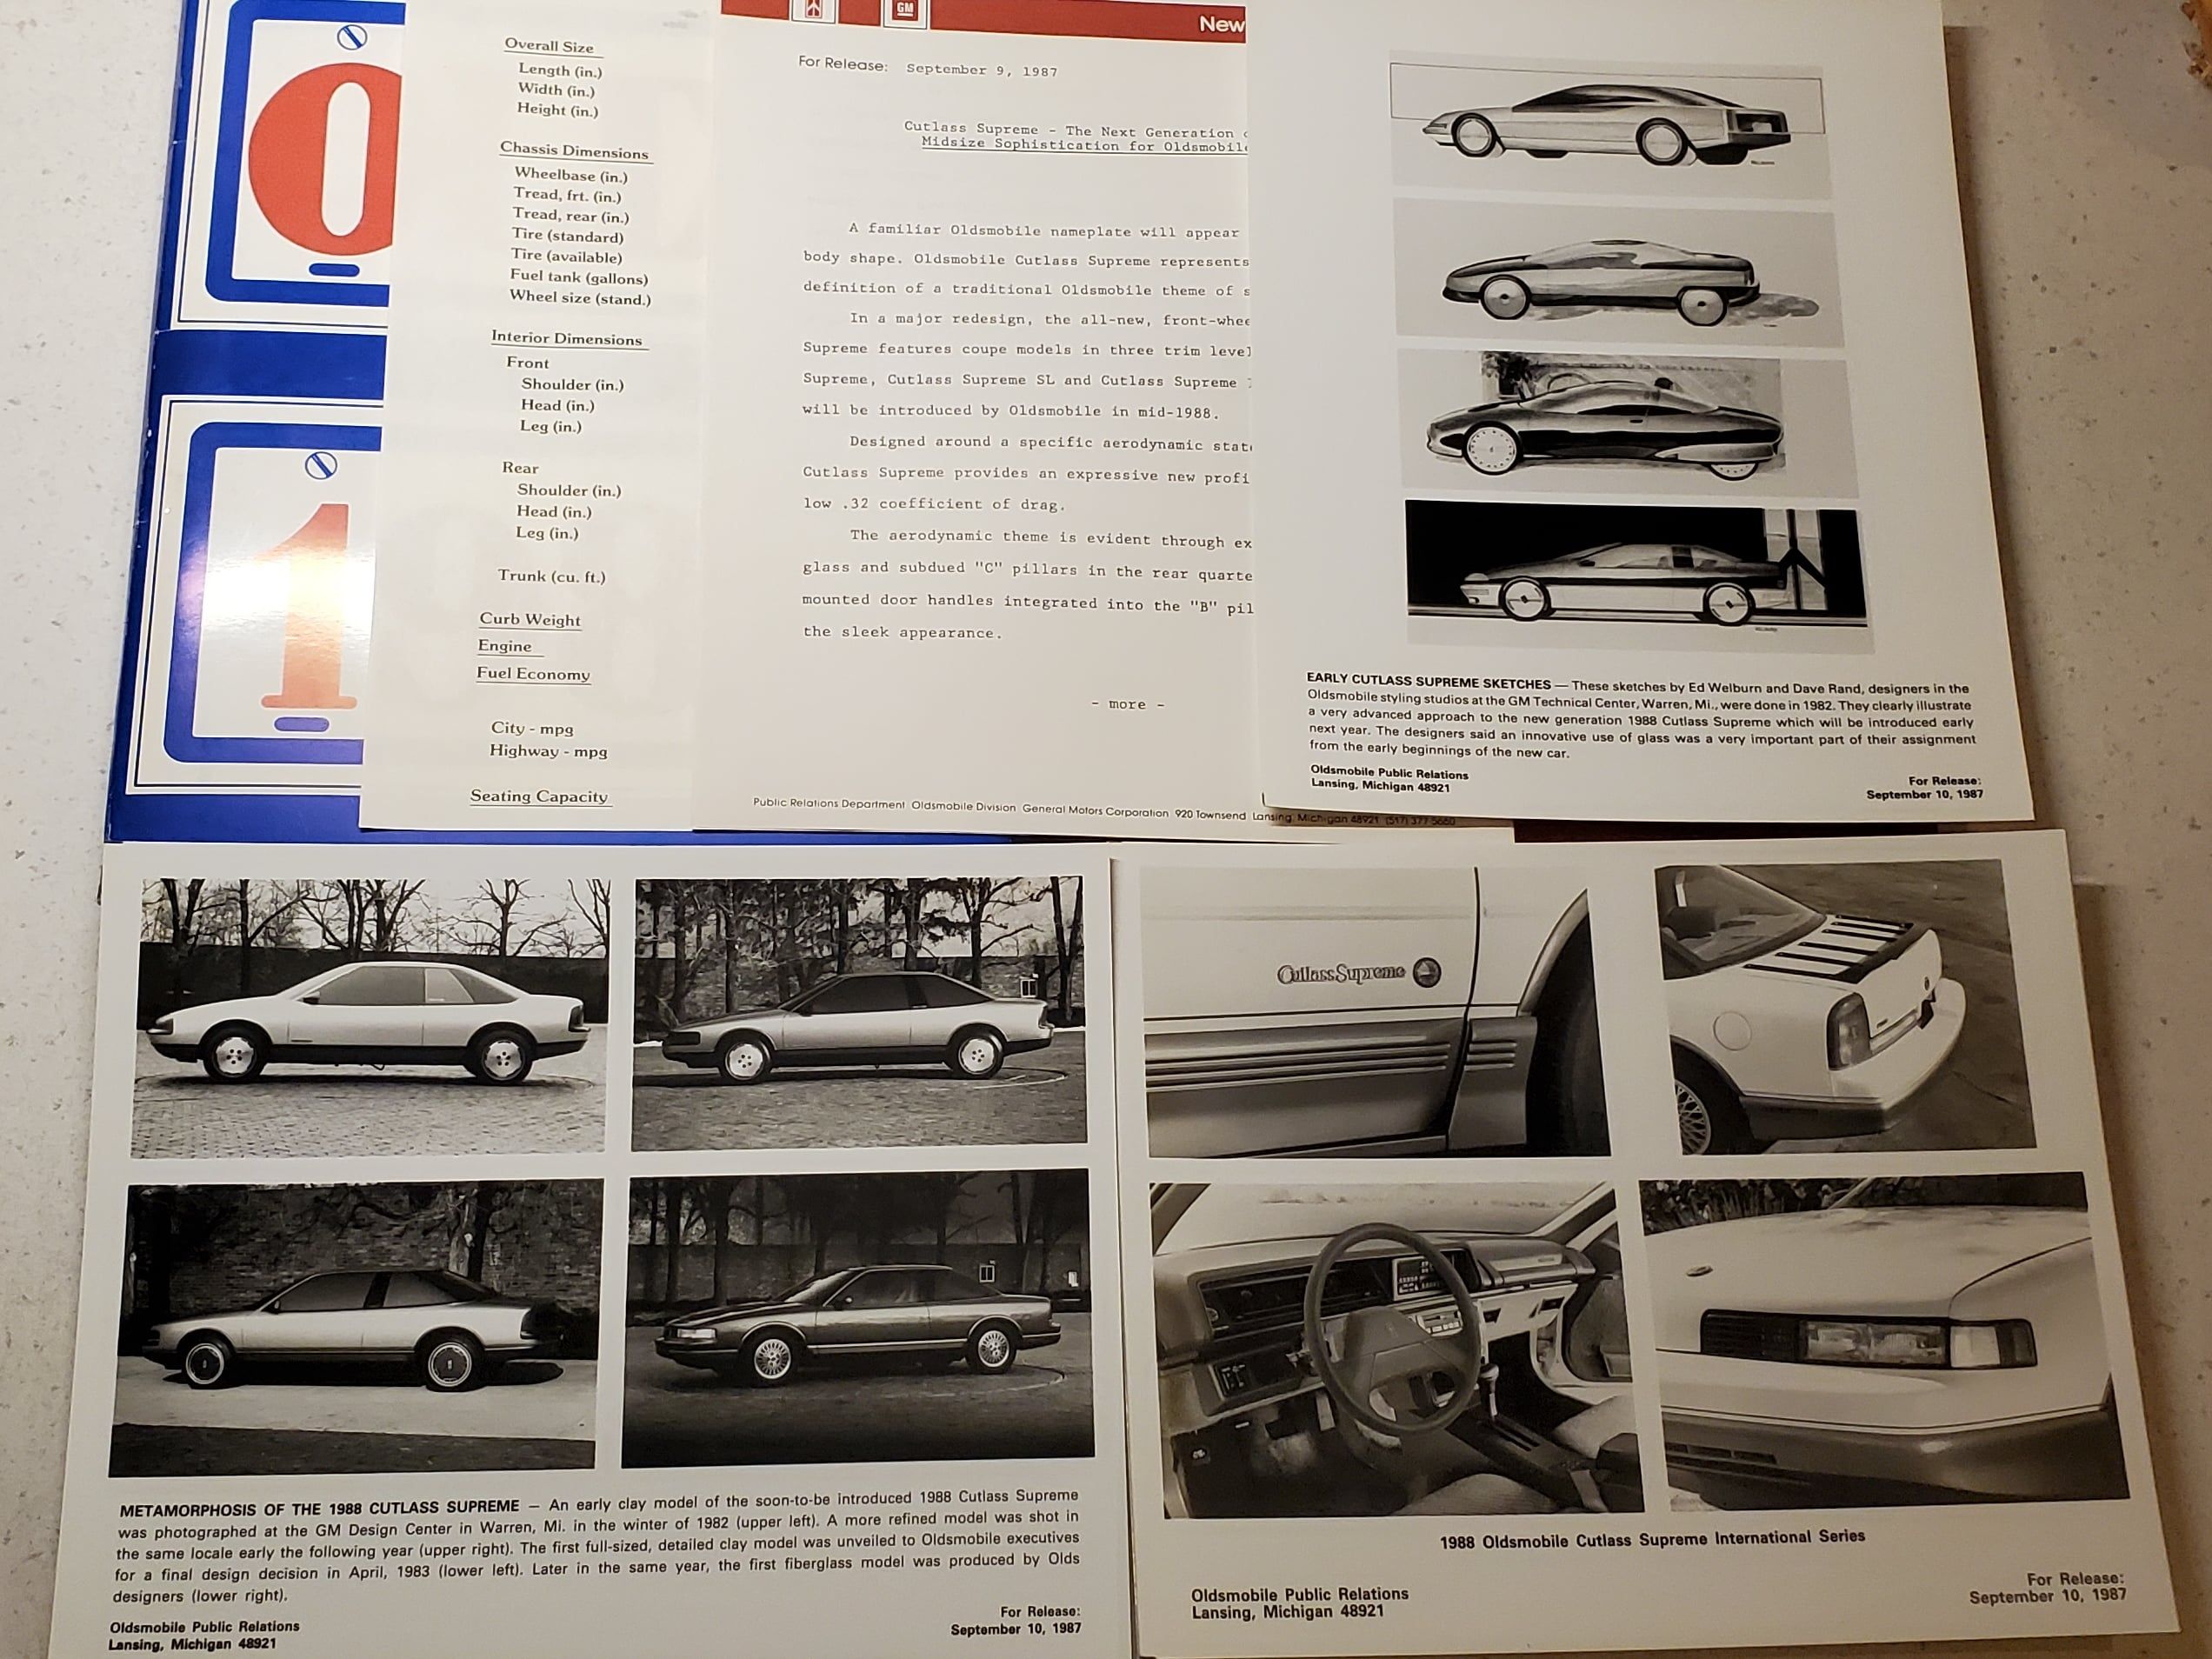 1 point
 -

3.8 Series 1 5-Speed regal
GnatGoSplat reacted to White93z34 for a topic
For once I condone a thread being resurrected 22 years after the fact.1 point -
Repair your broken 284 shift cable bushings
SuperBuick reacted to White93z34 for a topic
Tools needed: Drill Dremel tool vice grips flat and philips screwdrivers 10mm socket and necessary tools to pull your center console 5/16s(8mm) drill bit dielectric grease At time of writing this repair has only been done to one car so far, so far results are good but its been less then a week. And as with most write ups, this is a home made fix. I make no guarantees that these will last or not fail in any number of different ways. Materials needed, all of this was available at my local hardware store 2x 5/8 x 3/8 x 1/4 inch nylon bushings 4 8x24mm washers.... 22mm would probably be ideal though 2 .062 E-Clips I don't know how many people this applies to but the rubber bushings inside our shift cables are at newest 17 years old, and as such heat and the elements have gotten to them by this point and on the off chance your shifter does no got flaccid and you cannot get into any gear you are left with disgusting amounts of vertical shifter play. I have heard of using aftermarket Dodge Neon shifter bushings, but I haven't seen it in action yet. I set about to make my own solution to this issue. Presto, one trip the the hardware store later and we have everything needed to get this fixed. Shown is enough to fix both ends of a broken shift cable Showing a shift cable, minus the bushing that is a problem. closer picture of the materials to do the job put your nylon spacer in the vice grips, don't crank them down too tight or else you can break them or oval your holes. you may have to make several passes through it to get it to fit the shift arm properly so it is neither too tight or too loose. The washers I used... the only ones I could get in 8mm were a touch too big to clear the outer edge of the shift cable so I modified them with a Dremel too to have a flat edge to fit around the shift cable. Just clamped both together with vice grips and filed down the edge, be careful they will be hot. Fortunately I had a spare shift arm to test fit everything on before installing on the car. this shows how to install. washer down, nylon bushing in. shift cable on, second washer on, and e-clip holding it all together. I would highly recommend using a thin coating of dielectric grease or even hi-temp brake caliper pin grease on all the moving surfaces to reduce wear. To install on the car: under hood: all you need to do is remove the airbox and that should offer enough clearance to slip it in and install it. interior: center console removal is necessary and you need to unbolt the one 10mm bolt that holds the shift cable to the shift mechanism then you will have enough space to get it all in and fastened down. Also in case you have not figured it out already engine and shifter side bushings are exactly the same. For those of you that don't want to buy the parts and modify them yourselves I can do that and ship them to for probably around $10 shipped. PM me if interested. Hope this helps1 point