All Activity
- Yesterday
-
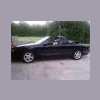
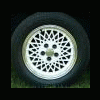
Well, I completed my front brake upgrade, gone are the 10 1/2" rotors & in their retired place are a pair of 12" rotors. My approach for this was to maintain the original W calipers & just install larger dia rotors in the same manner that GM did when replacing the 10 1/2" rotors with 11 1/4" rotors. The W calipers are more than adequate on their own merits. The 11 1/4" calipers are pushed further out from center by a later design in the caliper bracket adapter. Seeing as I didn't want to purchase & then alter the 95-96 adapters I reconfigured what I had on the car. To do this alteration one has to remove the adapter that is welded to the steering knuckle. One has to cut away the outer section of the *ears* that the caliper bracket is bolted to. I sourced a length of 1/4"x2"x 12" A36 hot rolled mild steel flatbar, this bar is already stronger than the stamping of the adapters & the flatbar is thicker than the adapter by .050 thou. Starting with the drivers side which being done 1st served as the guinea pig for any mistakes I know I would make. I cut off the adapter, gave it a blasting, laid it out on a workbench & proceeded to mock up what the new longer *ears* would look like to get what was needed. Out of the 12" of flatbar I cut 4 *ears* each the same size, from there I laid out on each one the location where I would need to drill the 9/16 hole for the thru bolt. The *ears* have to be shaped into a circular manner on their edge so as to fit into the valley on the backside of the caliper brackets & be able for me to pivot them to get the appropriate angle before tacking them to the adapter. This mod requires that the new *ears* be overlaid onto the backside surface of the adapter. The new rotors *hat* is 1/4" deeper than the original rotor so the need for 1/4" flatbar to move the caliper back inward to get the proper location for the new rotors. Now the adapter has to be fastened back into place on the knuckle behind the hub assembly, install the new rotor onto the hub & lock it into place with a couple of wheel nuts, bolting loosely the *ears* to the cast caliper bracket I can now place the bracket over the rotor to get an approx location where the position will be that is the same as the original caliper was placed. I now install the caliper & the new pads into the bracket & slide the entire assembly over the new rotor, getting an accurate height position for the caliper on the rotor I now need to check that all of the caliper pad is contacting the rotor face. Seeing as the 12" rotor has a larger diameter one needs to make sure that the outer edge of the rotor will clear the inside edge of the stationary bracket but get all of the caliper pad on the rotor surface. I had to remove the brackets & mount them into a bench vise an carefully remove approx .030 tho of surface inside the very upper edge of the upper & very bottom edge of the lower portion to expand the radius to get the needed rotor clearance as it spins inside the stationary bracket. After doing this I can now reinstall the assembly, position the assembled caliper & bracket, position the new *ears* over the cut off ends of the adapter, tighten down the bolts to hold the *ears* where I want them & now tack the upper & lower *ear* into position. I repeated this same procedure for the right side but it went much faster seeing that after completing the left side I now have a template use for the right side. The welding was simple, remove everything from the car, bolt the cast caliper bracket to the adapter to prevent the adapter from warping while welding, mount them into a vise and run the beads, a flat downhand is best for this, the 71M wire puts down a nice wide bead to get maximum coverage for strength in a single pass. This welding procedure requires a minimum of a 200 amp mig, the wire I used was a deep penetration fabrication flux core wire for argon/c02 for heavy fab work such as construction/ship building. A 70S is not recommended. After getting everything assembled back together the last thin to cover is the new rotors hub opening, the W hubs are 70mm dia, the new rotors are 71 mm opening, this means that a 1mm shim is required to slide into the center of the rotor to properly center it over the hub. This was relatively easy, I pick up some 1mm stainless sheet steel & cut two shims 1/4" wide & to length & slipped them into the center of the rotor around the hub stub, then slide the rotor onto the hub. Worked perfect. It's been 2 weeks now since completion, after bedding in the new pads I have done some mild to moderate brake stops, working up to a few panic stops. The difference is instantly noticeable. The car just hauls down to a stop in a much quicker, shorter amount of time. Now since a few years ago when I did the booster upgrade the pedal feel at that time was instantly changed. Going from a hard, less than desirable *no assist* feel to a one can literally stop the car by using ones hand on the brake pedal, the booster supplies so much assist the pedal is like a feather to press. The pads because of their shape do not cover the entire rotor contact face, approx 70% of the rotor surface is made use of & that's the outer portion of the rotor. I have to believe that the smaller 11 1/4" rotors see this as well, not having had any in my hands to compare the contact area with the 10 1/2" rotors I'm pretty sure that THOSE rotors may have a larger dia hat area that reduces the contact area to something similar to the 10 1/2" rotors, these Ford Crown Vic rotors have a *hat* area that is the same as the 10 1/2" rotor hat. All in all...well worth my time & effort & what did it cost me? ...the price of a pair of new rotors & pads & a length of flatbar.
.jpg.c4d6348e317bf2f79de33f95de565a47.jpg)
.jpg.0e61bb96673f2a83f65452fdc4a05a1d.jpg)
.jpg.faf86374a321ccd1979b46c71d014121.jpg)
.jpg.1160a1a16f045a43f9bb706b17d861cb.jpg)
.jpg.faa3ad49cb0e98fb57af02de2cee9833.jpg)
.jpg.2499ebca0f944ad096f21d7d55a6e438.jpg)
.jpg.03583582174edba078f7fdf0d9d6006e.jpg)
.jpg.56a4efaa0dfa8acfdeaf1b59bea73f25.jpg)
.jpg.6ed0ec32047bde2b9a2fe658b86d536e.jpg)
.jpg.9de49998adeeee03fbb7af7bef36f6f8.jpg)
.jpg.5deadf0cce8c646a017ef6d4c0adde97.jpg)
.jpg.9b80a75b67e9357769866c3d5322f430.jpg)
.jpg.baa09a4659642dbc0124eb156ff12aee.jpg)
.jpg.1585e0611eff3ca984dd2eda87e828f8.jpg)
.jpg.3e99bac60b306bccf08afd7fc5f023ca.jpg)
.jpg.1dddd8e640c1dc894f11ba6d7019134e.jpg)
.jpg.38031f65f77090da5984152b5149054b.jpg)
-
 94 olds vert reacted to a post in a topic:
Radiator Cooling Fans Question
94 olds vert reacted to a post in a topic:
Radiator Cooling Fans Question
- Last week
-
 ernie22lord joined the community
 -
ceramicheper joined the community
-
Cnuts24 joined the community
- Earlier
-
I have the enthusiasm to figure it out, just not the time or money at the moment. If that were to change then I would love to really take this thing apart in a better equipped shop. Then do all those things the forum has discovered worked better over the years to build it back for reliability and continuity.
-
LOL......& here I was thinking you lucked into a rear upgrade somewhere back up the road...
-
Sorry about that, I should have reread that last post a bit better. After clocking out for the day, getting into car stuff then hopping on the PC I`m worn out. While I was focusing on just the rear brakes and what caused the issue I wound up replacing the front brake parts as well. Went all against "if its not broke don't fix it" but those front piston boots and brake lines were on borrowed time.
-
What's the reset process for a new accelerator pedal on an '08 3.8L?
55trucker replied to showme's topic in General
As I posted if you want to do your own repairs you'll need a service manual to guide you, the vehicle is an '08, you should be using a proper scanner (not a reader) such as a Snap-On/Matco/OTC to recalibrate the throttle pedal, without that you may not be successful. You CAN try the below......but #4 is where you may fail 1 Turn the ignition to ON (do not start) and wait 3 seconds. 2 Turn the ignition OFF and wait 10 seconds. 3 Turn the ignition back to ON (do not start) and wait 3 seconds. 4 Depress the accelerator pedal all the way to the floor and release it 5 times within 5 seconds. 5 Wait 7 seconds then depress the accelerator pedal and hold it for approximately 20 seconds until the check engine light stops flashing and stays on solid. 6 Release the accelerator pedal and start the engine. Let it idle in park for about 3 minutes. -
What's the reset process for a new accelerator pedal on an '08 3.8L?
showme replied to showme's topic in General
So... do you know how to know how to recalibrate the accelerator pedal position sensor or not? I'm not buying the manual you mentioned because as soon as I get this thing fixed, they're selling it. And I need to get it done asap. I was looking for an answer to the question asked. -
uuuuuuuuuhhhhhhhhh..........what brackets? 1st generation rear discs prior to '94 don't make use of a bracket, the caliper is fastened directly to the rear knuckle casting...sooooooooo what have you got there?
-
After taking a closer look at the rear brakes it seemed someone only replaced the drivers side parts once upon a time and left the passenger side caliper and bracket original. So just to be sure I replaced both sides with all new calipers, brackets, ac delco pads, and hardware all greased up in the right spots. Then the P/S fluid started going foamy on me so I bought all new parts for that system and found... One doesnt need to fish out and back in brand new P/S lines if the F`n pump to reservoir O-ring seal was the culprit all along... She's almost ready.
-
What's the reset process for a new accelerator pedal on an '08 3.8L?
55trucker replied to showme's topic in General
My good man, honestly, you need this...... https://www.ebay.com/itm/236716370404?fits=Year%3A2008|Model%3AGrand+Prix&_trkparms=itmf%3D1%26aid%3D1110018%26rkt%3D12%26mech%3D1%26algv%3DCompVIDesktopATF2V6ReplaceKnnV4WithVectorDbNsOptHotPlRecallWithSiblingFilterCpcRecallsWithCiiQueryEmbedding%26pmt%3D1%26amclksrc%3DITM%26sd%3D167707521148%26sid%3DAQALAAAAEFEOJKTB8w2%2FUvCv%2B9BmnHc%3D%26itm%3D236716370404%26noa%3D0%26plcampt%3D0%3A161936924014%26algo%3DHOMESPLICE.COMPLISTINGS%26brand%3DChevrolet%26asc%3D20201210111451%26ao%3D1%26rk%3D2%26pid%3D101196%26b%3D1%26mehot%3Dnone%26lsid%3D100%26meid%3D031cf1d323cc45f48d590ca2cbbfb577%26pg%3D2332490&_trksid=p2332490.c101196.m2219&itmprp=cksum%3A236716370404031cf1d323cc45f48d590ca2cbbfb577|enc%3AAQALAAABYMJqCZOVY9EoLokt2QswX93oJfuGbORZEZhlCAjlXRRCUbpM9OMIdCmRfkOVQ1PhspDZGTlVp%2BsQFBtO93nb2QX5mVs4lL83nkIbUjqkMa8029EY4XfdhoaLjzTWK5DJUavttt5PoiOIedyWzJY%2FVuksmX506GdUxBoPT1LIWqjfWGejsfPdVITxAKzulOfMQQzvMopxvh020LIFxF%2F1RiyhTFtoeUf0kcPSfyaJp%2BqEsvlJmUmp6P%2B6ZXUDEhrqhuDWjXNRu9Vx3c77Hy1gWwqXTnGUWstmFy1WB81FxnZek%2BvwaLQ4bOU2dwUbV7kufOFF8gwiTc0VeOn%2B4MWaPd1p0%2BUGgIVKXXQHpuXpQgf0Cv%2Btjj2%2B3HQ49QVOK0A3yudeI2kPk%2BCNl8MQHkPLGnFgRvy9lzN5DGtFRlREpsF1GFQ%2Fv6N1%2FfSSN%2F4YIadnCydMbJTrQtw57KcYUXLBA4Q%3D|ampid%3APL_CLK|clp%3A2332490&itmmeta=01KQX3SJVJNPZ9BRW6D2YJV73Z if one wants to be able to diagnose & service their vehicles themselves it is invaluable. It's money well spent. -
What's the reset process for a new accelerator pedal on an '08 3.8L?
showme posted a topic in General
My grandkids '08 went into limp mode (reduced power) and I've been throwing parts at it to try to fix it. I installed a brake pedal position sensor and had it calibrated, but it's still showing reduced power, so I installed a new accelerator pedal. But after I did, the car's idle was crappy. It sounded weak and was revving up and down (not bad, but noticable), so I figured I had gotten a defective new pedal and removed it and put the old one back on and the idling problem disappeared. While checking out videos on some other GP subjects, I came across one for resetting accelerator pedals by turning the key to accessory, slowly pushing the pedal to the floor and holding it for 10-15 seconds and letting it up slowly. But the guy said at the end of the video that each vehicle has it's own sequence for resetting, so I need to know if anyone can tell me the correct procedure for doing this on our 2008 Grand Prix 3.8. I want to try putting it in again and see if it will work correctly by resetting it, which I didn't do last time. Thanks for any ideas or comments. Lee -
Will the car still function if I remove the shift interlock solenoid?
showme replied to showme's topic in General
Late update- I talked to my transmission guy and when I told him the linkage on the top of the transmission was moving with the shifter through the gears, he just said Something broke on the inside. So I'm having AAA haul it down to his shop. He was kind of surprised when i told him it wouldn't roll in neutral, but he said explained how that can happen, but I can't remember what it was. Anyway, the kids are going to have a long wait since he's a busy guy. He's good, so that's to be expected. He told me it could be less, but expect the cost to be 18-1900 dollars. My daughter asked if it was even worth paying that to have it fixed, and i told her if we didn't, she'd have a 3500# boat anchor. It would either be a parts car or scrap, so get it fixed and the kids will have a car with a rebuilt transmission or at least she could sell it that way. Anyway, tomorrow or the next day I'll have it hauled to by buddy Steve at Farmington Transmission. -
cold joined the community
-
Will the car still function if I remove the shift interlock solenoid?
showme replied to showme's topic in General
No movement, no whining or strange noises. Maybe solenoids? Or transmission control unit. Whatever it is, it's now over my skill level, so I'm going to have to take it to a shop. They need the car bad and I need to get them back in it. -
Will the car still function if I remove the shift interlock solenoid?
55trucker replied to showme's topic in General
Moving the trans selector into any gear gets you no vehicle movement? When in any selected gear do you hear any sort of whining that changes pitch & volume as you increase engine rpm (altho you're not moving)? That would be a sign that the trans pump is/has failed. It's no longer producing any needed pressure to supply to the valve body/clutches to properly operate the trans. -
Will the car still function if I remove the shift interlock solenoid?
showme replied to showme's topic in General
Ok, yes, it does still function without it. I installed the new shift interlock solenoid, and it worked great. Too great. When i tried running the shifter through the gears, it worked fine. Until I tried to pull the key out of the ignition. It was stuck like glue. I tried every trick I knew and a few other people knew. Key wiggling, shifter pushing, steering wheel cranking to the far sides, disconnecting the battery, pushing on the interlock cable, pulling on the interlock cable, and a few more I can't remember right now. After leaving the car in the parking lot with its key in it last night (hung a roll of black gorilla tape over the key. It wouldn't go anywhere if they did get in and start it, anyway). Today I pulled the dash apart to try to get to the ignition switch so I could pull the tumbler cylinder out and work on it that way. As I was triggering the cable, I watched it as i pulled the shifter trigger button that releases the shift interlock solenoid. I reached down and grabbed the dead end of the cable on the back of the rocker that pulls it, I found that there was enough slack in the cable that i could pull it another 3/32" more cable past the point of where the rocker pulled it to. I tried pulling the key out and it came out! Apparently, the cable/wirehas stretched. I tried to figure out a way to crimp something on or adjust the rocker that pulls the cable, thinking maybe a lead fishing sinker crimped on there may work. But then I thought about the grandkids having it come uncrimped or slide up and going back to square one, so I disconnected the ignition switch end of the cable from its housing and it worked. I then thought, well, if that works, I wonder if it even needs the solenoid on there, so I tried it with the solenoid off. Still works. I checked for dash warning lights, went through the gears and it still functions fine. So the $80 solenoid is going back for a refund. I was a little worried about the car starting in gear, but it won't. It will start in park and neutral, but not in any of the driving gears, including reverse. I'm going to get them a new cable and install it sometime, but for now, it's fixed. Sort of. At least I don't have to buy a $200 ignition tumbler and have it recoded. Now, I just have to figure out what's wrong with the tranny. The shift cable is good and is switching through all the positions at the arm on top of the transmission, but it's not engaging in any gears and neutral isn't letting me role any. But at least the key isn't stuck anymore and I think I've fixed the problem with the shifter. Onward, to the next problem! -
Will the car still function if I remove the shift interlock solenoid?
showme replied to showme's topic in General
Ok, thanks. I will attempt to check that. The shift interlock solenoid and maf sensor came in yesterday, and I have a pcv valve and hose coming in today. To be honest, I'm ready to have it towed to the transmission shop. I've been working on another grandson's '13 vw passat for weeks after he tore up his front end. I'm getting worn down with all these unexpected problems. And I've decided it's my last run as family mechanic. For me, anyway, it's one thing to confront a problem I'm familiar with and fix it, but the constant sinking new parts and time into things that seem to have unexplainable reasons to not work has burned me out. I take my Silverado 3500 diesel to my mechanic when the problems are over my skill level. But I still like working on my '51 Chevy 3100 since it doesn't have lots of unnecessary electrical details. -
Will the car still function if I remove the shift interlock solenoid?
55trucker replied to showme's topic in General
The *Neutral Safety Switch* doesn't have a single *install & forget it* position, the switch can be rotated. The switch slides down over the selector lever that extends above the trans casing, one has to rotate the switch assembly into the correct position & lock it down for accurate trans shifting. One usually does so from the park position. If it's been moved it can cause what you're experiencing..jpg.34d640b08971f81693653f3a77f7c126.jpg)
-
KnightRider84 joined the community
-
I've got a 240a mechman alternator and need a shorter serpentine belt for my 5.3L GXP. Does anyone know where to buy one from?
-
Will the car still function if I remove the shift interlock solenoid?
showme replied to showme's topic in General
No i'm not absolutely sure it's alligned. I wasn't aware it needed to be. It's my grandkids car, and I'm an Ironworker, not an auto mechanic. It's a 3.8. No idea what transmission is in it. -
Will the car still function if I remove the shift interlock solenoid?
55trucker replied to showme's topic in General
Are you absolutely sure that the shifter mechanism on top of the case is properly aligned? It is an electro/mechanical device that has to properly positioned. The engine is the 3.8 or 5.3? The trans IS the 4T65e? -
Will the car still function if I remove the shift interlock solenoid?
showme replied to showme's topic in General
Update- So the new scanner didn't perform as expected, so i had my mechanic come out and recalibrate the brake pedal position sensor and he told me the car is starting (which it did already), and the shifter is moving into gear but it isn't engaging and he thinks it may be the transmission. I'm not sure how the transmission can cause reduced power, but it makes since that it's causing shifting and gear engaging problems. I just don't want to pay to have the transmission rebuilt and then have it turn out to be something else, i.e., more simple and less expensive. My daughter is a single working mom with 3 teenage kids, one in his first year of college and the other two in high school. I should be finishing up on the grandson's car repair today. (He went off the road and I've replaced his radiator, condensor, fan, low pressure AC hose and a new compressor is coming in today.) Hopefully I'll have it back on the road by this evening. But with my daughter working full time as a nurse, and the 3 kids all in school and working, they are all depending on her Ford Expedition and its' wearing them all out. Any help or ideas on this will be appreciated. -
mrspankey2357 joined the community
-
Will the car still function if I remove the shift interlock solenoid?
showme posted a topic in General
I'm working on my grandson's '08 GP and I need some advice. He was starting to have problems shifting out of park and was also having 'reduced power' (limp mode) until it got so bad he called me for help. From what I've learned, the possible culprits for the shifting problem are the brake pedal position sensor, the shift interlock solenoid, and that the accelerator pedal may be one reason for the limp mode. I know the throttle body might cause this too, but I replaced that about 2 years ago with a GM OEM part. I've put a new brake pedal position sensor on, and a new accelerator pedal/sensor just in case. I have a new scan tool arriving today to calibrate the brake pedal sensor. As of now, after putting those parts in, the car starts, the shifter moves (sometimes), but when I put it in any gear it revs but doesn't kick into gear. I'm hoping this will clear up after I re-set the brake sensor. My question is about the shift interlock solenoid. After not finding new ones anywhere, I ordered a used complete shifter with a solenoid on it after asking the seller if the solenoid was for sure good. He said it was, and it's on the way. But if I remove the interlock solenoid from the shifter, would everything still work as normal (aside from the fact that the shifter would no longer need to be in park to complete the start up? Is there anything in the circuit between the brake pedal sensor and the shift interlock solenoid that would keep the car from starting or running correctly? I've already pulled the solenoid but didn't try to start it and check it yet. The car is sitting in the high school parking lot where my grandkids are students. Anyway, the scanner comes in today and the "new" shifter assembly will be here in a few days. I'm wondering if I get the brake sensor calibrated and can get it running and shifting if it would be safe (me driving) to drive back to my house to finish the job. Also, if anyone has any suggestions about troubleshooting the reduced engine power/limp mode, I'd appreciate any help or comments on that. Thanks for any help on this. Lee -
showme joined the community
-
I can probably make a chip for the OBD1 computer. swapping to obd2 isn't the best way to go about it but its the only way those derby companies know how to do it. Microsquirt or similar would be ideal.
-

1994 Cutlass Supreme Convertible Parts
Psych0matt replied to Topless1994's topic in Cutlass Supreme Convertible
Whatcha looking for? I think I got rid of the few things I had left when we moved, but I know a few guys here still have some stuff. Nate will probably chime in haha -
Looking for info for parts..... anyone here available with info?
-
1994 cutlass supreme Brake Booster replacement
carkhz316 replied to AjMillerKing's topic in Brakes/Suspension/Steering/Wheels/Tires
I think I used a 2x4 between the studs to twist it.