|
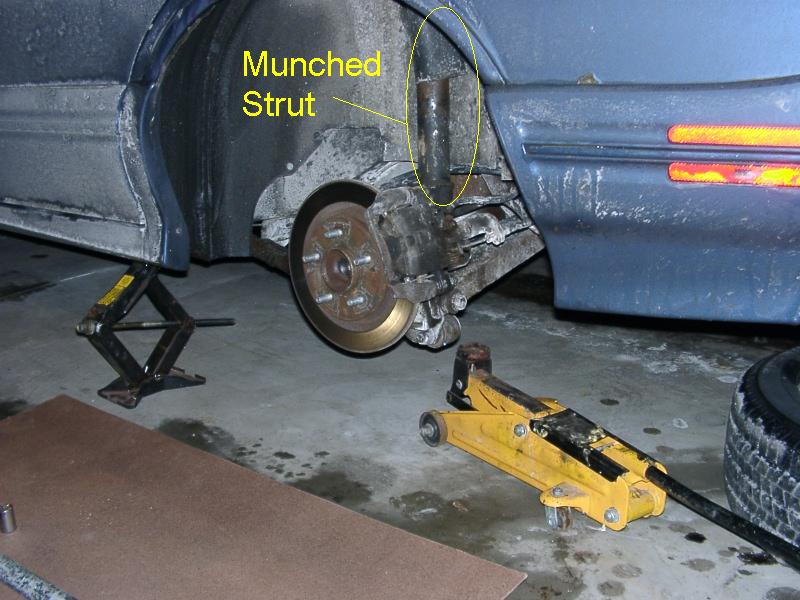
Over time and multiple speed bumps and potholes, the struts / shocks on W-Bodies tend to loose traction to the road. With having new struts installed, the car is able to handle and preform how it was made to. Wanting to save money on cheap installations? Here's the way to score big over retail suspension shops.
Tools Required:
2 jacks
½" breaker bar
3/8" ratchet
2 15/16" deep well socket ½" drive (6 point preferred)
8lb sledgehammer or equivalent
15mm socket 3/8" drive (6 point preferred)
Materials:
2 new rear struts
duct tape
block of wood 12" long, with one end 1" by 2"
WD-40 or some other type of liquid wrench
2 foot pipe that fits over the breaker bar handle.
1.) Lubricate the upper strut mount bolts. * Most beneficial when done a few days prior to actually changing the strut. * If you open the trunk, look at the towers, and you will see the two bolts (2 on the driver side / 2 on the passenger side), poking out of the towers. Lube them well; this will help prevent breaking them upon removal. If you feel ambitious enough, you can lubricate the lower strut bolts too, but its not a requirement.
2.) Raise the rear driver or passenger side of thecar using the jack that came with the car. * Raise it where the owner's / service manual explain; there should be a notch just in front of the wheels for the jack. * ** Be careful around a raised vehicle; use jack supports if available. ** Remove the rear wheel that is off the ground.
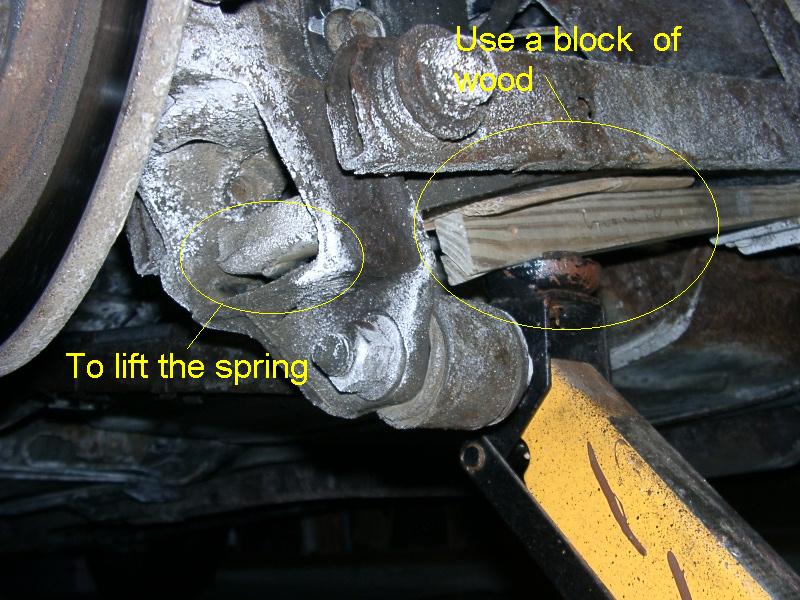
3.) Use the hydraulic jack to raise the black monoleaf spring out of the knuckle; it only has to be raised ½" or so. * You will need to life the spring to remove tension and pressure of the knuckle. * Use the block of wood in between the jack and the spring for two reasons. First, because you dont want to damage the spring, and the second is to keep the car from sliding on the jack because of the springs curvature. Position the jack as close to the knuckle as possible. The jack will dig into the wood a bit to prevent the jack from sliding. * You want support the cars weight on that spring; this relieves the pressure on the strut. * In essence, you are compressing the spring with the jack, and the cars weight.
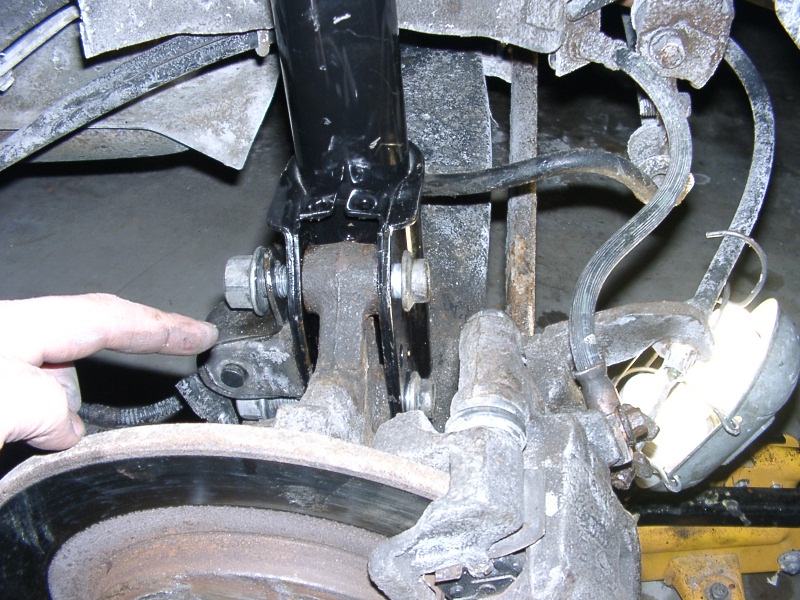
4.) Once the knuckle and spring are lifted; begin to loosen and remove the bottom strut bolts. * Not only are you going to spend the majority of your time on the bottom bolts anyway, but also, if you get stuck and give up on the bottom bolts because they wont move, at least you will not have broken anything on top. If you brake the top bolts, you have to finish the strut replacement, otherwise the car is not driveable. *
Use the 15/16" socket and breaker bar, and start loosening the nut. You may well need to use that pipe here to give you some extra leverage and torque. Once you get the nut semi-close to the end of the bolt, take the socket off, and wrap the nut once with just enough duct tape to ensure the socket wont fall off the nut. Put just the socket on the nut, do not connect the ratchet here. Get out the hammer and start pounding that socket/nut. It helps if you have a worn 15/16 short socket here, because your going to be hitting it pretty hard with the hammer. The bolts are splined so you cannot wrench them out, they have to be pounded out. Once they have moved by hammering, dont take them completely out yet.
5.) Loosen the upper strut mount bolts (15 mm), and remove them. If a bolt head breaks off, use a "easy out" or bolt extractor to remove the bolt from the inside of the trunk.
6.) Take out the bottom bolts, and remove the strut. You will have to turn it a little to get it out of the way of the sway bar.
7.) Reinstall new strut by reversing process; steps 6 - 2. Recommend to clean bolts and mounting hareware before reinstalling. Also, it recommended that you some anti-sieze / loc-tight compound on all threads.
Also, some places may sell you the strut separately from the strut mount. You will need both! If they do come separately, try to get the store you are buying them from to put the two together right there. The reason is when you put the mount on the strut, you have to hold the top of the shaft in place while tightening the nut that holds the mount on. Sometimes this is done with a Allen wrench, sometimes with an open ended wrench. Either way the nut is extremely difficult to tighten. Get them to assemble the thing. Make them work for your money!
8.) Repeat steps 2 - 7 for the opposite side of the vehicle.
- Average Time: 1.5+ hours each side; 3+ hours both
- Scheduled Maintenance: when rear struts leak / chatter
- Price of Materials: rear struts (2) ~ $125.00+
hydrolic car jack ~ $100.00+
duct tape ~ $3.00
wood plank ~ $5.00+
liquid wrench ~ $4.00+
anti-sieze / loc-tight ~ $3.00+ (optional)
- Writed by Lee Grable
- Edited by Erik Melander
|